Hologic Affirm Service Manual
Breast biopsy guidance system
Hide thumbs
Also See for Affirm:
- User manual (194 pages) ,
- Service manual (116 pages) ,
- User manual (70 pages)
Table of Contents
Advertisement
Advertisement
Table of Contents

Related Manuals for Hologic Affirm


Summary of Contents for Hologic Affirm
- Page 3 Service Manual For Software Version 1.8 Part Number MAN-04069 Revision 002 June 2016...
-
Page 5: Table Of Contents
Affirm Breast Biopsy Guidance System Service Manual Table of Contents Table of Contents List of Figures _________________________________________________________________ ix List of Tables __________________________________________________________________ xi 1: Introduction __________________________________________________________________1 Preface ..................................1 Intended Use................................1 User Profiles................................1 1.3.1 Mammography Technologist ........................1 1.3.2 Radiologists, Surgeons .......................... - Page 6 Affirm Breast Biopsy Guidance System Service Manual Table of Contents 4: Verification and Removal _____________________________________________________17 System Verifications ............................. 17 4.1.1 Confirm the Host Connection ......................... 17 4.1.2 Biopsy Staging ............................18 Installation and Removal of Accessories ......................20 4.2.1 The Biopsy Device Holder ........................20 4.2.2 The Needle Guides ...........................
- Page 7 Affirm Breast Biopsy Guidance System Service Manual Table of Contents Appendix D: Biopsy Device Evaluation Procedure _________________________________45 Introduction ................................45 D.1.1 Please Read Prior to Performing Calibration ..................45 D.1.2 Hologic Factory-Verified Biopsy Devices ....................46 Configuring Device and Needle ......................... 47 D.2.1 Add or Edit Biopsy Device Information ....................
-
Page 9: List Of Figures
Table of Contents List of Figures Figure 1: Affirm Biopsy System on the Selenia Dimensions Mammography System ..........5 Figure 2: How to Lift the Biopsy Guidance Module ..................... 6 Figure 3: How to Store the Biopsy Guidance Module ....................6 Figure 4: Label Location .............................. -
Page 11: List Of Tables
Table 1: Calibration Target List ............................28 Table 2: Calibrations ................................ 29 Table 3: Service Engineer Preventive Maintenance Schedule ................... 33 Table 4: Affirm System Audible Alerts ......................... 39 Table 5: Affirm System Error Messages ........................39 Table 6: Hologic Factory-Verified Biopsy Devices ...................... 46 Table 7: Biopsy Device Parameters .......................... -
Page 13: 1: Introduction
Caution: Federal law restricts this device to sale by or on the order of a physician. The Affirm™ breast biopsy guidance system is an optional accessory for the Selenia® Dimensions® digital mammography system. Its function is to localize lesions accurately in the breast in three dimensions. -
Page 14: Medical Physicist
Additionally, the user manual is a guide for directions on how to use the system. All users must make sure that they receive training on correct operation of the system before use on patients. Hologic does not accept the responsibility for injury or damage from wrong system operation. Quality Control Requirements Perform all Quality control tests within the correct time frame. -
Page 15: Warranty Statement
Refer to the title page of this manual for contact information for product support. Product Complaints Report any complaints or problems in the quality, reliability, safety, or performance of this product to Hologic. If the device has caused or added to patient injury, immediately report the incident to Hologic. 1.10... -
Page 16: Descriptions Of Warnings, Cautions, And Notes
Affirm Breast Biopsy Guidance System Service Manual Chapter 1: Introduction 1.11 Descriptions of Warnings, Cautions, and Notes Descriptions of Warnings, Cautions, and Notes used in this manual: WARNING! The procedures that you must follow accurately to prevent possible dangerous or fatal injury. -
Page 17: 2: General Information
Biopsy Control Module A compatible biopsy device attaches to the biopsy guidance module device mount. During a procedure, motors in the Affirm system move the biopsy device in X and Y directions. Z-axis movement is manual. The Tube Arm on the Selenia Dimensions system moves separately from the Compression Arm to permit the acquisition of stereotactic and tomosynthesis images for targeting. -
Page 18: How To Handle The Biopsy Guidance Module
Biopsy Guidance Module. Caution: The Affirm Biopsy Guidance Module weighs 15 pounds. When you move it, be sure to have a secure grip on the handles. Only lift the Biopsy Guidance Module with the handles. -
Page 19: Safety
Read and understand this manual before you use the system. Keep this manual available during the patient exams. Always follow all the instructions in this manual. Hologic does not accept the responsibility for injury or damage from incorrect system operation. Hologic can schedule training at your site. -
Page 20: Compliance
Caution: To prevent damage or misalignment, be careful when you move the Affirm system. Caution: The Affirm Biopsy Guidance Module weighs 15 pounds. When you move it, be sure to have a secure grip on the handles. Note The system does not have any parts that are serviced by the user. -
Page 21: Symbols
Potential Equalization terminal Protective Earth terminal "On" and "Off" (power) for the computer and display. Discard electrical and electronic equipment separately from standard waste. Send decommissioned material to Hologic or contact your service representative. Manufacturer Date of Manufacture Label Locations... -
Page 23: 3: Installation
Preinstallation Check If your Dimensions system serial number is less than 488, check the C-arm Housing for the presence of the Affirm system icon. If the icon is not present, use ASY-04074 to prepare the Gantry to receive the Affirm system. -
Page 24: Install The Internal Gantry Biopsy Guidance Module Cables
Affirm Breast Biopsy Guidance System Service Manual Chapter 3: Installation Install the Internal Gantry Biopsy Guidance Module Cables Refer to the Selenia Dimensions system Service Manual for the detailed removal instructions in the following procedure. Remove the Breast Platform. Remove the Detector (IRSD). -
Page 25: Installation Of Components
Slide the top hooks (item 2) of the Biopsy Guidance Module into the slots marked with the Affirm system icon (item 2A) on the front of the Selenia Dimensions C-arm. Make sure the top and bottom hooks attach to the Selenia Dimensions C-arm. -
Page 26: Attach The Biopsy Control Module
Affirm Breast Biopsy Guidance System Service Manual Chapter 3: Installation 3.5.2 Attach the Biopsy Control Module The Biopsy Control Module attaches to either the left or right handle of the Biopsy Guidance Module. Figure Legend Lock Knob for the Articulating Arm... -
Page 27: Mount The Tabletop Stand
Mount the Tabletop Stand Caution: The Affirm system Tabletop Stand is not for mobile applications. Mounting the tabletop stand to a permanent location is optional. The stand is secured to a flat surface using four screws through holes in the base of the stand. -
Page 29: 4: Verification And Removal
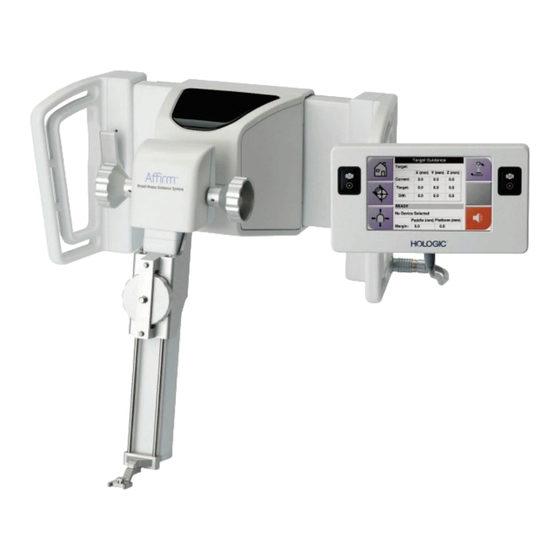
Interfaces. 4.1.1 Confirm the Host Connection When the Selenia Dimensions system is On, logged in as Service, and the Affirm system cable connections are correct, the Home screen displays on the Biopsy Control Module. Figure Legend Go to Target Guidance... -
Page 30: Biopsy Staging
Affirm Breast Biopsy Guidance System Service Manual Chapter 4: Verification and Removal 4.1.2 Biopsy Staging The buttons in the Biopsy Options area communicate target information to the Biopsy Control Module. The area on the right side of the buttons shows the selected target and biopsy device. - Page 31 Red indicates that the current coordinates exceed the safety margin. • Yellow warns of being near the safety limit. • Note To make a target active for the Affirm system, select a target icon from the target set and click the Resend button. MAN-04069 Revision 002 Page 19...
-
Page 32: Installation And Removal Of Accessories
Affirm Breast Biopsy Guidance System Service Manual Chapter 4: Verification and Removal Installation and Removal of Accessories 4.2.1 The Biopsy Device Holder To install a biopsy device holder: Align the holes (top and bottom) in the holder with the guide pins on the mount. -
Page 33: The Needle Guides
Affirm Breast Biopsy Guidance System Service Manual Chapter 4: Verification and Removal 4.2.2 The Needle Guides To install a disposable Needle Guide: Align the Needle Guide so that the raised-square side of the Needle Guide fits between the two lobes of the Needle Guide Mount. -
Page 34: Removal Of Main Components
Biopsy Guidance Module. Caution: The Affirm Biopsy Guidance Module weighs 15 pounds. When you move it, be sure to have a secure grip on the handles. To remove the Biopsy Guidance Module from the Selenia Dimensions C-arm: Disconnect the Biopsy Guidance Module Cable from the Selenia Dimensions C-arm. -
Page 35: 5: Calibration Procedures
Affirm Breast Biopsy Guidance System Service Manual Chapter 5: Calibration Procedures Chapter 5 Calibration Procedures This chapter describes the tools and procedures required to perform the Biopsy subsystem calibrations. The Guidance Hardware calibrations do not involve imaging and can be implemented by using CalTool. - Page 36 Affirm Breast Biopsy Guidance System Service Manual Chapter 5: Calibration Procedures Description Image Part Number Biopsy Device with Holder Disposable Needle Guide (14-guage) Lateral Arm Stand ASY-09644 Lateral Arm Biopsy Paddle ASY-05205 Lateral Arm QAS Phantom ASY-09506 Lateral Arm Needle Guide Holder...
-
Page 37: Front Needle Guide Alignment
Affirm Breast Biopsy Guidance System Service Manual Chapter 5: Calibration Procedures Front Needle Guide Alignment This procedure ensures that the needle guide does not cause deflection of the needle shaft as the needle guide mount is moved from needle base to tip. -
Page 38: Biopsy Guidance Hardware
Affirm Breast Biopsy Guidance System Service Manual Chapter 5: Calibration Procedures Biopsy Guidance Hardware This procedure establishes the Biopsy Guidance Hardware zero reference points. Refer to the CalTool to perform the Biopsy Guidance Hardware calibration procedure. Note Perform this procedure on new or serviced hardware. -
Page 39: Stx Calibration
Affirm Breast Biopsy Guidance System Service Manual Chapter 5: Calibration Procedures STX Calibration This procedure maps the needle coordinates to the detector space for either the standard approach or lateral arm approach of a biopsy device. A calibration must be performed for each Biopsy Guidance Module/Gantry/Detector combination, and requires the Biopsy Guidance Module to move the QAS needle to pre-defined coordinates. -
Page 40: Table 1: Calibration Target List
Affirm Breast Biopsy Guidance System Service Manual Chapter 5: Calibration Procedures Accept the target. Select the next stereo pair, and repeat steps 3 through 8 for the next four exposures. After the first five exposures, move to the C-arm angle indicated by the Acquisition Workstation. -
Page 41: Biopsy Calibration Interaction
The QAS Test Perform the Quality Assurance Standard (QAS) Test procedure to make sure of accurate alignment and performance of the needle guidance system when you use the Affirm biopsy system with the Selenia Dimensions mammography system. Log into the system as a Service User. -
Page 42: Figure 14: Admin Screen Showing Qas Test
On the Admin screen, select the QAS button. Figure 14: Admin Screen Showing QAS Test On the QAS screen, select the Biopsy tab. Make sure that Affirm system QAS appears in the Device field. Figure 15: Device Field in the Biopsy Tab Attach the QAS Phantom. -
Page 43: Dose Calibration
If the targeting coordinates are not within ± 1 mm, contact Technical Support. Do not try to adjust the system. Do not perform any biopsy procedure with the Affirm system until Technical Support indicates the system is ready for use. -
Page 45: 6: Care And Cleaning
Check compression lockout operation. Verify the Affirm system alignment to the C-arm. Verify the Needle Guide alignment. Verify the Affirm system locks in position on the C-arm. Verify the ID sensors correctly identify the Affirm system when installed. Install software/ firmware upgrades if required and if under warranty/contract. -
Page 46: For General Cleaning
Caution: Use the least possible amount of cleaning fluids. The fluids must not flow or run. If more than soap and water is required, Hologic recommends any one of the following: • 10% chlorine bleach and water with one part commercially available chlorine bleach (normally 5.25% chlorine and 94.75% water) and nine parts water... -
Page 47: To Prevent Possible Injury Or Equipment Damage
Affirm Breast Biopsy Guidance System Service Manual Chapter 6: Care and Cleaning 6.2.2 To Prevent Possible Injury or Equipment Damage Do not use a corrosive solvent, abrasive detergent, or polish. Select a cleaning/disinfecting agent that does not damage the plastics, aluminum, or carbon fiber. -
Page 49: Appendix A System Specifications
Affirm Breast Biopsy Guidance System Service Manual Appendix A: System Specifications Appendix A System Specifications App endix A Affirm System Measurements Figure 16: Affirm Biopsy Guidance Module A. Height 37.1 cm (14.6 inches) B. Width 37.8 cm (14.9 inches) C. Depth 35.6 cm (14 inches) -
Page 50: Biopsy Control Module
Affirm Breast Biopsy Guidance System Service Manual Appendix A: System Specifications Biopsy Control Module Display Window Touch screen controls Weight 3 pounds Power System Input from Biopsy Guidance Module: + 5 Vdc ± 10% Page 38 MAN-04069 Revision 002... -
Page 51: Appendix B: System Messages And Alerts
Affirm Breast Biopsy Guidance System Service Manual Appendix B: System Messages and Alerts Appendix B System Messages and Alerts App endix B Audible Alerts Table 4: Affirm System Audible Alerts Activity Frequency Duration Repeats? At Power Up: 250 ms Any Needle position within the... - Page 52 If the message continues to display, contact Technical Support. Selftest Error Disconnect the Affirm Biopsy Guidance Module cable from the Dimensions system. Reconnect the Affirm Biopsy Guidance Module cable to the Dimensions system. If the message continues to display, contact Technical Support. Stuck Switch Fault Disconnect the Biopsy Control Module cable from the Biopsy Guidance Module.
-
Page 53: Appendix C Hardware Range Calibration
Affirm Breast Biopsy Guidance System Service Manual Appendix C: Hardware Range Calibration Appendix C Hardware Range Calibration App endix C Hardware Range Calibration Perform these procedures when you replace components in the Biopsy Guidance Module or you cannot reach points specified in the STX calibration. -
Page 54: Figure 18: Placing The Y-Axis Dowel Pin
Affirm Breast Biopsy Guidance System Service Manual Appendix C: Hardware Range Calibration Place the dowel pin in the center hole in the top of the Y-axis Component Mount (see following figure). Notice the slot visible in the large hole near the dowel pin is off center. - Page 55 Affirm Breast Biopsy Guidance System Service Manual Appendix C: Hardware Range Calibration Determine the maximum X-axis encoder count by moving the X carriage to the left mechanical limit (as viewed from the front of the Biopsy Guidance Module). With the carriage at the mechanical limit, use the Biopsy Control Module function "Set Xlimit...
-
Page 57: Appendix D Biopsy Device Evaluation Procedure
Affirm system Service Manual and User Guide, as well as the procedures in the User Guide of any biopsy device that is used with the Affirm system. These procedures provide step-by-step instructions for validating biopsy devices for use with the Affirm system. -
Page 58: Hologic Factory-Verified Biopsy Devices
Affirm Breast Biopsy Guidance System Service Manual Appendix D: Biopsy Device Evaluation Procedure D.1.2 Hologic Factory-Verified Biopsy Devices Table 6: Hologic Factory-Verified Biopsy Devices Manufacturer Description Model Hologic Affirm QAS Needle ASY-03949 Hologic ATEC 9 g x 12 cm, 12 mm (Petite) ATEC 0912-12 ®... -
Page 59: Configuring Device And Needle
Whether you add a new (or edit an existing) biopsy device, keep each parameter within the valid range as stated in the following table. If you believe that a parameter for your device is outside the valid range, contact Hologic Technical Support desk for guidance on how to proceed. -
Page 60: Figure 20: Biopsy Device Parameters
Affirm Breast Biopsy Guidance System Service Manual Appendix D: Biopsy Device Evaluation Procedure Figure 20: Biopsy Device Parameters Page 48 MAN-04069 Revision 002... -
Page 61: Needle Validation Process
Affirm Breast Biopsy Guidance System Service Manual Appendix D: Biopsy Device Evaluation Procedure D.2.2 Needle Validation Process Note All manual jogs in the following procedure are performed from the Biopsy Control Module Target Screen, not from the Service Screen. (This screen affects the target numbers.) The Jog is used to move the needle (and target) away from the phantom... -
Page 62: Figure 21: Offset Measurement, Device In Extended (Post Fired) Position
Affirm Breast Biopsy Guidance System Service Manual Appendix D: Biopsy Device Evaluation Procedure Visually verify the alignment of X and Y. If X or Y appears to be off, press Motor Enable to be sure that the motorized movement was completed. Do not make any other adjustments. - Page 63 Affirm Breast Biopsy Guidance System Service Manual Appendix D: Biopsy Device Evaluation Procedure Add the biopsy device to the Acquisition Workstation. Select Admin; then in the System section, select Biopsy Devices. b. Select New. Enter "0" for Aperture and Dead Space.
- Page 64 Affirm Breast Biopsy Guidance System Service Manual Appendix D: Biopsy Device Evaluation Procedure Adjust the Needle Length at the Acquisition Workstation Select Admin; then in the System section, select Biopsy Devices. Select the Biopsy Device in the list. b. Select Edit.
-
Page 65: Configuring The Wire Localization Needle
Affirm Breast Biopsy Guidance System Service Manual Appendix D: Biopsy Device Evaluation Procedure Note Loaner biopsy devices require revalidation. Use professional judgment to determine needle validation. Be aware of any changes in devices by vendors. Note If you are validating a Wire Localization Needle, also perform the steps in Validate the Wire Localization Needle on page 53. -
Page 66: Calculate And Confirm The New Wire Localization Needle Parameters
Affirm Breast Biopsy Guidance System Service Manual Appendix D: Biopsy Device Evaluation Procedure Select Admin; then in the System section, select Biopsy Devices. Select New. Enter the following values (leave all other fields at 0.0): • Name • Enabled (confirm box is checked) •... -
Page 67: Validate Needle
Affirm Breast Biopsy Guidance System Service Manual Appendix D: Biopsy Device Evaluation Procedure D.3.4 Validate Needle Open the procedure used earlier with the QAS needle, and select the previously acquired stereo pair. Select the needle from the list. Select Resend Target. -
Page 69: Appendix E: Field Replaceable Units (Frus)
Affirm Breast Biopsy Guidance System Service Manual Appendix E: Field Replaceable Units (FRUs) Appendix E Field Replaceable Units (FRUs) App endix E Biopsy Control Module - Field Replaceable Units Table 8: Recommended FRUs - Biopsy Control Module (BCM) Description Part... -
Page 70: Accessories - Field Replaceable Units
Affirm Breast Biopsy Guidance System Service Manual Appendix E: Field Replaceable Units (FRUs) Table 9: Recommended FRUs - Biopsy Guidance Module (BGM) Description Part Status / Notes Number Biopsy I/O Interface PCB PCB- 00374 Returnable Mount, Biopsy Gun FAB-05314 Non-Returnable Rod, Needle Guide (2 on assy.) -
Page 71: Glossary Of Terms
Affirm Breast Biopsy Guidance System Service Manual Glossary of Terms Stereotactic Procedure Glossary of Terms A type of examination that allows stereotactic views at the Acquisition Workstation. Affirm System The breast biopsy guidance system for the Selenia Stereotactic View Dimensions system... -
Page 73: Index
- 21 biopsy device intended use - 1 holder, attach - 20 intended use of the Affirm breast biopsy guidance Biopsy Guidance Module, how to handle - 6 systeem - 1 bracket height, adjustment - 15 main components - 5... - Page 74 - 37, 41 verification - 17 technical support - 3 training requirements - 2 use of the Affirm breast biopsy guidance system - Warning / Caution / Note - description of each type - 4 Warranty Statement - 3...
Need help?
Do you have a question about the Affirm and is the answer not in the manual?
Questions and answers