Hologic Affirm User Manual
Breast biopsy guidance system
Hide thumbs
Also See for Affirm:
- User manual (194 pages) ,
- Service manual (116 pages) ,
- Service manual (76 pages)
Table of Contents
Advertisement
Advertisement
Table of Contents

Related Manuals for Hologic Affirm


Summary of Contents for Hologic Affirm
- Page 3 User Guide For Software Version 1.7 Part Number MAN-03209 Revision 005 January 2015...
-
Page 5: Table Of Contents
Biopsy Compression Paddles ........................18 3.2.2 Biopsy Device Holder ..........................18 3.2.3 Needle Guides ............................19 3.2.4 Affirm Table-top Stand ..........................20 Removal of Main Components ........................... 21 3.3.1 Biopsy Control Module ..........................21 3.3.2 Biopsy Guidance Module ......................... 21... - Page 6 Geometry Calibration Procedure ......................47 6: Troubleshooting _____________________________________________________________49 Audible Alerts ............................... 49 Error Messages ..............................50 Appendix A: System Specifications ______________________________________________51 Affirm Measurements ............................51 Biopsy Guidance Module ............................ 51 Biopsy Control Module ............................51 Appendix B: Forms _____________________________________________________________53 QAS Test Checklist ............................... 53 Appendix C: CNR Correction for Biopsy __________________________________________55 CNR Correction for Stereotactic Biopsy ......................
-
Page 7: List Of Figures
Affirm User Guide Table of Contents List of Figures Figure 1: Affirm on the Selenia Dimensions ........................7 Figure 2: How to Lift the Biopsy Guidance Module ..................... 8 Figure 3: How to Store the Biopsy Guidance Module ....................8 Figure 4: Biopsy Guidance Module .......................... -
Page 9: List Of Tables
Table 4: The C-Arm Stereo Mode Button ........................36 Table 5: How to Select the C-Arm Stereo Mode ......................37 Table 6: Radiologic Technologist Preventive Maintenance Schedule............... 45 Table 7: Affirm Audible Alerts ............................49 Table 8: Affirm Error Messages ............................. 50 MAN-03209 Revision 005... -
Page 11: 1: Introduction
United States federal law restricts this device to use by, or on the order of, a physician. The Affirm™ breast biopsy guidance system is an optional accessory for the Selenia® Dimensions® digital mammography system. Its function is to localize lesions accurately in the breast in three dimensions. -
Page 12: User Profiles
Affirm User Guide Chapter 1: Introduction User Profiles 1.7.1 Mammography Technologist • Meets all requirements that apply to the location in which the Mammography Technologist operates. • Completed training on the mammography system. • Has training in mammography positions. •... -
Page 13: Training Requirements
Additionally, the user manual is a guide for directions on how to use the system. All users must make sure that they receive training on correct operation of the system before use on patients. Hologic does not accept the responsibility for injury or damage from wrong system operation. Terms and Definitions... -
Page 14: International Symbols
Potential Equalization terminal Protective Earth terminal "On" and "Off" (power) for the computer and display. Discard electrical and electronic equipment separately from standard waste. Send decommissioned material to Hologic or contact your service representative. Manufacturer Date of Manufacture Page 4... -
Page 15: Warnings, Cautions, And Notes
Affirm User Guide Chapter 1: Introduction 1.11 Warnings, Cautions, and Notes Descriptions of Warnings, Cautions, and Notes used in this manual: The procedures that you must follow accurately WARNING! to prevent possible dangerous or fatal injury. The procedures that you must follow accurately to Warning: prevent injury. -
Page 17: 2: General Information
The Affirm attaches to the Selenia Dimensions. A biopsy device attaches to the Affirm. X- and Y-axes motors in the Affirm move the biopsy device left or right and forward or back. Z-axis movement is manual. The Affirm Biopsy system has two main components: •... -
Page 18: How To Handle The Biopsy Guidance Module
To prevent damage or alignment problems with the Caution: Needle Guidance Stage, be careful when you move the Biopsy Guidance Module. The Affirm Biopsy Guidance Module weighs 15 pounds. Caution: When you move it, be sure to have a secure grip on the handles. -
Page 19: Biopsy Guidance Module Components
Holds the biopsy device. Moves along the Z-axis Slide Rail when a Z-axis Control Knob is rotated. Cable Connects to Selenia Dimension to bring power to the Affirm. Lock Lever One on each side. Engage both levers to lock the Biopsy Guidance Module in position and on the Selenia Dimensions gantry. -
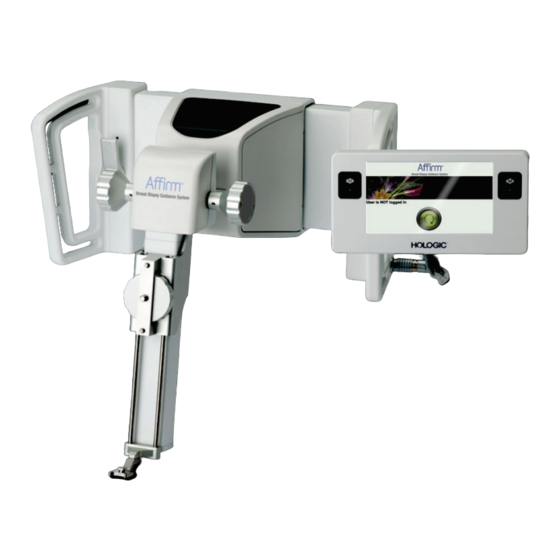
Page 20: Biopsy Control Module Components
Affirm User Guide Chapter 2: General Information Biopsy Control Module Components The Biopsy Control Module attaches to either the left or right handle on the Biopsy Guidance Module with a bracket (item 5). The display screen (item 2) is a touch screen for the user to perform the desired tasks. -
Page 21: Safety
Read and understand this manual before you use the system. Keep this manual available during the patient exams. Always follow all the instructions in this manual. Hologic does not accept the responsibility for injury or damage from wrong system operation. Hologic can arrange for training at your facility. - Page 22 To prevent damage or misalignment, be careful when you Caution: move the Affirm. The Affirm Biopsy Guidance Module weighs 15 pounds. Caution: When you move it, be sure to have a secure grip on the handles.
-
Page 23: Compliance Information
Affirm User Guide Chapter 2: General Information Compliance Information 2.7.1 Requirements The manufacturer is responsible for the effects of safety, reliability, and performance of this equipment, with the following provisions: • The equipment is used in accordance with the User Guide. -
Page 25: 3: How To Install Or Remove The System
Slide the top hooks (item 2) of the Biopsy Guidance Module into the slots marked with the Affirm icon (item 2A) on the front of the Selenia Dimensions gantry. Make sure the top and bottom hooks attach to the Selenia Dimensions gantry. -
Page 26: How To Attach The Biopsy Control Module
Affirm User Guide Chapter 3: How to Install or Remove the System 3.1.2 How to Attach the Biopsy Control Module The Biopsy Control Module attaches to either the left or right handle on the Biopsy Guidance Module. Figure Legend Lock Knob for Articulating Arm... - Page 27 Affirm User Guide Chapter 3: How to Install or Remove the System How to adjust the bracket height Release the Attachment Bracket Lock (item 5). Slide the bracket to the required height. Put the Attachment Bracket Lock (item 5) into the locked position.
-
Page 28: Installation And Removal Of Accessories
Affirm User Guide Chapter 3: How to Install or Remove the System Installation and Removal of Accessories 3.2.1 Biopsy Compression Paddles 5x5 cm 6x7 cm 5x5 cm Standard Biopsy Standard Biopsy Axillary Biopsy Paddle Paddle Paddle The biopsy compression paddles attach to the compression device on the Selenia Dimensions. -
Page 29: Needle Guides
Affirm User Guide Chapter 3: How to Install or Remove the System 3.2.3 Needle Guides Always use sterile techniques when you use Needle Warning: Guides during the patient procedures. It is important to install the device correctly. Be sure Warning: to insert the needle through the top and bottom Needle Guides. -
Page 30: Affirm Table-Top Stand
The Affirm Table-top Stand is not applicable to mobile Caution: applications. To place the Affirm on the optional stand, refer to the following figure. Move the Affirm Biopsy Device Holder and needle guide to the highest upper position as shown in A. -
Page 31: Removal Of Main Components
To prevent damage or alignment problems with the Caution: Needle Guidance Stage, be careful when you move the Biopsy Guidance Module. The Affirm Biopsy Guidance Module weighs 15 pounds. Caution: When you move it, be sure to have a secure grip on the handles. -
Page 33: 4: How To Use The System
How to Use the System System Verifications 4.1.1 Confirm the Host Connection When the Selenia Dimensions is On and the Affirm cable connections are correct, the Home screen shows on the Biopsy Control Module. Figure 11: Home Screen on the Biopsy Control Module 4.1.2... -
Page 34: Figure 12: Admin Screen
Affirm User Guide Chapter 4: How to Use the System The QAS Test Select the Admin button on the Selenia Dimensions, then select the QAS button from the Admin screen. Figure 12: Admin Screen When the QAS screen shows on the Selenia Dimensions Acquisition Workstation, select the Biopsy tab. - Page 35 If the targeting coordinates are not within ± 1 mm, Warning: contact Technical Support. Do not try to adjust the system. Do not perform any biopsy procedure with the Affirm until Technical Support indicates the system is ready for use. The user or a servicing engineer must correct Warning: problems before the system is used.
-
Page 36: Biopsy Control Module Screens
Affirm User Guide Chapter 4: How to Use the System Biopsy Control Module Screens 4.2.1 Home Screen The Home screen shows the name or initials of the user who logs in and any error messages. The Go button takes the user to the Target Guidance screen. -
Page 37: Figure 15: Target Guidance Screen
Affirm User Guide Chapter 4: How to Use the System Figure 15: Target Guidance Screen Figure Legend Go to the Jog Mode screen Go to the Select Target screen Go to the Previous screen Target Information Switch between C-Arm Mode or Stereo Mode (when the system is set for Manual C-Arm Stereo Mode). -
Page 38: Figure 16: Green Differential Cells
Affirm User Guide Chapter 4: How to Use the System Colored Cells in the Screens Green Cells When all Diff cells are green, the biopsy device is in the correct position for the selected target. When the biopsy device is fired, the target is at the center of the aperture of the device. -
Page 39: Figure 18: Alert Sounds Are Audible
Affirm User Guide Chapter 4: How to Use the System The Sound Button The Sound button is enabled when there is a system fault. When the Sound button displays, you can control system sounds related to alarms and motor movements of the biopsy device. -
Page 40: Jog Mode Screen
Affirm User Guide Chapter 4: How to Use the System 4.2.3 Jog Mode Screen This screen allows the user to manually overwrite the targeting coordinates of the Biopsy Guidance Module. The arrow buttons in the Jog Mode screen change the Jog value of the X and Y coordinates. -
Page 41: Figure 20: Jog Mode Screen
Affirm User Guide Chapter 4: How to Use the System Figure 20: Jog Mode Screen Figure Legend Change Y-axis Jog value in negative direction Change X-axis Jog value in negative direction Change Y-axis Jog value in positive direction Target Information... -
Page 42: Select Target Screen
Affirm User Guide Chapter 4: How to Use the System 4.2.4 Select Target Screen This screen allows the user to select a different target for biopsy guidance or to move to one of the Home positions. The buttons in the Select Target screen allow the user to go to the Previous screen (item 1), go to the Target screen (item 2), or go to the Left or Right Home Position (item 3 or item 6). -
Page 43: Selenia Dimensions
Affirm User Guide Chapter 4: How to Use the System Selenia Dimensions 4.3.1 Biopsy Views When used with the Selenia Dimensions 2D system, biopsy procedures require stereo views, which are images taken at +15° and -15° angles. Collectively, these images are called a stereo pair. -
Page 44: Figure 23: Edit Biopsy View Screen
Affirm User Guide Chapter 4: How to Use the System How to Edit a Stereo View Use the Edit View screen to assign a different view to an image. Figure 23: Edit Biopsy View Screen To edit a view: Select an exposed thumbnail image view in the Procedure screen. -
Page 45: C-Arm Stereo Modes
Affirm User Guide Chapter 4: How to Use the System 4.3.2 C-Arm Stereo Modes Acquire the stereo images in either the Auto C-Arm Stereo Mode or the Manual C-Arm Stereo Mode. Make the C-Arm Stereo Mode selection at the Acquisition Workstation... -
Page 46: Figure 24: Stereo Mode
Affirm User Guide Chapter 4: How to Use the System In Manual C-Arm Stereo Mode In Manual C-Arm Stereo Mode, the C-Arm Stereo Mode button shows on the Target Guidance screen. The default is Stereo Mode. See the table that follows for a description of the button function. -
Page 47: Figure 26: System Status Icon
Affirm User Guide Chapter 4: How to Use the System How to Select the C-Arm Stereo Mode for Image Acquisition Table 5: How to Select the C-Arm Stereo Mode 1. Select the System Status icon. Figure 26: System Status Icon 2. -
Page 48: Biopsy Tab
Affirm User Guide Chapter 4: How to Use the System 4.3.3 Biopsy Tab Figure Legend Target Function Buttons Biopsy Staging Area Figure 29: The Biopsy Tab When you select the Biopsy tab, the Biopsy screen appears. This middle section of the screen shows information about the targets and the biopsy device installed on the system. -
Page 49: Figure 31: Function Buttons And Data On The Biopsy Tab
Affirm User Guide Chapter 4: How to Use the System Biopsy Staging The buttons on the Biopsy Staging area communicate target information to the Biopsy Control Module. The fields on the right side of the buttons show the selected target and biopsy device. - Page 50 Affirm User Guide Chapter 4: How to Use the System Move Z-Target Down moves the final position of the needle toward the Breast Platform and the graphic of the lesion upward. The values for the safety margins change accordingly. Show/Hide Targets shows/hides all targets in the list of targets in the Biopsy Staging area.
-
Page 51: Stereotactic Lesion Targeting
Affirm User Guide Chapter 4: How to Use the System 4.3.4 Stereotactic Lesion Targeting Note You can use the Zoom tool (in the Tools tab or View Actual Pixels button) to magnify the area of interest in an image. Note If the exam data in the image blocks detection of the lesion, click the Information icon in the Tools tab to hide the data. -
Page 52: Lesion Targeting With Tomosynthesis
Affirm User Guide Chapter 4: How to Use the System 4.3.5 Lesion Targeting with Tomosynthesis Lesion targeting for tomosynthesis requires system licenses for tomosynthesis and biopsy. Note Make sure that the biopsy device is out of the imaging area. Acquire the Tomographic target (scout) image. -
Page 53: Post Biopsy
Affirm User Guide Chapter 4: How to Use the System Observe Targets on Post-Tomographic Scout Image To project targets from the pre-fire Tomographic Target (scout) onto the post-fire Tomographic Target (scout), follow these steps: Select the pre-fire Tomographic Target (scout) thumbnail. The image shows in the bottom half of a 2-Up display in the Preview screen. -
Page 55: 5: Care And Cleaning
Inspect the Biopsy Paddle for damage before use. Inspect the calibration Phantom for damage. Inspect all cables for wear and damage before use. Make sure that the Affirm locks in position. Make sure that the Needle Guides are installed correctly before use. -
Page 56: For General Cleaning
Use the least possible amount of cleaning fluids. The Caution: fluids must not flow or run. If more than soap and water is required, Hologic recommends any one of the following: • 10% chlorine bleach and water with one part commercially available chlorine bleach (normally 5.25% chlorine and 94.75% water) and nine parts water... -
Page 57: To Prevent Possible Injury Or Equipment Damage
Affirm User Guide Chapter 5: Care and Cleaning 5.3.2 To Prevent Possible Injury or Equipment Damage Do not use a corrosive solvent, abrasive detergent, or polish. Select a cleaning/disinfecting agent that does not damage the plastics, aluminum, or carbon fiber. -
Page 59: 6: Troubleshooting
Affirm User Guide Chapter 6: Troubleshooting Chapter 6: Troubleshooting Audible Alerts Table 7: Affirm Audible Alerts Activity Frequency Duration Repeats? At Power Up: 250 ms Any Needle position within the 50 ms safety margin limit: BGM calibrate or configuration operation, Move or Jog: If the operation is •... -
Page 60: Error Messages
Select the Clear All Faults options. If the message continues to display, contact Technical Support. Selftest Error Disconnect the Affirm cable from the Selenia Dimensions. Reconnect the Affirm to the Selenia Dimensions. If the message continues to display, contact Technical Support. -
Page 61: Appendix A: System Specifications
Input from Selenia Dimensions: +15Vdc±10% and +5Vdc±10% Output: +12Vdc Note The Affirm biopsy guidance system is designed for + 1 mm targeting precision when a biopsy device is mounted to the system with an applicable device holder. Biopsy Control Module... -
Page 63: Appendix B: Forms
Affirm User Guide Appendix B: Forms Appendix B: Forms App endix B QAS Test Checklist Date Tech X Diff Y Diff Z Diff Pass/Fail MAN-03209 Revision 005 Page 53... -
Page 65: Appendix C: Cnr Correction For Biopsy
Affirm User Guide Appendix C: CNR Correction for Biopsy Appendix C: CNR Correction for Biopsy App endix C CNR Correction for Stereotactic Biopsy Note System default setting is AEC Table 0 for imaging under stereotactic biopsy mode. C.1.1 AEC Table 0 (Standard Stereotactic Biopsy Dose) Prior to Software Rev After Software Rev 1.7.x... -
Page 67: Index
• 19 glossary • 3 auto biopsy mode • 35 auto C-Arm stereo mode • 35 Hologic technical support • 45 home screen • 26 biopsy control module • 7, 10 host connection verification • 23 biopsy device holder, attachment •... - Page 68 • 7 host connection verification • 23 specifications • 51 verification • 23 Table-top Stand install the Affirm • 20 target guidance screen • 26 target lesion stereotactic lesion targeting • 41 tomo lesion targeting • 42 technical support • 1 terms and definitions •...
Need help?
Do you have a question about the Affirm and is the answer not in the manual?
Questions and answers