Table of Contents
Advertisement
Quick Links
Operating Instructions and Parts Manual
Vertical Tilting Band Saw
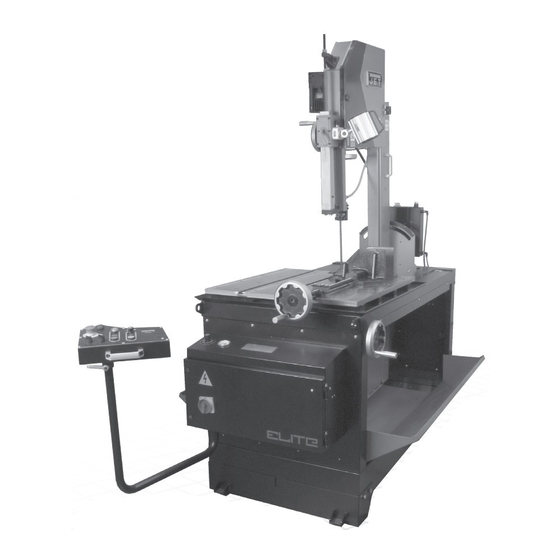
Models EVTBS16V-230, EVTBS16V-460
JET
®
427 New Sanford Road
LaVergne, Tennessee 37086
www.jettools.com
Ph.: 855-336-4032
891200_EVTBS16V Tilting Band Saw_Edition 1.indd 1
891200_EVTBS16V Tilting Band Saw_Edition 1.indd 1
Part No. M-891200
EDITION 2 05/2022
Copyright © 2022 JET
5/10/22 10:22 AM
5/10/22 10:22 AM
Advertisement
Table of Contents

Related Manuals for Jet ELITE EVTBS16V-230


Summary of Contents for Jet ELITE EVTBS16V-230
- Page 1 Models EVTBS16V-230, EVTBS16V-460 ® 427 New Sanford Road LaVergne, Tennessee 37086 Part No. M-891200 www.jettools.com EDITION 2 05/2022 Ph.: 855-336-4032 Copyright © 2022 JET 891200_EVTBS16V Tilting Band Saw_Edition 1.indd 1 891200_EVTBS16V Tilting Band Saw_Edition 1.indd 1 5/10/22 10:22 AM 5/10/22 10:22 AM...
-
Page 2: Table Of Contents
TABLE OF CONTENTS TABLE OF CONTENTS ..........................2 IMPORTANT SAFETY INSTRUCTIONS ......................3 INTRODUCTION ............................6 SPECIFICATIONS ............................7 MACHINE DIMENSIONS ..........................9 MACHINE TRANSPORT ..........................10 Shipping Contents ..........................10 SPOTTING and INSTALLATION ........................ 11 Equipment Setting ..........................12 ELECTRICAL CONNECTIONS ........................12 Three-Phase Test Run .........................12 CONTROL PANEL DESCRIPTION ......................13 10.0 SET UP AND OPERATION PREPARATIONS ....................13 10.1... -
Page 3: Important Safety Instructions
Read and understand the warnings posted on the machine and in this manual. Failure to comply with all of these warnings may cause serious injury. Replace the warning labels if they become obscured or removed. Do not use this band saw for other than its intended use. If used for other purposes, JET , disclaims any real or implied ®... - Page 4 22. Give your work your undivided attention. Looking around, carrying on a conversation and “horse-play” are careless acts that can result in serious injury. 23. Maintain a balanced stance at all times so that you do not fall or lean against the blade or other moving parts. Do not overreach or use excessive force to perform any machine operation.
- Page 5 Familiarize yourself with the following safety notices used in this manual: This means that if precautions are not heeded, it may This means that if precautions are not heeded, it may result in serious or even fatal injury. result in minor injury and/or possible machine dam- age.
-
Page 6: Introduction
Your machine has been designed and constructed to provide consistent, long-term operation if used in accordance with the instructions as set forth in this document. If there are questions or comments, please contact your local supplier or JET. JET can also be reached at our web site: www.jettools.com/us/en/elite. -
Page 7: Specifications
SPECIFICATIONS Model Number EVTBS16V-230 EVTBS16V-460 Stock Number 891200 891210 Motor and Electricals Main motor type Totally enclosed, fan-cooled, AC induction Horsepower 2 HP (1.5kW) Phase 3 phase Voltage prewired 230V prewired 460V Cycle 60 Hz Listed FLA (full load amps) 6.5 A 3.25 A Starting amps/inrush current... - Page 8 EVTBS16V-230 EVTBS16V-460 General dimensions Height of bed from floor 39-3/8”(1000mm) Overall dimensions (LxWxH 94.5 x 49.2 x 90.55 in. (2400 x 1250 x 2300mm) Shipping dimensions (LxWxH) 83.5 x 38.18 x 92.91 in. (2120L x 970W x 2360Hmm) Weights Net weight (approx.) 1408 lbs (640kg) Shipping weight (approx.) 1584 lbs (720kg) The specifications in this manual were current at time of publication, but because of our policy of continuous improvement,...
-
Page 9: Machine Dimensions
MACHINE DIMENSIONS EVTBS16V 891200_EVTBS16V Tilting Band Saw_Edition 1.indd 9 891200_EVTBS16V Tilting Band Saw_Edition 1.indd 9 5/10/22 10:22 AM 5/10/22 10:22 AM... -
Page 10: Machine Transport
MACHINE TRANSPORT Note: DO NOT use alternate lift points. Shipping Contents Item Description Cross driver 1 piece Flat driver 1 piece 17/19 Open wrench 1 piece 12/14 Open wrench 1 piece 4/5/6/8 Hex wrench 1 piece M12x45 Hex Cap Screw 4 pieces M12 Nut 4 pieces... -
Page 11: Spotting And Installation
SPOTTING AND INSTALLATION Note: Read and understand the entire manual before attempting setup or operation. Finish uncrating the saw and inspect for damage. Should any damage have occurred, immediately contact your local distributor and shipping agent. Remove the four (4) nuts and washers holding the band saw to the pallet. -
Page 12: Equipment Setting
Equipment Setting ELECTRICAL CONNECTIONS Fill the coolant reservoir with 18 gallons of the appropriate coolant. All electrical connections must be done by a qualified electrician in compliance with all relevant codes. This machine must be properly grounded to help prevent serious or fatal injury. The EVTBS16V is wired for 3-phase, 230V, or 3-phase 460V, depending on your model. -
Page 13: Control Panel Description
CONTROL PANEL 10.0 SET UP AND OPERATION DESCRIPTION PREPARATIONS Reference Figure 6 A: EMERGENCY STOP SWITCH: All adjustments or repairs to machine must be done with power off and machine disconnected from Press to immediately stop all machine functions. To power source. -
Page 14: Blade Tracking Adjustment
10.2 Blade Tracking Adjustment To adjust the cutting head angle, turn the lock handle counterclockwise (CCW) (C, Fig. 9). Typically, the blade should track with the back edge of the blade maintaining an approximate 1/32" gap from the Holding the cutting head handle, tilt the head to desired flange on the back of blade wheels. -
Page 15: Feeding Stroke
The lock handle (K, Fig. 10) secures the clamp assembly 10.5.2 Saw Head Movement - Automatic to the table T-slot. 1. The saw also can be fed forward automatically by adjusting the feed force. Pull upward on the knob (N, Pulling the release handle (H, Fig. -
Page 16: Blade Speed Adjustment
To adjust: Push the START button on the control panel. Twist the blade speed control knob clockwise (CW) to increase the Loosen the forward travel adjustment handle (Q, Fig. 14) blade speed, counterclockwise (CCW) to reduce blade and slide the adjustment block forward to allow the saw speed. -
Page 17: Adjusting Cutter Head Weight
10.10 Alignment Blade Squareness: To check, move the upper blade guide to its uppermost position. Use a square (U, Fig. 17) to check that the blade is perpendicular to the tabletop. If alignment is necessary, loosen the two (2) bolts (V, Fig. 17) holding the lower blade guide assembly. -
Page 18: Band Saw Operation
The following procedure will be adequate, however, for When correct guide bearing adjustment is done, the blade runs smoothly and evenly without twisting or snagging break-in of JET-supplied blades on lower alloy ferrous anywhere along its path. materials. Use a section of round stock. -
Page 19: Operation Procedure
11.3 Operation Procedure 13. Set the feed pressure to a pressure as recommended in pressure chart, Table 2 - Recommended Feed Force. Operation of this band saw is quite simple once the function of each control and feature is understood. 14. -
Page 20: Maintenance
12.0 MAINTENANCE • Use compressed air to clean the blade guides (guide bearings and drain hole of the lubricating and cooling tank). • Clean flywheel housings and the race of the flywheels. • Check and add coolant. Before doing maintenance on the machine, discon- nect it from the electrical supply by pulling out the •... -
Page 21: Accessing And Cleaning The Coolant System
12.3 Accessing and Cleaning the Coolant System Clean the drain screens on the machine base and the drains on the ends of the table. • Drain and wash out the dirt and debris from the reservoir. • Thoroughly clean the pump and pump inlet. •... -
Page 22: Troubleshooting
13.0 TROUBLESHOOTING 13.1 Operating Problems Table 3 Trouble Probable Cause Remedy Material loose in vise. Clamp work securely. Incorrect speed or feed. Adjust speed or feed. Blade pitch too coarse. Use finer pitch. Blade tensioned too high. Reduce tension. Excessive blade breakage Blade guides out of adjustment. -
Page 23: Mechanical And Electrical Problems
13.2 Mechanical and Electrical Problems Table 3 (cont.) Trouble Probable Cause Remedy Verify machine is connected to power source. No incoming power. Make sure START button is pushed in com- pletely, and STOP button is disengaged. Cord damaged. Replace cord. When the band saw overloads on the circuit breaker built into the motor starter, it may take time for the machine to cool down before re-... -
Page 24: Mechanical And Electrical Problems (Cont.)
13.2 Mechanical And Electrical Problems (cont.) Table 3 (cont.) Trouble Possible Cause Remedy Double check to confirm all electrical connec- tions are correct. Reference the appropriate Miswiring of the unit. wiring diagrams to make any needed correc- Machine will not start/restart or tions. -
Page 25: Speed And Pitch Chart
14.0 SPEED AND PITCH CHART Table 4 Sawing speed (Ft/min) for specified Material and thickness Pitch (No. of teeth/inch) Material Thickness ~1/4 1/4~1 ~1/4 1/4~1 1~3 3~6 6~ High carbon steel Free cutting steel Ordinary tool steel High speed steel Stainless steel Thick iron plate Cast iron Aluminum 108, A108 A132, C133 13,43,85,4032,6151... -
Page 26: Replacement Parts - Evtbs16V
Having the Model Number and Serial Number of your machine available when you call will allow us to serve you quickly and accurately. Non-proprietary parts, such as fasteners, can be found at local hardware stores, or may be ordered from JET. Some parts are shown for reference only, and may not be available individually. - Page 27 CABINET ASSEMBLY — EVTBS16V EVTBS16V 891200_EVTBS16V Tilting Band Saw_Edition 1.indd 27 891200_EVTBS16V Tilting Band Saw_Edition 1.indd 27 5/10/22 10:22 AM 5/10/22 10:22 AM...
- Page 28 CABINET ASSEMBLY PARTS LIST — EVTBS16V Index No. Part No. Description Size Qty. EVTBS16V-A1 Base Frame-Table Top EVTBS16V-A2 Rod-Carriage Way TS-1525031 Set Screw M10 x 16L TS-1541031 Nylon Lock Hex Nut M8, Nylon Insert TS-1504101 Socket Hd Cap Screw M8 x 50L TS-1504041 Socket Hd Cap Screw M8 x 20L...
- Page 29 CABINET ASSEMBLY PARTS LIST — EVTBS16V (cont.) Index No. Part No. Description Size Qty. EVTBS16V-A47 Fitting For Hose ID 3/8", 3/8" NPT EVTBS16V-A48 Coolant Pump TS-1550041 Flat Washer TS-1503061 Socket Hd Cap Screw M6 x 25L TS-1513011 Socket Head Flat Screw M5 x 10L EVTBS16V-A52 Pump Splash Guard...
- Page 30 TURNING BRACKET ASSEMBLY — EVTBS16V Vertical Tilting Band Saw 891200_EVTBS16V Tilting Band Saw_Edition 1.indd 30 891200_EVTBS16V Tilting Band Saw_Edition 1.indd 30 5/10/22 10:22 AM 5/10/22 10:22 AM...
- Page 31 TURNING BRACKET ASSEMBLY PARTS LIST — EVTBS16V Index No. Part No. Description Size Qty. EVTBS16V-B1 Carriage Weldment TS-2311101 Hex Nut EVTBS16V-B3 Carriage Bumper TS-1491031 Hex Cap Screw M10 x 25L TS-2361101 Lock Washer EVTBS16V-B6 Bolt, Bow Pivot TS-2246101 Socket Head Flat Screw M6 x 16L TS-1504041 Socket Hd Cap Screw...
- Page 32 TURNING BRACKET ASSEMBLY PARTS LIST (cont.) Index No. Part No. Description Size Qty. EVTBS16V-B48 Shaft For Sprocket RS40 TS-1522041 Set Screw M5 x 12L EVTBS16V-B50 Sprocket RS40 T10 EVTBS16V-B51 Sprocket RS40 T17 BB-6003ZZ Ball Bearing 6003ZZ F006054 C-Retaining Ring, Ext EVTBS16V-B54 Chain RS40 x 225 Pitch...
- Page 33 AIR CYLINDER ASSEMBLY — EVTBS16V Index No. Part No. Description Size Qty. EVTBS16V-C1 U-Bolts 1-1/4 x 1/4" TS-2228161 Hex Cap Screw M8 x 16L TS-2361081 Lock Washer EVTBS16V-C4 Air Cylinder EVTBS16V-C5 Channel Weldment TS-0561011 Hex Nut 1/4"-20 TS-1550041 Flat Washer TS-1550041 Flat Washer TS-0561011...
- Page 34 TABLE ASSEMBLY — EVTBS16V Vertical Tilting Band Saw 891200_EVTBS16V Tilting Band Saw_Edition 1.indd 34 891200_EVTBS16V Tilting Band Saw_Edition 1.indd 34 5/10/22 10:22 AM 5/10/22 10:22 AM...
- Page 35 TABLE ASSEMBLY PARTS LIST — EVTBS16V Index No. Part No. Description Size Qty. EVTBS16V-D19 Right Table EVTBS16V-D20 Left Table TS-1525031 Set Screw M10 x 16L TS-1505041 Socket Hd Cap Screw M10 x 30L EVTBS16V-D23 T-Slot Nut EVTBS16V-D24 Base - Quick Action Clamp EVTBS16V-D25 Locking Handle M10 x 20L...
- Page 36 BOW ASSEMBLY — EVTBS16V Vertical Tilting Band Saw 891200_EVTBS16V Tilting Band Saw_Edition 1.indd 36 891200_EVTBS16V Tilting Band Saw_Edition 1.indd 36 5/10/22 10:22 AM 5/10/22 10:22 AM...
- Page 37 BOW ASSEMBLY PARTS LIST — EVTBS16V Index No. Part No. Description Size Qty. TS-1513011 Socket Head Flat Screw M5 x 10L EVTBS16V-E2 Hinge-Upper Wheel Housing TS-2361051 Lock Washer TS-1540041 Hex Nut TS-1512011 Socket Head Flat Screw M4 x 8L EVTBS16V-E6 Cover Stop (2 pcs) EVTBS16V-E7 Bracket-Cover Stops...
- Page 38 BOW ASSEMBLY PARTS LIST (cont.) Index No. Part No. Description Size Qty. EVTBS16V-E47 Upper Blade Guide Arm TS-1503011 Socket Hd Cap Screw M6 x 8L EVTBS16V-E49 Gear Rack 3/4" M2 TS-1502031 Socket Hd Cap Screw M5 x 12L BB-6002ZZ Ball Bearing 6002ZZ EVTBS16V-E52 Bracket-Upper Blade Guide Arm...
- Page 39 BOW ASSEMBLY PARTS LIST (cont.) Index No. Part No. Description Size Qty. TS-1513011 Socket Head Flat Screw M5 x 10L EVTBS16V-E93 Bracket-Sliding Plate Cover TS-1550031 Flat Washer TS-1502031 Socket Hd Cap Screw M5 x 12L EVTBS16V-E96 Washer-Bow Pivot EVTBS16V-E97 Locking Handle M16 x 30L EVTBS16V-E98 Handle-Bow Pivot...
- Page 40 GUIDE POST ASSEMBLY — EVTBS16V Vertical Tilting Band Saw 891200_EVTBS16V Tilting Band Saw_Edition 1.indd 40 891200_EVTBS16V Tilting Band Saw_Edition 1.indd 40 5/10/22 10:22 AM 5/10/22 10:22 AM...
- Page 41 GUIDE POST ASSEMBLY PARTS LIST — EVTBS16V Index No. Part No. Description Size Qty. EVTBS16V-F9A Lower Guide Assembly (F1-F15) F006090 E-Retaining Ring BB-608ZZ Ball Bearing 608ZZ EVTBS16V-F3 Eccentric Roller Shaft EVTBS16V-F4 Carbide Guide EVTBS16V-F5 Concentric Roller Shaft TS-1503061 Socket Hd Cap Screw M6 x 25L TS-2361061 Lock Washer...
- Page 42 GUIDE POST ASSEMBLY PARTS LIST (cont.) Index No. Part No. Description Size Qty. EVTBS16V-F45 Pivot Indicator Block TS-1540061 Hex Nut TS-1504051 Socket Hd Cap Screw M8 x 25L EVTBS16V-F48 Fitting For Hose ID 3/8", 1/4" NPT EVTBS16V-F49 Coolant Valve Switch Female x Female, 1/4"...
- Page 43 ELECTRICAL BOX ASSEMBLY — EVTBS16V EVTBS16V 891200_EVTBS16V Tilting Band Saw_Edition 1.indd 43 891200_EVTBS16V Tilting Band Saw_Edition 1.indd 43 5/10/22 10:22 AM 5/10/22 10:22 AM...
- Page 44 ELECTRICAL BOX ASSEMBLY PARTS LIST — EVTBS16V Index No. Part No. Description Size Qty. EVTBS16V-G1 Electrical Box Weldment EVTBS16V-G2 Electrical Box Cover TS-1503061 Socket Hd Cap Screw M6 x 25L TS-1550041 Flat Washer TS-1540041 Hex Nut EVTBS16V-G6 Tube Fitting For Tube OD 8 mm, 1/4"...
- Page 45 ELECTRICAL BOX ASSEMBLY PARTS LIST — EVTBS16V (cont.) Index No. Part No. Description Size Qty. 31-12 EVTBS16V-G31-12 Fuse 10x38 mm( 1A) 31-13 EVTBS16V-G31-13 Fuse 5x10 mm(5A) 31-14 EVTBS16V-G31-14 Fuse 5x10 mm(1A) 31-15 EVTBS16V-G31-15 Relay BMY5-4C5 31-16 EVTBS16V-G31-16 Relay BMY5-2C5 31-17 EVTBS16V-G31-17 Potentiometer RV24YN...
-
Page 46: Wiring Diagram - Evtbs16V
16.0 WIRING DIAGRAM — EVTBS16V Vertical Tilting Band Saw 891200_EVTBS16V Tilting Band Saw_Edition 1.indd 46 891200_EVTBS16V Tilting Band Saw_Edition 1.indd 46 5/10/22 10:22 AM 5/10/22 10:22 AM... -
Page 47: Hydraulics / Pneumatics - Evtbs16V
17.0 HYDRAULICS / PNEUMATICS — EVTBS16V EVTBS16V 891200_EVTBS16V Tilting Band Saw_Edition 1.indd 47 891200_EVTBS16V Tilting Band Saw_Edition 1.indd 47 5/10/22 10:22 AM 5/10/22 10:22 AM... -
Page 48: Warranty And Service
JET has Authorized Service Centers located throughout the United States. For the name of an Authorized Service Center in your area call 1-855-336-4032 or use the Service Center Locator on the JET website. Vertical Tilting Band Saw 891200_EVTBS16V Tilting Band Saw_Edition 1.indd 48... - Page 49 Canada by JPW Industries, Inc. NOTE: JET is a division of JPW Industries, Inc. References in this document to JET also apply to JPW Industries, Inc., or any of its successors in interest to the JET brand.
- Page 50 NOTES Vertical Tilting Band Saw 891200_EVTBS16V Tilting Band Saw_Edition 1.indd 50 891200_EVTBS16V Tilting Band Saw_Edition 1.indd 50 5/10/22 10:22 AM 5/10/22 10:22 AM...
- Page 51 NOTES EVTBS16V 891200_EVTBS16V Tilting Band Saw_Edition 1.indd 51 891200_EVTBS16V Tilting Band Saw_Edition 1.indd 51 5/10/22 10:22 AM 5/10/22 10:22 AM...
- Page 52 A DIVISION OF JPW INDUSTRIES 427 New Sanford Road LaVergne, Tennessee 37086 www.jettools.com Phone: 1-855-336-4032 891200_EVTBS16V Tilting Band Saw_Edition 1.indd 52 891200_EVTBS16V Tilting Band Saw_Edition 1.indd 52 5/10/22 10:22 AM 5/10/22 10:22 AM...
Need help?
Do you have a question about the ELITE EVTBS16V-230 and is the answer not in the manual?
Questions and answers