Goodwe Lynx Home F Series User Manual
Hide thumbs
Also See for Lynx Home F Series:
- Quick installation manual (91 pages) ,
- User manual (44 pages) ,
- User manual (39 pages)
Table of Contents
Advertisement
Quick Links
Advertisement
Table of Contents

Related Manuals for Goodwe Lynx Home F Series


Summary of Contents for Goodwe Lynx Home F Series
- Page 1 User Manual Lynx Home F Series (HV) V 1.2 2022-02-18...
- Page 2 Disclaimer User Manual V1.0-2022-02-18 Disclaimer • All the information in this document is the property of the manufacturer. No part of this document could be reproduced in any way for business use. Internal use is allowed. • The manufacturer makes no representations or warranties express or implied, with respect to this document or any of the equipment and/or software it may describe, including(with no limitation) any implied warranties of utility, merchantability, or fitness for any particular purpose.
-
Page 3: Table Of Contents
Content User Manual V1.0-2022-02-18 TABLE OF CONTENTS 01 Safety Precaution ............... 01 02 Product Introduction ..............03 2.1 Product Description ..................03 2.2 Symbol Description ................... 03 03 Parts Introduction ..............04 3.1 Battery System Introduction ..............04 3.2 Battery Introduction ..................04 3.3 Base Introduction .................. -
Page 4: Safety Precaution
01 Safety Precaution User Manual V1.0-2022-02-18 01 Safety Precaution DANGER • Please keep Power Off before any operations to avoid danger. Strictly follow all safety precautions outlined in this manual and safety labels on the equipment. • All installation operations should be performed by trained and knowledgeable technical personnel who are familiar with local standards and electric systems. - Page 5 • Restrictions of Hazardous Substances Directive 2011/65/EU and (EU) 2015/863 (RoHS) • Waste Electrical and Electronic Equipment 2012/19/EU • Registration, Evaluation, Authorization and Restriction of Chemicals (EC) No 1907/2006 (REACH) You can download the EU Declaration of Conformity on https://en.goodwe.com.
-
Page 6: Product Introduction
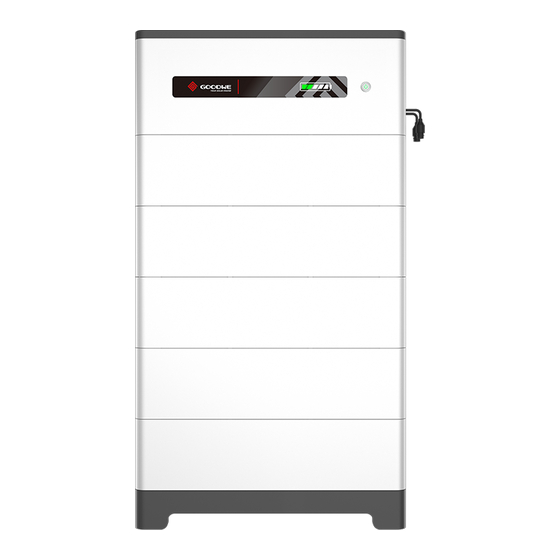
User Manual V1.0-2022-02-18 02 Product Introduction 2.1 Product Description • This user manual describes the Lynx Home F Series (HV) Battery System (Battery System for short) in terms of the introduction, application, installation, commission, maintenance, and technical parameters, etc. • The Battery System consists of the LX F3.3-H Battery Module (Battery Module for short) and LX F-H Power Control Unit (PCU). -
Page 7: Parts Introduction
03 Parts Introduction User Manual V1.0-2022-02-18 03 Parts Introduction 3.1 Battery System Introduction Notice • Ensure that the PCU is installed above the Battery Module. Do not install any Battery Modules above the PCU. • This manual will show you the installation and cable connection of 5 Battery Modules. -
Page 8: Power Control Unit Introduction
03 Parts Introduction User Manual V1.0-2022-02-18 3.4 Power Control Unit Introduction Left View Right View Bottom Front View Parts Positive Pole of Power Negative Pole of Power Ventilation Valve COM Cable Port Grounding Point Circuit Breaker SOC Indicator Button Indicator Rectangular Connector... -
Page 9: Dimensions
04 Storage and Package User Manual V1.0-2022-02-18 3.5 Dimensions 04 Storage and Package 4.1 Storage Environment If the equipment is not to be installed or used immediately, please ensure that the storage environment meets the following requirements: • Pack the equipment using a packing box and put some desiccant in the box before sealing. •... - Page 10 04 Storage and Package User Manual V1.0-2022-02-18 Power Control Unit Red Power PCU x1 Base x1 Expansion Bolts x4 Connector x1 Black Power Terminal Connector x1 Resistor x 1 M5*12 Screw x4 Grounding Terminal x2 M5 hexagon screw Locking Bracket x4 User Manual x1 Protection cover x1 Protection cover x2...
-
Page 11: System Installation
05 System Installation User Manual V1.0-2022-02-18 05 System Installation 5.1 Installation Environment • Install the Battery System on a ground with sufficient bearing capacity and flatness. Increase the bearing capacity and flatness of the ground by laying the foundation, adding bearing plates, and so on. -
Page 12: Battery System Installation
05 System Installation User Manual V1.0-2022-02-18 5.3 Battery System Installation Notice • Make sure that the ground is flat and no inclination. • Put the base cling to the floor vertically. • Put all the base cling to the wall, and the arrow points outward. •... - Page 13 05 System Installation User Manual V1.0-2022-02-18...
- Page 14 05 System Installation User Manual V1.0-2022-02-18 Notice • Shelter the equipment using paperboards when drilling to avoid dust. • Put the locking bracket cling to the wall. And the bracket bottom cling to the Battery Module. • Watch out for Battery Modules dropping.
-
Page 15: Electrical Connection
05 System Installation User Manual V1.0-2022-02-18 5.4 Electrical Connection 5.4.1 Connecting the PE Cable Notice • Connect the PE cable first before installing the equipment. Disconnect the PE cable before dismantling the equipment. • The PE cable should be prepared by customers.The cross-sectional area of the PE cable conductor: 5mm . - Page 16 05 System Installation User Manual V1.0-2022-02-18 Connecting the Battery Power Cable (Compatible with EHB Series Inverters) Notice • Use a power cable to connect the EHB series inverters and the Battery System. The cross- sectional area of the power cable conductor: 16mm (AWG 6).
- Page 17 05 System Installation User Manual V1.0-2022-02-18 Connecting the Battery Power Cable (Compatible with ET,BT,EH,BH Series Inverters) Notice • Use a power cable to connect the ET, BT, EH, and BH series inverters and the Battery System. Replace the white seal ring inside the power connector with a black seal ring before crimping the power cable.
-
Page 18: Connecting The Com Cable
05 System Installation User Manual V1.0-2022-02-18 5.4.3 Connecting the COM Cable Notice • The two communication ports are the same. • Connect the cable to any one of the two communication ports. And connect the terminal resistor to the other port. •... -
Page 19: Install The Terminal Resistor
05 System Installation User Manual V1.0-2022-02-18 5.4.4 Install the terminal resistor Notice If the terminal resistor is not installed, the Interlock Failure will occur, and the system cannot work correctly. Step1: Disassemble the waterproof module. Step2: Install the terminal resistor. Step3: Tighten the nut. -
Page 20: Install The Protection Cover
06 System Operation User Manual V1.0-2022-02-18 5.5 Install the protection cover 06 System Operation 6.1 Check Items Before Switching Power ON Check the following items before power on to avoid the System be damaged. Check Item The inverter is firmly installed in a clean place where is well-ventilated and easy to operate. -
Page 21: Battery Parameters
Wi-Fi SSID: Solar-WiFi*** PV Master Password: 12345678 Set battery model via PV Master App. Select Battery Model Select LX F-H. GoodWe LX F-H PYLON AlpahESS eSTORE DYNESS Notice "Battery Communication Failure" will be displayed if you select the wrong battery model. Please... -
Page 22: Indicator Status
06 System Operation User Manual V1.0-2022-02-18 6.4 Indicator Status SOC Indicator Button Indicator Button Indicator Status Green Standby or Working Alarming or Faulty 6.4.1 Normal Button Indicator SOC Indicator Description SOC<5% 5%≤SOC<25% Idle: green blink 2 25%≤SOC<50% times Standby: green blink 1 time 50%≤SOC<75% Working: steady green... -
Page 23: Alarming
06 System Operation User Manual V1.0-2022-02-18 6.4.2 Alarming Button SOC Indicator Alarm Solutions Indicator Battery Restart the battery. If the problem persists, contact Overvoltage the after-sales service. Battery Long press the button for 5s when charging. If the Undervoltage problem persists, contact the after-sales service. Overcurrent Restart the battery. -
Page 24: Battery Module Power Off
07 Battery Parameters User Manual V1.0-2022-02-18 Restart the battery. If the problem persists, Relay Fault please contact the after-sales service. Restart the battery. If the problem persists, Circuit Breaker Fault please contact the after-sales service. Do not touch the battery, and contact the Insulation Fault after-sales service. -
Page 25: Maintenance
08 Maintenance User Manual V1.0-2022-02-18 Communication Weight (Kg) 115kg 158kg 201kg 244kg Dimensions (W*D*H) (mm) 600*380*625 600*380*780 600*380*935 600*380*1090 Operating Temperature (℃) Charge: 0<T≤50 ; Discharge: -20<T≤50 Storage temperature (℃) 20~45 (≤ One Month); 0~35 (≤ One Year) Humidity(%) ≤95 Altitude (m) ≤2000 Enclosure Type... - Page 26 GoodWe PV Master Website GoodWe Technologies Co., Ltd. No. 90 Zijin Rd., New District, Suzhou, 215011, China www.goodwe.com service@goodwe.com Local Contacts 340-00627-02...
Need help?
Do you have a question about the Lynx Home F Series and is the answer not in the manual?
Questions and answers