
Related Manuals for Kärcher SP 1 Dirt


Summary of Contents for Kärcher SP 1 Dirt
- Page 1 Deutsch SP 1 Dirt English SP 2 Flat Français SP 3 Dirt Italiano 59673110 05/16...
-
Page 5: Table Of Contents
Lesen Sie vor der ersten Benutzung Ihres Sicherheit Gerätes diese Originalbetriebsanleitung und die Sicherheitshinweise. Handeln Sie danach. Bewahren Sie sie für späteren Gebrauch oder Gefahrenstufen für Nachbesitzer auf. Inhaltsverzeichnis GEFAHR Inhaltsverzeichnis Hinweis auf eine unmittelbar Garantie drohende Gefahr, die zu schwe- Umweltschutz Sicherheit ren Körperverletzungen oder... -
Page 6: Sicherer Umgang
lassene und entsprechend 30 mA und mit einem Schutz- gekennzeichnete elektrische kontakt (Erdung) betreiben. Fehlerstromschutzschalter Verlängerungsleitungen mit ausreichendem Leitungs- und Schutzkontakt (Erdung) querschnitt. regelmäßig auf Funktion prü- Netzstecker und Kupplung ei- fen. Pumpen auf keinen Fall be- ner Verlängerungsleitung müssen wasserdicht sein und treiben, wenn sich Personen... -
Page 7: Sonstige Gefahren
schen, sensorischen oder fallen des Geräts zu vermei- geistigen Fähigkeiten oder den. Um Unfälle oder Verletzun- mangels Erfahrungen und/ oder mangels Wissen benutzt gen zu vermeiden, beim zu werden, es sei denn, sie Transport das Gewicht des werden durch eine für ihre Si- Gerätes beachten (siehe cherheit zuständige Person technische Daten). -
Page 8: Gerätebeschreibung De
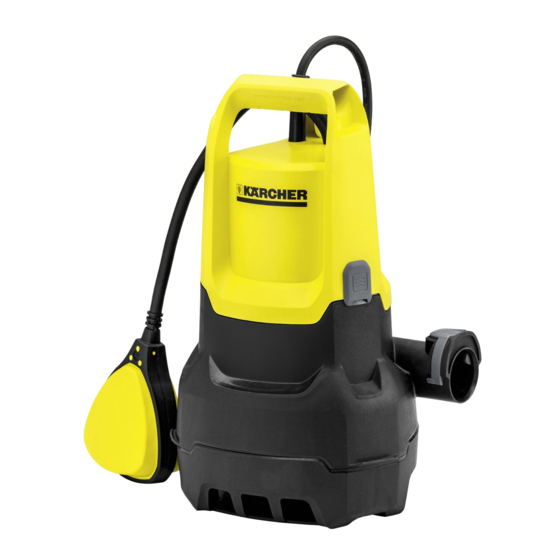
Abbildung Gerätebeschreibung Schlauchklemme auf den Schlauch schieben. Bei Verwendung eines ¾“ oder 1“ Schlauchs: Tragegriff Pumpenanschlussstück (siehe Sonderzubehör) Netzanschlusskabel mit Stecker auf den Anschlussstutzen schrauben. Arretierung (Schwimmerschalter) Schlauch auf Pumpenanschlussstück schieben Schwimmerschalter und mit Schlauchklemme befestigen. Quick-Connect ... -
Page 9: Manueller Betrieb
Einschalthöhe / Ausschalthöhe siehe folgende Tabelle: Betrieb beenden Min / Max SP 1 Dirt SP 2 Flat SP 3 Dirt Einschalthöhe cm* 43 / 50 36 / 44 43 / 50 HINWEIS Verschmutzungen können sich ablagern und zu Funkti- Ausschalthöhe... -
Page 10: Hilfe Bei Störungen De
Hilfe bei Störungen GEFAHR Lebensgefahr durch elektrischen Schlag! Um Gefährdungen zu vermeiden, dürfen Reparaturen und der Einbau von Ersatzteilen nur vom autorisierten Kun- dendienst durchgeführt werden. Störung Ursache Behebung Pumpe läuft aber fördert nicht Luft in der Pumpe Netzstecker der Pumpe mehrmals aus- und einstecken, bis Flüssigkeit angesaugt wird. - Page 11 Technische Daten SP 1 Dirt SP 2 Flat SP 3 Dirt Spannung 230 - 240 V 230 - 240 V 230 - 240 V Stromart Leistung P nenn Max. Fördermenge 5500 6000 7000 Max. Druck 0,45 Max. Förderhöhe Max. Eintauchtiefe Max.
- Page 12 Please read these original operating in- Safety structions and safety instructions prior to the initial use of your device. Proceed ac- Hazard levels cordingly. Retain them for future reference or for subse- quent owners. Contents DANGER Pointer to immediate danger, Contents Warranty which leads to severe injuries or...
-
Page 13: Safe Handling
Never operate the pumps and have an adequate cable cross-section. while there are persons in the The mains plug and the cou- pool or garden pond. Do not touch feed fluids, the pling of an extension cable must be watertight and must rope attached to the carrying never lie in water. -
Page 14: Other Risks
Do not operate the device in age of 8 and supervised by a person in charge of their safe- fire or explosion-endangered ty, or if they have received in- surroundings. structions on the use of this CAUTION Water that has been deliv- appliance and have under- stood the resulting risks. -
Page 15: Description Of The Appliance En
For switch-on height / switch-off height see the following device. table: Illustration Min / Max SP 1 Dirt SP 2 Flat SP 3 Dirt To remove the connection nozzle, press the Quick- Connect (grey button). Switch-on height 43 / 50... -
Page 16: Manual Operation
*The switching height can vary depending on the posi- Finish operation tion of the float switch. Insert the mains plug into the socket. NOTICE Soiling can deposit and lead to malfunctions. Manual operation Pump clear water or thoroughly rinse the pump af- ter every use. - Page 17 Troubleshooting DANGER Risk of mortal danger on account of electric shock! To avoid risks, all repairs and replacement of spare parts may only be carried out by the authorised customer service personnel. Fault Cause Remedy Pump runs but does not transport Air in the pump Unplug and plug in the mains plug of the pump repeatedly until the fluid is...
- Page 18 Specifications SP 1 Dirt SP 2 Flat SP 3 Dirt Voltage 230 - 240 V 230 - 240 V 230 - 240 V Current type Output P Max. flow rate 5500 6000 7000 Max. pressure 0,45 Max. flow height Max. immersion depth Max.
- Page 19 Avant la première utilisation de votre ap- Sécurité pareil, lire attentivement ce manuel d'ins- tructions original et les consignes de sécu- Niveaux de danger rité. Respecter l'ensemble de ces instructions. Conser- vez-les pour une utilisation ultérieure ou pour le futur propriétaire.
- Page 20 Des rallonges électriques non avec un disjoncteur de cou- adaptées peuvent présenter rant de défaut avec courant des risques. Utiliser à l’air de fuite nominal de 30 mA libre uniquement des câbles maxi et avec un dispositif de de rallonge électriques autori- protection (mise à...
-
Page 21: Manipulation Fiable
Manipulation fiable dommagement dû à une chute de l'appareil. AVERTISSEMENT Afin d'éviter tout accident ou Cet appareil n'est pas destiné toute blessure lors du trans- à être utilisé par des per- port, tenir compte du poids de sonnes ayant des capacités l'appareil (voir les caractéris- physiques, sensorielles ou tiques techniques). -
Page 22: Description De L'appareil Fr
Description de l’appareil Illustration Pousser le collier de flexible sur le flexible. Poignée de transport Pour une utilisation d'un flexible ¾“ ou 1“ : Câble d’alimentation avec fiche secteur Visser l'élément de raccord de pompe (cf. acces- Blocage (interrupteur à flotteur) soire en option) sur le manchon de raccordement. -
Page 23: Fonctionnement Manuel
: Mettre immédiatement hors tension en cas de marche à sec. Min / Max SP 1 Dirt SP 2 Flat SP 3 Dirt Fin de l'utilisation Hauteur de démar- 43 / 50 36 / 44... -
Page 24: Assistance En Cas De Panne Fr
Assistance en cas de panne DANGER Danger de mort par choc électrique ! Afin d'éviter tout danger, seul le service après-vente agréé est habilité à effectuer des réparations ou à monter des pièces de rechanger sur l'appareil. Panne Cause Remède La pompe tourne mais ne débite pas Air dans la pompe Brancher et débrancher la fiche sec- teur de la pompe à... - Page 25 Caractéristiques techniques SP 1 Dirt SP 2 Flat SP 3 Dirt Tension 230 - 240 V 230 - 240 V 230 - 240 V Type de courant Puissance P Débit max. 5500 6000 7000 Pression max. 0,45 Hauteur manométrique max.
-
Page 26: Indice It
Prima di utilizzare l’apparecchio per la pri- Sicurezza ma volta, leggere queste istruzioni per l’uso originali e le avvertenze di sicurezza. Livelli di pericolo Agire corrispondentemente e conservarle per un uso fu- turo o per un successivo proprietario. Indice PERICOLO Indica un pericolo imminente Indice Garanzia... -
Page 27: Uso Sicuro
omologate e contrassegnate ferenziale e del contatto di con sezione cavo sufficiente. protezione (collegamento a La spina di alimentazione e il terra). In nessun caso fare funziona- giunto di un cavo prolunga utilizzati devono essere a te- re la pompa, quando nella pi- nuta d'acqua e non devono scina o stagno da giardino si trovarsi in acqua. -
Page 28: Altri Pericoli
Per prevenire incidenti o le- pervisionati per la loro sicu- rezza da una persona incari- sioni nella scelta del luogo di cata o che abbiano da questa stoccaggio è necessario os- ricevuto istruzioni su come servare il peso dell'apparec- usare l'apparecchio e dei pe- chio (vedi Dati tecnici). -
Page 29: Descrizione Dell'apparecchio It
Descrizione dell’apparecchio Figura Spingere la fascetta per tubi sul tubo flessibile. Maniglia di trasporto All'utilizzo di un tubo flessibile da ¾“ o 1“: Cavo di allacciamento alla rete con spina Avvitare il raccordo per pompa (vedi accessorio Arresto (interruttore a galleggiante) speciale) sul manicotto di collegamento. -
Page 30: Funzionamento Manuale
Per l'altezza livello di accensione / di spegnimento vedi funziona a secco. la tabella seguente: Dopo l’uso Min / Max SP 1 Dirt SP 2 Flat SP 3 Dirt Altezza di livello 43 / 50 36 / 44 43 / 50 NOTA Si possono depositare delle impurità... -
Page 31: Guida Alla Risoluzione Dei Guasti It
Guida alla risoluzione dei guasti PERICOLO Pericolo di morte da scossa elettrica! Per escludere qualsiasi rischio, gli interventi di riparazione e il montaggio dei pezzi di ricambio vanno effettuati esclu- sivamente dal servizio assistenza autorizzato. Guasto Causa Rimedio La pompa funziona ma non trasporta Aria nella pompa Staccare/inserire la spina della pom- pa più... - Page 32 Dati tecnici SP 1 Dirt SP 2 Flat SP 3 Dirt Tensione 230 - 240 V 230 - 240 V 230 - 240 V Tipo di corrente Potenza P Quantità di trasporto max. 5500 6000 7000 Pressione max. 0,45 Altezza max. di trasporto Profondità...
- Page 36 http://www.kaercher.com/dealersearch Alfred Kärcher GmbH & Co. KG Alfred-Kärcher-Str. 28 - 40 71364 Winnenden (Germany) Tel.: +49 7195 14-0 Fax: +49 7195 14-2212...
Need help?
Do you have a question about the SP 1 Dirt and is the answer not in the manual?
Questions and answers