
Related Manuals for REA VeriCube


Summary of Contents for REA VeriCube
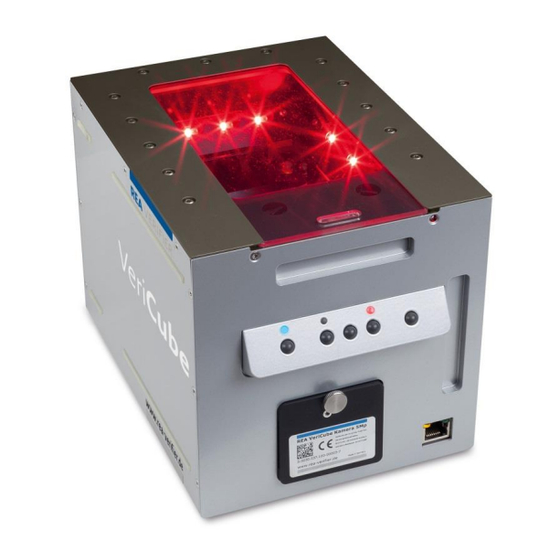
- Page 1 REA VeriCube Verifier for Matrix Codes and Barcodes Operating Manual Document Version 2.16 © REA Elektronik GmbH, Teichwiesenstraße 1 D-64367 Muehltal REA VeriCube Operating Manual Version 2.16 – 11/2020 Page 1 of 119...
- Page 2 REA Elektronik constantly strives to improve its products and therefore reserves the right to make changes to the figures and data contained in this document on an ongoing basis without prior notice.
- Page 3 + behaviour with screensaver from CD9.15 2.16 2020-11-03 New calibration function from CD9.17 S.Liebler VeriCube-UV, IR added © REA Elektronik GmbH, Teichwiesenstraße 1 D-64367 Muehltal REA VeriCube Operating Manual Version 2.16 – 11/2020 Page 3 of 119...
-
Page 4: Table Of Contents
Software options ................. 11 Transport, storage and operating conditions ..........12 Safety Instructions ..................13 General safety ..................13 Additional safety instructions for REA VeriCube UV ........15 Electrical hazards ................16 REA VeriCube Version ................17 REA VeriCube Standard ................ 17 REA VeriCube Pharma ................ - Page 5 18.3 Export limitations ................107 18.4 Maintenance .................. 107 18.5 Liability ..................107 Certificate of conformity for REA VeriCube..........108 © REA Elektronik GmbH, Teichwiesenstraße 1 D-64367 Muehltal REA VeriCube Operating Manual Version 2.16 – 11/2020 Page 5 of 119...
- Page 6 Certificate of conformity for the REA calibration cards ....... 109 EU declaration of conformity for the REA VeriCube ........110 Technical data ..................111 Measurement Report radiation emission ..........114 Terms of guarantee ................114 Attachment ..................116 25.1 General symbols used in this manual ..........116 25.2...
-
Page 7: Introduction
Microsoft Windows. In contrast to a scanner for barcodes and matrix codes, REA VeriCube is an optically operating measurement device. Measurement devices are subject to a regular adjustment and calibration (monitoring of testing equipment). -
Page 8: Vericube Variations
At least one camera module must be specified when ordering. © REA Elektronik GmbH, Teichwiesenstraße 1 D-64367 Muehltal REA VeriCube Operating Manual Version 2.16 – 11/2020 Page 8 of 119... - Page 9 030.037.402 Camera module for IR 945nm - matrix codes typical >= 0.25 mm (focal length 16 mm, field of view 64 x 47 mm) © REA Elektronik GmbH, Teichwiesenstraße 1 D-64367 Muehltal REA VeriCube Operating Manual Version 2.16 – 11/2020 Page 9 of 119...
- Page 10 08316222 Protective Cover VeriCube 030.037.200 Measuring table – one measuring table as a table for parts / cans which can neither be left on the REA VeriCube for measuring nor placed on the REA VeriCube. 99031620 Stand – REA VeriCube can be mounted into our height-adjustable stand and used with the camera modules with focus position +15mm.
-
Page 11: Software Options
If a software option is purchased subsequently, it is supplied with an activation key only, which must be entered in TranWin32. © REA Elektronik GmbH, Teichwiesenstraße 1 D-64367 Muehltal REA VeriCube Operating Manual Version 2.16 – 11/2020 Page 11 of 119... -
Page 12: Transport, Storage And Operating Conditions
The plastic cover serves as dust protection during the storage and transportation of the REA VeriCube. The glass plate serves as a top plate in the event that the codes to be measured need to be placed on the surface. The glass top plate must always be removed prior to the transportation and the plastic cover used as protection. -
Page 13: Safety Instructions
Supplementary notes can be found in Annex 24. Symbols are described in 24.1. The REA Verifier tester REA VeriCube is built according to state of the art and recognized safety regulations. Nevertheless, its use risks to life and limb of the user or others, or damage to the REA VeriCube or other property may arise. - Page 14 Warning: Be careful with the glass cover. When the VeriCube is tilted, it could slip out and fall down. Caution, danger of injury. Warning: Be careful with the glass cover. After a glass breakage, be careful with possible glass splinters, danger of cutting.
-
Page 15: Additional Safety Instructions For Rea Vericube Uv
(wearing UV glasses). With REA VeriCube UV the irradiation values according to EN 62471:2008 for the skin directly on the device are exceeded. For longer-term work at the radiation source it is therefore recommended to wear opaque clothing and gloves. -
Page 16: Electrical Hazards
This applies to the power supply. The verifier itself falls under the category of Low Voltage. © REA Elektronik GmbH, Teichwiesenstraße 1 D-64367 Muehltal REA VeriCube Operating Manual Version 2.16 – 11/2020 Page 16 of 119... -
Page 17: Rea Vericube Version
REA VeriCube Version REA VeriCube Standard The REA VeriCube, in the standard design, has 13 screws on the upper side. With the exception of any two screws, all the others can be removed. The plate is either in blue or silver in color. The screws have Torx T10 heads. -
Page 18: Rea Vericube Uv
REA VeriCube UV The REA VeriCube UV has an ultraviolet illumination as an alternative to the red light illumination with 660 nm. For this alternative illumination there are arranged 16 UV- LEDs with a wavelength of 365 nm in the unit. - Page 19 The focusing plane of the camera module in UV is shifted in relation to that in red light. If the REA VeriCube UV is to be used for measurements with red light, it is essential that a suitable camera module is then used for red light.
-
Page 20: Rea Vericube Ir
REA has two different versions for infrared lighting in its portfolio. The REA VeriCube IR can be purchased as a variant with 855 nm or with 945 nm. With these types of device, IR is always the alternative lighting to red light. For this alternative lighting, the device contains 16 IR LEDs with a wavelength of 855 nm or 945 nm. -
Page 21: System Requirements
When the REA VeriCube is subjected to temperature changes (e.g. when it is utilized in heated rooms after transport in winter), condensation can occur on the optical parts. In such an instant, wait for about 15 min before the REA VeriCube can be used. -
Page 22: Connecting
The REA VeriCube is delivered with two identical network cables. Picture of PoE power supply and network cables The REA VeriCube is connected with one of the two Ethernet cables to the PoE power supply unit. The socket, which is marked on the power supply unit with "Data&Power Out”, is intended for the connection to the device. -
Page 23: Own Ethernet Port
As long as the testing takes place, no LED lights up on the Ethernet socket of the REA VeriCube. As soon as the device receives power, the left LED lights up (light- orange) -
Page 24: Network Operation
6.4.2 Network operation The PC is connected to a company network LAN. The REA VeriCube is connected from the "Data/IN" connection with an available and connected (patched) network socket. The server (DHCP) in the network automatically assigns the network addresses. -
Page 25: Firewall And Network Ports
6.4.7 Using a gateway The REA VeriCube is using the camera protocol GigE Vision. This is primarily specified for a direct communication between two devices (PC and Camera). Operation over a Gateway is not recognized and does not work. -
Page 26: Software
The REA TranWin32 software is necessary for the operation of the VeriCube. Only one REA VeriCube can be used by a PC at any one time. Other REA Verifier products can be used on this PC at the same time but not a second REA VeriCube. - Page 27 1. Within the TransWin32 menu “Tool” the installation of the Vericube Network driver is performed 2. A second Ethernet port is added to the PC and the REA VeriCube is exclusively connected to this port. © REA Elektronik GmbH, Teichwiesenstraße 1 D-64367 Muehltal REA VeriCube Operating Manual Version 2.16 –...
-
Page 28: Software And Device Options
Software and device options Select the desired language for the installation process The next step is to agree to the license terms. © REA Elektronik GmbH, Teichwiesenstraße 1 D-64367 Muehltal REA VeriCube Operating Manual Version 2.16 – 11/2020 Page 28 of 119... - Page 29 VeriCube The REA Verifier model REA VeriCube is used The installation option ADB Client installs the REA article database software. The option ScanLink Assistant is an option for installing and using the ScanLink software for extended analysis and evaluation of ISO standardized data structures.
- Page 30 DataServer. This installation requires that the license is activated in VeriCube or that a license key is ordered from REA. Please also refer to the separate Audit Trail manual.
- Page 31 Documents section of the user or in the one for all users. The folder for saving the reports can be changed in the saving settings in TransWin32. © REA Elektronik GmbH, Teichwiesenstraße 1 D-64367 Muehltal REA VeriCube Operating Manual Version 2.16 – 11/2020 Page 31 of 119...
- Page 32 After clicking Install, the software is installed and the process is displayed in the window with a progress bar. © REA Elektronik GmbH, Teichwiesenstraße 1 D-64367 Muehltal REA VeriCube Operating Manual Version 2.16 – 11/2020 Page 32 of 119...
- Page 33 Depending on the selected installation, the following icons can then be found on the desktop. In the actual release only the TransWin32 and maybe the REA ADB icon is there. The other two icons are not required because these programs are started and stopped automatically together with the TransWin32 program.
-
Page 34: Mounting And Exchanging The Camera Lens Module
ATTENTION: The lens of the optic module is optically measured and is preset. The alignment shall not be changed and the lens shall not be mounted on other electronics. © REA Elektronik GmbH, Teichwiesenstraße 1 D-64367 Muehltal REA VeriCube Operating Manual Version 2.16 – 11/2020 Page 34 of 119... -
Page 35: Correct Handling
Correct handling General considerations The REA VeriCube is an optical measurement device with a camera and built-in lighting. The device should be lifted only by the recessed grips provided for this purpose. The camera module should never be used as a handle. -
Page 36: Checklist For Measuring
Picture: 2D code with manual ROI (region of interest = determining the measuring range) Picture: Barcode with manual determination of the ROI © REA Elektronik GmbH, Teichwiesenstraße 1 D-64367 Muehltal REA VeriCube Operating Manual Version 2.16 – 11/2020 Page 36 of 119... - Page 37 11.The REA VeriCube must be regularly adjusted and has to be controlled with the help of test equipment monitoring for measurement accuracy (calibrated)(see sections 9 and 10) ©...
-
Page 38: Operating The Device
Operating the device In some basic functions, the REA VeriCube can be operated with the device buttons The on/off button With this button, the device is turned on and off. The PoE power supply needs to communicate with the connected device, this results in some turn-on delay. - Page 39 The LED shows the testing result. Red means "failed" and green means OK/ passed. F2 button LED The LED shows the type of light used for measurement. It is either white or red. © REA Elektronik GmbH, Teichwiesenstraße 1 D-64367 Muehltal REA VeriCube Operating Manual Version 2.16 – 11/2020 Page 39 of 119...
-
Page 40: Adjustment And Calibration Of The Rea Vericube
The following calibration checks if the required measuring accuracy is achieved. The REA VeriCube must be calibrated in regular intervals of between 4 and 12 weeks. In the setting >configure >configure calibration and adjustment the validity period of the calibration can be entered from 1 to 90 days. - Page 41 The instructions for performing a correct measurement must be observed particularly closely during calibration (see section 7.2). The adjustment and calibration data of the REA VeriCube are, in contrast to the other REA Verifiers, saved in the PC – not on the device.
-
Page 42: Adjustment Of Rea Vericube
(the normal materials let the light penetrate). During the operation of an adjustment step, the device should not be moved. Adjustment of REA VeriCube The device adjustment is initiated through the REA TransWin32 software. For this purpose, the menu item >configure, >Adjustment and calibration must be selected in TransWin32. - Page 43 5 minutes, before starting the adjustment procedure. The REA VeriCube is delivered with a transparent plastic top plate, which covers the inside space of the camera, as well as with a glass top plate.
- Page 44 If the target values are missing, the error message above will pop up and with the icon “OK”, you get into the input window. © REA Elektronik GmbH, Teichwiesenstraße 1 D-64367 Muehltal REA VeriCube Operating Manual Version 2.16 – 11/2020 Page 44 of 119...
- Page 45 After the input of the reference values is completed, an overview of the entered data appears after pressing the OK button. © REA Elektronik GmbH, Teichwiesenstraße 1 D-64367 Muehltal REA VeriCube Operating Manual Version 2.16 – 11/2020 Page 45 of 119...
- Page 46 This becomes necessary when a new calibration card is inserted. The "Next" button takes you to the menu for the adjustment: © REA Elektronik GmbH, Teichwiesenstraße 1 D-64367 Muehltal REA VeriCube Operating Manual Version 2.16 – 11/2020 Page 46 of 119...
-
Page 47: Level Correction
The card is positioned so that a completely unprinted area of the map is in the field of view of REA VeriCube. The blue square in the image below shows the position that should be shown in the field of view. - Page 48 After the white card is placed on the REA VeriCube, the level correction is started by selecting the OK icon. Picture of a level correction card (original size 22 x 25 cm) Picture: The level correction card on the device The level correction corrects the uneven lighting of the measurement field (tolerances of the LEDs, construction, optics, etc.).
- Page 49 This does not apply to REA VeriCube IR. With this device the warning can only be avoided by making adjustments and subsequent measurements without a disc.
-
Page 50: Reflectance Adjustment
Picture: Cross hair in the gray value field Then the Reflectance adjustment is started with the <OK> button. © REA Elektronik GmbH, Teichwiesenstraße 1 D-64367 Muehltal REA VeriCube Operating Manual Version 2.16 – 11/2020 Page 50 of 119... -
Page 51: Scale Adjustment
Camera modules with 8mm and with 50mm focal length have to be adjusted and calibrated with the other symbol sizes: © REA Elektronik GmbH, Teichwiesenstraße 1 D-64367 Muehltal REA VeriCube Operating Manual Version 2.16 – 11/2020 Page 51 of 119... -
Page 52: Rea Vericube Calibration
Camera modules with 8mm focal length: Latest calibration cards contain a REA reference test report for the symbol Dnom = 0.75 and for Dnom = 0.5. For adjustment and calibration of the 8mm lens the symbol with Dnom = 0.75 should be used and thus the reference values from the test report of the 0.75 symbol should be transferred to the... - Page 53 ISO/IEC 15426-2 states that it is a per cent value. This per cent value refers to the Contrast Uniformity value specified for the test symbol 5 (see the card with the REA article number 90031704). Contrast uniformity is one detail value of many used to determine Modulation for the entire symbol.
-
Page 54: Calibration For White Light
Rmax – Maximum Reflectance according to ISO/IEC 15415 Rmin – Minimum Reflectance according to ISO/IEC 15415 UEC – Unused Error Correction – defined in ISO/IEC 15415 © REA Elektronik GmbH, Teichwiesenstraße 1 D-64367 Muehltal REA VeriCube Operating Manual Version 2.16 – 11/2020 Page 54 of 119... -
Page 55: Calibration With Rea Calibration Card
ISO/IEC 15426-2 states that it is a per cent value. This per cent value refers to the Contrast Uniformity value specified for the test symbol 5 (see the card with the REA article number 90031704). Contrast uniformity is one detail value of many used to determine Modulation for the entire symbol. - Page 56 Via the button "Next" the overview with reference values will pop up: © REA Elektronik GmbH, Teichwiesenstraße 1 D-64367 Muehltal REA VeriCube Operating Manual Version 2.16 – 11/2020 Page 56 of 119...
- Page 57 The reference values can be edited and modified by “Edit reference values” A test report with the reference results of REA is supplied with all calibration cards. The test reports with the reference results carries the following stamp: Picture: Stamp on the reference test report To avoid confusions, the certified calibration card has a serial number which is mentioned in the reference test report.
- Page 58 The appropriate reference symbol (depending on the camera module that is to be calibrated) is positioned in the crosshairs at 90° and calibration is started with "OK": © REA Elektronik GmbH, Teichwiesenstraße 1 D-64367 Muehltal REA VeriCube Operating Manual Version 2.16 – 11/2020 Page 58 of 119...
- Page 59 ISO/IEC 15426-2 are used as a basis here. The calibration report can now be exported to pdf, then printed, signed and filed via Windows if required. © REA Elektronik GmbH, Teichwiesenstraße 1 D-64367 Muehltal REA VeriCube Operating Manual Version 2.16 – 11/2020 Page 59 of 119...
-
Page 60: Calibration With Extended Calibration Cards
9.2.4 Calibration with extended calibration cards For this purpose, the extended calibration uses test cards, which are sold by REA and its authorized resellers, but are otherwise manufactured fully independently of REA and are measured with other reference devices (traceable back to national standards). - Page 61 #5, #10, #11 and #12 with X=0,200. A resolution of approx. 10 pixels per module is recommended. Level 1: Calibration with REA calibration card with DataMatrix reference test code: part-no. 90031702 Level 2: Calibration with REA calibration card with DataMatrix reference test code: part-no.
-
Page 62: Synthetic Aperture / Measuring Opening
In this context, this is not the case. The diaphragm opening of the lens of the REA VeriCube has a fixed presetting from the plant, which achieves the best compromise between the maximum possible depth of field and the minimum possible diffraction effects. -
Page 63: Execution Of The Measurements
11 Execution of the measurements 11.1 Positioning of the device The REA VeriCube can be operated in different measuring positions. 11.1.1 Camera downwards In this mode, the device is positioned, for example, on a printed sheet or on another flat product with the camera pointing downwards. On a printed sheet, the device can be moved from code to code and the measurements are made in this position. -
Page 64: Camera Upwards
Picture: Camera upwards with the product on the glass top plate © REA Elektronik GmbH, Teichwiesenstraße 1 D-64367 Muehltal REA VeriCube Operating Manual Version 2.16 – 11/2020 Page 64 of 119... -
Page 65: Camera Sideways
If this is not sufficient, the product or the REA VeriCube and the product can additionally be placed on a lifting table and thus the optimal measurement position can be set. -
Page 66: Turning The Keyboard
The advantage is the ease with which you can replace and modify such a fixture. © REA Elektronik GmbH, Teichwiesenstraße 1 D-64367 Muehltal REA VeriCube Operating Manual Version 2.16 – 11/2020 Page 66 of 119... -
Page 67: Measuring Process Using The Windows Software
(1D or 2D) are recognized automatically. If the automatic recognition fails, the measurement area must be set manually. © REA Elektronik GmbH, Teichwiesenstraße 1 D-64367 Muehltal REA VeriCube Operating Manual Version 2.16 – 11/2020 Page 67 of 119... - Page 68 The measuring width is determined automatically (up to Version 1.0.20.1) Version 1.0.20.1/13914r and later limmits the measuring width to the left and right position points. © REA Elektronik GmbH, Teichwiesenstraße 1 D-64367 Muehltal REA VeriCube Operating Manual Version 2.16 – 11/2020 Page 68 of 119...
-
Page 69: Automatic Measurement Mode
These settings with prompts apply only to manual operation. In the menu >Configure, >Others, >Automatic mode, the mode is activated and the time settings are made: © REA Elektronik GmbH, Teichwiesenstraße 1 D-64367 Muehltal REA VeriCube Operating Manual Version 2.16 – 11/2020 Page 69 of 119... -
Page 70: Automatic Roi
With this function the live image can be mirrored. This function can facilitate the positioning of the code in the crosshairs. © REA Elektronik GmbH, Teichwiesenstraße 1 D-64367 Muehltal REA VeriCube Operating Manual Version 2.16 – 11/2020 Page 70 of 119... -
Page 71: Setting The Brightness Of The Live Image
This setting does not influence the measurement. 11.7 Recording the image The REA VeriCube can take an image without making an evaluation. Icon. Old icon New icon 11.8... -
Page 72: Saving The Image File
In a given measurement image (without evaluation, see section 11.7), a static reflection measurement is performed A red measurement point appears in the image © REA Elektronik GmbH, Teichwiesenstraße 1 D-64367 Muehltal REA VeriCube Operating Manual Version 2.16 – 11/2020 Page 72 of 119... -
Page 73: Preset The Measurement Image Size
11.12 Rotating the image Depending on the orientation of the REA VeriCube, the movement of the image does not follow what is maybe intuitively expected. For this reason, the image can be rotated with the help of the green arrow symbols until the movement of the image moves as expected. -
Page 74: Behaviour Of The Software Transwin32 When Locking The Pc
After a new installation of the software, the simple report will be displayed by default with every measurement, like shown in the following: © REA Elektronik GmbH, Teichwiesenstraße 1 D-64367 Muehltal REA VeriCube Operating Manual Version 2.16 – 11/2020 Page 74 of 119... - Page 75 (graphic view). This view is designed for qualified personnel with appropriate background knowledge and shows all test parameters in detail, partly in editable sub-windows. © REA Elektronik GmbH, Teichwiesenstraße 1 D-64367 Muehltal REA VeriCube Operating Manual Version 2.16 – 11/2020 Page 75 of 119...
- Page 76 The fourth icon shows a report with GS1 format. This view is available for GS1 barcode symbologies only, not for 2D codes. © REA Elektronik GmbH, Teichwiesenstraße 1 D-64367 Muehltal REA VeriCube Operating Manual Version 2.16 – 11/2020 Page 76 of 119...
- Page 77 This view will be shown after each verification. The icons described before change the view on demand without changing the default setup. © REA Elektronik GmbH, Teichwiesenstraße 1 D-64367 Muehltal REA VeriCube Operating Manual Version 2.16 – 11/2020 Page 77 of 119...
-
Page 78: Details In The Test Reports
The light margin (quiet zone) © REA Elektronik GmbH, Teichwiesenstraße 1 D-64367 Muehltal REA VeriCube Operating Manual Version 2.16 – 11/2020 Page 78 of 119... - Page 79 The display then provides information about the code word number, bit number, reflection values and modulation values at the selected location. © REA Elektronik GmbH, Teichwiesenstraße 1 D-64367 Muehltal REA VeriCube Operating Manual Version 2.16 – 11/2020 Page 79 of 119...
-
Page 80: Configuring The Evaluation And Symbologies
12 Configuring the evaluation and symbologies In this section, the essential REA VeriCube configurations are described. This configuration is performed with the help of the Windows software TransWin32. The detailed description of TransWin32 is in a separate operating manual. -
Page 81: Evaluation
(remember DPM software and/or model is optional). Note: The standard REA VeriCube has 45 °lighting from all four sides. This illumination type shall only be modified for DPM codes. © REA Elektronik GmbH, Teichwiesenstraße 1 D-64367 Muehltal REA VeriCube Operating Manual Version 2.16 –... -
Page 82: Symbology Selection
The symbology selection determines which of the symbologies and with which respective properties they are verified. The selection and the properties determine the respective use. © REA Elektronik GmbH, Teichwiesenstraße 1 D-64367 Muehltal REA VeriCube Operating Manual Version 2.16 – 11/2020 Page 82 of 119... - Page 83 All other non-activated symbologies are evaluated with a "Not decoded" error message and cannot be recognized and evaluated! © REA Elektronik GmbH, Teichwiesenstraße 1 D-64367 Muehltal REA VeriCube Operating Manual Version 2.16 – 11/2020 Page 83 of 119...
-
Page 84: Lighting And Aperture
"Use adjustment" is removed, the manual exposure setting is active. ATTENTION: Changing the manual exposure setting leads to changed and non-calibrated measurement results © REA Elektronik GmbH, Teichwiesenstraße 1 D-64367 Muehltal REA VeriCube Operating Manual Version 2.16 – 11/2020 Page 84 of 119... - Page 85 Further details about the opening can be found in the REA training manual. © REA Elektronik GmbH, Teichwiesenstraße 1 D-64367 Muehltal REA VeriCube Operating Manual Version 2.16 – 11/2020 Page 85 of 119...
-
Page 86: Profile Management
Selection and activation of a profile sets a complete device configuration within one step. © REA Elektronik GmbH, Teichwiesenstraße 1 D-64367 Muehltal REA VeriCube Operating Manual Version 2.16 – 11/2020 Page 86 of 119... -
Page 87: File Saving Options
Counting of the first digit can be configured from the end or the beginning of the code (left to right or opposite). © REA Elektronik GmbH, Teichwiesenstraße 1 D-64367 Muehltal REA VeriCube Operating Manual Version 2.16 – 11/2020 Page 87 of 119... - Page 88 Attention: It is strongly recommended that all users have full access to the set directory for document storage. Restriction to read and write access may result in restrictions to some functions. © REA Elektronik GmbH, Teichwiesenstraße 1 D-64367 Muehltal REA VeriCube Operating Manual Version 2.16 – 11/2020 Page 88 of 119...
-
Page 89: Device Data
The calibration and service data can be saved by using Configure / Others / Collect device data. The calibration data can be re-imported on another PC with the TransWin32 installation for a REA VeriCube device. In this way, a new calibration can be avoided if one device is used alternately at different PCs. -
Page 90: User Management
In the displayed setting, the simple password protection is active. In this mode, all settings, except for the profile selection, are inaccessible for the user without a password. © REA Elektronik GmbH, Teichwiesenstraße 1 D-64367 Muehltal REA VeriCube Operating Manual Version 2.16 – 11/2020 Page 90 of 119... -
Page 91: Setting Up The User Management
The user management can be applied through two alternative approaches: User management through TransWin32 (only if the SW option is available) User management through the service program (relevant for users of REA Check ER and REA ScanCheck 3 without a TransWin32 license) The actual user management dialog and also the subsequent work procedure are the same in both cases. - Page 92 If a user has already been created, the dialog for user management can be started directly with the "User Management" button. The preset password is 739485. © REA Elektronik GmbH, Teichwiesenstraße 1 D-64367 Muehltal REA VeriCube Operating Manual Version 2.16 – 11/2020 Page 92 of 119...
- Page 93 "Normal User". The Administrator has all rights and permissions. The "Normal User" can essentially perform measurements and select predefined profiles. © REA Elektronik GmbH, Teichwiesenstraße 1 D-64367 Muehltal REA VeriCube Operating Manual Version 2.16 – 11/2020 Page 93 of 119...
-
Page 94: User Management During Operation
Depending on the selection, the use as administrator or as normal user is possible. After logging in, the REA device is ready for measurement, or if an administrator has logged in, it is ready for measurement and configuration. - Page 95 The following input form appears. The data in parenthesis (here (ww) ) shows that the logged-in user has the name "ww". © REA Elektronik GmbH, Teichwiesenstraße 1 D-64367 Muehltal REA VeriCube Operating Manual Version 2.16 – 11/2020 Page 95 of 119...
-
Page 96: Transwin32 Configuration Protection
Transwin32 software. Eg. print layout, data saving path and data export settings. Settings related to evaluation, measurement, reporting and calibration are not locked. © REA Elektronik GmbH, Teichwiesenstraße 1 D-64367 Muehltal REA VeriCube Operating Manual Version 2.16 – 11/2020 Page 96 of 119... -
Page 97: Trouble Shooting
Both network adapters (network cards, including WLAN) work in the same network. The REA Verifier on adapter 1 sends the data to the PC and the PC can send back the data through either adapter 1 or 2. If adapter 2 was chosen, the data no longer comes to the REA Verifier as it is connected to adapter 1. - Page 98 Speed The REA VeriCube has a network connection with max. speed of 1 Gbit/s. If the REA device is connected directly to a PC with a 100Mbit/s network interface, the speed is automatically restricted to 100Mbit/s. If the REA device and the PC are connected through an Ethernet switch with a speed of 1Gbit/s and the PC can, as before, process max.
- Page 99 Temporary change of the IP address If a fixed IP has been assigned to REA VeriCube, but this is no longer permitted in the network, then the device can no longer be connected, but is still found. This will also happen, if the REA VeriCube and PC are in different logical networks.
- Page 100 Now, an IP address can be set, that is reachable by your PC. But please be aware, that this IP will only be active in your VeriCube until next restart of the device!!! This means, don't turn off the Vericube, but connect it by TransWin32 and change the network settings of the VeriCube in the menue ...
- Page 101 You might set it now back to DHCP ON or set a new IP address that can be found in the network. Finally, the REA VeriCube has to be restartet to change the IP-Address. If problems occur that cannot be corrected with this manual, please contact REA...
-
Page 102: Maintenance And Cleaning
Make sure that no streaks remain on the mirror. To clean the lens of the camera module, switch off the REA VeriCube, then loosen the knurled screw on the camera module and removed it. Please handle this carefully so that the grub screw, which fixes the focusing, is not loosened. -
Page 103: Software Update
English.pdf", which is included in the download package on the top level) you can then decide whether you want to make an update on your device or PC. © REA Elektronik GmbH, Teichwiesenstraße 1 D-64367 Muehltal REA VeriCube Operating Manual Version 2.16 – 11/2020 Page 103 of 119... -
Page 104: Protected Trademarks
Intel Corporation. Linux is a registered trademark of Linus Thorvalds. REA is not responsible for the validity of this data. The use of any protected concepts and names should not represent a violation of a copyright and a protected brand. -
Page 105: License Conditions
This end-user license agreement is a law binding agreement between yourself (either as an unstudied or as a juristically qualified person) and REA for the use of the REA software as described above and the documentation thereof, either in digital or in printed format. -
Page 106: License Agreement
This license does not entitle you to reserve any rights in conjunction with the mentioned registered trademarks, logs and brand names. In the event that any rights of REA are not adhered to or the conditions of this license agreement are not kept, the granted license will automatically be withdrawn. -
Page 107: Export Limitations
18.5 Liability The user uses the program entirely at his / her own risk. REA cannot be held liable or responsible for any damages, caused by either the user or a third party, either by direct usage or by means of duplication. -
Page 108: Certificate Of Conformity For Rea Vericube
ISO/IEC 15426-2 Automatic identification and data capture techniques – Barcode Verifier conformance specification – Part 1 Two-dimensional symbols The barcode verifier REA VeriCube is a device which fulfills the requirements of these standards for minimum functionality (mandatory) and for optional functions. -
Page 109: Certificate Of Conformity For The Rea Calibration Cards
The calibration card must be stored protected from daylight. Scratching, dirt and other negative influences make the card unusable. The measurement precision of the REA VeriCube must be regularly verified (see section 9.2). Technical changes reserved August 2015 REA Elektronik GmbH ●... -
Page 110: Eu Declaration Of Conformity For The Rea Vericube
21 EU declaration of conformity for the REA VeriCube © REA Elektronik GmbH, Teichwiesenstraße 1 D-64367 Muehltal REA VeriCube Operating Manual Version 2.16 – 11/2020 Page 110 of 119... -
Page 111: Technical Data
ISO/IEC TR 29158 for DPM measurements Keyboard Control panel with 5 short-click keys 3 control Processor ARM ® microprocessor © REA Elektronik GmbH, Teichwiesenstraße 1 D-64367 Muehltal REA VeriCube Operating Manual Version 2.16 – 11/2020 Page 111 of 119... - Page 112 Interfaces RJ 45 LAN network socket Temperature range Operation: +5 °C to +40 °C, Storage: -20 °C to +70 °C, © REA Elektronik GmbH, Teichwiesenstraße 1 D-64367 Muehltal REA VeriCube Operating Manual Version 2.16 – 11/2020 Page 112 of 119...
- Page 113 0,05 0,04 Measuring plane +45mm: Focal length FoV Typical X-dimension Minimum X-dimension Pixel size µm 47 x 25 0,10 18,4 © REA Elektronik GmbH, Teichwiesenstraße 1 D-64367 Muehltal REA VeriCube Operating Manual Version 2.16 – 11/2020 Page 113 of 119...
-
Page 114: Measurement Report Radiation Emission
EN 62471:2008. With VeriCube UV, the irradiation values for the skin are exceeded directly on the system. For long-term work at the radiation source, the use of opaque clothing and gloves is recommended. - Page 115 If you have any questions regarding customer service, please contact REA Elektronik GmbH or its representative in charge of your area. On the REA Web site, you’ll find a document that indicates the status of the device. Devices no longer manufactured are taken from repair support after the period specified there.
-
Page 116: Attachment
This symbol gives instructions for proper care. information This symbol indicates useful additional information that can facilitate operation and improve the production process. © REA Elektronik GmbH, Teichwiesenstraße 1 D-64367 Muehltal REA VeriCube Operating Manual Version 2.16 – 11/2020 Page 116 of 119... -
Page 117: Abbreviations Used
Disregarding the present special or other known preventive measures. Non-observance of the necessary care during operation and handling. © REA Elektronik GmbH, Teichwiesenstraße 1 D-64367 Muehltal REA VeriCube Operating Manual Version 2.16 – 11/2020 Page 117 of 119... -
Page 118: Manager's Obligations
25.6 Intended use The REA VeriCube is a measuring device that can only be used for quality control of printed barcodes and matrix codes or for reflectance measurements. It is a measuring device, that must always be connected to a PC via a network. -
Page 119: Recycling
25.7 Recycling The REA VeriCube is an electronic device and must not be disposed of with household waste. The respective owner is responsible for the proper recycling. The REA VeriCube is a device which is exclusively sold for commercial use. For this reason, the REA VeriCube is not marked with the crossed bin symbol.
Need help?
Do you have a question about the VeriCube and is the answer not in the manual?
Questions and answers