Table of Contents
Advertisement
Advertisement
Table of Contents

Related Manuals for REA ScanCheck 3n


Summary of Contents for REA ScanCheck 3n
- Page 1 User manual REA ScanCheck 3n Version 1.20 · Status 24/02/2020...
- Page 2 1.20 English © 2019 REA Elektronik GmbH, all rights reserved Without the prior written consent of REA Elektronik GmbH, no part of this Operating Manual is allowed to be reproduced in any form or processed, duplicated and distributed using electronic systems.
- Page 3 VERIFIER Document change history Version Date Description Author 1.10 2010-08 Successor version ScanCheck 3n update S.Liebler 1.20 2019-09-24 Complete rework of the document S.Liebler Operating Manual Page 3 / 116 Copyright © REA Elektronik REA ScanCheck 3n V 1.2.0 24/02/2020...
-
Page 4: Table Of Contents
COMMISSIONING THE REA SCANCHECK 3N ..............17 3.1 Hardware installation ......................17 3.1.1 Charging the rechargeable batteries ................17 3.2 Connecting the REA ScanCheck 3n to the mains power supply ........19 3.3 Switching on and off ......................20 3.3.1 <1> Sleep mode ......................20 3.3.2 <2>... - Page 5 3.8.3 Connection via an Ethernet switch ................. 39 3.8.4 Connection with default IP address ................39 3.8.5 Data connection between the PC and REA ScanCheck 3n with an Ethernet switch ..40 3.9 Setting the network addresses ..................40 3.9.1 Setting directly on the ScanCheck 3n device ..............41 3.9.2 Setting via TransWin32 ....................
- Page 6 Set-up sub-menu <5> Article selection (option only) ..........95 5.6.1.6 Set-up sub-menu <6> Profile ................... 96 5.7 Operation with the PC program REA TransWin32 ............96 5.8 Service Tool ........................97 5.8.1 Creating profiles with the Service Tool ................97 5.8.2 User management with the Service Tool ................
- Page 7 8.6 Intended use ........................109 8.7 Recycling ......................... 109 CERTIFICATE OF CONFORMITY ..................110 EU DECLARATION OF CONFORMITY ................111 CERTIFICATE OF CONFORMITY FOR REA CALIBRATION CARDS ......112 SOFTWARE UPDATE ....................... 113 PROTECTED TRADEMARKS ................... 113 LICENCE CONDITIONS..................... 113 14.1 Licence Agreement ......................
-
Page 8: Introduction To Rea Scancheck 3N
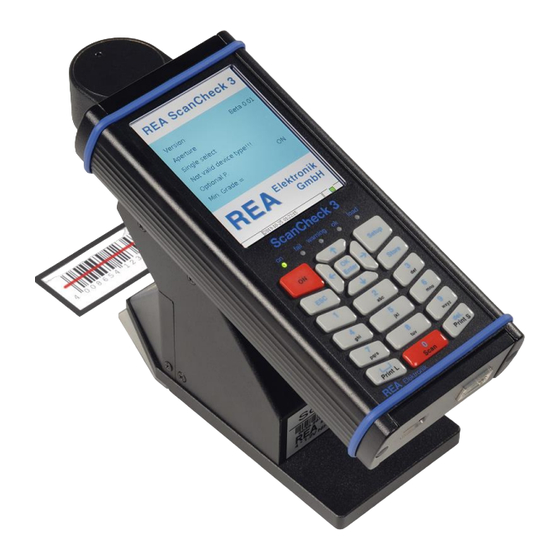
1 Introduction to REA ScanCheck 3n REA ScanCheck 3n is a mobile bar code verifier for the contactless checking of the quality of printed linear and stacked bar codes. It can be used for mobile quick checks on location. The results of the check - “Pass”... -
Page 9: Scope Of Delivery Of The Rea Scancheck 3N
Calibration card for white value and code size calibration, in protective envelope (article 030.007.340) including one reference measurement report for test equipment monitoring and one test report from the test code, created with the REA ScanCheck 3n supplied. • Transport box with special foam insert, optional transport case •... -
Page 10: Conditions For Transport, Storage And Operation
VERIFIER The Windows software “TransWin32” is always included on the CD supplied. This can be installed on any number of PCs. However, ScanCheck 3n can only be operated with this if the software option TransWin32 is activated on the device. - Page 11 The device and accessories should be operated at a dedicated low-dust test station and only in compliance with the operating instructions provided. Please refer to chapter 5 Operating the REA ScanCheck 3n in this regard.
-
Page 12: Determining The Serial Number On The Rea Product
When contacting the manufacturer or a system partner, it is important to quote the specific type, software version and serial number of the affected REA product. In the case of the hardware, this information can be found on the company sticker together with the article number. -
Page 13: Safety Instructions
2 Safety instructions 2.1 General safety instructions Before starting up the REA product and operating it, it is imperative for you to read and comply with this Operating Manual and in particular the safety instructions very diligently. Additional information and symbols are provided in the Appendix Fehler! Verweisquelle konnte nicht gefunden werden.. -
Page 14: Electrical Hazards
VERIFIER 2.2 Electrical hazards The verifier itself comes under the extra-low voltage category. Operating Manual Page 14 / 116 Copyright © REA Elektronik REA ScanCheck 3n V 1.2.0 24/02/2020... -
Page 15: Dangers When Handling The Rea Scancheck 3N
Nonetheless, hazards to life and limb of the user or of third parties, or impairments to the REA ScanCheck 3n or other property, can come into being when it is used - in particular if this does not take place correctly. The restrictions described in Chapter 14.4 must be complied with. - Page 16 This symbol indicates the direction of possible reflections of the laser beam. Caution If the device is tampered with or interventions in electronic/mechanical parts have been made, it can result in dangerous radiation exposure. Operating Manual Page 16 / 116 Copyright © REA Elektronik REA ScanCheck 3n V 1.2.0 24/02/2020...
-
Page 17: Commissioning The Rea Scancheck 3N
The power supply unit included in the delivery PoE supplies the voltage directly to the REA ScanCheck 3n via the network cable from the “Data & Power out” connection. This can also be used to recharge the batteries. An additional network cable from the “Data In”... - Page 18 Additionally, a supplied network connection cable is connected with the “Data & Power Out” socket on the power supply unit and the RJ45 socket in the REA ScanCheck 3n (see also chapter 3.2). Connecting the REA ScanCheck 3n to the mains power supply).
-
Page 19: Connecting The Rea Scancheck 3N To The Mains Power Supply
3.2 Connecting the REA ScanCheck 3n to the mains power supply The REA ScanCheck 3n can be operated with rechargeable batteries, Mignon batteries or a mains power supply. With rechargeable battery operation, the rechargeable batteries will be charged when the mains power supply is connected. -
Page 20: Switching On And Off
It takes 30-50 seconds for all programs to be initialised. Only then does the main screen appear, as shown on the right. If the REA ScanCheck 3n is switched on, it can be switched off again by pressing the <ON> button once more. -
Page 21: 3> Reboot Device
<1>, <OK Enter>. The restart takes a number of seconds. The REA ScanCheck 3n can also be switched off completely from this menu with the button sequence <ON>, <OK Enter>. If a software update is executed with a USB memory stick from this operating mode, this can be started with the command sequence <6>, <OK Enter>. -
Page 22: 6> Login / Logout
This can be downloaded with the function “Save device data on USB flash drive” and then sent by email to the Technical Support department of REA by email if necessary. 3.3.8 <8> Slide show This menu is primarily intended for demo purposes. Here, it is possible to set the performance of automatic measurements at certain intervals and subsequently the display of the test report, settings for symbology and evaluation on the screen. -
Page 23: Changing Pre-Settings On The Rea Scancheck 3N
VERIFIER 3.4 Changing pre-settings on the REA ScanCheck 3n The REA ScanCheck 3n is configured with the “factory settings” when delivered from the factory and after a RESET to the standard configuration. With these settings it is possible to check the majority of bar codes immediately and without implementing further settings. -
Page 24: Standard Parameters For Factory Pre-Settings
Network settings: unchanged Company / user data: Device name, user name, company details are overwritten with the REA factory data Password: is overwritten with spaces 3.4.2 Changing the menu language selection The device is preset with the national language of the delivery country prior to dispatch. -
Page 25: Changing Data Output Parameters
Please refer to chapter 5.6.1.3.4.2 Device configure <2> Output parameters for details. Operating REA ScanCheck 3n with report printer The REA ScanCheck 3n verifier can be used as a mobile device, also together with the mobile report printer of type REA TD-GPT-U. -
Page 26: Operating The Rea Scancheck 3N With Rea Transwin32
A compact plug-in charger is supplied together with the printer, for charging the internal battery with 6 Volt output voltage. It is not possible to mistake this for the power supply unit of the REA ScanCheck 3n. For all further operating information for the report printer, refer to the details in the user manual for the REA TD-GPT-U. - Page 27 ScanCheck 3n and the PC is in place. Licence key The licence key is stored in the ScanCheck 3n in the factory if the TransWin32 option is ordered. If this is ordered retrospectively, it is necessary to activate the TransWin32 option with a licence key, which you can request from us.
-
Page 28: Software Installation
It must be ensured, then, that all users have read and write rights for the “All users” document directory (public directory). It is recommended that REA ScanCheck 3n be connected to a dedicated, separate Ethernet port, otherwise connection interruptions and associated error messages may arise in the communication between the Windows software TransWin32 and the REA ScanCheck 3n. -
Page 29: Software And Device Options
The “REA VeriCube” REA verifier model is used VeriCube The ADB Client installation option installs the REA article database software. The ScanLink Assistant option allows for the installation and use of the ScanLink software for the advanced analysis and evaluation of ISO-standardised data structures. - Page 30 They are always available to all users independent of the installation version. Restoring the backup of the old configuration is valid only for the REA VeriCube type but not for the REA ScanCheck 3n (except for the configuration for saving the test reports).
- Page 31 The actual storage of user data is always done in the document folder of the user or in the public directory for all users. Operating Manual Page 31 / 116 Copyright © REA Elektronik REA ScanCheck 3n V 1.2.0 24/02/2020...
- Page 32 Depending on which type of installation was selected, the following icons can then be found on the desktop. In the current software, only TransWin32 and maybe REA ADB are shown. The other two icons are not required since these programs are started and exited automatically with TransWin32.
-
Page 33: Updating The Operating Software In The Rea Scancheck 3N
The PC software must only be updated if TransWin32 is in use, or if the verifier is licensed for this option. If the REA ScanCheck 3n is operated with TransWin32, the PC software forms a unit with the device software. -
Page 34: Updating The Device From The Usb Stick With Gui
On CD or in the download package: The files are in the directory "bin\CD_Device_SC3". Switch on the ScanCheck 3n device and plug the USB memory stick into the right USB socket on the REA ScanCheck 3n. Close sleep mode / low power in the Scancheck 3: ... -
Page 35: Updating The Device From The Usb Stick With Text Console
VERIFIER Please wait for the ScanCheck 3n to restart (approx. 6 minutes). The device can restart in the middle of the update procedure and resume the update. Once the update is complete, a restart also takes place and the device then enters normal operating mode again. -
Page 36: Updating The Device With Transwin32
Recalibrate the ScanCheck 3 device for 6 mil and 20 mil. 3.7.4 Updating the device with TransWin32 Switch on the ScanCheck 3 device. Close sleep mode / low power mode in the Scancheck 3n <Set-up> button Button <3> (settings) ... -
Page 37: Network Installation
If there is a DHCP server in the network, the PC is connected with the installed REA TransWin32 software and the REA ScanCheck 3n through this network. In the factory settings of the REA ScanCheck 3n, both the REA ScanCheck 3n and the PC get their network settings automatically from a DHCP server in the network. -
Page 38: Direct Point-To-Point Connection
3.8.2 Direct point-to-point connection In this case, the REA ScanCheck 3n is always connected to the DATA & Power OUT socket of the power supply unit. The DATA IN socket of the power supply unit is connected directly to the Ethernet socket of the PC with the second cable. -
Page 39: Connection Via An Ethernet Switch
The PC gets the addresses in its network configuration under TCP/IP settings. The REA ScanCheck 3n must be connected directly to the device via the network configuration (see chapter 3.9 Setting the network addresses), or reconfigured to a fixed IP address with the help of a point-to-point connection and the REA TransWin32 program. -
Page 40: Data Connection Between The Pc And Rea Scancheck 3N With An Ethernet Switch
There is no need for further hardware installation. 3.9 Setting the network addresses The network address of the REA ScanCheck 3n is set to an automatic address assignment at the factory. If the REA ScanCheck 3n is operated in a company network with a DHCP server, this server will assign a network address (IP address) to the REA ScanCheck 3n. -
Page 41: Setting Directly On The Scancheck 3N Device
<Setup>, <3> Settings, <4> Device configure, <5> Net configuration. 3.9.2 Setting via TransWin32 The network address can be set by the REA TransWin32 software. The setting can be found at <Configure> <Others> <Device system>. Operating Manual Page 41 / 116 Copyright ©... -
Page 42: General Information About Network Addresses
PC via the network connection or that data of the PC is mined. When the network communication with the REA ScanCheck 3n begins, it is not yet known to the firewall program. Depending on the setting, it will prevent the communication or ask whether the communication is allowed. -
Page 43: Mac Addresses
MAC address in the network. With such a constellation, the MAC address of the REA device used must be entered in the filter table. This must be done by a user with administrator rights, e.g. the IT network administration. -
Page 44: Adjustment And Calibration Card
4.2 Adjustment and calibration card The REA card with the article number 08300903 is required for adjustment and calibration. Operating Manual Page 44 / 116 Copyright ©... -
Page 45: Adjustment Of The Measuring Apertures 6, 8 And 10 Mil
4.3 Adjustment of the measuring apertures 6, 8 and 10 mil Pressure plates (accessories, refer also to chapter 1.1. Scope of delivery…) are available for the REA ScanCheck 3n, and are used as positioning aids. The pressure plates must be removed with adjustment and calibration The calibration process can be selected from the set- up menu. - Page 46 Selecting whether “a normal user can calibrate and adjust the device” or not only has an effect if the user management or password protection of the REA ScanCheck 3n is switched on. The administrator is able to specify with this, whether adjustment can be performed without administrator rights.
- Page 47 VERIFIER the date of manufacture of the REA ScanCheck 3. The basic adjustment must only be repeated if calibration fails despite readjustment and device cleaning. Failure can also be caused by damaged calibration cards. The card must therefore be in a reliably fault-free condition.
- Page 48 “Adjustment OK”. Confirm this message with the <OK ENTER> button. The measuring results of the EAN code of the calibration card now appear. This measuring result is used for calibrating the REA ScanCheck 3n. Operating Manual Page 48 / 116 Copyright ©...
-
Page 49: Adjustment Of The Measuring Aperture 20 Mil
EAN code (200%). The mean value and dark value must be taken from the 20 mil reference test report. The sticker on the card only contains the values for the small EAN code. Operating Manual Page 49 / 116 Copyright © REA Elektronik REA ScanCheck 3n V 1.2.0 24/02/2020... -
Page 50: Calibrating The Rea Scancheck 3N
For calibration, the test code on the calibration card (see chapter 4.2) is measured and the result documented. A test report with the reference results of REA for this code is enclosed with the calibration card. The reference report with the reference results is furnished with a stamp: The REA calibration and adjustment card bears a serial number. -
Page 51: Permitted Device Tolerances
The ISO/IEC 15426-1 standard for bar code verifiers specifies the requirement for measuring accuracy. The REA ScanCheck 3n can be optionally supplied with a 20 mil adapter. In this case, the two reference reports are created and supplied with it. The adjustment and calibration must be performed once for each configuration. - Page 52 Rmax – the maximum reflection in the symbol determined in accordance with ISO/IEC 15416 Rmin – the minimum reflection determined in accordance with ISO/IEC 15416 Operating Manual Page 52 / 116 Copyright © REA Elektronik REA ScanCheck 3n V 1.2.0 24/02/2020...
- Page 53 Rmax – the maximum reflection in the symbol determined in accordance with ISO/IEC 15416 Rmin – the minimum reflection determined in accordance with ISO/IEC 15416 Operating Manual Page 53 / 116 Copyright © REA Elektronik REA ScanCheck 3n V 1.2.0 24/02/2020...
- Page 54 VERIFIER Measured values on the reference test report Operating Manual Page 54 / 116 Copyright © REA Elektronik REA ScanCheck 3n V 1.2.0 24/02/2020...
-
Page 55: Operating The Rea Scancheck 3N
TransWin32 analysis software are explained in the TransWin32 operating manual; they will not be repeated in this operating manual. It must be kept in mind that the REA ScanCheck 3n has the task of measuring bar codes. The measurement results must be repeatable and comparable with one another. -
Page 56: Handling The Rea Scancheck 3N
If a light/dark wall is present in this area for example, this will change the contrast results. 7. The bar code to be tested should be centred in front of the REA ScanCheck 3n, to obtain the best possible measuring accuracy. - Page 57 17. To remove the Ethernet cable, the latching lever must be pushed downwards. The cable must not be exposed to mechanical stress (tensile stresses and/or lateral pressure loads). Operating Manual Page 57 / 116 Copyright © REA Elektronik REA ScanCheck 3n V 1.2.0 24/02/2020...
-
Page 58: Using The Pressure Plates
5.2 Using the pressure plates The REA ScanCheck 3n can be used with extension panels with a range of cut-out widths as accessories. For this purpose, it is necessary to remove the standard trapezoidal base panel installed and replace this with one of the extension panels. -
Page 59: Measuring Bar Codes For The First Time
In order to measure bar codes, the REA ScanCheck 3n must be calibrated (refer also to chapter 4 “Adjustment and calibration”). After switching on the REA ScanCheck 3n, the system requires approx. 15 seconds to initialise the programs. Only then does the main screen appear, with the... -
Page 60: Quick Display With Led And Acoustic Signal
1 x beep plus 2 x beeps and red LED on = The measurement and decoding were successful, but there is at least one error in the code symbol, meaning that the pre-set specifications were not satisfied. Operating Manual Page 60 / 116 Copyright © REA Elektronik REA ScanCheck 3n V 1.2.0 24/02/2020... -
Page 61: Evaluation According To Iso/Iec15416
Such a diagram is shown on the following pages for the narrowest and widest spaces, E-value (bar neighbouring space) and P-value (code word). Operating Manual Page 61 / 116 Copyright © REA Elektronik REA ScanCheck 3n V 1.2.0 24/02/2020... -
Page 62: 6Th Screen Page: Optional Parameters
The detailed description and interpretation of the individual measuring results and parameters can be found in the separate training manual available from REA Elektronik GmbH. Operating Manual Page 62 / 116 Copyright ©... -
Page 63: Setting / Selection Of The Correct Measuring Aperture
(e.g. GS1 specification) with some code types and applications. The REA ScanCheck 3n offers code testing with a selection of four different aperture settings. The three apertures 6, 8 and 10 mil are always available. The 20 mil aperture is only optionally available and requires connection of the mechanical 20 mil adapter foot. - Page 64 The same tables are also used for the module size settings of the code type <code selection> in the menus of the REA ScanCheck 3n (see chapter 5.6.1.3.1) Source: Copy of table from version 19-1 of the GS1 general specifications, chap. 5.10.3 In a closed application, the measuring aperture can be determined by means of the optical aperture of the bar code scanner that is used.
-
Page 65: Measuring Apertures 6, 8 And 10 Mil
If large codes, such as 100 % ITF-14 codes including the light field zones, are to be measured, this can result in the width of the scanning beam from the REA ScanCheck 3n being insufficient in the aperture settings 6, 8 or 10 mil. -
Page 66: Measuring Aperture 20 Mil (Optional)
3n requires a greater distance from the code. This can be obtained with the optional 20 mil adapter accessory. The 20 mil adapter is mounted on the base panel of the REA ScanCheck 3n with snap fasteners and a switching mandrel as shown. -
Page 67: Settings / Button Functions
REA TranWin32 set-up function. These special functions are described in the user manual for the REA TransWin32 program. Only functions that can be called up directly from the REA ScanCheck 3n are described here. 5.5.1 General button assignments and control functions The REA ScanCheck 3n keypad has multicoloured lettering. - Page 68 The function of this button can only be called up if a measuring result is shown in the display. If REA ScanCheck 3n is connected with the REA TD-GPT-U printer, pressing the “Print” button prints out the test report on this printer.
-
Page 69: Buttons With Special Functions
Article selection function for article database: Button <5> (can only be used together with the “article database32” option Operating Manual Page 69 / 116 Copyright © REA Elektronik REA ScanCheck 3n V 1.2.0 24/02/2020... - Page 70 When activated the user management: Button <8> A user can log in by pressing the <8> button. Exit the GUI: Button <9> Press <9> button to exit the GUI. Operating Manual Page 70 / 116 Copyright © REA Elektronik REA ScanCheck 3n V 1.2.0 24/02/2020...
-
Page 71: Reset Function
However, the REA ScanCheck 3n also has setting menus that enable the comprehensive individual setting of all device parameters. All setting functions can be called up by pressing the <Set-up> button. If the... -
Page 72: Setup Sub-Menu <1> Stored Reports
<Print (L)> or <Print (S)>. Alternatively, the measurement report selected in this way is displayed with the PC software REA TransWin32. <Show> shows the top measuring report marked in the display of the REA ScanCheck 3n once more. <Delete> deletes all marked files If a very large number of reports is saved, this can greatly affect the reaction time of the device. -
Page 73: 3> Settings - Sub-Menu <1> Code Type Selection
2 from 5 INT). If such a code type is selected, the code type that cannot be selected together with it will be automatically deselected. Operating Manual Page 73 / 116 Copyright © REA Elektronik REA ScanCheck 3n V 1.2.0 24/02/2020... -
Page 74: Additional Test Criteria
SST#1 from 0.249mm, if printing is to take place directly on site in the store with a thermal or laser Operating Manual Page 74 / 116 Copyright © REA Elektronik REA ScanCheck 3n V 1.2.0 24/02/2020... - Page 75 (formerly UC Council) stipulates a 4-digit add-on. In contrast, GS1 Global specifies a 5-digit add-on. The instore test function of the REA ScanCheck 3n is flexible and permits the combination of all settings. The table lists all coding options from "20" to "29".
-
Page 76: Upc-A Code - Additional Test Criteria
UPC-A Code is decoded with all 13 characters, the leading character “2” must always be decoded as “02”. The REA ScanCheck 3n decodes the complete information with 13 digits. As such, the leading digit is shown in the left screen as “02” rather than “2”. -
Page 77: Upc-E Code - Additional Test Criteria
The GS1-128 code (formerly EAN 128) is a special form of code 128, whereby a special data structure is applied. This has been specified by the organisation GS1 Global. The REA ScanCheck 3n can also check these special data structures and some additional characteristics of this code type. - Page 78 Example (inputs for the Application Identifier 15 and 17) Selected time period corresponding with the current date of the internal clock of the REA ScanCheck 3: FROM + 0020days + 0030days Operating Manual Page 78 / 116 Copyright © REA Elektronik REA ScanCheck 3n V 1.2.0 24/02/2020...
-
Page 79: Gs1 Databar Code Family
DataBar Stacked is used for very small articles. Because this code type is also available as an omnidirectional variant, this can be selected in the menu (large line height). . Operating Manual Page 79 / 116 Copyright © REA Elektronik REA ScanCheck 3n V 1.2.0 24/02/2020... -
Page 80: Test Criteria
ANSI permits a ratio of 1:2.5 to 1: 3.0 if the module width is less than 0.5 mm. The ISO standard always permits a ratio of between 1:2.0 and 1:3.0. Operating Manual Page 80 / 116 Copyright © REA Elektronik REA ScanCheck 3n V 1.2.0 24/02/2020... - Page 81 In both cases, the HIBC code starts with a “+” sign, followed by a stipulated data structure. The REA ScanCheck 3n checks whether the “+” sign exists and if the check digit is correct. It is planned that later software versions will also be capable of checking the additional data structure.
-
Page 82: Code 39-Full Ascii - Additional Test Criteria (Optional Code Types)
(630 nm to 680 nm). The REA ScanCheck 3n always uses a laser light source with a wavelength of 670 nm. The measuring aperture should be 6 mil. The permissible code size X is between 0.187 mm and 0.450 mm. -
Page 83: Codabar / Codabar 18 - Additional Test Criteria
The Codabar can use a check digit, although this is not essential. The check digit is formed per Modulo 11 or Modulo 16 and is checked by the REA ScanCheck 3n if the check box is activated. The ANSI check box permits size ratios between the narrow and wide bars of between 1:2.5 and 1: 3.0, if the module width is below... -
Page 84: Of 5 Int Iata / 2 Of 5 3 Bar Matrix / 2 Of 5 5 Bar Ind - Additional Test Criteria (Optional Code Types)
Modulo 10. 5.6.1.3.1.12 Pharma Code / Plessey Code - Additional test criteria (optional code types) REA bar code verifiers use the specifications of Laetus in order to test Pharma Codes. The specifications of other manufacturers are slightly different (e.g. the Sick Code). -
Page 85: Pharma Code / Plessey Code - Additional Test Criteria (Optional Code Types)
0.635 mm (small), 0.787 mm (middle) and 1.02 mm (wide). If “Automatic” has been selected, the REA ScanCheck 3n calculates the deviation to the next standard size. For Plessey code, the use of two different stop characters is permitted: One is used if the code is only to be read from left to right. -
Page 86: 3> Settings - Sub-Menu <3> Evaluation
Only in this way is it guaranteed that the evaluations with the REA verifier will be performed correctly. If implemented settings are to be discarded, the Back button or <ESC>... - Page 87 A multiple measurement can be interrupted at any time by pressing the button key <3> on the REA ScanCheck 3n (see chapter 5.5.2). In the quantity field it is possible to enter values between 2 and 10.
-
Page 88: 3> Settings - Sub-Menu <4> Device Configure With 8 Sub-Menus
5.6.1.3.4 <3> Settings – Sub-menu <4> Device configure with 8 sub-menus “4 Device configure” facilitates device settings in further sub-menus that rarely require changing. Operating Manual Page 88 / 116 Copyright © REA Elektronik REA ScanCheck 3n V 1.2.0 24/02/2020... -
Page 89: Device Configure <1> Operating System
The display shows the main screen and it is also possible to reactivate the USB data connection to the PC or printer. In the PC application REA TransWin32 it is possible to automatically re-establish the connection to the REA ScanCheck 3. -
Page 90: Device Configure <2> Output Parameters
<Store> button at the set storage location Select device for saving measurements Saving can either take place to the SD memory card permanently installed in the ScanCheck 3n, or to a USB memory stick connected via the USB interface. -
Page 91: Device Configure <3> Options
Please contact your supplier to obtain the necessary activation key. Operation of the REA ScanCheck 3n together with the PC evaluation software REA TransWin 32 requires activation with a licence code for example. Without activation, the respective device cannot be identified, addressed or used by the PC software. -
Page 92: Device Configure <4> Date And Time
This screen shows the network settings of the verifier and facilitates a change to the pre-set parameters if necessary. No driver installation is required for operation of the REA ScanCheck 3n together with the evaluation software REA TransWin 32. Furthermore, it is fundamentally unnecessary to implement any further network configuration, because this can usually take place automatically. -
Page 93: Device Configure <7> Company And User Info
REA TD-GPT-U printer. These settings do not change the appearance of the measurement results in the PC software REA TransWin32 and its printout. The detailed report (long report) is only printed out if the <Print L> button is pressed. -
Page 94: 3> Settings - Sub-Menu <5> Code Comparator (Option Only)
PC, edit existing data records and ready records for export to the REA ScanCheck 3n. This function can be enabled with a licence key for operation with the REA ScanCheck 3n, subject to a charge. -
Page 95: 3> Settings - Sub-Menu <7> Factory Reset
5.6.1.3.8 <3> Settings – Sub-menu <8> USB update For a detailed description of this function, please refer to chapter 3.7 Updating the operating software in the REA ScanCheck 3n Fehler! Verweisquelle konnte nicht gefunden werden.. 5.6.1.3.9 <3> Settings – Sub-menu <9> Languages For a detailed description of this function, please refer to chapter 3.4.2 Changing the menu... -
Page 96: Set-Up Sub-Menu <6> Profile
TransWin32 manual. 5.7 Operation with the PC program REA TransWin32 By enabling the licensed function TransWin32 it is also possible to operate the REA ScanCheck 3n via the computer software TransWin32. Please refer to the TransWin32 manual in this regard. - Page 97 VERIFIER Operating Manual Page 97 / 116 Copyright © REA Elektronik REA ScanCheck 3n V 1.2.0 24/02/2020...
-
Page 98: Service Tool
Service Tool Fehler! Verweisquelle konnte nicht gefunden werden.. 5.8.1 Creating profiles with the Service Tool REA considers a profile to be the consolidation of all device-dependent settings that can be configured for the evaluations in the software. The creation and use of user profiles is particularly expedient if the user produces or checks multiple codes for multiple customers for example, and requires different verifier configurations for the various customers. -
Page 99: User Management With The Service Tool
An available profile can also be selected in the set-up menu directly on the REA ScanCheck 3n in the main menu “Configuration”, under item “6 Profile”. Here, the currently selected profile is shown with a green background. -
Page 100: Simple User Name
VERIFIER To create a new profile it is first accordingly necessary to change all desired settings in the REA ScanCheck 3n. Now press the "save actual config as profile” button in the Service Tool and enter a new name in the empty dialogue field in the centre, followed by a useful description of the significant measuring features. -
Page 101: Simple Password
This setting is intended for operation with TransWin32. Refer to chapter 5.6.1.3.4.1 Device configure <1> Operating system Fehler! Verweisquelle konnte nicht gefunden werden. to learn how username can be modified in the REA ScanCheck 3n. 5.8.2.2 Simple password The simple password protection is selected with the button “Protection only with password”... - Page 102 “Admin-Default” opens. It is necessary to log in as this user with the default password 739485, in order to create users. After logging in, the adjacent dialogue appears: To add a user, select “Add user”. Operating Manual Page 102 / 116 Copyright © REA Elektronik REA ScanCheck 3n V 1.2.0 24/02/2020...
- Page 103 If the password is no longer accessible (forgotten, misplaced), log in three times with an incorrect administrator password. After that, you can log in again with the Admin-Default password 739485. After starting the REA ScanCheck 3n, if user management is active then the prompt to log in always appears:...
-
Page 104: Technical Data Rea Scancheck 3N
VERIFIER 6 Technical data REA ScanCheck 3n Mains charging device power supply via supplied Power-over-Ethernet Output: 48 VDC- 1250mA Battery operation 4 x 1.2 V / 2,500 mAH NiMH rechargeable batteries Housing Aluminium, powder-coated, black Keypad 21 short-stroke keys Display Colour TFT graphic display, 320 x 240 pixels;... - Page 105 120 x 60 x 40 mm (w x d x h) Weight 414 g Maintenance maintenance-free Primary power connector 3-pin IEC socket, type C14, IEC60320 Operating Manual Page 105 / 116 Copyright © REA Elektronik REA ScanCheck 3n V 1.2.0 24/02/2020...
-
Page 106: Terms Of Guarantee
If the purchased device does not work flawlessly within the guarantee period stated above, REA Elektronik GmbH will repair it free of charge. To avoid unnecessary costs, we ask you to carefully check all information in the user manual before concluding that the device is defective or does not work flawlessly. -
Page 107: Appendix
References to this Manual or other documents are marked with a book symbol. Care instruction This symbol gives instructions for proper care. Laser beam This symbol indicates the direction of the laser beam. (Outlet opening) Operating Manual Page 107 / 116 Copyright © REA Elektronik REA ScanCheck 3n V 1.2.0 24/02/2020... - Page 108 This symbol indicates handling advice. Itemisation Attention ATTENTION This signal word indicates hazards that might result in property damage. Operating Manual Page 108 / 116 Copyright © REA Elektronik REA ScanCheck 3n V 1.2.0 24/02/2020...
-
Page 109: Abbreviations Used
Non-compliance with the care and diligence required for operation and handling. 8.4 Obligations of the operating company The operating company undertakes to have only those persons work on the REA ScanCheck 3n who: have been trained in the operation or maintenance of the system with the fundamental provisions for industrial safety and accident prevention;... -
Page 110: Intended Use
8.7 Recycling The REA ScanCheck 3n is an electronic device. It is not allowed to dispose of it with household waste. The respective owner is responsible for proper recycling. The REA ScanCheck 3n is a device sold exclusively to commercial users. -
Page 111: Certificate Of Conformity
ISO/IEC 15426-1 Automatic identification and data capture techniques – Bar Code Verifier conformance specification – Part 1 Linear symbols The bar code verifier REA ScanCheck 3n is a device that contains the minimum functionality (mandatory) of this standard and optional features (optional). -
Page 112: Eu Declaration Of Conformity
VERIFIER 10 EU declaration of conformity EU declaration of conformity for REA ScanCheck 3n EU declaration of conformity Declaration of Conformity Déclaration de conformité Das Unternehmen / The company / La société REA Elektronik GmbH Teichwiesenstraße 1 64367 Mühltal, Germany bestätigt hiermit die Konformität des Produkts /... -
Page 113: Certificate Of Conformity For Rea Calibration Cards
REA ScanCheck 3n The white values of the calibration card and the test codes on it have been checked with an REA PC-Scan reference device. The corresponding reference test report is supplied together with the card. -
Page 114: Software Update
The latest released version is available as a free download on the Internet on our support Web pages at the following address: https://support.rea-verifier.de You can access the support area of the Rea Verifier Web site by entering the following access data: User name:... -
Page 115: Licence Agreement
You are not authorized to license, sell, lease or lend the software to third parties, either in part or in full, or to market the software in any other form without the express permission of REA. All of the trademarks and service marks mentioned are the property of their respective owners. -
Page 116: Warning
14.5 Liability The user makes use of the program entirely at their own risk. REA shall not be liable for damages caused or endured by the user or third parties as a result of using or distributing the software.
Need help?
Do you have a question about the ScanCheck 3n and is the answer not in the manual?
Questions and answers