Table of Contents
Advertisement
Advertisement
Chapters
Table of Contents

Subscribe to Our Youtube Channel
Related Manuals for Samsung RM255BABB


Summary of Contents for Samsung RM255BABB
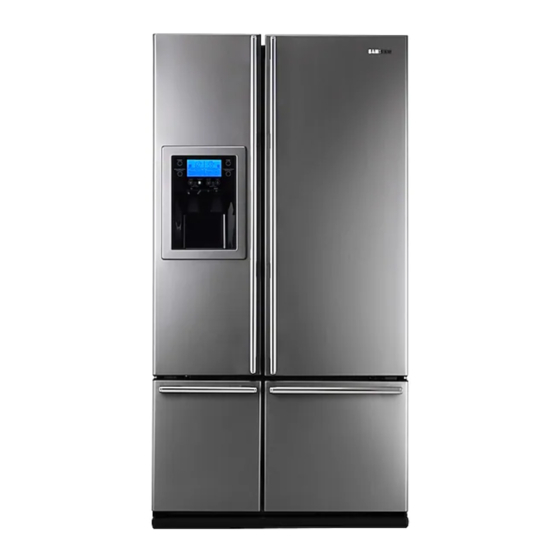
- Page 1 Samsung 2 Door 2 Drawer Convertible Samsung 2 Door 2 Drawer Convertible Maytag Technical Institute, 2006 Maytag Technical Institute, 2006 Side by Side Training Manual Side by Side Training Manual RM255BARB RM255BARB RM255BASB RM255BASB RM255BABB RM255BABB L2006-028 L2006-028...
- Page 2 Maytag maintains an affiliation with ten institutions in the US and Canada to offer technical training sessions focused on Maytag branded product. Maytag supplies the course content and product but each school operates as an independent agent and collects fees accordingly.
-
Page 3: Important Safety Notice
SAMSUNG ELECTRONICS AMERICA, INC. Technical Service Guide All rights reserved. This service guide may not be reproduced in whole or in part in any form without written permission from the SAMSUNG ELECTRONICS Company. WARNING Copyright... -
Page 4: Table Of Contents
CONTENTS PRECAUTIONS ...5 PRODUCT SPECIFICATIONS ...8 OPERATING INSTRUCTIONS & INSTALLATION...13 DIASSEMBLY and REASSEMBLY...24 TROUBLESHOOTING...37 WIRING DIAGRAM...60 PCB DIAGRAM...73 CIRCUIT (SCHEMATIC) DIAGRAM...74 CURCUIT DESCRIPTIONS...75 REFERENCE INFORMATION...81... -
Page 5: Precautions
They must look the same as they did before disassembly. Check the conditions surrounding the installed refrigerator. When the refrigerator is located at humid or wet place, or the installed state is unstable, change the location. If necessary instal a ground conductor. - Page 6 Warning & Caution Pull the power plug out to exchange the interior lamp of the refrigerator. It may cause electric shock. Unplug Upon repair, remove completely dust or other items form the housing areas, harnesses, and check parts appearance.
- Page 7 It may hurt you when the refrigerator door is opened and closed resulting in stuff falling down. Forbidden Do not allow users to disassemble, repair or alter.
-
Page 8: Product Specifications
2. PRODUCT SPECIFICATIONS 2-1) Introduction of main functions...8 2-2) Model Specifications...9 2-4) Electric Parts Specifications...10 2-6) Optional Material Specifications...12... -
Page 9: 2-1) Introduction Of Main Functions
PRODUCT SPECIFICATIONS 2-1) Introduction of main function THE SAMSUNG side by side refrigerator has the following characteristics: This operation instruction covers various models. The characteristics of your appliance may differ slightly from those described in this NOTE manual. TDM System(Time-Divided-Multi-evaporator system) •... -
Page 10: 2-2) Model Specifications
Refrigerator Type Refrigerant Refrigerant Input Amount Product Weight Specification RM25 Dispenser without beverage station 24.8 ft 11.6 ft 7.0 ft 3.8 ft 2.4 ft 115V/60Hz 183W 470W Indirect Cooling Method Refrigerator R-134a 235g(8.29oz) before packing : 353lbs after packing : 386lbs... -
Page 11: 2-4) Electric Parts Specifications
PRODUCT SPECIFICATIONS 2-4) Electric Parts Specification Item Model Model Compressor Starting type Oil Charge Freezer Fridge Evaporator Fresh Select Zone Arctic Select Zone Condenser Dryer Capillary tube Refrigerant Temperature Selection Model THERMISTOR (F-SENSOR) 502AT Model Temperature Selection THERMISTOR (R-SENSOR) 502AT First Defrost Cycle (Concurrent defrost of F and R) Defrost Cycle(FRE) Defrost Cycle(REF) - Page 12 PRODUCT SPECIFICATIONS Items Model Defrost-Heater(FRE) Conducting F Defrosting Defrost-Heater(REF) Conducting R Defrosting Defrost-Heater(CF) Conducting CF Defrosting Defrost-Heater(CR) Conducting CR Defrosting DRAIN PIPE(FRE) Conducting F Defrosting DRAIN PIPE(REF) Conducting R Defrosting DISPENSER Heater Interlock with F-FAN WATER PIPE Heater WATER TANK Heater Bimetal Condenser for COMP...
-
Page 13: 2-6) Optional Material Specifications
PRODUCT SPECIFICATIONS 2-6) Optional Material Specifications Photograph Part Name FILTER WATER-ASSY ASSY-INSTALL FILTER INCANDENT LAMP INCANDENT LAMP Part Code DA29-00012A DA97-01469D Refrigerator : 3pcs 4713-001194 4713-001172 Remarks Freezer : 2pcs 120V, 40W CF : 1pcs CR : 1pcs 130V, 30W... -
Page 14: Operating Instructions & Installation
3. OPERATING INSTRUCTIONS & INSTALLATION 3-1) Digital Panel...14 3-2) Temperature Control Operation ...14 3-3) Power Freeze and Vacation Operation...15 3-4) Lock Function ...16 3-5) Functions Where the Ice Dispenser and Water Dispenser Have Been Attached (External Type)...16 3-6) Light Operation ...17 3-7) Machine Room F-Fan Motor Delay Function...17 3-8) Ice Maker Function ...18 3-9) Defrosting Function...22... -
Page 15: 3-1) Digital Panel
/ when electric power had been cut off for a short time by unstable electric supply because of electricity supply line problem so as to be connected again, then the refrigerator judges it as momentary power interruption. So the refrigerator reads again to use them after saving the temperatures and... -
Page 16: 3-3) Power Freeze And Vacation Operation
1-2) If power freeze is selected, the COMP and F-FAN operate continuously for 2 hours and 30 minutes. 1-3) The refrigerator compartment operates per the current set condition even during power freeze operation. 1-4) When power freeze is terminated, ICON signifying the power freeze turns off automatically and operation there is by temperature ordinarily set for the freezer compartment. -
Page 17: 3-4) Lock Function
1-2) CRUSHED is automatically selected at initial POWER ON of the refrigerator product. 1-3) Water is extracted by operating the WATER SOLENOID VALVE under the condition of WATER LEVER ON. -
Page 18: 3-6) Light Operation
WATER SWITCH and DISPENSER SWITCH operation conditions. 3-7) Machine Room F-Fan Motor Delay Function The temperature in this refrigerator is automatically controlled by program depending on ambient temperature. Among the operative functions depending on ambient temperature, the compressor cooling fan (machine room fan) is controlled as shown in the table below. -
Page 19: 3-8) Ice Maker Function
OPERATING INSTRUCTIONS & INSTALLATION 3-8) ICE-MAKER Function (applies only for model with dispenser function) This ICE-MAKER function is option specification so as to be drawn to the function explanation for relevant model. ICE-MAKER is model attached with unit equipment where is furnished function of automatic ice making so that ice may be made in container inside the freezer compartment and may be drawn out by using ice dispenser under storage status ==>... - Page 20 receptacle.
- Page 21 OPERATING INSTRUCTIONS & INSTALLATION 4-2) Step 2 : operation is to overturn tray in order to separate the ice in the ice tray where tray is overturned by direction rotation of ice extraction motor. -In case the storage container is full ice: if the ice extraction S/W is ON again before 3.6 seconds elapse from the time the extraction S/W condition changed to “on motor, then this means that the storage tray is full of ice so that direction rotation of the motor is interrupted so as to start reverse direcion rotation (horizontal movement) after waiting a second.
- Page 22 6-1) ICE OFF is selected if the ice selection button is pressed on the DISPLAY and ICE OFF is canceled if the button is pressed again. 6-2) When the electric power turns on, the refrigerator operates automatically in the ice making mode where fragment ice is automatically selected and the lamp is lit.
-
Page 23: 3-9) Defrosting Function
1) Defrosting of the F compartment, Arctic Select Zone, R compartment and the Fresh Select Zone is determined by the cumulated time period of COMP. ON. 2) In case of initial POWER ON of the refrigerator product, defrosting of the Freezer Compartment and Arctic Zone is executed when 4 hrs. of cumulated COMP. ON time period have elapsed. -
Page 24: 3-10) Arctic Select Zone Function
- If this function finishes automatically, it is automatically converted to Freeze. 3-11) Fresh Select Zone Function 1) At initial POWER ON of the refrigerator, the Fresh select Zone is set to Cool. 2) This function is set and changed as follows by pressing the Select Fresh Zone button. - Page 25 OPERATING INSTRUCTIONS & INSTALLATION FUNCTION Fresh Select Zone temp. is controlled by interlock with the set Cool temp. (33.8 ~ 44.6 ) of the Fridge compartment Fresh Soft Freeze Chill 3-12) Test Functions (Forced Operation Start and Forced Defrosting Functions) If the Fresh Select Zone key and the F compartment key on the PANEL PCB are simultaneously pressed for more than 8 seconds, then the TEST MODE is entered.
- Page 26 OPERATING INSTRUCTIONS & INSTALLATION 1) Forced Start Operation Function 1-1) Forced start operation is selected if the test key is pressed once while in the test mode. At that time the buzzer executes an alarm by making a beep sound. 2-1) If forced start operation is selected , then COMP.
-
Page 27: 3-13) Alarm Function
2-2) If the door open condition is maintained even longer, the operation recycles generating the alarm sound 10 times per 1 minute period. 2-3) The alarm sound stops readily if the refrigerator compartment and the freezer compartment are both closed. 3-14) Communication Error Display Function... -
Page 28: 3-15) Self-Diagnostics Function
2) Self-Diagnostics Function during Normal Operation 2-1) If the freezing setting + the Refrigeration setting keys are pressed simultaneously for 6 seconds, during normal refrigerator operation, the temperature-setting display flickers ALLON/OFF with 0. 5 second interval for about 2 seconds.The Self- Diagnostics function is selected when the freezing setting + the Refrigeration settingkeys are pressed simultaneously for about 8 seconds, including the 2 seconds during which theLED repeats ON/OFF.. - Page 29 OPERATING INSTRUCTIONS & INSTALLATION Self-Diagnostics Checklist BAD ITEM I/M-SENSOR Ice maker sensor system abnormality R-SENSOR R Compartment sensor system abnormality R-DEF-SENSOR System abnormality of defrosting sensor for of R compartment R-FAN ERROR I/M Fan motor system abnormality in R compartment FUNCTION ERROR Ice maker operation abnormality R-DEFROSTING ERROR...
- Page 30 OPERATING INSTRUCTIONS & INSTALLATION Error items of self-diagnostics ITEM Electric wire cut, short-circuit, contact failure, sensor housing missing, while in I/M-SENSOR case of displaying a temperature defect, it is only displayed when the sensor detected temperature is not lower than 122 Electric wire cut, short-circuit, contact failure, sensor housing missing, while in R-SENSOR case of displaying a temperature defect, it is only displayed when the sensor...
- Page 31 OPERATING INSTRUCTIONS & INSTALLATION ITEM Electric wire cut, short-circuit, contact failure, sensor housing missing, while in case F-DEF-SENSOR of displaying a temperature defect, it is only displayed when sensor detection temperature is not lower than 122 Error is displayed in case there is a contact failure on the feedback signal line, F-FAN ERROR motor wire missing or defect of the motor itself, when operating the relevant fan motor.
-
Page 32: 3-16) Load Condition Display Function
1) If the freezing setting + the refrigeration setting keys are pressed simultaneously for about 6 seconds under normal operation condition, the freezer compartment and the refrigerator compartment temperature setting displays go on ALL ON/OFF for about 2 seconds with a 0.5 second interval. -
Page 33: 3-17) Operation Condition Recovery Function In Case Of Power Outage
Arctic Select Zone, setting of Fresh Select Zone, ice type, lock condition, etc.) related to PANEL DISPLAY are restored. - Page 34 2) If the Arctic Select Zone Setting Key + Refrigerator Compartment Key is simultaneously pressed for about 12 seconds under normal operating condition, display is converted to an option setting mode.
- Page 35 OPERATING INSTRUCTIONS & INSTALLATION 4) If "6" is set as shown in the following option table for the freezer compartment after setting at "0" for the refrigerator compartment, standard temperature of freezer compartment is lowered by -26.6°F. (Refer to the figure of temperature...
- Page 36 29.3 28.4 27.5 26.6 25.7 32.9 33.8 34.7 35.6 36.5 37.4 38.3 39.2 2) Temperature Change Table for the Refrigerator Compartment Set Value Option Value R Compartment Set value for temperature display 31.1 30.2 29.3 28.4 27.5 26.6 25.7 32.9 33.8...
- Page 37 OPERATING INSTRUCTIONS & INSTALLATION The following options apply only to models attached with ice maker. In case of basic model, the following items cannot be set. 3) Water Supply Quantity Control Function, for the Ice Maker Automatic water supply quantity control option by flow sensor.
- Page 38 Ice-Maker Thermistor……………………………………………………… 54 Water Tank………………………………………………………………….54 Partition in the Refrigerator……………………………………………... 54 Evaporator Cover in the Refrigerator……………………………………… 55 Evaporator Fan Motor in the Refrigerator…………………………………. 55 Evaporator in Refrigerator…………………………………………………. 56 Refrigerator Thermister……………………………………………………. 56 Fresh/Arctic Select Zone Thermistor………………………………………. 56 Evaporator Fan Motor in Fresh Select Zone……………………………….. 57 Upper Ductwork…………………………………………………………….
-
Page 39: Disassembly And Reassembly
DISASSEMBLY AND REASSEMBLY 5-1) Door Assy Removing the Front Leg Cover Pull the leg-font-cover down with both hands and remove it by lifting it up with the upper rib. And then, disengage the lower hooks. Removing the Freezer Door • Lift the door straight up. •... - Page 40 DISASSEMBLY AND REASSEMBLY Removing the Freezer Door 2) Remove the water tube by pressing the coupler-ring ( ➂ ) and pulling the water tube ( ➃ ) away. Do not cut the water tube. Separate it from the coupler. NOTE 3) Pull and open the latch (➄), and take off the door hinge (➅) along the arrow.
-
Page 41: Removing The Refrigerator Door
DISASSEMBLY AND REASSEMBLY Removing the Refrigerator Door 1) With the door closed, remove the upper hinge cover (➀) using a screwdriver. 2) Pull and open the latch (➁), and take off the door hinge ( ➂ ) along the arrow. - Page 42 DISASSEMBLY AND REASSEMBLY How to Disassemble the Fresh Select Zone Door 1) Open the Fresh Select Zone Door. 3) Remove two screws holding it to the liner on the left side of the rail. 4) Remove two screws holding it to the liner on the right side of the rail.
- Page 43 DISASSEMBLY AND REASSEMBLY Reattaching the Freezer Door 1) Reattach the hinge screws ( ➀ ). 3) Insert the upper hinge shaft (➃) into the hole (➄). After levelling between the hinge brackets (➅). Reattach and close the latch (➆). 4) Connect the wires (➇) and the water tube (➈).
-
Page 44: Reattaching The Refrigerator Door
DISASSEMBLY AND REASSEMBLY Reattaching the Refrigerator Door 1) Reattach hinge screws ( ➀ ). 3) Insert the upper hinge shaft (➃) into the hole (➄). After levelling between the hinge brackets (➅). Reattach and close the latch (➆) along the arrow. -
Page 45: Reattaching The Front Leg Cover
DISASSEMBLY AND REASSEMBLY Reattaching the Front Leg Cover Hold the leg-front-cover with both hands and insert it while sliding the hooks along the guide at the bottom. Then, lift up the leg-front-cover a little bit and snap the upper ribs into the locking tabs. LEVELLING If the front of the appliance is slightly higher than the rear, the door can be opened and closed easier. - Page 46 DISASSEMBLY AND REASSEMBLY How to Disassemble the Arctic Select Zone Door 1) Open the Arctic Select Zone Door. 3) Remove two screws holding it to the liner on the left side of the rail. 4) Remove two screws holding it to the liner on the right side of the rail.
-
Page 47: Install The Water Filter
Install the water filter. 1) Open the cartridge cover as shown by pulling and pushing up at the front, The water filter cartridge is located at the upper right corner of the refrigerator compartment. NOTE When the display in the control panel “filter change”, it is mecessory to be changed the filter cartridge. -
Page 48: 5-2) Door Sub Parts
2. Lift it up as shown 3. Disconnect the wire connector. Door Handle The door handles allow access into the refrigerator and freezer. They are front mounted with screws. 1. Remove the screw on the upper part of the handle 2. -
Page 49: 5-3) Refrigerator Compartments
DISASSEMBLY AND REASSEMBLY 5-3) Refrigerator Compartments Refrigerator Door Light Switch The refrigerator has a door light switch located in the upper right corner for the refrigerator. 1. Use a small flat-blade screwdriver to unlock the locking tab and pull the switch out until you can see the wire connector. -
Page 50: 5-4) Freezer Compartments
DISASSEMBLY AND REASSEMBLY 5-4) Freezer Compartments Door Bin in Freezer The door bins allow storage of perishable items. 1. Push the bin up and slide it out. Freezer Door Light Switch This switch is located in the left-hand portion of the freezer and sends a signal to the processor. -
Page 51: Ice Dispenser Ice Maker
DISASSEMBLY AND REASSEMBLY Ice Dispenser Ice Maker The ice dispenser is located in the upper portion of freezer. This assembly is to store and dispense ice made by the icemaker. 1. Lift the ice bucket up and slide out the ice dispenser assembly The Ice Maker is located inside of the Ice Dispenser assembly... -
Page 52: Auger Motor Case
DISASSEMBLY AND REASSEMBLY Auger Motor Case This shelf is designed to support the ice maker & ice dispenser. 1. Remove the screws(2) on the side of the case 2. Slide the case out while disconnecting the wire connector. Screws Upper Ductwork 1. -
Page 53: Partition In The Freezer
DISASSEMBLY AND REASSEMBLY PARTITION IN THE FREEZER The Partition is located in the lower part of the freezer.Before separating the partition,take out all the shelves and cases which are above the partition. 1. Unscrew the partition(a screws). 2. Insert the flat-tip screwdriver into the center groove of the partition, and lift it up. -
Page 54: Evaporator Fan Motor In Arctic Select Zone
Evaporator Fan Motor The evaporator fan is located in the lower rear of the refrigerator. This fan circulates cold air in the refrigerator. 1. Remove the screws(4 pieces) from the four corners of fan bracket. -
Page 55: Freezer Thermistor
1. Unscrew the water tank(2 screws)to separate, and lift it up. Ductwork PARTITION IN THE Fridge Partition is located in the lower part of refrigerator. For the disassembly of partition, water tank should be disassembled first. 1. Unscrew the partition. (2 screws) 2. -
Page 56: Evaporator Cover In The Refrigerator
Refrigerator For the disassembly of evaporator cover, water tank and partition should be disassembled first. -
Page 57: Evaporator In Refrigerator
The evaporator is located in the bottom of the refrigerator. 1. Take off the partition in the refrigerator. 2. Take off the evaporator cover in the refrigerator. 3. Disconnect the wire connector.(Heater and Thermistor) 4. Desolder the capillary tube and the suction line from the evaporator. -
Page 58: Evaporator Fan Motor In Fresh Select Zone
DISASSEMBLY AND REASSEMBLY Evaporator Fan Motor in Fresh Select Zone The Evaporator Fan Motor in the Fresh Select Zone is located in the lower part of the cooling compartment. 1.Unscrew the fan-cover. (2 screws) 2. Separate the insulation covering the fan by removing the sponge and tape. -
Page 59: Machine Compartment Electric Box
DISASSEMBLY AND REASSEMBLY Machine Compartment Electric Box 1. Disconnect the power cord of the refrigerator. 2. Remove the fixing screws (8) of compressor cover. 3. Slide up and take off the compressor cover to see the machine compartment. 4. Unscrew the electric box cover in the rear of refrigerator with the crossed-head screwdriver.(2 screws) - Page 60 DISASSEMBLY AND REASSEMBLY REMOVING THE ARCTIC SELECT ZONE ACCESSORIES Open the Arctic Select Zone Door. Hold the front side of cover, and pull it out. Lift the front side of basket first, and then take it out carefully. REMOVING THE FRESH SELECT ZONE ACCESSORIES Open the Fresh Select Zone door.
- Page 61 DIAGNOSTIC 6-1) If power is not ON Caution! At the power of main PCB, the 115V AC and a high-voltage over DC 170V occur. Please be careful wih repair and measurement Check at the SMPS PBA. - Check Main PCB connection. - Check the connections between upper hinge and CABI-door.? - Check the connections between door...
- Page 62 Is the CN72 connector normal? Is COMP assembly normal? Normal Start Recheck the comp after a 5 min. Is refrigerator sensor normal? Is the temperature sensor of main PCB Normal? Open and repair the connection. Check connector for contact failure.
- Page 63 DIAGNOSTIC 6-3) If the defrost function doesn’t work See test function in the manual. Recheck the corresponding sensor for an error if it fails in return. Reference If temp. of F, R defrosting sensors by the heaters working are over 50 respectirely, operation of defrosting heaters is over and return to normal operation after a respite.
- Page 64 6-4) If there is a trouble with self-diagnosis(sensor failure) - Error in sensor can be seen on the front display of refrigerator. If sensor failure is found when power is initially impressed to refrigerator, the product will not work, and display is repeatedly blinking in the trouble occurred sensor.
- Page 65 DIAGNOSTIC 6-5) Alarm Sounds continuously(related to the buzzer) 1) If “Ding-Dong” sounds continuously Freezer door MICOM No. 49, Fridge door MICOM No. 47 CF - door micom no.50 CR - door micom no.48 – Regular voltages are 5V to Open : 0V to Close.
- Page 66 DIAGNOSTIC 3) If the buzzer doesn’t sound This model is equipped with the buzzer on the Panel PCB. If buzzer doesn't sound in case of button operation, forced operation or door opening, separate the panel PCB first to check if buzzer is broken or there are any soldering failures. It is not easy to troubleshoot it as the Panel PCB is made with SMD parts.
- Page 67 See the electric circuit diagram or connection diagram attached to the backside of refrigerator. It is a care. 1. Check the door wire of freezer – breaking of wire, short between wires. 2. Check the CABI wire of freezer – breaking of wire, short between wires.
- Page 68 6-7) If fan motor doesn’t working normaly. This refrigerator uses a BLDC FAN motor and this motor is driven by 8 ~12V DC. Under the normal condition of COMP ON, it is operated together with F-FAN motor. F-Fan motor may not work depending on the conditions.
- Page 69 CN No.2 and No.7? Apply power around 5 minutes In the first power application, the after the power OFF. (to prevent freezer / refrigerator / compressor overload of compressor.) fans work for 5 minutes regardless of the condition. FOR F-FAN Does DC 0V al t ernate wi t h DC 12V between GND of the mai n -PCB and CN76 pi n No.
- Page 70 DIAGNOSTIC 6-9) If Ice Cubed or/and Ice Crushed don't work normally Start Does ice come out when drawing ice? What is the ice status on the panel Display? cubed ice Do ice cubed come out when drawing ice? Does MAIN MICOM No. 14 change to 0V when pressing ice s/w? Does MAIN MICOM No.
- Page 71 6-8) If Indoor Lamp of Freezer/Refrigerator doesn’t light Caution! 1. When replacing the indoor lamp of freezer or refrigerator, please turn the power OFF to avoid an electric shock. 2. Please be sure to avoid a burn by the excessive heating of incandescent light bulb.
- Page 72 DIAGNOSTIC 6-10) If Water Drawer doesn't work normally Preliminary Check 1. Stop water supply before disassembling or assembling because water is directly supplied to the water valve. 2. Keep in mind to avoid shock hazard during disassembly because power is always present on one side of wire. Check water coming out when pressing water lever at dispenser.
- Page 73 DIAGNOSTIC 6-11) If Dispenser LED Lamp doesn't light Caution 1. Dispenser LED Lamp is working with 12V DC.(=Dispenser LED Lamp has 12V DC power supply.) Anyone without approval or other than the qualified engineer is prohibited to perform the repair or disassembling work due to the danger of high voltage DC current. 2.
-
Page 74: Wiring Diagram
9. WIRING DIAGRAM... -
Page 75: Pcb Diagram
PCB DIAGRAM 10-2) CONNECTOR ARRANGEMENT (Main Board) -
Page 76: Circuit(Schematic) Diagram
CIRCUIT(SCHEMATIC) DIAGRAM... - Page 77 Circuit Descriptions 10-3) CONN ECTOR ARRANGEMENT (SMP S Board)
-
Page 78: Circuit Descriptions
Circuit Descriptions 12-1) POWER BUS This POWER BUS, and SMPS (Switch Mode Power Supply), is an improved efficiency power- convertion circuit for converting AC input voltage to high voltage DC. However, a consistent attention should be paid to the POWER BUS because 115V AC and 170V DC may be generated. -
Page 79: Curcuit Descriptions
CIRCUIT DESCRIPTIONS Temp.( ) Temp.( ) Resistance( ) Voltage(V) -43.6 98.9 4.54 93.7 -41.8 4.52 88.9 -40.0 4.49 84.2 -38.2 4.47 79.8 -36.4 4.44 -34.6 75.7 4.42 -32.8 71.8 4.39 -31.0 68.2 4.36 -29.2 64.7 4.33 -27.4 61.5 4.30 58.4 -25.6 4.27 55.6... - Page 80 7) Using this FG signal, it can be determined whether the FAN MOTOR is operating normally, and in case of FG signal errors, FAN motor errors are detected to use as refrigerator error data. 8) When the MICOM #6 signal changes to 0V again, IC75 # 1 PIN is OFF, and IC75 #18 PIN is OFF.
- Page 81 MOTOR DRIVE CIRCUIT DESCRIPTIONS 1) This refrigerator uses BLDC MOTORS for the purpose of saving power consumption, the BLDC MOTOR is is used for the freezing compartment, cooling compartment, and machine room motor (this motor drive circuit is a common circuit...
- Page 82 13. REFERENCE INFORMATION 13-1) Model Name(Nomenclature)
-
Page 83: Reference Information
• Is the refrigerator in direct sunlight or located near a heat source? • Is the back of the refrigerator too close to the wall? • Is the temperature control on the display The food in the... - Page 84 • Press and hold the CHILD LOCK for 3 seconds. • Dispense water until all water in system is replenished. • Wait 24 hours for the refrigerator to completely cool down. • Dispense water until all water in system is replenished.
- Page 85 REFERENCE INFORMATION 13-3) Additional Information Compressor Sub-condenser Hot Pipe Dryer Step valve R Capillary Tube R/CR evaporator C - Capillary Tube F Capillary Tube CF/F evaporator Suction Pipe comp 3-W ay...
- Page 86 REFERENCE INFORMATION Freezer Refrigerator...
- Page 87 Notes:...
- Page 88 Be Aware, Be Alert Always work safely. On the Job, On the Road, In the Home Every Time, All the Time...
Need help?
Do you have a question about the RM255BABB and is the answer not in the manual?
Questions and answers