Advertisement
All applications are available free of charge from www.aco.com.pl. PRO-USB 2.0 can be connected anywhere in the intercom installation and will manage
the settings of all generation 3 PRO devices. Adding and deleting proximity key fobs is also possible using the master key fob, which is included in the set
(without connecting the panel to a PC and without having to disassemble the panel).
Generation 3 PRO includes:
- Programming settings and software update via system bus (optional PRO-USB module required)
- Individual number of each module (Dev ID)
- Compatibility with earlier PRO system generations
- Connecting two door entry panels in one system, i.e. master and slave (to switch the camera signal it is necessary to use the PRO-VIDEO-SW2-60
(G3) camera switch module)
TECHNICAL PARAMETERS
•
Supply voltage
•
Standby power consumption
•
Maximum power consumption
•
E-lock supply voltage
•
Permitted load of E-lock output
•
Output type
•
Lock activation time
•
Output control type
•
Camera viewing angle
•
Horizontal and vertical camera adjustment angle
•
Connector type
•
Housing material
•
Resistance of external opening input
•
INPUT delay time
•
Front dimensions (H x W)
•
Standard for supported proximity cards (RFID)
•
Maximum number of supported proximity cards
ACO Sp. z o.o. sp. komandytowa, 62-002 Suchy Las, ul. Diamentowa 7, phone/fax +48 61 843 93 71
Installation and user manual for PRO system digital panels:
COMO-PRO-Vx / COMO-PRO-Ax
GENERAL INFORMATION
COMO PRO (generation 3) digital video door entry panel is dedicated to single- and multi-family houses that
require transmission of video signal along with audio signal.
between receivers. The panels are available in COMO-PRO-Vx version with built-in camera as well as in COMO-PRO-
Ax audio version (without built-in camera - in which case the panels work the same way, except for missing the video
functions). It is also possible to connect an external camera to audio panels - the system operation will be similar to
that with a built-in camera (for details of this solution, contact Aco technical department).
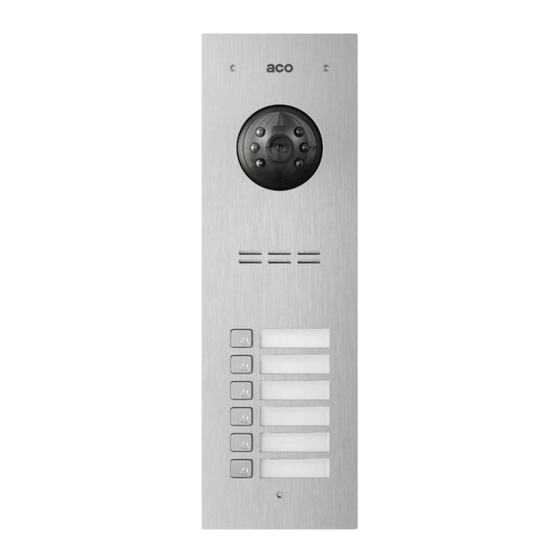
The front part of the panel is made of stainless steel, which provides effective mechanical and weather protection.
IMPORTANT! Always use cleaning agents based on alcohol only when disinfecting panels made of stainless steel. Any
chlorides (which are present in common cleaning products) are harmful to the steel surface, causing abrasion of its
natural protective coating and increasing the risk of corrosion.
The panel features up to 6 independent illuminated call buttons that can be assigned to specific apartments. The
panel also features illuminated description fields next to the buttons, to fill in apartment number or other information. It
also features an integrated proximity key fob reader for gate/door opening directly from the panel (two key fobs are
included).
The panel is powered by energy-saving PS45-15-PRO-13 switched-mode power supply unit with built-in video
splitter: 1 panel input, up to 3 outputs for monitors or outputs for audio receivers. The door entry unit supports receivers
of the PRO system: video receivers include such as units as: GLASS-PRO-7, MPRO 4, MPRO800 3.5 series, and
audio receivers: UPRO or UPRO800 series. The door entry unit is easy to handle, functional and its installation is simple.
After connecting the optional PRO-I/O-60 module (module with built-in relay and input for additional button) it enables
control of external devices, such as gate, barriers, roller shutters, lighting. The PRO-I/O-60 module can also function
as a doorbell - after connecting the bell button, the receivers will ring in different ringtones (PRO receivers can also be
connected directly to the bell button, but it is necessary to install additional cables to each receiver that is to perform
this function).
The wiring (topology) of the door entry unit is based on UTP min. cat. 5e for a video door entry unit or any three
wires for an audio door entry unit. Note that cable cross-section is important for maximum distance between the power
supply and components of the door entry system.
The panel is preconfigured in a way that its settings are suitable for most cases - therefore no configuration of the
unit is necessary - it will work immediately after powering up. Configuration of all settings is possible only via the "PRO
3 MANAGER" PC application and optional PRO-USB 2.0 modules for connecting the system to a PC (to be purchased
separately). The PRO 3 MANAGER application can also be used to manage proximity key fobs and for software updates.
Aco
The panel can also be used internal communication
15VDC ±5%
~2,5W
400mA
12VDC - 15VDC
1,5A
normal or reversible (by default: normal)
0.6 to 25s (by default: 4s)
pulse to E-lock (default) or fixed to relay
approx. 90º
20º
RJ45 socket/removable ARK screw connectors
Stainless steel
≤ 20Ω, input type: NO
0 - 25s (by default: 0s)
Video 286 x 90 mm, Audio
197 x 90 mm,
Unique 125 kHz
10 for each address/call button (or 10210 available via the PC application)
Audio surface-mounted
174.8 x 67.8 mm
Advertisement
Table of Contents

Related Manuals for ACO COMO-PRO-V Series


Summary of Contents for ACO COMO-PRO-V Series
- Page 1 The PRO 3 MANAGER application can also be used to manage proximity key fobs and for software updates. All applications are available free of charge from www.aco.com.pl. PRO-USB 2.0 can be connected anywhere in the intercom installation and will manage the settings of all generation 3 PRO devices.
- Page 2 www.aco.com.pl...
- Page 3 OPERATION The panel will ringing upon pressing the call button, as long as the system features a receiver with the address is assigned to the pressed button. If no such receiver is present, the panel will not ring and will generate a busy signal. By default, the buttons ring addresses from 1 (lower button) and 6 (top upper button), and this can be freely changed via the PC application from 0 to 1023, where 0 is used to ring all receivers in the system.
- Page 4 Audio/Video signal wires) close to wires from other installations (power, telecommunication, alarm systems) as this may adversely affect the operation of the system. More information is available at www.wsparcie.aco.com.pl, by sending an email to: bok@aco.com.pl, or by calling us (contact details available...
- Page 5 Volume settings. The call volume of the panel is pre-set (as shown in Figure 5) and requires no re-setting. To change the volume settings, connect to the monitor as follows: - adjust the sensitivity of the unit microphone using the "MIC" potentiometer, - adjust the unit speaker volume level of the unit using the "SPK"...
Need help?
Do you have a question about the COMO-PRO-V Series and is the answer not in the manual?
Questions and answers