
Subscribe to Our Youtube Channel
Related Manuals for RADWAG MA X2.A


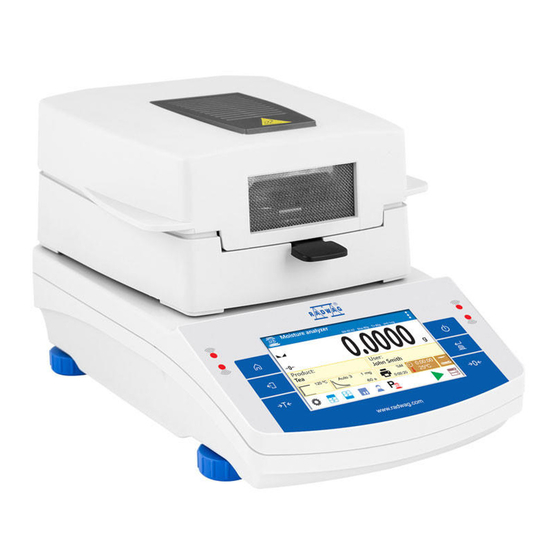
Summary of Contents for RADWAG MA X2.A
- Page 1 IMMB-11-02-05-22-EN-PL Start up Guide Szybki start Moisture Analyzer Wagosuszarki • MA X2.A • MA X2.IC.A...
- Page 2 To view a complete User Manual go to the website or scan QR code: Aby wyświetlić pełną instrukcję obsługi, przejdź do strony internetowej lub zeskanuj kod QR: radwag.com/en/manuals/9315...
- Page 3 1. CONTENT ZAWARTOŚĆ Moisture Cross-shaped Drying Disposable pan Drying pan shield Power cord* analyzer holder pan handle Szalka Wagosuszarka Krzyżak szalki Uchwyt szalki Osłona szalki Kabel zasilający* jednorazowa *The plug type may vary by country. *Rodzaj wtyczki może się różnić w zależności od kraju. 2.
-
Page 4: Recommendations And Warnings
3. RECOMMENDATIONS AND WARNINGS ZALECENIA I OSTRZEŻENIA Operate the device in a room where the temperature ranges between 10–40 °C +40 °C (50–104 °F) and where the relative humidity is below 80%. +104°F Place the moisture analyzer on a solid surface to ensure stability. To obtain sta- ble and repeatable weighing results, an anti-vibration table is recommended. -
Page 5: Components Assembly
Do not place the device in a hazard- Do not open in the course of opera- Be extremely careful while taking the ous area. Do not weigh explosive or tion since the heating components sample out. The sample and the mois- fl... -
Page 6: Preparing For Work
6. PREPARING FOR WORK PRZYGOTOWANIE WAGI DO PRACY Place the moisture analyzer at the workstation, wait until it reaches room temperature. Ustaw urządzenie w miejscu jego użytkowania i pozostaw je do osiągnięcia temperatury pokojowej. 6.1. Temperature stabilisation Stabilizacja temperatury wagi up to 4 h Prior to switching the device on let it Connect the power cord to the AC socket... -
Page 7: Switching The Device On
6.3. Switching the device on Włączenie wagi The moisture analyzer is ready to use! Twoja wagosuszarka jest gotowa do użycia! Before using WEIGHING mode, carry out instrument adjustment: refer to section 8.1. (adjustment is not required for DRYING mode). Przed korzystaniem z trybu WAŻENIA, wskazane jest wykonanie adiustacji urządzenia: patrz punkt 8.1. -
Page 8: Home Screen
7.2. Home screen Ekran główny Working modes list List of current working mode functions Lista trybów pracy Lista aktualnych funkcji modów pracy Status bar Pasek stanu Weighing result window Okno wyniku ważenia Enabled for editing info fi elds Edytowalne pole informacyjne Editable tool bar with quick access keys Pasek szybkiego... - Page 9 8.1.2. Adjustment (for models with an external adjustment only) Adiustacja (tylko dla modeli z zewnętrzną adiustacją) It is recommended to carry out adjustment operation prior to running the WEIGHING mode (adjustment is not required for DRYING). External adjustment is carried out using an external mass standard of the right accuracy and weight value, which value depends on device type and capacity.
- Page 10 Wait for completion of the start mass Load the weighing pan with mass standard determination process. and press button for confi rmation. Poczekaj na zakończenie procesu ustalania Postaw odpowiedni wzorzec masy na szalce masy początkowej. i naciśnij przycisk by zatwierdzić. Wait for the process completion.
- Page 11 8.3. Taring Taring With loaded weighing pan: upon stabilisation The moisture analyzer has been tared. of the weighing result, press “Tare” button. Waga została wytarowana. Przy obciążonej szalce: po uzyskaniu stabilnego wyniku kliknij przycisk „Tarowanie”. 8.4. Drying profi les / drying process fi nish modes Profi...
- Page 12 8.5. Automatically opened and closed drying chamber Automatycznie otwierana i zamykana komora suszenia In order to open/close the drying chamber, press an on-screen button: “Open / Close the chamber” Aby otworzyć / zamknąć komorę suszenia, należy nacisnąć przycisk na ekranie: „Otwórz / Zamknij komorę” 9.
-
Page 13: User Settings
9.2. User settings Konfi guracja użytkowników Prior to balance users setup, log in as Administrator (point 9.1.). Przed konfi guracją użytkowników zaloguj się jako Administrator (patrz punkt 9.1.). Databases Products Users Packaging Customers Press “Databases” button. Select “Users” database. Naciśnij przycisk “Bazy danych”. Wybierz bazę... - Page 14 Following the above procedure, set remaining parameters: Postępując zgodnie z powyższą procedurą, ustaw pozostałe parametry: Code: | Kod: Enter user ID | wpisz unikalny identyfi kator użytkownika Password: | Hasło: Enter user password | nadaj użytkownikowi hasło Permissions:| Poziom uprawnień: Set respective access level (user, advanced user, administrator) nadaj uprawnienia (użytkownik, użytkownik...
-
Page 15: Preparing Samples
Proximity sensors Left sensor None Right sensor Select the appropriate sensor (right or left). Select function that is to be assigned to the choosen sensor. Wybierz konkretny czujnik (prawy lub lewy) z listy. Wybierz funkcję, którą chcesz przypisać do danego czujnika. Following the above procedure you can confi... - Page 16 10.2. Handling hazardous samples Postępowanie z próbkami niebezpiecznymi Substances that in the course of Explosive and fl ammable and ma- Toxic and corrosive substances heating may emit vapours causing terials that in the course of heating and substances that in the course corrosion (e.g.
- Page 17 11. PERIPHERAL DEVICES CONNECTORS PODŁĄCZENIE URZĄDZEŃ PERYFERYJNYCH Power cord Kabel zasilajcy Computer Printer Komputer Drukarka Computer Printer Komputer Drukarka Additional display Barcode scaner Dodatkowy Skaner kodów wyświetlacz kreskowych Wi-Fi® Keyboard Printer Klawiatura Drukarka Computer Computer Printer Barcode scaner Komputer Komputer Drukarka Skaner kodów kreskowych ®...
-
Page 18: Device Cleaning
12. DEVICE CLEANING CZYSZCZENIE I KONSERWACJA 12.1. General recommendations Zalecenia i ostrzeżenia Prior to cleaning it is necessary Use soft cloths made of microfi ber, Apply the cleanser onto the cloth to disconnect the device from the natural fi ber or man-made fi ber. fi... -
Page 19: Cleaning Instructions
12.2. Cleaning instructions Wskazówki dotyczące czyszczenia urządzenia • GLASS PANES AND COMPONENTS can be cleaned using window cleaner. • WEIGHING PANS AND STAINLESS STEEL OR ALUMINIUM COMPONENTS can be cleaned using a cloth slightly soaked in a solution of water and gentle cleanser (e.g. soap or dishwashing liquid). •... - Page 20 www.radwag.com...
Need help?
Do you have a question about the MA X2.A and is the answer not in the manual?
Questions and answers