RADWAG PUE C32 Quick Start Manual
Hide thumbs
Also See for PUE C32:
- User manual (98 pages) ,
- User manual (106 pages) ,
- User manual (29 pages)
Table of Contents
Advertisement
Quick Links
Advertisement
Table of Contents

Related Manuals for RADWAG PUE C32


Summary of Contents for RADWAG PUE C32
- Page 1 ITKB-09-01-12-20-EN Quick Start Indicator • PUE C32...
- Page 2 To view the full user manual, go to the website or scan the QR code: radwag.com/en/manuals/I36...
-
Page 3: Notes And Warnings
1. CONTENT Indicator Power supply* ×1 ×1 *The type of plug may vary depending on the country. 2. NOTES AND WARNINGS Operate the indicator in a room free from dust where the temperature ranges +104 -10–40 °C (+14–104 °F) and where the relative humidity is below 80%. Potential temperature change shall occur gradually and slowly. -
Page 4: Preparing For Work
3. PREPARING FOR WORK Place the indicator on the workstation and leave it until it reaches ambient temperature. 3.1. Indicator Temperature Stabilization 1- 8 h Prior to switching the indicator on let Connect the power supply to a DC Connect the power it reach room temperature (estimated connector located on the side of the supply to the mains. -
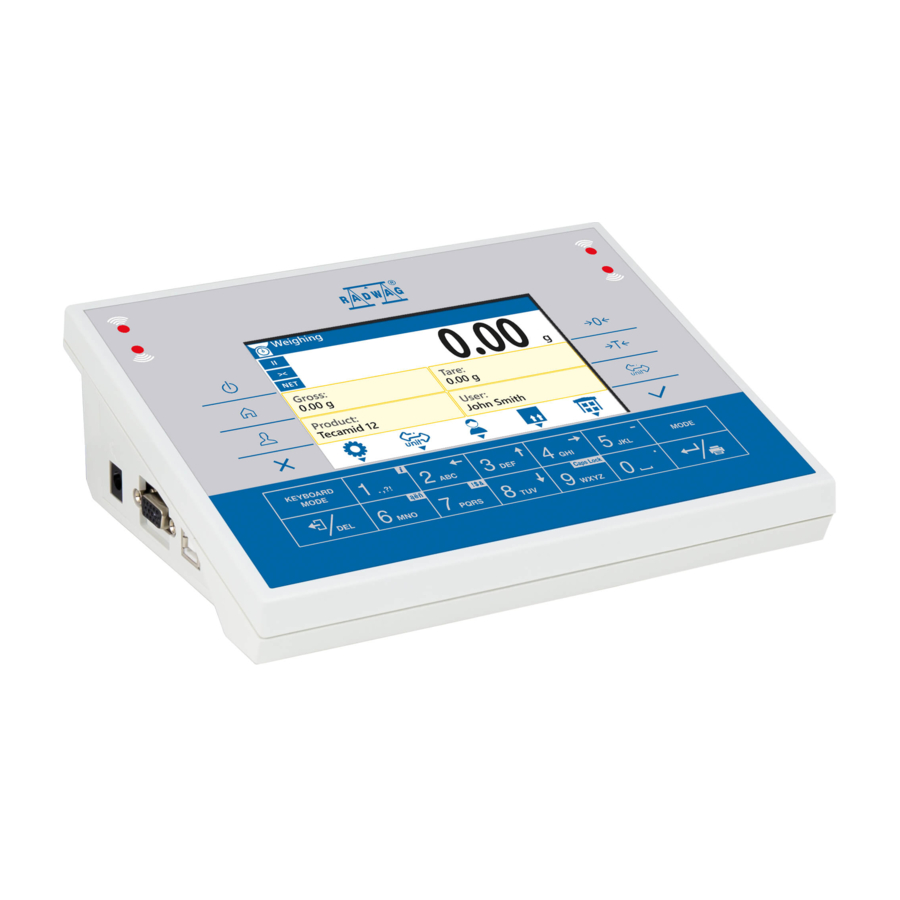
Page 5: Home Screen
4. PANEL AND SCREEN 4.1. Keypad Proximity sensor Proximity sensor Switching Zeroing on / off Weighing Taring PUE C32 0.00 Home screen >< Product: Tare: 0.00 kg Operator: Sum: 0.00 kg Log in Units Cancel Confirm Keyboard mode Working mode... -
Page 6: Working Modes
4.3. Working Modes Working mode Weighing Checkweighing Dosing Weighing PUE C32 0.00 >< Tare: Product: Weighing 0.00 kg Operator: Sum: Checkweighing 0.00 kg Dosing Formulations Percent weighing Parts counting Press key to enter Press keys to select working mode and working modes menu. - Page 7 Weighing Operator 0.00 PUE C32 >< Product: Tare: 0.00 kg Operator: Sum: 0.00 kg When the field for filling the password in is You have logged as the Administrator. opened, confirm the empty field by pressing key. 5.2. Proximity Sensors Configuration Prior to the proximity sensors configuration, log in as the Administrator (see step 5.1.).
- Page 8 Right sensor Name Accept / Print Left sensor None Print header Right sensor Print footer Zeroing Using keys select a function to be Using keys select right or left assigned to the respective sensor. Press sensor and press to confirm. key to confirm.
-
Page 9: Connecting Peripherals
6. CONNECTING PERIPHERALS Power supply Computer Printer Computer Printer Additional Barcode display scanner ® Wi-Fi Keypad Computer Printer Computer Barcode Printer scanner ® Wi-Fi is a registered trademark of Wi-Fi Alliance. -
Page 10: Cleaning And Maintenance
7. CLEANING AND MAINTENANCE 7.1. Notes and Warnings Prior to cleaning it is necessary to For cleaning use only soft cloths made Apply the cleanser onto the cloth first. disconnect the scale from the mains. of microfiber. Do not use any abrasive Avoid applying the cleanser directly Unplug the connector from the cloths or any material that may scratch... - Page 12 www.radwag.com...
Need help?
Do you have a question about the PUE C32 and is the answer not in the manual?
Questions and answers