Evolution Aqua nexus eazy 200 Installation & Operating Instructions Manual
Hide thumbs
Also See for nexus eazy 200:
- Installation and instruction manual (20 pages) ,
- Installation & operating instructions manual (9 pages)
Advertisement
Quick Links
200 / 300 Module
Installation & Operating Instructions
Note: Do not attempt to install this Module
without first reading this manual thoroughly
Manufactured by Evolution Aqua Ltd
Evolution House
Kellett Close
Wigan WN5 0LP
England
Tel: +44(0)1942 216554
Fax: +44(0)1942 216562
E-mail: info@evolutionaqua.com
Web: www.evolutionaqua.com
Advertisement

Related Manuals for Evolution Aqua nexus eazy 200


Summary of Contents for Evolution Aqua nexus eazy 200
- Page 1 200 / 300 Module Installation & Operating Instructions Note: Do not attempt to install this Module without first reading this manual thoroughly Manufactured by Evolution Aqua Ltd Evolution House Kellett Close Wigan WN5 0LP England Tel: +44(0)1942 216554 Fax: +44(0)1942 216562 E-mail: info@evolutionaqua.com...
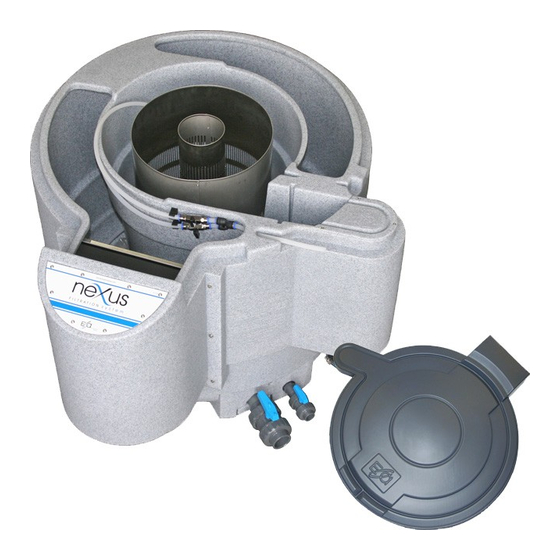
- Page 2 Thank you for purchasing your Module. We are sure you will be delighted with its performance. Your new Module comprises of the following components: 300 Module 200 Module Stainless steel Stainless steel Stainless steel Stainless steel ”Eazy” vessel centre pipe ”Eazy”...
- Page 3 300 Installation 1) Drain the Nexus central chamber 2) Remove the central and exit foams from your Nexus. 3) Remove the existing black spigot (later models having 3 retaining screws). 4) Using the template supplied, drill two 4mm holes in the side of the inner chamber.
- Page 4 5) Fit the two air-pipe clips using the M4 screws and “Nyloc” nuts supplied. 6) Remove the current 90° air-pipe elbow by pushing in the collar and pulling pipe out. Connect the incoming air tube directly to the new “T” connector. 7) Connect the existing air-ring air tube to the lower connection on the “T”...
- Page 5 9) Install the “Eazy” over the spigot in the Nexus central chamber. 10) Align the air tube as shown, ensuring that the “Eazy” support legs are positioned equally either side of the waste drain. 11) Connect the new back wash air tube to the other side of the air valve.
- Page 6 13) Position the supplied Jubilee Clip (band clamp) at the base of the centre pipe and tighten fully. 14) Fill the “Eazy” with 45 litres of Kaldnes. The volume of Kaldnes will be found when levelled, to correspond with the lower edges of the slots in the centre pipe.
- Page 7 200 Installation 1) Drain the Nexus central chamber 2) Remove the central and exit foams from your Nexus. 3) Remove the existing black spigot (later models having 3 retaining screws). 4) Using the template supplied, drill two 4mm holes in the side of the inner chamber.
- Page 8 5) Fit the two air-pipe clips using the M4 screws and “Nyloc” nuts supplied. 6) Remove the current 90° air-pipe elbow by pushing in the collar and pulling pipe out. Connect the incoming air tube directly to the new “T” connector. 7) Connect the existing air-ring air tube to the lower connection on the “T”...
- Page 9 9) Install the “Eazy” over the spigot in the Nexus central chamber. 10) Align the air tube as shown, ensuring that the “Eazy” support legs are positioned equally either side of the waste drain. 11) Connect the new back wash air tube to the other side of the air valve.
- Page 10 13) Position the supplied Jubilee Clip (band clamp) at the base of the centre pipe and tighten fully. 14) Fill the “Eazy” with 30 litres of Kaldnes. The volume of Kaldnes will be found when levelled, to correspond with the lower edges of the slots in the centre pipe.
- Page 11 Cleaning To achieve optimum water clarity we recommend that the “Eazy” be air backwashed and purged on a regular basis. The frequency of cleaning will depend on the loading of the pond. The longer the filter is left undisturbed the finer the filtration will become.
- Page 12 Pump Procedure 1) Close inlet valve. 2) Close off the feed to the biological chamber by inserting the Isolation pipe into the centre of the “Eazy”, ensuring that the rubber flange engages within the Nexus centre spigot. 3) Re-open inlet valve until the water level within the Nexus central chamber is level with the overflow, close inlet valve.
- Page 13 Distributed by: Evolution Aqua Ltd, Evolution house, Kellett Close, Wigan, WN5 OLP United Kingdom Sales: +44 (0)1942 219 898 Technical: +44 (0)1942 219 872 E mail: info@evolutionaqua.com Web: www.evolutionaqua.com USA & Canada – Wholesaler Contact: Trevor Cole Pond Wise Inc.
- Page 14 200 Template...
- Page 15 300 Template...
Need help?
Do you have a question about the nexus eazy 200 and is the answer not in the manual?
Questions and answers