GORMAN-RUPP PUMPS 10 Series Installation, Operation, And Maintenance Manual With Parts List
Hide thumbs
Also See for 10 Series:
Table of Contents
Advertisement
Quick Links
ACDE
OM-00652-OB09
April 17, 1981
Rev. E 09-14-07
INSTALLATION, OPERATION,
AND MAINTENANCE MANUAL
WITH PARTS LIST
10 SERIES PUMP
MODEL
14A2-B
THE GORMAN-RUPP COMPANY D MANSFIELD, OHIO
www.grpumps.com
D
GORMAN-RUPP OF CANADA LIMITED
ST. THOMAS, ONTARIO, CANADA
Printed in U.S.A.
e
Copyright by the Gorman-Rupp Company
Advertisement
Table of Contents

Related Manuals for GORMAN-RUPP PUMPS 10 Series


Summary of Contents for GORMAN-RUPP PUMPS 10 Series
- Page 1 ACDE OM-00652-OB09 April 17, 1981 Rev. E 09-14-07 INSTALLATION, OPERATION, AND MAINTENANCE MANUAL WITH PARTS LIST 10 SERIES PUMP MODEL 14A2-B THE GORMAN-RUPP COMPANY D MANSFIELD, OHIO www.grpumps.com GORMAN-RUPP OF CANADA LIMITED ST. THOMAS, ONTARIO, CANADA Printed in U.S.A. Copyright by the Gorman-Rupp Company...
- Page 2 Register your new Gorman-Rupp pump online at www.grpumps.com Valid serial number and e-mail address required. RECORD YOUR PUMP MODEL AND SERIAL NUMBER Please record your pump model and serial number in the spaces provided below. Your Gorman-Rupp distributor needs this information when you require parts or service. Pump Model: Serial Number:...
-
Page 3: Table Of Contents
TABLE OF CONTENTS INTRODUCTION ..........PAGE I −... - Page 4 TABLE OF CONTENTS (continued) STOPPING ..............PAGE C −...
-
Page 5: Introduction
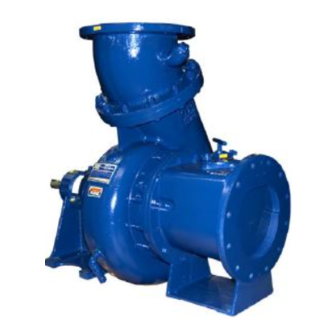
Rupp pump. Immediate hazards which WILL result in severe personal injury or death. These This pump is a 10 Series, semi-open impeller, self- priming centrifugal model with a suction check instructions describe the procedure re- valve. The pump is designed for handling most... -
Page 6: Safety - Section A
10 SERIES OM−00652 SAFETY - SECTION A This information applies to 10 Series ba- sic pumps. Gorman-Rupp has no con- trol over or particular knowledge of the power source which will be used. Refer This pump is designed to handle most... - Page 7 OM−00652 10 SERIES This pump is designed to pump materi- Do not operate the pump without als which could cause serious illness or shields and/or guards in place over the injury through direct exposure or drive shafts, belts, and/or couplings, or emitted fumes.
-
Page 8: Installation − Section Bpage B
10 SERIES OM−00652 INSTALLATION − SECTION B Review all SAFETY information in Section A. configuration, and priming must be tailored to the specific application. This pump is equipped with a Since pump installations are seldom identical, this Gorman-Rupp double grease lubricated seal,... -
Page 9: Preinstallation Inspection
OM−00652 10 SERIES PREINSTALLATION INSPECTION POSITIONING PUMP Lifting The pump assembly was inspected and tested be- fore shipment from the factory. Before installation, Pump unit weights will vary depending on the inspect the pump for damage which may have oc- mounting and drive provided. -
Page 10: Line Configuration
10 SERIES OM−00652 forced type to prevent collapse under suction. Us- Fittings ing piping couplings in suction lines is not recom- Suction lines should be the same size as the pump mended. inlet. If reducers are used in suction lines, they... -
Page 11: Suction Line Positioning
OM−00652 10 SERIES If it is necessary to position inflow close to the suc- Suction Line Positioning tion inlet, install a baffle between the inflow and the The depth of submergence of the suction line is suction inlet at a distance 1-1/2 times the diameter critical to efficient pump operation. -
Page 12: Bypass Lines
10 SERIES OM−00652 With high discharge heads, it is recommended that a throttling valve and a system check valve be in- stalled in the discharge line to protect the pump from excessive shock pressure and reverse rota- A bypass line that is returned to a wet well tion when it is stopped. -
Page 13: Automatic Air Release Valve
OM−00652 10 SERIES sive rupture of the pump casing. Per- sonnel could be severely injured. Allow an over-heated pump to cool be- É fore servicing. Do not remove plates, É É covers, gauges, or fittings from an over- heated pump. Liquid within the pump... -
Page 14: Air Release Valve Installation
10 SERIES OM−00652 lease Valve for your specific application. connected to the discharge line of the self-priming centrifugal pump (see Figure B−5). NOTE Air Release Valve Installation If the Air Release Valve is to be installed on a staged pump application, contact the factory for specific The Automatic Air Release Valve must be inde- installation instructions. -
Page 15: Coupled Drives
OM−00652 10 SERIES pump and piping are installed, and before opera- tion. NOTE Check Rotation, Section C, before final alignment of the pump. When mounted at the Gorman-Rupp factory, driver Figure B−6. Alignment of V-Belt Driven and pump are aligned before shipment. Misalign- Pumps ment will occur in transit and handling. -
Page 16: V-Belt Tensioning
10 SERIES OM−00652 from dirt, grease, oil and other foreign material which may cause slippage. Tension Measurement Correct v-belt tension can be achieved using a v- belt tension tester and Table 1 or 2. Use the tables to find the v-belt size (cross-section), the smallest sheave diameter, the belt type for your application. - Page 17 OM−00652 10 SERIES Place the tension tester squarely on the belt at the O-ring on the deflection force scale. Compare this center of the belt span. Apply force on the plunger, force with the value shown in Table 1 or 2 and ad- perpendicular to the belt span, until the bottom of just the tension accordingly.
- Page 18 10 SERIES OM−00652 Table 1. Sheave Diameter (Inches) Table 2. Sheave Diameter (Millimeters) Deflection Force (Lbs.) Deflection Force (KG.) Belt Deflection Force Belt Deflection Force Uncogged Cogged Uncogged Cogged Hy-T Belts & Torque-Flex Hy-T Belts & Torque-Flex Uncogged & Machined Uncogged &...
-
Page 19: Electrical Connections
OM−00652 10 SERIES ELECTRICAL CONNECTIONS Before connecting a motor to the incoming power, check that the electrical service available matches The electrical power used to operate the the pump motor requirements stamped on the mo- pump is high enough to cause injury or tor nameplate. -
Page 20: Operation − Section C
OM−00652 10 SERIES OPERATION − SECTION C Review all SAFETY information in Section A. Add liquid to the pump casing when: 1. The pump is being put into service for the Follow the instructions on all tags, labels and first time. -
Page 21: Operation
OM−00652 10 SERIES Consult the operating manual furnished with the filled, adjust the throttling valve to the required flow pump power source before attempting to start the rate. power source. Leakage If an electric motor is used to drive the pump, re-... -
Page 22: Pump Vacuum Check
OM−00652 10 SERIES Pump Vacuum Check solids by flushing with a hose. Operate the pump for approximately one minute; this will remove any With the pump inoperative, install a vacuum gauge remaining liquid that could freeze the pump rotat- in the system, using pipe dope on the threads. - Page 23 10 SERIES OM−00652 TROUBLESHOOTING − SECTION D Review all SAFETY information in Section A. Before attempting to open or service the pump: 1. Familiarize yourself with this manual. 2. Disconnect or lock out the power source to ensure that the pump will remain inoperative.
- Page 24 OM−00652 10 SERIES TROUBLE POSSIBLE CAUSE PROBABLE REMEDY PUMP STOPS OR Leaking or worn seal or pump gasket. Check pump vacuum. Replace FAILS TO DELIVER leaking or worn seal or gasket. RATED FLOW OR Impeller clogged. Free impeller of debris.
- Page 25 10 SERIES OM−00652 equipped) between regularly scheduled inspec- PREVENTIVE MAINTENANCE tions can indicate problems that can be corrected Since pump applications are seldom identical, and before system damage or catastrophic failure oc- pump wear is directly affected by such things as curs.
- Page 26 10 SERIES OM−00652 PUMP MAINTENANCE AND REPAIR - SECTION E MAINTENANCE AND REPAIR OF THE WEARING PARTS OF THE PUMP WILL MAINTAIN PEAK OPERATING PERFORMANCE. STANDARD PERFORMANCE FOR PUMP MODEL 14A2−B Based on 70_ F (21_ C) clear water at sea level Contact the Gorman-Rupp Company to verify per- formance or part numbers.
- Page 27 OM−00652 10 SERIES PARTS PAGE SECTION DRAWING VOLUTE TOP VIEW Figure E−1. Pump Model 14A2−B PAGE E − 2 MAINTENANCE & REPAIR...
- Page 28 10 SERIES OM−00652 PARTS LIST Pump Model 14A2−B (From S/N 740693 up) If your pump serial number is followed by an N", your pump is NOT a standard production model. Contact the Gorman-Rupp Company to verify part numbers. ITEM PART NAME PART MAT’L...
- Page 29 OM−00652 10 SERIES PUMP AND SEAL DISASSEMBLY 4. Check the temperature before AND REASSEMBLY opening any covers, plates, or plugs. Review all SAFETY information in Section A. 5. Close the suction and discharge valves. Follow the instructions on all tags, label and de- 6.
- Page 30 10 SERIES OM−00652 Remove the nuts (13), and separate the pump cas- Turn ing and gasket set (40) from the seal plate (39) and Counterclockwise pedestal (33). Clean the mating surfaces of the seal plate and pump casing. Tie and tag the gas- kets, or measure and record their thickness for ease of reassembly.
- Page 31 OM−00652 10 SERIES If no further disassembly is required, see Seal Installation. To prevent damage during removal from Shaft and Bearing Removal and Disassembly the shaft, it is recommended that bearings be cleaned and inspected in place. It is When the pump is properly operated and main-...
- Page 32 10 SERIES OM−00652 Shaft and Bearing Reassembly and sleeve and a press to reposition the bearings Installation against the shaft shoulders. If heating the bearings is not practical, use a suit- Clean and inspect the bearings as indicated in ably sized sleeve and arbor (or hydraulic) press to Shaft and Bearing Removal and Disassembly.
- Page 33 OM−00652 10 SERIES Inspect the impeller shaft for damage. Small NOTE scratches or nicks may be removed with a fine file Shaft endplay should be between .002 and .010 or emery cloth. If excessive wear exists, the shaft inch (.05 to .25 mm). Add or remove bearing adjust- will have to be replaced.
- Page 34 10 SERIES OM−00652 SEAL GREASE PLATE CUP PIPING SPRING IMPELLER SHIMS SEAL LINER SPACER STATIONARY SLEEVE SEATS IMPELLER SHAFT IMPELLER PACKING RINGS PACKING WASHERS SEAL WASHER ROTATING ELEMENTS Figure E−3. GS1250 Seal Assembly from a length of plastic pipe would aid this installa- tion.
- Page 35 OM−00652 10 SERIES A clearance of .020 to .040 inch (0,51 to 1,02 mm) Clean any scales or debris from the contacting sur- between the impeller and the seal plate is neces- faces on the pump casing that might prevent a sary for maximum pump efficiency.
- Page 36 10 SERIES OM−00652 Refer to OPERATION, Section C, before putting the pump back into service. LUBRICATION Monitor the condition of the bearing lubri- cant regularly for evidence of rust or mois- Bearings ture condensation. This is especially im- portant in areas where variable hot and The pedestal was fully lubricated when shipped cold temperatures are common.
- Page 37 OM−00652 10 SERIES POSITION POSITION POSITION WHEN WHEN EMPTY FILLING IN USE GREASE FITTING CROSS RELIEF HOLE Figure E−4. Automatic Lubricating Grease Cup NOTE Power Source Some smoking and leakage may occur after instal- Consult the literature supplied with the power ling a new seal assembly.
- Page 38 For U.S. and International Warranty Information, Please Visit www.grpumps.com/warranty or call: U.S.: 419−755−1280 International: +1−419−755−1352 For Canadian Warranty Information, Please Visit www.grcanada.com/warranty or call: 519−631−2870 THE GORMAN-RUPP COMPANY D MANSFIELD, OHIO GORMAN-RUPP OF CANADA LIMITED ST. THOMAS, ONTARIO, CANADA...
Need help?
Do you have a question about the 10 Series and is the answer not in the manual?
Questions and answers