Table of Contents
Advertisement
Advertisement
Table of Contents

Subscribe to Our Youtube Channel
Related Manuals for Carimali BlueDot Series


Summary of Contents for Carimali BlueDot Series
- Page 1 USER’S MANUAL Translation of original instructions...
-
Page 3: Table Of Contents
CONTENTS 5 TECHNICAL CHARACTERISTICS ..49 TECHNICAL DATA ....... 49 OVERALL DIMENSIONS..... 50 1 GENERAL SAFETY WARNINGS .... 5 6 RESIDUAL RISKS ......... 50 2 IDENTIFICATION ........8 7 HANDLING AND STORAGE ....51 3 INTRODUCTION ........9 SYMBOLS ........9 8 INSTALLATION AND STARTUP ... - Page 4 10.2.7 Disassembly and manual cleaning of the instant products Mixer ... 78 10.2.8 Cleaning of Milker circuit ..80 10.2.9 Disassembly and manual cleaning of Milker ....82 11 TROUBLESHOOTING ......85 11.1 DEFINITION OF ERRORS AND ALARM LEVELS ....86 11.2 ESPRESSO GROUP ERRORS ..
-
Page 5: General Safety Warnings
1 GENERAL SAFETY NOTE WARNINGS This manual is integral part of the ma- chine it is supplied with. Before proceeding with installation, use and maintenance of the machine, the operator is held to read and fully understand the contents of this man- ual. - Page 6 Do not position the machine in close Unplug the machine for any interven- proximity of water jets or heat sourc- tion of routine maintenance or check- es. Avoid the direct contact with water ing. or other liquids also during cleaning. WARNING Do not expose the machine to weath- er conditions (sun, rain, etc.).
- Page 7 Remove the water tank from the ma- For repairing, contact only a Service chine.when.it.is.to.be.filled.or.for.any. Centre authorised by the Manufac- other checking operation. turer and require the use of original spare parts and accessories. Failure Never touch the hot parts of the ma- to comply with the above regulations chine.
-
Page 8: Identification
Owing to the above, some pictures contained in this manual may slightly differ from the actual product. NOTE The latest version of the manual can be accessed by entering the area reserved to customers.of.the.offi- cial Carimali website. -
Page 9: Introduction
ATTENTION WARNING Only the CARIMALI TECHNICIAN or a It indicates a poten- SKILLED TECHNI- tially dangerous situ- CIAN have a shut- ation that may cause... -
Page 10: Intended Use
INTENDED USE ATTENTION The “BLUEDOT” machine was de- The machine is not signed and manufactured for dis- intended for outdoor pensing hot drinks, such as: use. ● Coffee ● Instant products ● Tea 3.3.1 Reasonably foreseeable mi- ● Milk. suse The machine is intended for profes- WARNING sional use, such as:... -
Page 11: Description Of The Machine
4 DESCRIPTION OF THE MACHINE MACHINE CONFIGURATIONS Fresh Brewer Water supply Milk ESPRESSO BREWER BlueDot WT - WM - WJ BlueDot WT - WM - WJ BlueDot WT - WM - WJ BlueDot WT - WM - WJ BlueDot WT - WM - WJ BlueDot WT - WM - WJ BlueDot... - Page 12 Optional: ● Water supply connections ● Jolly water supply (tank + water connection) ● 100 l CariPure water filter ● Premium grinder set ● Premium Self (Cup station) ● Sensor of presence and cup size ● MaxSave energy savings ● Aroma fan ● Liquid grounds direct discharge ● Solid grounds direct discharge ● GSM modem ● RFiD...
-
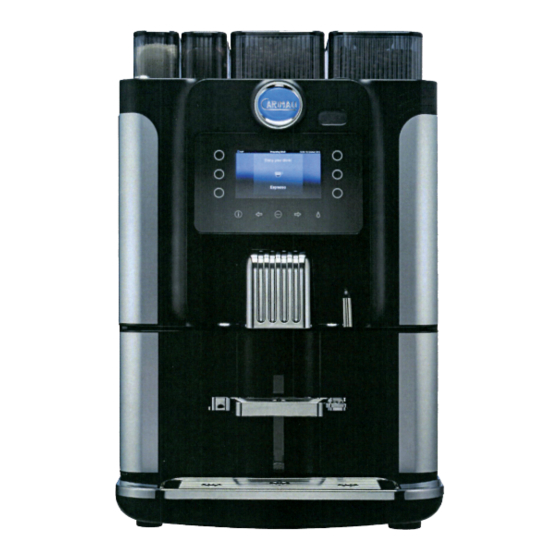
Page 13: Outer Components
OUTER COMPONENTS Product containers Upper front door RFID reading sensor (optional) Door closing lock TFT display Drink dispensing capacitive keypad / menu Hot water spout Dispensing nozzles Cup support grid Drip tray Fresh milk inlet Lower front door Power switch Water connection pre-set Wiring... -
Page 14: Inner Components
INNER COMPONENTS NOTE The machine can be set up (modular) according to customer’s requirements. The main components are listed below. NOTE All configurations described here below can have more or few- er optional extras installed (raised containers, grounds drawer with compactor, aroma fan, etc..) according to customer re- quirements. 06 Version Espresso “E”... - Page 15 07 Version Fresh Brew “F” + instant products (tank or water connection or Jolly) Instant products Coffee bean container container Coffee grinder Instant products container Mixer Milker Fresh Brew unit Water tank Grounds drawer 08 Version Espresso + Fresh Brew “EF” (with water mains only) Instant products Coffee bean container Coffee beans...
- Page 16 09 Version Espresso “E” + instant products (Tank or water connection or Jolly) Instant product Coffee beans containers container Coffee grinder Instant product container (high version) Mixer Milker Espresso group Water tank Grounds drawer 10 Version Espresso “E” + instant products (Tank or water connection or Jolly) Instant product Coffee beans containers container...
- Page 17 11 Version Espresso + Fresh Brew “EF” (with water mains only) Coffee bean Coffee bean container container Coffee grinder Coffee bean container Group Coffee grinder Fresh Brew Coffee grinder Milker Espresso unit Grounds drawer Grounds drawer Fresh Brew unit Espresso unit 12 Version Espresso + Tea “ET”...
- Page 18 13 Version Espresso (tank or water connection or Jolly) Coffee bean container Coffee grinder Espresso unit Water tank Grounds drawer Espresso unit 14 Version Espresso (tank or water connection or Jolly) Instant products Coffee bean container Coffee beans Coffee grinder Coffee grinder Milker Espresso unit...
- Page 19 15 Version Espresso “E” + instant products (Tank or water connection or Jolly) Instant prod- Coffee bean container ucts container Coffee grinder Instant prod- ucts container Instant prod- ucts container Mixer 1 Mixer 2 Espresso unit Milker Grounds drawer Water Espresso unit tank...
-
Page 20: Product Containers
4.3.1 Product containers Standard container capacity 0.6 Kg / 1.8 l Raised container capacity 16 - Instant product container 1.2 Kg / 3.5 litres WARNING When the container is filled with the prod- uct, close the lock protection; open it af- ter filling. Standard container capacity NOTE 1.1 litres Never fill the contain-... -
Page 21: Tft Display
TFT DISPLAY 4.4.1 Power ON - Switching on RFID sensor GSM/WiFi module GSM/WiFi signal Message light activation status reception level variable User Available presence credit detector Boiler tem- Time and 0.00EUR 11:25 19 Febbraio 2015 45° perature date M a c h i n e alarm that Information signals ex-... -
Page 22: Heating Waiting Screen (Boiler-Exchanger)
4.4.2 Heating waiting screen (Boiler-exchanger) Temperature gauge 11:25 19 Febbraio 2015 45° C° BOILER NOTE The screen is visualized when switching the machine on or anytime the temperature of the boiler or the exchanger goes below the minimum drink dispensing temperature. NOTE The heating of the exchanger begins after the one of the boiler. -
Page 23: Selection Of Beverages To Be Dispensed (Example Of Beverages) (Free Vend)
4.4.4 Selection of beverages to be dispensed (example of beverages) (free vend) Select beverage 2 Select beverage 1 Enjoy Your Drink ! Enjoy Your Drink ! Enjoy Your Drink ! Enjoy Your Drink ! Enjoy Your Drink ! Enjoy Your Drink ! Enjoy Your Drink ! Enjoy Your Drink ! Enjoy Your Drink ! -
Page 24: Hot Water Delivery
4.4.5 Hot water delivery Small water amount dispensing Medium water Enjoy Your Drink ! Enjoy Your Drink ! Enjoy Your Drink ! Enjoy Your Drink ! Enjoy Your Drink ! Enjoy Your Drink ! Enjoy Your Drink ! Hot Water 45°... -
Page 25: Delivery Completed
4.4.7 Delivery completed Enjoy Your Drink! Enjoy Your Drink! Enjoy Your Drink! Enjoy Your Drink! Enjoy Your Drink! Enjoy Your Drink! 11:25 11:25 11:25 11:25 11:25 11:25 19 Febbraio 2015 19 Febbraio 2015 19 Febbraio 2015 19 Febbraio 2015 19 Febbraio 2015 19 Febbraio 2015 45°... -
Page 26: Setup Menu - Recipe Setting
4.4.8 Setup menu - recipe setting NOTA Minimum access level. From the “Power ON” screen, press the “Dose setting” key to enter the product screen with yellow labels showing the possibility of modify the recipes. 26 - Beverage setting screen (beverages example) Press to Press to set set Long... - Page 27 28 - General setting page Press to scroll Press to the list exit Enjoy Your Drink! Enjoy Your Drink! Enjoy Your Drink! Enjoy Your Drink! Enjoy Your Drink! Enjoy Your Drink! Enjoy Your Drink! Enjoy Your Drink! Enjoy Your Drink! Drink setting Set Up on power...
- Page 28 Each drink composition defines the type and the parameters to set in the menu “Product setting”. 30 - Product setting page Selected Settable product parameters Press to scroll Press to Drink settings Enjoy Your Drink ! Enjoy Your Drink ! Enjoy Your Drink ! Enjoy Your Drink ! Enjoy Your Drink ! Enjoy Your Drink ! Enjoy Your Drink ! Enjoy Your Drink ! Enjoy Your Drink !
- Page 29 SETTABLE PARAMETERS: Comp. Unit of Element Other /Notes beverage measure Origin Grinder 1 Grinder 2 Grinder 3 Decaf Grinder 1 and 2 Delayed start time Tenths of a second Grinding time Tenths of a second Water dose pulses Empty coffee chamber Water adding pulses Pre-infusion time setting Tenths of a second...
- Page 30 Comp. Unit of Element Other /Notes beverage measure Origin Instant product mo- tor 1 Instant product mo- tor 2 Instant product mo- tor 3 Delayed start time Tenths of a second Water dispensing delayed Tenths of a second start Mixer motor time ON Tenths of a second Mixer motor delayed start 0 Tenths of a second...
-
Page 31: Tft Display Variations
TFT DISPLAY VARIATIONS 4.5.1 “All in One” hot water dispensing Setting the “Hot water outlet” function to “All in One”, hot water dispensing is pos- sible only when there are no doses (hot water dispensing on request). To dispense hot water using the drinks selection screen, keep the key pressed until the dose required is reached. -
Page 32: Cup Station
4.5.2 Cup station NOTE If the “Cup Station” option is enabled, every time delivery of a drink is selected, the system checks the closing state of the front door. NOTE The version with “Cup Station” features one only front door. Open the door with the key for emptying the drawer of used grounds. - Page 33 Once having closed the front door, the dispensing starts automatically. Preparing drink 11:25 19 Febbraio 2015 45° Chocolate NOTA During delivery, the door cannot be opened and will remain locked until the end of the process. Subsequently, the end of delivery page is visualized. The door can be opened and the beverage taken out.
-
Page 34: Yes" Option
4.5.3 “YES” option When the coffee grounds drawer is full, the machine will show: Error page 11:25 19 Febbraio 2015 131° ERROR Grounds number max ES Open the front door, that result a single unit. NOTE The machine will switch off automatically and will restart when the front door is closed. - Page 35 Remove the grounds drawer and empty out the coffee grounds. Refit the grounds drawer and close the front door again. The machine will restart, showing the “Power ON” screen. 45° 11:25 19 Febbraio 2015 Power On Error page 131° 11:25 19 Febbraio 2015 ERROR Grounds number max ES...
- Page 36 Power On Press to switch on the machine. The display will read: Error page 11:25 19 Febbraio 2015 131° ERROR Grounds number max ES Reset Funds Press to confirm emptying of the coffee grounds drawer and reset the grounds counter.
-
Page 37: Yes+?" Option
4.5.4 “YES+?” option Regardless of the coffee grounds drawer being full, when “Power ON” is pressed, the machine will ask if the drawers have been emptied. 45° 11:25 19 Febbraio 2015 11:25 19 Febbraio 2015 45° Power On Press to Power On switch on machine. - Page 38 Error page 131° 11:25 19 Febbraio 2015 ERROR Grounds number max ES Reset Funds Press to confirm emptying of the coffee grounds drawer and reset the grounds counter.
-
Page 39: Cup Height/Presence Sensor
4.5.5 Cup height/presence sensor NOTE If the “Height / presence cup” option is enables and the bever- age recipe has been set for the types of cup suited to the de- livery, each type the beverage delivery is selected, the system will check for the presence of a suitable cup on the cup sensor. - Page 40 NOTE When the user does not position the correct cup, the drink will not be dispensed. Once having positioned the correct cup, the machine will proceed with the drink dispensing. Preparing drink 11:25 19 Febbraio 2015 45° Chocolate After dispensing, the following page is shown. Enjoy Your Drink ! Enjoy Your Drink ! Enjoy Your Drink !
-
Page 41: Energy Save
4.5.6 Energy save NOTE Technical access level. NOTE When the energy saving option is enabled, it will be applied only with the machine on. The software will activate the energy saving mode according to five conditions: • User’s presence, if no user is detected. • Cup presence, if no cup is detected. -
Page 42: Light Dose View
4.5.7 Light dose view NOTE Technical access level. Press Machine Setup to access the maintenance management menu. Machine setup Enjoy Your Drink ! Enjoy Your Drink ! Enjoy Your Drink ! Enjoy Your Drink ! Enjoy Your Drink ! Enjoy Your Drink ! Enjoy Your Drink ! Enjoy Your Drink ! Enjoy Your Drink ! - Page 43 This menu allows to visualize: ● Total counter of the drinks dispensed ● Total counter of the drinks dispensed ● Total counter of the drinks dispensed in detail Total counter Detailed for beverag- Enjoy Your Drink ! Enjoy Your Drink ! Enjoy Your Drink ! Enjoy Your Drink ! Enjoy Your Drink !
-
Page 44: Manual Delivery Stop
4.5.8 Manual delivery stop NOTE If the “Stop Dispensing” function is enabled, the user has the possibility to stop delivery manually. Press “Stop Dispensing” to stop beverage delivery manually. Manual Preparing drink 45° 11:25 19 Febbraio 2015 delivery Stop Chocolate dispensing stop NOTE... -
Page 45: Rfid - Filter Replacement Caripure100
4.5.9 RFiD - Filter replacement CA- RIPURE100 NOTE Enjoy Your Drink ! Enjoy Your Drink ! Enjoy Your Drink ! 0.00EUR 11:25 11:25 11:25 11:25 11:25 11:25 11:25 11:25 11:25 11:25 11:25 19 Febbraio 2015 19 Febbraio 2015 19 Febbraio 2015 19 Febbraio 2015 19 Febbraio 2015 19 Febbraio 2015... -
Page 46: Mdb Payment System
4.5.10 MDB payment system NOTE If the MDB payment system is installed and enabled, it is nec- essary to insert the required money to delivery the beverage. WARNING Beverage management can be managed from software (tech- nica) and it is different according to the type of MDB installed. NOTE To set the price of each single beverage, it is necessary to access the selection option and then to select the price filed. - Page 47 Press to Press to increase the Drink setting value of the confirm the 11:25 19 Febbraio 2015 45° Price set value price. Press to decrease the value of the price. Press to Press to return to the select the previous price to set page NOTE If the price is set at zero, the drink will be dispensed free of...
- Page 48 NOTE At the time of inserting the money into the MDB module, the value of the credit available on the display will become larger for a few seconds. Press a beverage to be delivered in order to proceed. Press to return to the beverage Enjoy Your Drink !
-
Page 49: Technical Characteristics
5 TECHNICAL CHARACTERISTICS TECHNICAL DATA UNIT OF DESCRIPTION DATA MEASURE Coffee boiler capacity Litres With grounds compactor Pieces Coffee bean container capacity 0,6 (1,8) Kg (Litres) Capacity of raised coffee bean con- 1,2 (3,5) Kg (Litres) tainer (optional) Water mains pressure Max ~ 6 (0,6) bar (Mpa) (version with Water connection) -
Page 50: Overall Dimensions
6 RESIDUAL RISKS OVERALL DIMENSIONS The Manufacturer pre-sets all neces- sary measures to ensure operator’s safety when using the machine. Anyway, some inconveniences may occur in certain conditions and/or sit- uations. The causes may be: ● Operator not suitably trained and/ or experienced. -
Page 51: Handling And Storage
7 HANDLING AND STORAGE WARNING COFFEE MACHINES COFFEE MACHINES Made in Italy Made in Italy COFFEE MACHINES Made in Italy COFFEE MACHINES Made in Italy COFFEE MACHINES Made in Italy NOTE Handle the packaging by means of the apposite carrying handles. WARNING In case of prolonged storage at a temperature below 2°C, emp-... -
Page 52: Installation And Startup
8 INSTALLATION AND STARTUP PACKAGING CONTENTS Machine Shut-off Door key front containers Adapter for tank 37.05324 (if required) (if the water tank is C O F F present E E M A C H I N M a d e i n I t a User manual... -
Page 53: Positioning
NOTE NOTE machine with In case damages or raised containers anomalies of the sup- cannot be installed ply are noticed, con- on a surface under tact the Manufacturer a wall unit, due to within 7 days from the the increased dimen- purchase. -
Page 54: Installation
INSTALLATION WARNING 8.4.1 Power mains connection In case of prolonged storage at a tempera- ture below 2°C, empty DANGER the machine hydraulic system. Do not switch Do not carry out this the machine on be- operation with wet or fore having recondi- damp hands. -
Page 55: Water Mains Connection
Water mains connection WARNING connection water mains must be done by a skilled technician in compli- ance with applicable regulations. Use the certified CARIMALI Filter HOSE (95.01889). softener Liquid to be fitted discharge To prevent damag- by the es to the hydraulic customer... - Page 56 Predisposition hole < 4°C milk tube inlet If an additional unit is fitted, connect the Milker outlet to the unit. NOTE The fridge was designed and built to work along with the machine BLUE- DOT, in order to ensure a correct conservation of milk at a suitable temperature.
-
Page 57: Instructions For Use
9 INSTRUCTIONS FOR USE ● Fill the tank. GETTING STARTED 9.1.1 Water tank filling ● Open the lower door. NOTE Fill the tank up to the max. level. NOTE Always install the ap- posite filter CARIMA- (CariPure 100 Water Filter) into the ● Remove the water tank. tank. Once having inserted the adapter, always use the filter for the correct indica- tion of empty tank. NOTE For more details on the CARIPURE 100 filter installation pro- cess, see the rele-... -
Page 58: Product.filling
● Re-position the water tank. 9.1.2 Product filling ● Open the required product contain- er using the corresponding key. ● Close the lower door. NOTE Before pouring the product into the con- tainer, close the blue lock protection plug “A”. ● Pour the required product into the container, avoiding to pour it onto the machine. -
Page 59: Switching On
9.2 SWITCHING ON NOTE Before closing the container, open the blue lock protection plug “A”. After having carried out the installa- tion and the preliminary operations, ● Close the container using the proceed with machine switching on. lock. 1. Press the switching on key. NOTE Properly close the 2. When the machine is on, the fol- containers to prevent lowing screens appear. -
Page 60: Drink Dispensing
9.3 DRINK DISPENSING 45° 11:25 19 Febbraio 2015 C° Once the machine reaches the work- ing temperature, it is possible to pro- ceed with drink dispensing. BOILER For dispensing, press the key corre- sponding to required drink. Temperature gauge NOTE 4. After the boiler heating, if the ex- WATER SYSTEM changer is present, the machine FILLING: will heat it up. When installing for the first time or after emptying, carry out the boiler filling pro-... -
Page 61: Dispensing Circuit Washing
1. With the first installation or every 9.3.2 Dispensing circuit washing time the machine is emptied with the apposite procedure, press the WARNING “Boiler fill” key to fill the boiler. When using the ma- chine for the first time or when it is not used for a long period of time, carry out the 11:25 19 Febbraio 2015 45°... -
Page 62: Routine Maintenance
10 ROUTINE WARNING MAINTENANCE Do not pull the pow- er cord or the ma- chine itself to unplug DANGER the machine from the The intervention of electric power socket. routine maintenance and cleaning must be WARNING performed by the op- erator only after: Each operation re- ● having switched... - Page 63 TYPE OF OPERATION FREQUENCY PARAGRAPH OPERATION TFT display cleaning Manual Daily 10.1.1 External cleaning of Manual Daily 10.1.2 chrome-plated surfaces External cleaning of Manual Daily 10.1.3 machine surfaces Emptying and cleaning the Daily or before if Manual 10.1.4 liquid grounds container necessary Emptying and cleaning the When counting is...
-
Page 64: External Cleaning
For cleaning the inner components, 10.1.2 Cleaning of chrome-plated open the front door of the machine by surfaces using the keys supplied. WARNING cleaning chrome-plated surfac- 10.1 EXTERNAL CLEANING es, use a damp cloth, an antistatic cloth or 10.1.1 TFT cleaning similar. -
Page 65: Cleaning Of Solid/Liquid Grounds Container
10.1.4 Cleaning of solid/liquid 10.1.5 Cleaning of instant products/ grounds container coffee bean containers Carry out the following procedures for cleaning the containers of instant products and coffee beans: Grounds ● Open the upper front door. container Liquid con- tainer NOTE Wash with care to prevent the prolifera-... -
Page 66: Cleaning Of Functional Units
● Press the flap to close the side. 91 (view from the bottom up) ● Clean with hot water solution and sanitizing agents. ● Remove the coffee containers ● Rinse and dry thoroughly. from the machine. ● Insert the containers into the ma- chine. NOTE In case the containers required by the con- figuration are missing or are not inserted... - Page 67 If enables, the machine can require washing for a group/circuit. 45° 11:25 19 Febbraio 2015 Enjoy Your Drink ! Enjoy Your Drink ! Enjoy Your Drink ! Enjoy Your Drink ! Enjoy Your Drink ! Enjoy Your Drink ! Enjoy Your Drink ! Enjoy Your Drink ! Enjoy Your Drink ! Enjoy Your Drink !
-
Page 68: All In One Wash
● If there is a Milker circuit, insert the float in a container with water and Carimali sanitizer (06.00136). Follow the instructions on the sanitizer package for a proper di- lution. ● Put a container of approx. 2 l un- der the dispensing nozzle to col- lect the cleaning liquids. - Page 69 3. Close the door and the machine 2. Open the front door of the machine will turn on automatically. and insert a CARIMALI tablet (06.00133) into the Espresso and/ or Fresh Brew group, according to the machine configuration. Enjoy Your Drink !
- Page 70 Enjoy Your Drink ! Enjoy Your Drink ! Enjoy Your Drink ! Enjoy Your Drink ! Enjoy Your Drink ! Enjoy Your Drink ! Enjoy Your Drink ! Enjoy Your Drink ! Enjoy Your Drink ! Enjoy Your Drink ! Enjoy Your Drink ! Enjoy Your Drink ! Enjoy Your Drink !
- Page 71 ● Clean the milk pipe. ATTENTION Once the “All in One” washing cycle has been completed, re- Enjoy Your Drink ! Enjoy Your Drink ! Enjoy Your Drink ! Enjoy Your Drink ! Enjoy Your Drink ! Enjoy Your Drink ! Enjoy Your Drink ! Enjoy Your Drink ! Enjoy Your Drink !
-
Page 72: Semi-Automatic Cleaning Of The Espresso/ Fresh Brew Units
Group Cleaning mode, the following screen is dis- Milker Cleaning Mixer Cleaning played. Open the door and insert a CARIMALI tablet (6.00133) into the unit. ● Select “Semi-Automatic ES” to Enjoy Your Drink ! Enjoy Your Drink ! Enjoy Your Drink ! - Page 73 NOTE ATTENTION If the cleaning cycle In the machine ver- is stopped suddenly sion with tank (WT), before comple- check and fill the wa- tion, the unit returns ter tank up to the MAX to HOME screen and level if necessary. It is the machine carries absolutely necessary out an automatic rins- to ensure that there is...
-
Page 74: Light Cleaning Of The Espres- So/Fresh Brew Units
10.2.4 LIGHT cleaning of the Espres- ● Select “Light ES” to proceed with so/Fresh Brew units cleaning of the Espresso unit or “Light FB” to carry out the clean- NOTE ing of the Fresh Brew unit. This type of washing does not require the use of tablets or the need of opening the machine. -
Page 75: Manual Cleaning Of The Espres- So Unit
● From the cleaning menu, select NOTE “Group Cleaning”. The cleaning cycle lasts approximately 1 minute and uses 150 ml of water. Enjoy Your Drink ! Enjoy Your Drink ! Enjoy Your Drink ! Enjoy Your Drink ! Enjoy Your Drink ! Enjoy Your Drink ! Enjoy Your Drink ! Enjoy Your Drink ! - Page 76 ● Open the front door. ● Remove the unit towards the front side of the machine. ● Release the “A” fitting, pressing on the button, then slide out the ● Clean the Espresso unit with pipe “B”. lukewarm water. ● Slide out the waste pipe “A“ and press the lever “B“...
- Page 77 Required tools for cleaning: ● CARIMALI brush (9.501.806) ● Lukewarm water ATTENTION ● Insert the brush into the Espresso unit and remove any residue. Make sure the com-...
-
Page 78: Mixer Automatic Cleaning
10.2.6 Mixer automatic cleaning NOTE NOTE The machine carries This procedure can out the cleaning au- be carried out follow- tomatically. ing the instructions on the display. ● Await until the cleaning of the se- lected unit is completed. ATTENTION In the machine ver- sion with tank (WT), check and fill the wa-... - Page 79 Required tools for cleaning: ● Hot water ● Cleaning agent ● Immerse all components in a solu- tion of hot water and cleaning agent CARIMALI. ● Remove the mixer towards the front side of the machine.
-
Page 80: Cleaning Of Milker Circuit
● Immerse all components in a 10.2.8 Cleaning of Milker circuit solution of hot water and cleaning NOTE agent CARIMALI. This procedure can be carried out follow- ing the instructions on the display. NOTE Put a container of ap- prox.ly 2 l under the dis- pensing nozzle to col- lect the cleaning liquids. - Page 81 ● From the cleaning menu, select ● Await until the Milker cleaning is “Milker Cleaning”. completed. Enjoy Your Drink ! Enjoy Your Drink ! Enjoy Your Drink ! Enjoy Your Drink ! Enjoy Your Drink ! Enjoy Your Drink ! Enjoy Your Drink ! Enjoy Your Drink ! Enjoy Your Drink !
-
Page 82: Disassembly And Manual Cleaning Of Milker
Enjoy Your Drink! Enjoy Your Drink! Enjoy Your Drink! Enjoy Your Drink! Enjoy Your Drink! Enjoy Your Drink! Enjoy Your Drink! Enjoy Your Drink! Enjoy Your Drink! Enjoy Your Drink! 45° 45° 45° 45° 45° 45° 45° 45° 45° 45° 45°... - Page 83 For cleaning oper- ations, use the CA- RIMALI cleaning ● Remove the milk frother. agent (06.00136). Required tools for cleaning: ● Brush (CARIMALI 95.01806) NOTE ● Hot water Check the O-rings ● Cleaning agent and replace them, if necessary. NOTE...
- Page 84 ● Immerse all components in a ATTENTION solution of hot water and cleaning agent CARIMALI. Make sure the com- ponents are perfectly dry before installing them again on the machine, to prevent bacteria growth. ● Re-assemble the Milker. ● Brush the Milker dispensing noz- zle with the brush to remove the residues.
-
Page 85: Troubleshooting
11 TROUBLESHOOTING FAULT POSSIBLE SOLUTION USER POSSIBLE CAUSE Wrong connection to Check and repair the power mains. wiring. The machine does not turn on. Faulty door safety (TFT off) Check micro switch. micro switch. Contact the Service General electric failure. centre. -
Page 86: Definition Of Errors And Alarm Levels
11.1 DEFINITION OF ERRORS AND ALARM LEVELS SYMBOLS LEVEL DESCRIPTION High Machine failure Medium-high The problem can be solved and re- quires the switching off of the machine to restore the normal operation. Medium-low The problem can be solved and does not requires the switching off of the ma- chine. -
Page 87: Fresh Brew Group Errors
ERROR POSSIBLE CAUSE INTERVENTION USER N° Timeout upper slider waiting due to the delay in Check sensors. reaching the opening position. Timeout piston motor waiting due to the delay in Check encoder card. reaching the lower start position. 11.3 FRESH BREW GROUP ERRORS Error page 11:25 19 Febbraio 2015... -
Page 88: Steam Errors
ERROR POSSIBLE CAUSE INTERVENTION USER N° Open the upper front door. Check the Fresh Brew unit. The water waiting time has elapsed. Contact the Service centre, if neces- sary. 11.4 STEAM ERRORS Error page 131° 11:25 19 Febbraio 2015 ERROR STEAM ERROR - 1 POSSIBLE CAUSE INTERVENTION... - Page 89 MESSAGE POSSIBLE CAUSE INTERVENTION USER Insert the coffee beans in Missing coffee beans in con- MISSING COFFEE - 2 container 2. tainer 2. Re-start the machine. Insert the decaf coffee. MISSING COFFEE - 4 Missing instant coffee. The alarm resets automatical- ly after 15 seconds.
-
Page 90: Mdb Errors
MESSAGE POSSIBLE CAUSE INTERVENTION USER The PIN has been incorrectly Enter the correct PUK code for PUK ERROR entered 3 times the SIM. Insert the SIM card correctly in MISSING SIM CARD SIM card not found. its slot on the GSM module. 11.8 MDB ERRORS Error page 131°... -
Page 91: Medium-Low Level General Errors
MESSAGE POSSIBLE CAUSE INTERVENTION USER Switch the machine off. BOILER SENSOR ERROR Fault of boiler sensor. Contact the Technical Support. Switch the machine off. VOLUMETRIC SENSOR Fault of flowmeter. Contact the Technical Support. STEAM TEMPERATURE Fault of steam dispensing at Switch the machine off. - Page 92 MESSAGE POSSIBLE CAUSE INTERVENTION USER Fill up water container... 45° 11:25 19 Febbraio 2015 Open Close Minimum level of water in the Carry out the procedure shown tank on the display. 11:25 19 Febbraio 2015 45° Minimum level of water in the Await the water filling in the Air- tank Break.
-
Page 93: Disposal And Decommissioning
12 DISPOSAL The Customer is held to: ● Disassemble the machine parts. AND DECOMMISSIONING ● Separate them according to ma- terial type. This machine is compliant with the ● Deliver the material to the desig- Directive 2012/19/EU. nated collection facilities. WARNING WARNING When the machine is... - Page 94 Page intentionally left blank...
- Page 96 Carimali S.p.A. Via Industriale, 1 Chignolo d’Isola (BG) 24040 - ITALY +39 035 4949555 +39 035 905447 info@carimali.com carimali.com...
Need help?
Do you have a question about the BlueDot Series and is the answer not in the manual?
Questions and answers