Table of Contents
Advertisement
Quick Links
To our customers,
Old Company Name in Catalogs and Other Documents
st
On April 1
, 2010, NEC Electronics Corporation merged with Renesas Technology
Corporation, and Renesas Electronics Corporation took over all the business of both
companies. Therefore, although the old company name remains in this document, it is a valid
Renesas Electronics document. We appreciate your understanding.
Renesas Electronics website:
Issued by: Renesas Electronics Corporation (http://www.renesas.com)
Send any inquiries to http://www.renesas.com/inquiry.
http://www.renesas.com
st
April 1
, 2010
Renesas Electronics Corporation
Advertisement
Table of Contents

Related Manuals for Renesas SuperHTM Family SH72543R


Summary of Contents for Renesas SuperHTM Family SH72543R
- Page 1 On April 1 , 2010, NEC Electronics Corporation merged with Renesas Technology Corporation, and Renesas Electronics Corporation took over all the business of both companies. Therefore, although the old company name remains in this document, it is a valid Renesas Electronics document. We appreciate your understanding.
- Page 2 Renesas Electronics. Renesas Electronics shall not be in any way liable for any damages or losses incurred by you or third parties arising from the use of any Renesas Electronics product for an application categorized as “Specific”...
- Page 3 SH72546RFCC SH72544R SH72543R User-System Interface Converter Board R0E572546CBF10 Converter Board User’s Manual Renesas Microcomputer Development Environment System SuperH™ Family / SH72546RFCC, SH72544R, and SH72543R Rev.1.00 2008.11...
- Page 4 Rev. 1.00 Nov. 18, 2008 Page ii of iv REJ10J1937-0100...
- Page 5 Please be sure to implement safety measures to guard against the possibility of physical injury, and injury or damage caused by fire in the event of the failure of a Renesas product, such as safety design for hardware and software including but not limited to redundancy, fire control and malfunction prevention, appropriate treatment for aging degradation or any other applicable measures.
- Page 6 Rev. 1.00 Nov. 18, 2008 Page iv of iv REJ10J1937-0100...
-
Page 7: Important Information
Improvement Policy: Renesas Technology Corp. (including its subsidiaries, hereafter collectively referred to as Renesas) pursues a policy of continuing improvement in design, performance, and safety of the emulator product. Renesas reserves the right to change, wholly or partially, the specifications, design, user's manual, and other documentation at any time without notice. - Page 8 2. In no event shall Renesas Solutions Corporation be liable for any consequence arising from the use of this emulator.
-
Page 9: Limited Warranty
Renesas, upon inspection, shall determine to be defective in material and/or workmanship. The foregoing shall constitute the sole remedy for any breach of Renesas’ warranty. See the Renesas warranty booklet for details on the warranty period. This warranty extends only to you, the original Purchaser. - Page 10 3. This user's manual and emulator product are copyrighted and all rights are reserved by Renesas. No part of this user's manual, all or part, may be reproduced or duplicated in any form, in hard-copy or machine-readable form, by any means available without Renesas’ prior written consent.
- Page 11 • READ this user's manual before using this emulator product. • KEEP the user's manual handy for future reference. Do not attempt to use the emulator product until you fully understand its mechanism. DEFINITION OF SIGNAL WORDS Either in the user's manual or on the product, several icons are used to insure proper handling of this product and also to prevent injuries to you or other persons, or damage to your properties.
- Page 12 means WARNING or CAUTION. Example: CAUTION AGAINST AN ELECTRIC SHOCK means PROHIBITION. Example: DISASSEMBLY PROHIBITED means A FORCIBLE ACTION. Example: UNPLUG THE POWER CABLE FROM THE RECEPTACLE. Rev. 1.00 Nov. 18, 2008 Page VI of X REJ10J1937-0100...
- Page 13 Warnings for AC Power Supply: • If the attached AC power cable does not fit the receptacle, do not alter the AC power cable and do not plug it forcibly. Failure to comply may cause electric shock and/or fire. • Use an AC power cable which complies with the safety standard of the country.
- Page 14 • If you smell a strange odor, hear an unusual sound, or see smoke coming from this product, then disconnect power immediately by unplugging the AC power cable from the outlet. Do not use this as it is because of the danger of electric shock and/or fire.
- Page 15 Cautions for AC Adapter: • Use only the AC adapter included in this product package. • The included AC adapter is for this emulator. Do not use it for other product. • The DC plug on the included AC adapter has the below polarity.
- Page 16 Observe the precautions listed below. Failure to do so will result in a FIRE HAZARD and will damage the user system and the emulator product or will result in PERSONAL INJURY. The USER PROGRAM will be LOST. 1. Do not repair or remodel the emulator product by yourself for electric shock prevention and quality assurance.
-
Page 17: Preface
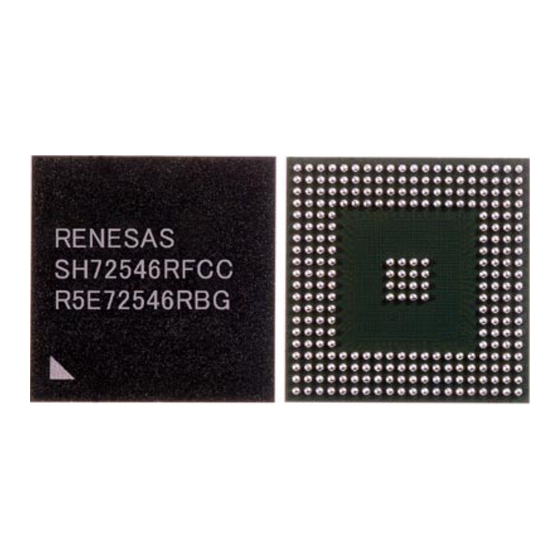
Preface The R0E572546CBF10 is a user-system interface converter board that connects a user system for the SH72546RFCC, SH72544R, and SH72543R PRBG0272FA-A package (former package: BP-272) to the SH72546RFCC, SH72544R, SH72543R, SH72531, and SH72531FCC E200F emulator (R0E0200F1EMU00 or R0E572546VKK00). -
Page 18: Table Of Contents
Preface ...1 Section 1 Configuration... 1 Section 2 Environmental Conditions... 3 Section 3 Connection Procedures ...5 Connecting User System Interface Cable to User System ... 5 3.1.1 Installing the IC Socket... 6 3.1.2 Assembling the User System Interface Cable... 6 3.1.3 Connecting Common User-System Interface Adaptor Cable (Board Unit) to EV-Chip Unit ... -
Page 19: Section 1 Configuration
Figure 1 and table 1 show the external appearance and components, respectively, of the user-system interface converter board. Please make sure you have all of these components when you unpack the product. IC socket Figure 1 External Appearance of the User-System Interface Converter Board Section 1 Configuration User system Section 1 Configuration... - Page 20 Section 1 Configuration 1. Use a BSSOCKET272Z2021RE21N socket (manufactured by Tokyo Eletech Corporation), and a CSPLUG/W272Z2021RE01 (manufactured by Tokyo Eletech Corporation) for the PRBG0272FA-A package IC socket, and IC socket plug, respectively, on the user system. 2. To connect the emulator with user-system interface converter board, the common user-system interface adaptor cable (R0E200F1CKL00) must be obtained separately.
-
Page 21: Section 2 Environmental Conditions
Section 2 Environmental Conditions Maintain the conditions in table 2 when using the emulator. Table 2 Environmental Conditions Item Temperature Humidity Vibration Ambient gases Specifications Operating: +10 to +35°C Storage: -10 to +35°C Operating: 35 to 80% RH, no condensation Storage: 35 to 80% RH, no condensation Operating: 2.45 m/s max. - Page 22 Section 2 Environmental Conditions Rev. 1.00 Nov. 18, 2008 Page 4 of 18 REJ10J1937-0100...
-
Page 23: Section 3 Connection Procedures
Section 3 Connection Procedures Section 3 Connection Procedures Connecting User System Interface Cable to User System WARNING Always switch OFF the user system and the emulator product before the USER SYSTEM INTERFACE CABLE is connected to or removed from any part. Before connecting, make sure that pin 1 on both sides are correctly aligned. -
Page 24: Installing The Ic Socket
Section 3 Connection Procedures 3.1.1 Installing the IC Socket Solder the IC socket (BSSOCKET272Z2021RE21N) to the user system. 1. Gently apply solder paste to the BGA pads of the user system. Be careful to keep the thickness of the solder within 100 to 150 μm. - Page 25 Connect the common user-system interface cable (cable unit) to CONNECTOR1 of the common user-system interface adaptor cable (board unit) as shown below. Then connect the common user system interface adaptor cable (cable unit) to CONNECTOR2. Connect the common user-system interface adaptor cable (cable unit) to CONNECTOR3. Connect the common user-system interface adaptor cable (board unit) with the user-system interface converter board via the common user-system interface cable (cable unit) by aligning the connector numbers on those boards.
- Page 26 Section 3 Connection Procedures Removing the common user-system interface adaptor cable (cable unit). When removing the common-user system interface adaptor cable (cable unit) from a converter board or a adaptor board, keep the board in place, hold both sides of the connector at the head of the cable, and apply vertical force to pull the cable away.
-
Page 27: Connecting Common User-System Interface Adaptor Cable (Board Unit) To
3.1.3 Connecting Common User-System Interface Adaptor Cable (Board Unit) to EV-Chip Unit Observe the precautions listed below. Failure to do so will result in a FIRE HAZARD and will damage the user system and the emulator product or will result in PERSONAL INJURY. - Page 28 Section 3 Connection Procedures Figure 4 Connecting Common User-System Interface Adaptor Cable (Board Unit) to Rev. 1.00 Nov. 18, 2008 Page 10 of 18 REJ10J1937-0100 Expansion AUD trace unit Ev-chip unit Connector number Ev-chip unit connector side connector number User I/F Connector 1 (CN3) User I/F Connector 2 (CN4)
-
Page 29: Installing To The Ic Socket
3.1.4 Installing to the IC Socket Check the location of pin 1 before insertion. Do not fail to insert the guide pin of the IC socket plug in the user system side. Use the provided IC socket plug to fasten the user-system interface converter board to the IC socket for a PRBG0272FA-A package on the user system. -
Page 30: Dimensions
Section 3 Connection Procedures Dimensions 3.2.1 Recommended Dimensions for User System Mount Pad (Footprint) Figure 6 shows the recommended dimensions for the mount pad (footprint) for the user system with an IC socket for a PRBG0272FA-A package (BSSOCKET272Z2021RE21N: manufactured by Tokyo Eletech Corporation). φ0.5 Figure 6 Recommended Dimensions for Mount Pad Rev. -
Page 31: External Dimensions
3.2.2 External Dimensions The external dimensions of the expansion AUD trace unit, emulation memory unit, EV-chip unit, common user-system interface adaptor cable (board unit), common user-system interface adaptor cable (cable unit), and user-system interface converter board are shown in figure 7. Expansion AUD trace unit User-system interface converter board Figure 7 External Dimensions of the Expansion AUD Trace Unit, Emulation Memory Unit,... -
Page 32: Dimensions Of User-System Interface Converter Board When Connected
Section 3 Connection Procedures 3.2.3 Dimensions of User-System Interface Converter Board when Connected Dimensions of the user-system interface converter board when it is connected to the user system are shown in figure 8. 5.95 Figure 8 Dimensions of the User-System Interface Converter Board When Connected to the Rev. -
Page 33: Verifying Operation
Verifying Operation 1. Turn on the emulator according to the procedures described in the SH-2A, SH-2 E200F Emulator User's Manual, Supplementary information on Using the SH72546RFCC, SH72544R, SH72543R, SH72531, and SH72531FCC (R0E0200F1EMU00E or R0E572546EMU00E). 2. The emulator connected to this user-system interface converter board supports two kinds of clock sources as the MPU clock. - Page 34 Section 3 Connection Procedures Rev. 1.00 Nov. 18, 2008 Page 16 of 18 REJ10J1937-0100...
-
Page 35: Section 4 Notice
1. Before connecting any parts or cables, make sure that pin 1 on the both sides are correctly aligned. 2. Do not apply excessive force to the user-system interface converter board while it is connected to the user system. 3. The dimensions of the recommended mount pad for the IC socket for this user-system interface converter board are different from those of the MPU. - Page 36 Section 4 Notice Rev. 1.00 Nov. 18, 2008 Page 18 of 18 REJ10J1937-0100...
- Page 37 User's Manual Publication Date: Rev.1.00, November 18, 2008 Published by: Sales Strategic Planning Div. Renesas Technology Corp. Edited by: Customer Support Department Global Strategic Communication Div. Renesas Solutions Corp. © 2008. Renesas Technology Corp. All rights reserved. Printed in Japan.
- Page 38 Nippon Bldg., 2-6-2, Ohte-machi, Chiyoda-ku, Tokyo 100-0004, Japan http://www.renesas.com RENESAS SALES OFFICES Refer to "http://www.renesas.com/en/network" for the latest and detailed information. Renesas Technology America, Inc. 450 Holger Way, San Jose, CA 95134-1368, U.S.A Tel: <1> (408) 382-7500, Fax: <1> (408) 382-7501 Renesas Technology Europe Limited Dukes Meadow, Millboard Road, Bourne End, Buckinghamshire, SL8 5FH, U.K.
- Page 40 SH72546RFCC SH72544R SH72543R User-System Interface Converter Board R0E572546CBF10 Converter Board User’s Manual 1753, Shimonumabe, Nakahara-ku, Kawasaki-shi, Kanagawa 211-8668 Japan REJ10J1937-0100...
Need help?
Do you have a question about the SuperHTM Family SH72543R and is the answer not in the manual?
Questions and answers