Table of Contents
Advertisement
Quick Links
Montage- und Bedienungsanleitung
Assembly and operating instructions
Notice de montage et d'emploi
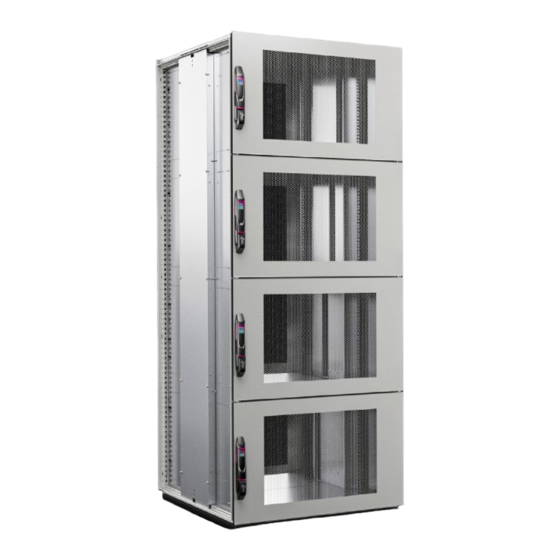
Compartment Rack VX IT
Compartment Rack VX IT
Baie de colocation
compartimentée VX IT
VX IT 5313.175
VX IT 5314.175
VX IT 5313.185
VX IT 5314.185
VX IT 5315.175
VX IT 5316.175
VX IT 5315.185
VX IT 5316.185
Advertisement
Table of Contents

Related Manuals for Rittal VX IT 5313.175


Summary of Contents for Rittal VX IT 5313.175
- Page 1 Compartment Rack VX IT Compartment Rack VX IT Baie de colocation compartimentée VX IT VX IT 5313.175 VX IT 5314.175 VX IT 5313.185 VX IT 5314.185 VX IT 5315.175 VX IT 5316.175 VX IT 5315.185 VX IT 5316.185 Montage- und Bedienungsanleitung Assembly and operating instructions Notice de montage et d’emploi...
- Page 2 Inhaltsverzeichnis Seite Seite Hinweise zur Dokumentation Transport Konformitätserklärungen und Installation 55 – 78 Approbationen Installation der Aufbewahrung der Unterlagen Kundenhardware 55 – 62 Verwendete Symbole Installation der Power- und Netzwerkverkabelung 63 – 64 Mitgeltende Unterlagen – Kabeleinführung im Dach Normative Verweise –...
-
Page 3: Table Of Contents
Contents Page Page Notes on documentation Transport Declarations of conformity Installation 55 – 78 and approvals Installing the Storing the documents customer hardware 55 – 62 Symbols used Installing the power and network cables 63 – 64 Other applicable documents –... - Page 4 Sommaire Page Page Remarques relatives Transport à la documentation Installation 55 – 78 Déclarations de conformité et Installation du homologations matériel du client 55 – 62 Conservation des documents Installation du câblage de Symboles utilisés puissance et de réseau 63 – 64 Autres documents applicables –...
- Page 5 Inhaltsverzeichnis Contents Sommaire 6 – 41, 55 – 62, 79 – 82 90° 65 – 69 70 – 72 75 – 77 Compartment Racks VX IT / Compartment Racks VX IT / Baies de colocation compartimentées VX IT...
-
Page 6: Notes On Documentation
Rittal zur Verfügung. the Rittal website. téléchargement sur le site internet de Rittal. 1.2 Aufbewahrung der Unterlagen 1.2 Storing the documents 1.2 Conservation des documents... - Page 7 2. Sicherheitshinweise 2.1 Bestimmungsgemäße Verwendung ◾ Achtung bei Verwendung von Teleskopschienen: Das VX IT Das VX IT Compartment Rack ist ein hochwertiges Gehäuse für die Compartment Rack muss am Boden befestigt oder an andere VX IT Unterbringung von 19˝-Hardware nach der Industrienorm EIA-310, angereiht sein, bevor Geräte auf Teleskopschienen herausgezogen hierzu gehören Server unterschiedlicher Art, Datenspeicher, Netzwerk- werden.
-
Page 8: Safety Instructions
2. Safety instructions 2.1 Intended use ◾ Caution when using telescopic slides: The VX IT Compartment The VX IT Compartment Rack is a high-quality enclosure for accommo- Rack must be secured to the fl oor or bayed to other VX IT before dating 482.6 mm (19˝) hardware to industry standard EIA-310, which using the telescopic slides to extend equipment. - Page 9 2. Consignes de sécurité 2.1 Utilisation correcte ◾ Attention lors de l’utilisation de rails télescopiques : La baie de La baie de colocation compartimentée VX IT est un habillage de haute colocation compartimentée VX IT doit être fi xée au sol ou être qualité...
- Page 10 2. Veiligheidsvoorschriften 2.1 Voorgeschreven gebruik ◾ Aandachtspunt bij het gebruik van telescooprails: het VX IT Het VX IT compartimenten rack is een hoogwaardig rack voor het compartimenten rack moet verankerd zijn aan de vloer of gekoppeld onderbrengen van 19˝-hardware volgens de industrienorm EIA-310. aan een ander VX IT rack voordat er apparaten op telescooprails naar Hiertoe behoren verschillende typen servers, apparaten voor gegeven- buiten worden getrokken.
- Page 11 2. Säkerhetsinstruktioner 2.1 Korrekt användning ◾ Observera vid användning av teleskopskenor: VX IT Compart- VX IT Compartment-rack är en högkvalitativ låda som ger plats för ment-rack måste förankras i golvet eller byggas ihop med andra VX IT 19˝-utrustning motsvarande industrinorm EIA-310. Till sådan utrustning innan aggregat dras ut på...
- Page 12 2. Istruzioni di sicurezza ◾ Attenzione quando si utilizzano le guide telescopiche: 2.1 Impiego conforme alle norme il Rack Compartimentato VX IT deve essere fi ssato al pavimento o Il Rack Compartimentato VX IT è un armadio versatile per montato in batteria con altri VX IT prima di estrarre gli apparecchi l’alloggiamento di componenti hardware da 19˝...
- Page 13 2. Instrucciones de seguridad ◾ Atención al utilizar guías telescópicas: antes de extraer las guías 2.1 Uso correcto telescópicas con el aparellaje, debe fi jarse el Compartment Rack VX IT El Compartment Rack VX IT es un rack de gran calidad destinado al al suelo o ensamblarse a otros VX IT.
- Page 14 2. Turvallisuusohjeet ◾ Huomautus käytettäessä teleskooppikiskoja: VX IT Compartment 2.1 Tarkoitettu käyttö Rack on kiinnitettävä lattiaan tai VX IT -kaappien riviin, ennen kuin VX IT Compartment Rack on korkealaatuinen 19˝ laitteille tarkoitettu, laitteet vedetään ulos teleskooppikiskoilla. teollisuusstandardi EIA 310:n mukainen kaappi mikä sisältää erilaisia Vedettynä...
- Page 15 2. Sikkerhedsanvisninger ◾ Vær forsigtig ved anvendelsen af teleskopskinner: VX IT 2.1 Forskriftsmæssig anvendelse Colocation Rack skal fastgøres i gulvet eller bygges sammen med VX IT Colocation Rack er et kvalitetskabinet til 19˝-hardware i henhold til andre VX IT, før enheder på teleskopskinner trækkes ud. industristandarden EIA-310, hvortil hører servere af forskellig art, Der må...
- Page 16 2. Wskazówki dotyczące bezpieczeństwa ◾ Uwaga w przypadku stosowania szyn teleskopowych: Szafa z 2.1 Używaj zgodnie z przeznaczeniem przestrzenią funkcyjną VX IT musi zostać przymocowana do podłoża Szafa z przestrzenią funkcyjną VX IT jest wysokiej jakości obudową lub połączona w szereg z inną VX IT, przed wysuwaniem urządzeń na przeznaczoną...
- Page 17 2. Bezpečnostní pokyny ◾ Pozor při použití teleskopických lišt: Dělená skříň VX IT musí být 2.1 Použití v souladu s určením upevněna k podlaze nebo řadově spojena s další skříní VX IT, než Dělená skříň VX IT je velmi kvalitní skříň pro instalaci 19˝ hardwaru podle přístroje vysunete na teleskopických lištách.
- Page 18 2. Инструкции за безопасност ◾ Внимание при използване на телескопичните шини: VX IT 2.1 Употреба по предназначение Колокационен рак трябва да бъдат монтирани към пода или VX IT Колокационен рак представлява висококачествен шкаф за поставени на друг VX IT, преди оборудването да бъде изтеглено поместване...
- Page 19 2. Меры безопасности ◾ Внимание при использовании телескопических 2.1 Использование согласно назначению направляющих: VX IT Compartment Rack долен быть закреплен VX IT Compartment Rack является высококачественным корпусом на полу или соединен в линейку с другими VX IT, до выдвижения для размещения 19˝ оборудования согласно промышленному устройств...
- Page 20 2. Υποδείξεις ασφαλείας ◾ Προσοχή κατά τη χρήση τηλεσκοπικών ραγών: Το VX IT 2.1 Προβλεπόμενη χρήση Compartment Rack πρέπει να στερεωθεί στο δάπεδο ή να είναι Το VX IT Compartment Rack είναι ένα υψηλής ποιότητας περίβλημα για συνδεδεμένο σε σειρά με ένα άλλο VX IT, προτού ανοίξετε συσκευές την...
- Page 21 2. Instrucțiuni de siguranță ◾ Atenție în cazul utilizării șinelor telescopice: VX IT Compartment 2.1 Domeniul de utilizare Rack trebuie să fi e fi xat la nivelul podelei sau montat în serie cu alte VX IT Compartment Rack este o carcasă de calitate superioară pentru produse VX IT înainte ca aparatele să...
- Page 22 2. Sigurnosne upute ◾ Pažnja prilikom upotrebe teleskopskih sabirnica: VX IT Compart- 2.1 Predviđena uporaba ment Rack potrebno je pričvrstiti za tlo ili mora biti poravnat s drugim VX IT Compartment Rack kućište je visoke kvalitete za smještaj opreme kućištima VX IT u nizu prije nego što se uređaji izvuku na teleskopske od 19˝...
- Page 23 2. Biztonsági utasítások ◾ Figyelem a teleszkópos sínek használatakor: A VX kollokációs 2.1 Rendeltetésszerű használat racket a padlóhoz kell rögzíteni, vagy másik VX IT-hoz kell sorolni, A VX IT kollokációs rack az EIA-310 ipari szabvány szerinti, 19˝-os mielőtt a teleszkópos sínekre szerelt berendezéseket kihúzza. hardver elhelyezésére szolgáló...
- Page 24 2. Saugos nurodymai ◾ Atkreipkite dėmesį naudodami teleskopinius bėgius: Sekcijinė 2.1 Naudojimas pagal paskirtį spinta VX IT turi būti pritvirtinta prie grindų arba pritvirtinta prie kitos Sekcijinė spinta VX IT yra aukštos kokybės korpusas, skirtas 19 colių VX IT, prieš ištraukiant prietaisus ant teleskopinių bėgių. įrangai pagal pramonės standartą...
- Page 25 2. Ohutusjuhised ◾ Tähelepanu teleskoopsiinide kasutamisel! Kapp VX IT Compart- 2.1 Sihtotstarbeline kasutus ment Rack tuleb kinnitada põranda külge või teise VX IT külge, enne Kapp VX IT Compartment Rack on kvaliteetne korpus 19˝ riistvara kui seadmed teleskoopsiinidel välja tõmmatakse. paigaldamiseks vastavalt tööstusstandardile EIA-310, see hõlmab Väljatõmmatud asendis võib olla korraga ainult üks seade.
- Page 26 2. Drošības norādījumi ◾ Uzmanību, lietojot teleskopiskās sliedes: VX IT statīvu ar 2.1. Paredzētais lietošanas veids nodalījumiem ir jāpiestiprina pie grīdas vai tam ir jābūt pievienotam pie VX IT statīvs ar nodalījumiem ir augstas kvalitātes korpuss 19˝ aparatūras pārējiem VX IT, pirms ierīces tiek izvilktas uz teleskopiskajām izvietošanai saskaņā...
- Page 27 2. Varnostni napotki ◾ Pozor pri uporabi teleskopskih vodil: Preden izvlečete posamezno 2.1 Predvidena uporaba napravo na teleskopskem vodilu, mora biti strežniška Rack omara Strežniška Rack omara VX IT je visokokakovostno ohišje za shranjevanje VX IT pritrjena na tla ali zaporedno priklopljena na drugo ohišje VX IT. strojne opreme velikosti 19˝...
- Page 28 2. Bezpečnostné pokyny ◾ Pozor pri používaní teleskopických líšt: Skriňa VX IT Kolokačný 2.1 Používanie v súlade s účelom Rack musí byť upevnená na podlahe alebo pričlenená k iným skriniam Skriňa VX IT Kolokačný Rack je vysoko kvalitná rozvádzačová skriňa pre VX IT, skôr ako vytiahnete zariadenia na teleskopických koľajniciach. umiestnenie 19˝-hardvérov podľa priemyselného štandardu EIA-310, Len jedno zariadenie sa môže nachádzať...
- Page 29 2. Instruções de segurança ◾ Atenção ao usar trilhos telescópicos: o Rack VX IT Compartimen- 2.1 Utilização tado deve ser fi xado no piso ou montado em módulo com outros O Rack VX IT Compartimentado é um rack de alta qualidade, projetado racks VX IT antes de puxar equipamentos para fora instalados sobre para a instalação de hardware de 19˝...
-
Page 30: Safety Instructions
2. Sicherheitshinweise 2. Veiligheidsvoorschriften 2. Safety instructions 2. Säkerhetsinstruktioner 2. Consignes de sécurité 2. Istruzioni di sicurezza Gefahr! Achtung! Danger! Caution! Danger ! Attention ! Gevaar! Waarschuwing! Fara! Varning! Pericolo! Attenzione! Warnung vor der Waarschuwing voor Prestare attenzione Warning against Danger dû... - Page 31 2. Sicherheitshinweise 2. Veiligheidsvoorschriften 2. Safety instructions 2. Säkerhetsinstruktioner 2. Consignes de sécurité 2. Istruzioni di sicurezza Aufsteigen auf eine Climbing on surfaces is Il est interdit de marcher Het is verboden het Förbjudet att stå på Divieto di salire sulla Fläche ist verboten prohibited sur toute surface...
- Page 32 2. Instrucciones de 2. Sikkerhedsanvisninger 2. Bezpečnostní pokyny seguridad 2. Wskazówki dotyczące 2. Инструкции за безопасност 2. Turvallisuusohjeet bezpieczeństwa Niebezpieczeństwo! ¡Peligro! ¡Atención! Vaara! Varoitus! Fare! Pas på! Pozor! Nebezpečí! Опасност! Внимание! Uwaga! Atención, movimiento Предупреждение Advarsel mod lukke- de cierre de compo- Varoitus koneen/laitteen Uwaga na zamykające за...
- Page 33 2. Instrucciones de 2. Sikkerhedsanvisninger 2. Bezpečnostní pokyny seguridad 2. Wskazówki dotyczące 2. Инструкции за безопасност 2. Turvallisuusohjeet bezpieczeństwa Det er forbudt at Качването върху Prohibido subirse a una Päälle astuminen Zakaz wchodzenia na klatre på maskinens Nešlapat na povrh повърхностите...
- Page 34 2. Меры безопасности 2. Sigurnosne upute 2. Υποδείξεις ασφαλείας 2. Biztonsági utasítások 2. Instrucțiuni de siguranță 2. Saugos nurodymai Опасно! Внимание! Κίνδυνος! Προσοχή! Pericol! Atentie! Opasnost! Oprez! Vigyázat! Veszély! Pavojus! Atsargiai! Προειδοποίηση Предупреждение Avertizare cu privire la πριν από την κίνηση Upozorenje na opas- Gép/berendezés Įspėjimas dėl mašinos /...
- Page 35 2. Меры безопасности 2. Sigurnosne upute 2. Υποδείξεις ασφαλείας 2. Biztonsági utasítások 2. Instrucțiuni de siguranță 2. Saugos nurodymai Становиться Απαγορεύεται η Urcarea pe o suprafață Zabranjeno je penjanje Draudžiama lipti ant на поверхность ανάβαση σε μία A felületre lépni tilos este interzisă...
- Page 36 2. Ohutusjuhised 2. Bezpečnostné pokyny 2. Drošības norādījumi 2. Instruções de segurança 2. Varnostni napotki Nebezpečenstvo! Ettevaatust! Oht! Briesmas! Uzmanību! Nevarnost! Pozor! Perigo! Cuidado! Výstraha! Hoiatus masina/ Brīdinājums par Dávajte pozor na Cuidado quando as Opozorilo pred seadme mehhaaniliste bīstamību aizverot zatvárací...
- Page 37 2. Ohutusjuhised 2. Bezpečnostné pokyny 2. Drošības norādījumi 2. Instruções de segurança 2. Varnostni napotki Pinna peale astumine Aizliegts kāpt uz Vzpenjanje na površino Je zakázané vystupovať É proibido subir para a on keelatud virsmas je prepovedano na plošinu superfície Ärge paigaldage kui Neuzstādiet bērnu Ne postavljajte v bližini...
-
Page 38: Product Description
◾ 1 front door per compartment, ◾ 1 porte avant par compartiment, mit Rittal Schließung Nr. 3524 E, vorbereitet with Rittal lock no. 3524 E, prepared for the avec serrure Rittal N° 3524 E, prévue pour für den Einsatz eines Profi lhalbzylinders use of a profi... -
Page 39: Labelling
ID de confi guration #51| Seriennummer #51| Serial number #51| Numéro de série Beispiel: Example: Exemple : http://rittal.com/DE/?5313175 http://rittal.com/EN/?5313175 http://rittal.com/FR/?5313175 #01|000000000000#04|5313175#09|600#10| #01|000000000000#04|5313175#09|600#10| #01|000000000000#04|5313175#09|600#10| 2200#11|1000#51|E-20P-0000001 2200#11|1000#51|E-20P-0000001 2200#11|1000#51|E-20P-0000001 Compartment Racks VX IT / Compartment Racks VX IT / Baies de colocation compartimentées VX IT... -
Page 40: Scope Of Delivery
3. Produktbeschreibung 3. Product description 3. Description du produit 3.3 Lieferumfang 3.3 Scope of supply 3.3 Composition de la livraison Best.-Nr. VX IT 1000 1200 1000 1200 Model No. VX IT Référence VX IT 5313.175 5315.175 5314.175 5316.175 5313.185 5315.185 5314.185 5316.185 Compartment Racks VX IT / Compartment Racks VX IT / Baies de colocation compartimentées VX IT... -
Page 41: Assembly And Siting
4. Montage und Aufstellung 4. Assembly and siting 4. Montage et implantation 4.1 Anforderungen an den Aufstellort 4.1 Site requirements 4.1 Exigences concernant le lieu Achtung: Das VX IT Compartment Rack ist nur Caution: The VX IT Compartment Rack is only d’implantation für die Anwendung im Innenbereich bestimmt. -
Page 42: Assembly Procedure
4. Montage und Aufstellung 4. Assembly and siting 4. Montage et implantation 4.3.1 Verpackungsbänder lösen, auspacken 4.3.1 Releasing the packing bands and unpacking 4.3.1 Ôter les liens d’emballage, déballer 4. Montage und Aufstellung 4. Assembly and siting 4. Montage et implantation 4.3.2 Anleitung lesen 4.3.2 Reading the instructions 4.3.2 Lire la notice... -
Page 43: Removing The Enclosure Panels
TX25 3 mm 4. Montage und Aufstellung 4. Assembly and siting 4. Montage et implantation 4.3.3 Flachteile entfernen 4.3.3 Removing the enclosure panels 4.3.3 Démonter les pièces plates Front-/Rücktüren demontieren Dismantling the front/rear doors Démonter les portes avant / arrière TX25 3 –... -
Page 44: Dismantling The Side Panels
TX30 4. Montage und Aufstellung 4. Assembly and siting 4. Montage et implantation 4.3.3 Flachteile entfernen 4.3.3 Removing the enclosure panels 4.3.3 Démonter les pièces plates Seitenwände demontieren (falls vorhanden) Dismantling the side panels (if applicable) Démonter les panneaux latéraux (si présents) Mögliche verbaute Seitenwände / Supported side panels / Panneaux latéraux possibles Seitenwand,... -
Page 45: Removing Any Accessories Supplied Loose
4. Montage und Aufstellung 4. Assembly and siting 4. Montage et implantation 4.3.4 Ggf. lose beiliegendes Zubehör entfernen 4.3.4 Removing any accessories supplied loose 4.3.4 Ôter les accessoires éventuellement joints TX30 4. Montage und Aufstellung 4. Assembly and siting 4. Montage et implantation 4.3.5 Bodenabdeckung demontieren 4.3.5 Dismantling the base cover 4.3.5 Démonter la plaque de fond... -
Page 46: Lifting The Rack Off Of The Pallet
4. Montage und Aufstellung 4. Assembly and siting 4. Montage et implantation 4.3.6 Rack von der Palette heben 4.3.6 Lifting the rack off of the pallet 4.3.6 Lever la baie de la palette Compartment Racks VX IT / Compartment Racks VX IT / Baies de colocation compartimentées VX IT... -
Page 47: Removing The Cardboard From The Bottom
4. Montage und Aufstellung 4. Assembly and siting 4. Montage et implantation 4.3.7 Entfernen des Bodenkartons 4.3.7 Removing the cardboard from the bottom 4.3.7 Ôter le carton inférieur 4. Montage und Aufstellung 4. Assembly and siting 4. Montage et implantation 4.3.7 Optionale Montage des Sockels Option 4.3.7 Optional installation of the base/plinth... -
Page 48: Installing Castors Or Levelling Feet
4. Montage et implantation 4.3.7 Montage von Rollen oder Nivellierfüßen Option 4.3.7 Installing castors or levelling feet 4.3.7 Montage des roulettes ou des pieds de nivellement Nur Original-Zubehör von Rittal verwenden Use only original Rittal accessories Utiliser uniquement des accessoires d’origine de Rittal... -
Page 49: Moving The Rack To The Installation Site
4. Montage und Aufstellung 4. Assembly and siting 4. Montage et implantation 4.3.8 Rack an den Aufstellort bewegen 4.3.8 Moving the rack to the installation site 4.3.8 Déplacer la baie sur le lieu d’implantation ◾ Um das VX IT Compartment Rack sicher bewegen zu können, werden mindestens zwei unterwiesene Personen oder Fachkräfte benötigt. -
Page 50: Preparing For Installation
TX30 4. Montage und Aufstellung 4. Assembly and siting 90° 4. Montage et implantation 4.3.9 Aufstellung vorbereiten 4.3.9 Preparing for installation 4.3.9 Préparer la mise en place Die Nivellierfüße müssen gleichmäßig in der Höhe ver- stellt werden. Während des Positionierens sind max. 5 mm Höhenunterschied zulässig. -
Page 51: Depth Adjustment Of The 482.6 Mm (19˝) Level
TX30 4. Montage und Aufstellung 4. Assembly and siting 4. Montage et implantation 4.3.9 Aufstellung vorbereiten 4.3.9 Preparing for installation 4.3.9 Préparer la mise en place Tiefenverstellung der 19˝-Ebene Depth adjustment of the 482.6 mm (19˝) level Réglage en profondeur du plan 19˝ 2 Compartments 2 compartments 2 compartiments... -
Page 52: Baying The Rack (Optional)
Baying connector for baying VX IT racks on site with a baying gap of Bestimmungsgemäße Verwendung 3 mm, suitable for the use of one-piece partitions from the Rittal range Baying connector for baying VX IT racks on site with a Intended use... -
Page 53: Securing The Rack To The Fl Oor
TX30 4. Montage und Aufstellung 4. Assembly and siting 4. Montage et implantation 4.3.11 Rack am Boden befestigen 4.3.11 Securing the rack to the fl oor 4.3.11 Fixer la baie au sol = 5 Nm Alternative ◾ Wählen Sie die Verschraubungslösung zum bauseitigen Boden nach den jeweiligen Erfordernissen am Aufstellungs- ort und der Endanwendung des VX IT Compartment Racks F = min. -
Page 54: Transport
5. Transport 5. Transport 5. Transport Das VX IT Compartment Rack muss beim The VX IT Compartment Rack must be secu- La baie de colocation compartimentée VX IT Transport gegen Umkippen gesichert und red to prevent it tipping over during transpor- doit être bloquée pour éviter tout basculement darf nur im Leerzustand versendet werden. -
Page 55: Installation
6. Installation 6. Installation 6. Installation 6.1 Installation der Kundenhardware 6.1 Installing the customer hardware 6.1 Installation du matériel du client Bevor das VX IT Compartment Rack mit Before populating the VX IT Compartment La baie de colocation compartimentée VX IT Equipment bestückt wird, muss es am Boden Rack with equipment, it must fi... - Page 56 6. Installatie 6. Installation 6. Installazione 6.1 Installatie van hardware van de klant 6.1 Installation av kundens utrustning 6.1. Installazione dell’hardware del cliente Voordat er apparaten in het VX IT comparti- Innan VX IT Compartment-rack förses med Il Rack Compartimentato VX IT deve essere menten rack worden gemonteerd, moet het utrustning måste den förankras i golvet.
- Page 57 6. Instalación 6. Asennus 6. Installation 6.1 Instalación del hardware del cliente 6.1 Asiakaslaitteiston asennus 6.1 Installation af kundens hardware Antes de instalar los componentes en el Ennen kuin VX IT Compartment Rack varus- Før VX IT Colocation Rack bestykkes med Compartment Rack VX IT debe fi...
- Page 58 6. Instalacja 6. Instalace 6. Инсталация 6.1 Instalacja sprzętu klienta 6.1 Instalace hardwaru od zákazníka 6.1 Инсталация на клиентския хардуер Przed zainstalowaniem sprzętu, szafa z Než osadíte dělenou skříň VX IT vyba- Преди VX IT Колокационен рак да бъде przestrzenią funkcyjną VX IT musi zostać vením, musíte ji připevnit k podlaze.
- Page 59 6. Установка 6. Εγκατάσταση 6. Instalare 6.1 Установка оборудования клиента 6.1 Εγκατάσταση υλικού του πελάτη 6.1 Instalarea echipamentului hardware Перед комплектацией VX IT Compartment Πριν από την τοποθέτηση εξοπλισμού στο al clientului Rack оборудованием шкаф необходимо VX IT Compartment Rack, αυτό θα πρέπει να Înainte de montarea echipamentului, produsul закрепить...
- Page 60 6. Ugradnja 6. Telepítés 6. Montavimas 6.1 Ugradnja korisničke opreme 6.1 Az ügyfél hardverének telepítése 6.1 Kliento įrangos montavimas Prije nego što postavite opremu na VX IT Mielőtt a VX IT kollokációs rack a berendezé- Prieš montuojant įrangą į sekcijinė spinta Compartment Rack, pričvrstite ga za tlo.
- Page 61 6. Paigaldus 6. Uzstādīšana 6. Namestitev 6.1 Kliendi riistvara paigaldus 6.1. Klienta aparatūras uzstādīšana 6.1 Namestitev strojne opreme stranke Enne kui VX IT Compartment Rack varus- Pirms VX IT statīvs ar nodalījumiem Preden opremite strežniško Rack omaro VX IT tatakse seadmetega, tuleb see kinnitada tiek aprīkots ar aprīkojumu, tam jābūt z opremo, jo morate pritrditi na tla.
- Page 62 6. Inštalácia 6. Instalação 6.1 Inštalácia hardvéru zákazníka 6.1 Instalação do hardware do cliente Predtým, ako je skrine VX IT Kolokačný Rack Antes de instalar equipamentos no Rack osadená technickým vybavením, musí byť VX IT Compartimentado, fi xar o rack no piso pripevnené...
-
Page 63: Installing The Power And Network Cables
TX30 6. Installation 6. Installation 10 KG max. 6. Installation 6.2 Installation der Power- und Netzwerkverkabelung 6.2 Installing the power and network cables 6.2 Installation du câblage de puissance et de réseau 10 KG max. Kabeleinführung im Dach Cable entry in the roof Introduction des câbles par le toit Option Option... -
Page 64: Cable Entry In The Base
TX30 6. Installation 6. Installation 6. Installation 6.2 Installation der Power- und Netzwerkverkabelung Option Option 6.2 Installing the power and network cables 6.2 Installation du câblage de puissance et de réseau Kabeleinführung im Boden Cable entry in the base Introduction des câbles par la base Nur/Only/Seulement Nur/Only/Seulement W = 600 mm... -
Page 65: Other Accessories
6. Installation 6. Installation 6. Installation 6.3 Weiteres Zubehör 6.3 Other accessories 6.3 Autres accessoires Systemträger zur Kabelführung über Dach System support for cable routing 19˝-Kabeldurchführungs-Panel Klettbandhalter Blindpanel, 482,6 mm (19˝) via the roof 482.6 mm (19˝) cable entry panel Nylon tape holder Blanking panel, 482.6 mm (19˝) Support pour le guidage... -
Page 66: Vx Cmc Iii Access Sensor
TX30 6. Installation 6. Installation 6. Installation 6.3 Weiteres Zubehör 6.3 Other accessories 5 x 12 6.3 Autres accessoires CMC III Zugangssensor VX (7030.128) VX CMC III access sensor (7030.128) Détecteur d’accès CMC III VX (7030.128) = 2 Nm Compartment Racks VX IT / Compartment Racks VX IT / Baies de colocation compartimentées VX IT... -
Page 67: Cmc Iii Infrared Access Sensor
TX30 6. Installation 6. Installation 6. Installation 6.3 Weiteres Zubehör 6.3 Other accessories 6.3 Autres accessoires CMC III Infrarot-Zugangssensor (7030.120) CMC III infrared access sensor (7030.120) Détecteur d’accès infrarouge CMC III (7030.120) 5 x 12 = 2 Nm Compartment Racks VX IT / Compartment Racks VX IT / Baies de colocation compartimentées VX IT... -
Page 68: Pdu Basic - Power Distribution
6. Installation 6. Installation 6. Installation 6.3 Weiteres Zubehör 6.3 Other accessories 6.3 Autres accessoires PDU basic – Stromverteilung (z. B. 7979.110 oder 7979.112) PDU basic – Power distribution (e.g. 7979.110 or 7979.112) PDU basic – Bandeau de distribution (p. ex. 7979.110 ou 7979.112) Nur für Racks mit 2 Compartments. - Page 69 TX20 ø 4,5 6. Installation 6. Installation 6. Installation 6.3 Weiteres Zubehör Rechtsanschlag/Hinge on right/ Linksanschlag/Hinge on left/ 6.3 Other accessories Porte avec charnières à droite Porte avec charnières à gauche 6.3 Autres accessoires CMC Online-Komfortgriff und Komfortgriff mit Zahlencode CMC online comfort handle and comfort handle with code Poignée confort Online CMC et poignée confort à...
-
Page 70: Protective Earthing
EN 50310), verwenden Sie das Potenzialaus- potential equalisation kit for VX IT (5302.027) compartimentée VX IT pour l’application fi nale gleich-Set für VX IT (5302.027) aus dem Rittal from the Rittal accessories. (p. ex. une mise à la masse fonctionnelle selon Zubehör programm. -
Page 71: Overview Of Connection Points For Protective Earthing
SW13 TX30 6. Installation 6. Installation 6. Installation 6.4.2 Übersicht der Anbindungspunkte für eine Schutzerdung 6.4.2 Overview of connection points for protective earthing 6.4.2 Vue d’ensemble des points de raccordement pour la protection par mise à la masse 5 x 12 = 5 + 1 Nm = 8 + 1 Nm = 5 + 1 Nm... -
Page 72: Accessories For Provision Of Protective Earthing
6. Installation 6. Installation 6. Installation 6.4.3 Zubehör zur Durchführung einer Schutzerdung 6.4.3 Accessories for provision of protective earthing 6.4.3 Accessoires pour la réalisation d’une protection par mise à la masse Potenzialausgleich-Set für VX IT (DK 5302.027) Potential equalisation kit for VX IT (DK 5302.027) Kit d’équipotentialité... -
Page 73: Fitting The Base Cover
TX30 6. Installation 6. Installation 6. Installation 6.5 Bodenabdeckung montieren 6.5 Fitting the base cover 6.5 Monter la plaque de fond Compartment Racks VX IT / Compartment Racks VX IT / Baies de colocation compartimentées VX IT... -
Page 74: Re-Installing The Removed Enclosure Panels
6. Installation 6. Installation 6. Installation 6.6 Entfernte Flachteile wieder montieren 6.6 Re-installing the removed enclosure panels 6.6 Remonter à nouveau les pièces plates démontées Front-/Rücktüren montieren Fitting the front/rear doors Monter les portes avant / arrière Compartment Racks VX IT / Compartment Racks VX IT / Baies de colocation compartimentées VX IT... - Page 75 TX25/30 3 mm 6. Installation 6. Installation 6. Installation 6.6 Entfernte Flachteile wieder montieren 6.6 Re-installing the removed enclosure panels 6.6 Remonter à nouveau les pièces plates démontées Front-/Rücktüren montieren – Türanschlag links (Türanschlagwechsel) Fitting the front/rear doors – l/h door hinge (swapping hinge to opposite side) Monter les portes avant / arrière –...
-
Page 76: Fitting The Front/Rear Doors - L/H Door Hinge (Swapping Hinge To Opposite Side)
TX25/30 3 mm 6. Installation 6. Installation 6. Installation 6.6 Entfernte Flachteile wieder montieren 6.6 Re-installing the removed enclosure panels 6.6 Remonter à nouveau les pièces plates démontées Front-/Rücktüren montieren – 4 Compartments Türanschlag links (Türanschlagwechsel) 4 compartments Fitting the front/rear doors – 4 compartiments l/h door hinge (swapping hinge to opposite side) Monter les portes avant / arrière –... - Page 77 TX25/30 3 mm 6. Installation 6. Installation 6. Installation 6.6 Entfernte Flachteile wieder montieren 6.6 Re-installing the removed enclosure panels 6.6 Remonter à nouveau les pièces plates démontées Front-/Rücktüren montieren – Türanschlag links (Türanschlagwechsel) Fitting the front/rear doors – l/h door hinge (swapping hinge to opposite side) Monter les portes avant / arrière –...
-
Page 78: Fitting The One-Piece Side Panels
TX30 6. Installation 6. Installation 6. Installation 6.6 Entfernte Flachteile wieder montieren 6.6 Re-installing the removed enclosure panels 6.6 Remonter à nouveau les pièces plates démontées Einteilige Seitenwände montieren Fitting the one-piece side panels Monter les panneaux latéraux monobloc M6 x 16 = 9 Nm Seitenwand-Zubehör, nicht zu verwenden bei VX IT Compartment Racks Side panel accessories, not to be used with VX IT Compartment Racks... -
Page 79: Commissioning
7. Inbetriebnahme 7. Commissioning 7. Mise en service Vor der Inbetriebnahme muss das VX IT Com- Before commissioning, the VX IT Compart- La baie de colocation compartimentée VX IT partment Rack, bzw. die Rackreihe ordnungs- ment Rack or bayed VX IT Compartment ou la rangée de baies de colocation compar- gemäß... -
Page 80: Troubleshooting
9. Incident et suppression Bei technischen Störungen wenden Sie sich For technical queries, please contact: Pour tout incident technique, bitte an veuillez vous adresser à Rittal International Service Rittal International Service Auf dem Stützelberg Rittal International Service Auf dem Stützelberg 35745 Herborn Auf dem Stützelberg... -
Page 81: Technical Specifi Cations
12. Technische Daten 12. Technical specifi cations 12. Caractéristiques techniques Nennmaße Schrank Nominal dimensions of enclosure Best.-Nr. VX IT Gewicht Farbe Verschluss Dimensions nominales de la baie Model No. VX IT Weight Colour Lock Référence VX IT Poids Couleur Serrure W mm H mm HE ⁄... -
Page 82: Spare Parts
Une version actualisée de cette notice est www.rittal.de. www.rittal.com. disponible sur le site internet www.rittal.fr. Es dürfen nur Original-Ersatzteile von Rittal Only original Rittal spare parts may be used. Seules les pièces de rechange d’origine de verwendet werden. Rittal doivent être utilisées. 14. Garantie 14. - Page 83 Notizen/Notes Compartment Racks VX IT / Compartment Racks VX IT / Baies de colocation compartimentées VX IT...
- Page 84 ◾ Climate Control ◾ IT Infrastructure ◾ Software & Services You can fi nd the contact details of all Rittal companies throughout the world here. www.rittal.com/contact RITTAL GmbH & Co. KG Auf dem Stuetzelberg · 35745 Herborn · Germany Phone +49 2772 505-0...
Need help?
Do you have a question about the VX IT 5313.175 and is the answer not in the manual?
Questions and answers