
Subscribe to Our Youtube Channel
Related Manuals for Daikin RKXYQ5T7Y1B


Summary of Contents for Daikin RKXYQ5T7Y1B
- Page 1 Installation and operation manual VRV IV compressor unit for indoor installation Installation and operation manual English VRV IV compressor unit for indoor installation RKXYQ5T7Y1B...
- Page 2 3P397286-2B...
-
Page 3: Table Of Contents
Symptom: White mist comes out of a unit (Indoor 6.1.6 To use mode 2 ............17 unit, heat exchanger unit) ..........30 6.1.7 Mode 1 (and default situation): Monitoring settings ..17 RKXYQ5T7Y1B Installation and operation manual VRV IV compressor unit for indoor installation 4P408443-1 – 2015.07... -
Page 4: About The Documentation
Target audience and-manuals/product-information/ Authorised installers + end users Latest revisions of the supplied documentation may be available on the regional Daikin website or via your dealer. The original documentation is written in English. All other languages are translations. For the installer... -
Page 5: About The Units And Options
Depending on the applicable legislation and the unit's maximum working pressure (see "PS High" on the unit name plate), larger piping thickness might be required. RKXYQ5T7Y1B Installation and operation manual VRV IV compressor unit for indoor installation 4P408443-1 – 2015.07... -
Page 6: To Select The Piping Size
Piping outer diameter size (mm) Transmission line section: index Gas pipe Liquid pipe Transmission wiring Sheathed + shielded cable (2 <150 15.9 wires) Vinyl cords 0.75~1.25 mm² Installation and operation manual RKXYQ5T7Y1B VRV IV compressor unit for indoor installation 4P408443-1 – 2015.07... -
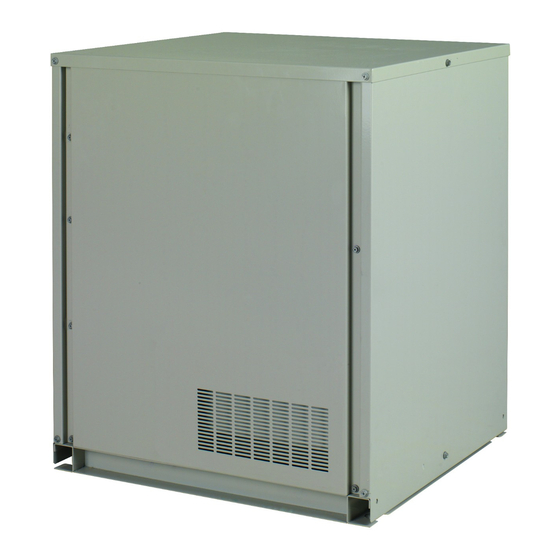
Page 7: Installation
You can install the compressor unit directly on the floor or on a structure. ▪ On the floor. You do NOT have to fix the unit with anchor bolts. RKXYQ5T7Y1B Installation and operation manual VRV IV compressor unit for indoor installation... -
Page 8: To Remove The Pinched Pipes
Use the following procedure to remove the pinched piping: 1 Remove the valve cover and make sure that the stop valves are fully closed. Installation and operation manual RKXYQ5T7Y1B VRV IV compressor unit for indoor installation 4P408443-1 – 2015.07... -
Page 9: To Connect The Refrigerant Piping To The Compressor Unit
Paint the edges and areas around the edges using repair make contact with electrical parts can cause malfunctions, paint to prevent rusting. smoke or fire. RKXYQ5T7Y1B Installation and operation manual VRV IV compressor unit for indoor installation 4P408443-1 – 2015.07... -
Page 10: Checking The Refrigerant Piping
Only field installed refrigerant piping needs to be checked. Therefore, make sure that all the compressor unit stop valves are Only circuit 2 firmly closed before performing leak test or vacuum drying. Installation and operation manual RKXYQ5T7Y1B VRV IV compressor unit for indoor installation 4P408443-1 – 2015.07... -
Page 11: To Perform A Leak Test
2 Check that, with the vacuum pump turned off, the target ▪ When charging refrigerant, always use protective vacuum is maintained for at least 1 hour. gloves and safety glasses. RKXYQ5T7Y1B Installation and operation manual VRV IV compressor unit for indoor installation 4P408443-1 – 2015.07... -
Page 12: To Determine The Additional Refrigerant Amount
Summary – Pre-charging: The determined additional Disconnect the manifold from refrigerant amount is not the liquid line(s). reached yet Continue with the "Stage 2" instructions. Installation and operation manual RKXYQ5T7Y1B VRV IV compressor unit for indoor installation 4P408443-1 – 2015.07... -
Page 13: Error Codes When Charging Refrigerant
10 Open valve A. (16 V) 11 Charge refrigerant until the remaining determined additional F1/F2 refrigerant amount is added, and then close valve A. (16 V) Main switch RKXYQ5T7Y1B Installation and operation manual VRV IV compressor unit for indoor installation 4P408443-1 – 2015.07... -
Page 14: Guidelines When Connecting The Electrical Wiring
1 Remove the service covers of the compressor unit and the switch box. 1× 2 Connect the transmission wiring as follows: Installation and operation manual RKXYQ5T7Y1B VRV IV compressor unit for indoor installation 4P408443-1 – 2015.07... -
Page 15: Finishing The Compressor Unit Installation
LED for indication during initialisation configured as applicable. ON ( ) OFF ( ) Flashing ( ) RKXYQ5T7Y1B Installation and operation manual VRV IV compressor unit for indoor installation 4P408443-1 – 2015.07... -
Page 16: To Access Mode 1 Or 2
You can read out setting [1‑5] (= the total number of connected units situation when shipped from factory). (heat exchanger unit + indoor units)) as follows: Action Button/display Start from the default situation. Installation and operation manual RKXYQ5T7Y1B VRV IV compressor unit for indoor installation 4P408443-1 – 2015.07... -
Page 17: To Use Mode 2
You can read out the following information: between compressor unit and heat exchanger unit, and between compressor unit and indoor units (F1/F2 communication line). RKXYQ5T7Y1B Installation and operation manual VRV IV compressor unit for indoor installation 4P408443-1 – 2015.07... -
Page 18: Mode 2: Field Settings
Fan static pressure setting (in heat exchanger unit). (default) You can set the external static pressure of the heat exchanger unit according to the ducting requirements. 90 Pa 120 Pa 150 Pa Installation and operation manual RKXYQ5T7Y1B VRV IV compressor unit for indoor installation 4P408443-1 – 2015.07... - Page 19 The level is according to the table. RKXYQ5T7Y1B Installation and operation manual VRV IV compressor unit for indoor installation...
-
Page 20: To Connect The Pc Configurator To The Compressor Unit
2 MΩ or more is attained by applying a voltage of 500 V DC between power terminals and earth. Never use the megatester for the transmission wiring. Installation and operation manual RKXYQ5T7Y1B VRV IV compressor unit for indoor installation 4P408443-1 – 2015.07... -
Page 21: Checklist During Commissioning
To abort the operation, press BS3. The unit will stop after ±30 seconds. 4 Check the test operation results on the compressor unit 7‑LEDs display. RKXYQ5T7Y1B Installation and operation manual VRV IV compressor unit for indoor installation 4P408443-1 – 2015.07... -
Page 22: Correcting After Abnormal Completion Of The Test Run
Heat exchanger unit: (R1T) - A1P (X16A) Discharge temperature sensor malfunction: open circuit / Check connection on PCB or actuator. short circuit Compressor unit: (R2T) - A1P (X12A) Installation and operation manual RKXYQ5T7Y1B VRV IV compressor unit for indoor installation 4P408443-1 – 2015.07... - Page 23 ▪ Confirm that the piping and wiring of the specified indoor exchanger unit are not connected correctly to the unit or heat exchanger unit are connected correctly to the compressor unit. compressor unit. RKXYQ5T7Y1B Installation and operation manual VRV IV compressor unit for indoor installation 4P408443-1 – 2015.07...
-
Page 24: Technical Data
The wiring diagram is delivered with the unit, located on the switch Wire number 15 box cover. Field wire Symbols: Field cable Main terminal Connection ** continues on page 12 column 2 /12.2 Earth wiring Installation and operation manual RKXYQ5T7Y1B VRV IV compressor unit for indoor installation 4P408443-1 – 2015.07... -
Page 25: For The User
In case of VRV DX indoor units combined with an air safe and effective operation. handling unit Heat exchanger unit Compressor unit Refrigerant piping User interface (dedicated depending on indoor unit type) RKXYQ5T7Y1B Installation and operation manual VRV IV compressor unit for indoor installation 4P408443-1 – 2015.07... -
Page 26: Operating The System
NOTICE defrost operation. This is not a malfunction. Do not turn off power immediately after the unit stops, but wait for at least 5 minutes. Installation and operation manual RKXYQ5T7Y1B VRV IV compressor unit for indoor installation 4P408443-1 – 2015.07... -
Page 27: Using The Dry Program
5 Press the ON/OFF button on the user interface once again. Result: The operation lamp goes out and the system stops operating. In case of VRV DX indoor units RKXYQ5T7Y1B Installation and operation manual VRV IV compressor unit for indoor installation 4P408443-1 – 2015.07... -
Page 28: To Designate The Master User Interface (Vrv Dx)
Wipe it with another dry If water leaks from the unit. Stop the operation. cloth. The operation switch does not work Turn off the power. well. Installation and operation manual RKXYQ5T7Y1B VRV IV compressor unit for indoor installation 4P408443-1 – 2015.07... -
Page 29: Error Codes: Overview
ON/OFF button. If not, ask your installer for advice. Compressor lock (startup) Transmission compressor unit - inverter: INV transmission trouble RKXYQ5T7Y1B Installation and operation manual VRV IV compressor unit for indoor installation 4P408443-1 – 2015.07... -
Page 30: Symptoms That Are Not Air Conditioner Troubles
Immediately after the power is turned on. The micro computer is getting ready to operate and is performing a communication check with all indoor units. Please wait 12 minutes (max.) till this process is finished. Installation and operation manual RKXYQ5T7Y1B VRV IV compressor unit for indoor installation 4P408443-1 – 2015.07... - Page 31 When another unit is running, some refrigerant will still flow through the unit. Relocation Contact your dealer for removing and reinstalling the total unit. Moving units requires technical expertise. RKXYQ5T7Y1B Installation and operation manual VRV IV compressor unit for indoor installation 4P408443-1 – 2015.07...
- Page 32 4P408443-1 0000000L 4P408443-1 2015.07...
Need help?
Do you have a question about the RKXYQ5T7Y1B and is the answer not in the manual?
Questions and answers