SOLIS GRIND & INFUSE PERFETTA User Manual
Hide thumbs
Also See for GRIND & INFUSE PERFETTA:
- User manual (38 pages) ,
- Quick start manual (127 pages)
Table of Contents
Advertisement
Advertisement
Table of Contents

Related Manuals for SOLIS GRIND & INFUSE PERFETTA


Summary of Contents for SOLIS GRIND & INFUSE PERFETTA
- Page 1 GRIND & INFUSE PERFETTA Type 1019 User manual...
-
Page 2: Table Of Contents
CO N T E N T S INTENDED USE IMPORTANT SAFETY PRECAUTIONS CONTENTS APPLIANCE DESCRIPTION CONTROL BUT TONS INSTALLATION BEFORE FIRST USE (WATER FILTER CARTRIDGE) MAKING AN ESPRESSO TIPS FOR A PERFECT ESPRESSO STEAMING MILK USING THE HOT WATER FUNCTION CHANGING THE ENERGY SAVING MODE CHANGING THE BREWING TEMPERATURE CHANGING THE WATER FILTER MODE (NO FILTER) -
Page 3: Important Safety Precautions
I N T E N D E D U S E • This appliance is intended to prepare various types of coffee with freshly ground beans. • Only use the appliance as described in this manual. • This appliance is intended for household use and similar applications such as: –... - Page 4 S A F E T Y I N S T R U C T I O N S R E G A R D I N G I N S TA L L AT I O N Risk of fire or electric shock. Using the appliance with a damaged power cable may cause electric shock or fire caused by short circuit of electrical components.
- Page 5 – Do not start using the appliance again before having it checked for functionality and safety by Solis or a service center authorized by Solis. • Do not operate the appliance with wet hands. Risk of electric shock. Heat or water originating from the appliance may damage the power outlet.
- Page 6 Risk of damage to the electrical components. Connecting the appliance to an unsuitable power supply may cause damage to the electrical components. • Before using the appliance, check that the voltage stated on the type plate of your appliance matches your mains voltage. •...
- Page 7 Risk of contamination. Hot water is more likely to contain contaminants, such as corrosion from metallic pipes or boilers. • Only use cold tap water in the water tank. Risk of burn injury. Parts of the appliance become hot during use.
- Page 8 Replace a damaged or defective appliance immediately. • Only use the appliance with the provided accessories or accessories recommended by Solis. Risk of overheating. Blockage of the ventilation openings or exposure to a heat source may cause the appliance to overheat.
- Page 9 Risk of water damage. Water may spill out of the water tank when it is too full and damage the internal electrical components. • Do not fill the water tank above the MAX marking. Risk of product damage. Using the appliance without water in the tank may cause damage to the internal components.
- Page 10 S A F E T Y I N S T R U C T I O N S R E G A R D I N G M A I N T E N A N C E Risk of choking. The cleaning tool is small and may be swallowed by children.
- Page 11 Risk of water damage. Internal electrical components will be damaged when they come into contact with water. • Never immerse the appliance in water or place it in a dishwasher. Risk of product damage. The appliance must be descaled periodically to prevent permanent damage to the internal components.
-
Page 12: Vco N T E N T S
CO N T E N T S Please check the contents of the package: 1x GRIND & INFUSE PERFETTA 1x Portafilter 1x Tamper 1x Milk jug 1x Cleaning brush 1x Rubber insert for cleaning 2x Filters 1x Water filter 1x Test strip A P P L I A N C E D E S C R I P T I O N The GRIND &... -
Page 14: Control But Tons
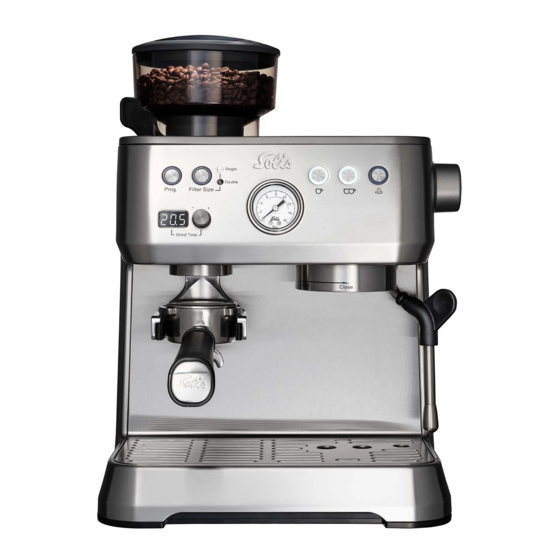
Bean container Power cable Cup tray Milk jug Portafilter holder Test strip Brewing head Cleaning brush Steaming wand Cleaning tool Drip tray Rubber insert for cleaning Grinder unlock button Tamper Water tank Double cup filter Water filter cartridge Single cup filter Accessories storage Portafilter Power button... -
Page 15: Installation
I N S TA L L AT I O N To install the appliance: Place the appliance on a stable, flat, and heat and moisture resistant surface. Place the bean container on the appliance. Rotate until the bean container locks in place. -
Page 16: Making An Espresso
M A K I N G A N E S P R E S S O To make an espresso with freshly ground coffee: Choose if you want to make one or two espressos. Place empty cups on the cup tray to preheat the cups. - Page 17 16. Tamp the ground coffee with the tamper o. Risk of product damage. Incorrect use of the portafilter may damage it. • Do not overfill the portafilter. The ground coffee should not be in direct contact with the brewing head when placed to ensure a proper seal.
- Page 18 Risk of product damage. Incorrect use of the portafilter may damage it. • Make sure the portafilter is firmly installed. If the portafilter does not turn easily in place, remove the portafilter and reduce the amount of ground coffee. 20. Place one or two cups from the cup tray underneath the spouts of the portafilter.
-
Page 19: Tips For A Perfect Espresso
Risk of burn injury. Parts of the appliance become hot during use. • Be careful when emptying the portafilter directly after use. The appliance and the coffee dregs are still very hot. • Never remove the portafilter during the brewing process. 23. -
Page 20: Steaming Milk
We recommend starting with these settings, and make small changes to taste: 1 cup 2 cups Grind size Amount 0.018 - 0.020 lb 0.035 - 0.040 lb Brewing time 15 – 25 s 25 – 35 s S T E A M I N G M I L K Risk of burn injury. -
Page 21: Using The Hot Water Function
If the steaming wand is used for dispensing hot water, the steaming wand dispenses water residue before the steaming function activates. For good steamed milk, first dispense the residue before putting the steaming wand into the milk. Check if the steaming function button constantly lights up white. -
Page 22: Changing The Energy Saving Mode
To use the hot water function: Lower the steaming wand into a cup. Rotate the steaming knob anticlockwise to dispense hot water from the steaming wand 5. Press the steaming function button to boost the hot water function. Rotate the steaming knob clockwise to stop the hot water function. -
Page 23: Changing The Brewing Temperature
C H A N G I N G T H E B R E W I N G T E M P E R AT U R E To set the brewing temperature: Press the programming button to enter the settings menu. Press the single cup extraction button j. -
Page 24: Storage
S TO R AG E Store the appliance in the original packaging in a dry and enclosed space. Risk of product damage. Exposure to hot or cold temperatures may cause damage to the internal components of the appliance. • Do not store the appliance at temperatures below 32 °F or above 131 °F. -
Page 25: Monthly Maintenance
M O N T H LY M A I N T E N A N C E We recommend cleaning the appliance every month. To clean the appliance: Plug in and switch on the appliance. Set the grind size selector to COARSE. - Page 26 Do not use excessive force when removing these parts. Reassemble the bean container (see image F). 10. Fill the bean container with GRINDZ , which is available in selected countries. You can buy GRINDZ from your supplier or Solis (art. no. 993.08).
- Page 27 11. Open the hopper gate at the back of the bean container 1. 12. Place a container under the portafilter holder 3. 13. Switch on the appliance. 14. Press and hold the grind time knob to switch on the grinder. 15.
-
Page 28: Replacing The Water Filter Cartridge
R E P L AC I N G T H E WAT E R F I LT E R C A R T R I D G E Replace the water filter cartridge when the corresponding alarm is visible (see section Alarms). -
Page 29: Using The Brewing Head Cleaning Cycle
Gently squeeze the water filter cartridge to remove air bubbles from the filter. Rinse the water tank with water. Insert the water filter cartridge into the bracket in the water tank with the selector facing downwards. Fill the water tank with water up to the MAX marking. - Page 30 Place the double cup filter into the portafilter s. Place the rubber insert for cleaning into the double cup filter (see image H) and put a SOLITABS cleaning tablet on top. Insert and rotate the portafilter into the brewing head (see image I).
-
Page 31: Descaling
The procedure has 8 cycles with pauses of 30 seconds. The cycle number and pause time are shown on the display. Let the appliance cool down. Remove the portafilter from the brewing head 4. 10. Remove the rubber insert for cleaning from the portafilter s. - Page 32 Remove the water tank from the appliance (see image J). Empty the water tank above a sink. Remove the water filter cartridge from the water tank 8. Fill the water tank with descaling agent and water. The minimum level required for descaling is 0.27 gallon.
- Page 33 Insert the water tank into the appliance. Place a large container (> 0.66 gal) underneath the brewing head 4. Aim the steaming wand into the container. 10. Plug in and switch on the appliance. 11. Press the programming button d. 12.
-
Page 34: Cleaning A Blocked Grinder
11. Place back the bean container. Make sure all parts lock in place. If the grinder is still not working, contact your supplier or Solis. R E S E T T I N G F U N C T I O N S... -
Page 35: Technical Specifications
T E C H N I C A L S P E C I F I C AT I O N S Model no. 1019 Voltage / frequency 120 V~ / 60 Hz Output 1550 W Dimensions (W x D x H) 11.8 x 15 x 15.7 in Weight 21.2 lbs... - Page 36 The steaming wand nozzle is Clean the steaming wand clogged. nozzle (section Monthly maintenance). The appliance is damaged Contact Solis or a Solis authorized service center. The water filter cartridge is Replace the water filter clogged. cartridge (see section Replacing...
- Page 37 The steaming wand nozzle is Clean the steaming wand clogged. nozzle (section Monthly maintenance). The appliance is damaged Contact Solis or a Solis authorized service center. The water filter cartridge is Replace the water filter clogged. cartridge (see section Replacing the water filter cartridge).
-
Page 38: Alarms
The appliance is damaged. Press any button. If the appliance doesn’t switch on, the appliance is damaged. Contact Solis or a Solis authorized service center. A L A R M S 6 It is possible that multiple alarm signals are displayed at the same time. -
Page 39: Helpline
Alarm Meaning Solution Display shows: OP The appliance indicates that Put the steam wand into the steaming knob should be a container and rotate the open during the descaling steaming knob anticlockwise. function. Display shows: CL The appliance indicates that Put the steam wand into the steaming knob should be a container and rotate the... - Page 40 Solis of Switzerland Ltd Solis-House • CH-8152 Glattbrugg-Zurich • Switzerland www.solis.ch • www.solis.com please visit us at www.solis.com...
Need help?
Do you have a question about the GRIND & INFUSE PERFETTA and is the answer not in the manual?
Questions and answers