Table of Contents
Advertisement
Advertisement
Table of Contents

Summary of Contents for Elegoo SATURN 2
- Page 1 SATURN 2 3D Printer www.elegoo.com...
- Page 2 ELEGOO SATURN 2 3D printer. This instruction applies to Saturn 2 printers. Please unbox and inspect the printer upon receiving it. If you have any questions regarding the printer, please contact us at 3dp@elegoo.com. Please read the instruction carefully before you use the printer.
- Page 3 If you need technical support please contact us at 3dp@elegoo.com Please keep the Saturn 2 3D printer and its accessories out of the reach of children. When you use the printer for the first time, you would need to level it refer to the leveling tutorial before printing.
- Page 4 SATURN 2 3D Printer Tech Specs System: EL3D-3.0.1 Operation: 3.5 Inch Touch Screen System Parameters Slicer Software: CHITUBOX Connectivity: USB Technology: MSLA Photocuring Light Source: COB (wavelength 405nm) XY Resolution: 0.0285mm (7680*4320) Z Axis Accuracy: 0.00125mm Printing Specification Layer Thickness: 0.01-0.2mm...
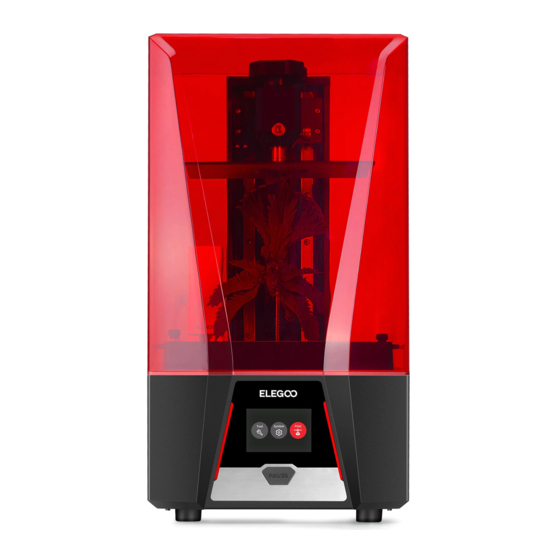
- Page 5 Printer Components Air Purifier Resin Tank 3.5 Inch Touch Screen Rotary Knob 10.1 Inch LCD Screen Switch Build Platform Rotary Knob Z Axis...
- Page 6 Power Socket Cover Vent Cover...
- Page 7 Package List Air Purifier U Disk Mask Gloves Scraper Funnel Backup Screws User Manual Adapter Tool Kit...
- Page 8 (Picture 2) (Picture 3) 2.Put a Saturn 2 leveling card between the build platform and the LCD screen, touch the screen to click "Move Z axis to zero". (See Picture 2) When the build platform stops moving, use an M8 Allen key to tighten the leveling screws diagonally, please be sure to tighten the screws in the order of the serial number ( ).(See Picture 3)
- Page 9 find that the leveling card of Saturn 2 can be pulled out with no resistance, please click the "down" button (step value is 0.1mm) until there is slight resistance to pull out the Saturn 2 leveling card.
- Page 10 (Picture 7) Exposure Tool Exposure Tool next step (Picture 8) Test the screen and UV lights by pressing the "Tools"-"Exposure"-"Next" button. (See Picture 8) If the LCD screen can display the "ELEGOO TECHNOLOGY www.elegoo.com", then the printer can work perfectly.
- Page 11 Test Printing 1. Model Printing (Cover the machine with the anti-UV cover.) Carefully remove the protective film from the touch panel and metal trim. Before printing, insert the air purifier into the USB port with the front side facing out, and then the green light will light up, indicating that the air purifier is working normally.
- Page 12 (Picture 11) 1. Install Chitu Box ELEGOO ChiTu Box is stored in the U Disk. Choose the right version and install it on your computer or you can download the latest version from www.elegoo.com/downloadifyouprefer. 2. How to Use Chitu Box After installation is complete, run the ChiTu software.
- Page 13 2) Scroll the mouse wheel to zoom in or zoom out the model. 3) Long press the right click to see different perspectives of the model. 3. Chitu Box Settings 3.1 Click "Parameter Settings" and choose ELEGOO Saturn 2 as your default printer.(See Picture 12) ELEGOO JUPITER ELEGOO JUPITER (Picture 12)...
- Page 14 3.3 Resin Parameters (See Picture 14) Resin Density: 1.1g/ml Resin Cost: You can enter the unit price of your resin, and after slicing you will see how much it costs for your model. (Picture 14) 3.4 Parameters (See Picture 14) Layer Height:...
- Page 15 Transition Layer Count: The count of transition layers after the bottom layer to make it stickier between layers. Except for the exposure time, the other parameters of the transition layer are the same as the normal layer; the default setting is 5. Transition Type:...
- Page 16 4. Save Model After setting up all the parameters, click "slice", and once it's done, click "export sliced files to U Disk", then plug the U disk to your printer and start printing. (See Picture 15) (Picture 15)...
- Page 17 Build platform or resin tank is not fastened. 3. Abnormal Screen Exposure llf your printer doesn't work please contact us at 3dp@elegoo.com. and as to better help and solve problems for you, please add your order ID in your email.
- Page 18 5. Maintenance 1.lf Z axis keeps making friction noises, please add some lubricant to it. 2.Please do not use sharp or pointy objects to scrape the resin tank in case of causing damages to release liner film. 3.Be careful when you remove the build platform in case you may smash the 8K LCD screen. 4.Remember to pour the rest of the resin in the tank back into the resin bottle and seal it well if you don't use the printer in the next 48 hours.
- Page 19 Email Support Discussion Forums Help Articles...


Need help?
Do you have a question about the SATURN 2 and is the answer not in the manual?
Questions and answers