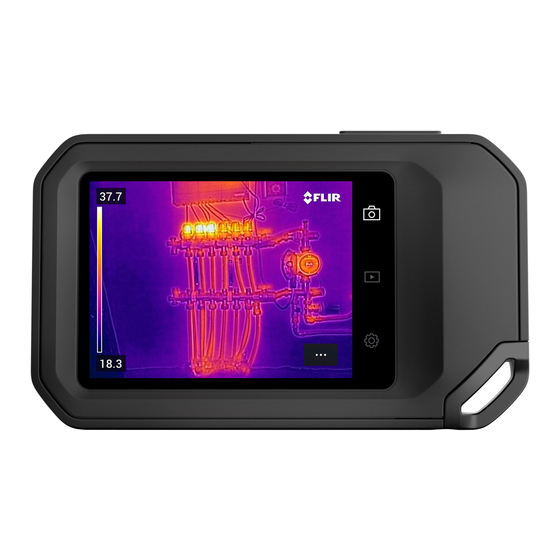
FLIR C Series User Manual
Hide thumbs
Also See for C Series:
- Getting started (76 pages) ,
- User manual (42 pages) ,
- User manual (80 pages)
Table of Contents
Advertisement
Quick Links
Advertisement
Table of Contents

Summary of Contents for FLIR C Series
- Page 1 User’s manual FLIR Cx series Flir C2...
- Page 2 With suggestions from Cambridge Carbon Fottprint 5.1 Procedure Follow this procedure: 1. Charge the battery for approximately 1.5 hours, using the FLIR power supply. 2. Push the On/off button to turn on the camera. 3. Aim the camera toward your target of interest.
-
Page 3: View From The Front
Description 6.1 View from the front 1. Camera lamp. 2. Digital camera lens. 3. Infrared lens. 4. Attachment point. 6.2 View from the rear 1. On/off button. 2. Save button. 3. Camera screen. #T559918; r. AN/42281/42281; en-US... -
Page 4: Screen Elements
The purpose of this USB Micro-B connector is the following: • Charging the battery using the FLIR power supply. • Moving images from the camera to a computer for further analysis in FLIR Tools. Note Install FLIR Tools on your computer before you move the images. -
Page 5: Navigating The Menu System
Description Note The auto-orientation feature is enabled by a setting. Select Settings > Device set- tings > Auto orientation > On. 6.6 Navigating the menu system The camera has a touch screen. You can use your index finger or a stylus pen specially designed for capacitive touch usage to navigate the menu system. -
Page 6: Charging The Battery
Make sure that you install the socket-outlet near the equipment and that it is easy to get access to. Follow this procedure: 1. Connect the FLIR power supply to a wall outlet. 2. Connect the power supply cable to the USB connector on the camera. -
Page 7: Deleting An Image
Operation 3. To view the previous or next image, do one of the following: • Swipe left or right. • Tap the left arrow or the right arrow 4. To switch between a thermal image and a visual image, swipe up or down. 5. -
Page 8: Measuring A Temperature Using A Spotmeter
Operation 1. Tap the camera screen. This displays the main menu toolbar. 2. Select Settings . This displays a dialog box. 3. In the dialog box, select Device settings. This displays a dialog box. 4. In the dialog box, select Reset options. This displays a dialog box. 5. -
Page 9: Changing The Image Mode
Operation 3. On the submenu toolbar, select the type of color palette: • Iron. • Rainbow. • Rainbow HC. • Gray. 7.10 Changing the image mode 7.10.1 General The camera captures both thermal and visual images at the same time. By your choice of image mode, you select which type of image to display on the screen. -
Page 10: Changing The Temperature Scale Mode
Operation infrared lens. To adjust the image accurately, the camera requires the alignment distance (i.e., the distance to the object). 7.10.2 Procedure Follow this procedure: 1. Tap the camera screen. This displays the main menu toolbar. 2. Select Image mode . -
Page 11: Setting The Emissivity
Operation 7.12 Setting the emissivity Shiny metals and glass have low emissivities, giving wrong temperatires 7.12.1 General To measure temperatures accurately, the camera must be aware of the type of surface you are measuring. You can choose between the following surface properties: It's hard to compansate for low emissivities. -
Page 12: Changing The Distance
Operation 5. To return to live mode, tap the upper left arrow repeatedly. You can also push the Save button once. 7.14 Changing the distance Advanced Only 7.14.1 General The distance is the distance between the object and the front lens of the camera. This pa- rameter is used to compensate for the following two facts: •... -
Page 13: Using The Camera Lamp
Operation 7.16 Using the camera lamp 7.16.1 General You can use the camera lamp as a flashlight, or as a flash when taking an image. 7.16.2 Procedure Follow this procedure: 1. Tap the camera screen. This displays the main menu toolbar. 2. -
Page 14: Changing The Settings
• Photo as separate JPEG: When this menu command is selected, the digital photograph from the visual camera is saved at its full field of view as a separate JPEG image. It may be necessary to activate this option if you are not using the FLIR Tools software. 7.18.1.3 Device settings •... -
Page 15: Updating The Camera
2. Start the camera. 3. Connect the camera to the computer using the USB cable. 4. FLIR Tools displays a welcome screen when the camera is identified. On the welcome screen, click Check for updates. You can also click Check for updates on the Help menu in FLIR Tools. - Page 16 Disclaimer Specifications subject to change without further notice. Models and accessories subject to regional market considerations. License procedures may apply. Products described herein may be subject to US Export Regulations. Please refer to exportquestions@flir.com with any questions. Publ. No.: T559918...


Need help?
Do you have a question about the C Series and is the answer not in the manual?
Questions and answers