Page 2
Important note Before operating the device, you must read, understand, and follow all instructions, warnings, cautions, and legal disclaimers. Důležitá poznámka Před použitím zařízení si přečtěte veškeré pokyny, upozornění, varování a vyvázání se ze záruky, ujistěte se, že jim rozumíte, a řiďte se jimi.
WARNING Applicability: Digital devices subject to 15.21. NOTICE: Changes or modifications made to this equipment not expressly approved by FLIR Systems may void the FCC authorization to operate this equipment. WARNING Applicability: Digital devices subject to 2.1091/2.1093/KDB 447498/RSS-102.
High temperatures can cause damage to the camera. CAUTION Do not attach the batteries directly to a car’s cigarette lighter socket, unless FLIR Systems supplies a specific adapter to connect the batteries to a cigarette lighter socket. Damage to the batteries can occur.
3.6 Important note about this manual FLIR Systems issues generic manuals that cover several cameras within a model line. This means that this manual may contain descriptions and explanations that do not apply to your particular camera model.
Notice to user 3.7 Note about authoritative versions The authoritative version of this publication is English. In the event of divergences due to translation errors, the English text has precedence. Any late changes are first implemented in English. #T810539; r. AC/67331/67368; en-US...
• The communication protocol, or method, between the camera and your device (e.g., SD card reader, HDMI, Ethernet, USB, or FireWire) • Device type (PC/Mac/iPhone/iPad/Android device, etc.) • Version of any programs from FLIR Systems • Full name, publication number, and revision number of the manual 4.3 Downloads...
3. You can easily set up the camera to upload images for storage online. To enable upload of images, you need to connect your camera to a FLIR Ignite ac- count. Use a computer or other device with internet access and follow the instructions on the camera screen.
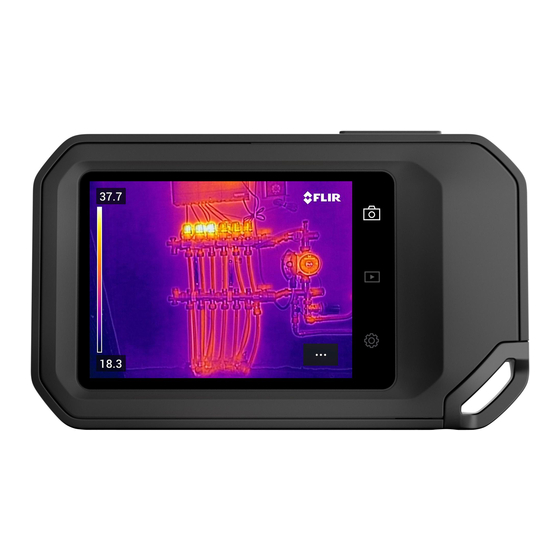
Camera overview 6.1 View from the front 1. Camera lamp. 2. Infrared lens. 3. Visual camera lens. 4. Lanyard attachment point. 6.2 View from the rear 5. USB-C connector. 6. Camera screen. 7. On/off button. 8. Save button. 9. Tripod mount. #T810539;...
Camera overview 6.3 Screen elements 6.3.1 General 1. Result table. 2. Status icons. 3. Live view button. 4. Gallery button. 5. Settings button. 6. Menu button. 7. Spotmeter. 8. Temperature scale. 6.3.2 Menu system To display the menu system, tap the menu button 1.
3. Screen brightness slider: Used to control the brightness of the screen. 4. Camera memory indicator. 5. The FLIR Ignite user account that the camera is paired with. For more information, see section 10.2 Pairing with FLIR Ignite, page 19.
Achieving a good thermal image These are the functions and settings you need to experiment with to achieve a good ther- mal image: • Adjusting the temperature scale. • Selecting a suitable temperature range. • Selecting a suitable image mode. •...
Achieving a good thermal image 7.2.2 Example 2 Here are two infrared images of an isolator in a power line. To make it easier to analyze the temperature variations in the isolator, the temperature scale in the right image has been changed to values close to the temperature of the isolator.
• For the Thermal MSX, Thermal, and Picture in picture image modes, all thermal and visual information is stored when an image is saved. This means that you can edit the image later, in the camera image gallery or in a FLIR Thermography software, and se- lect any of the image modes.
Achieving a good thermal image To align the thermal and visual images, do the following: 1. Tap the screen. This displays a box with a distance in the upper right corner. 2. Tap the distance box. This displays a slider. 3.
Measuring temperatures You can measure a temperature using a spotmeter or a box. The measured tempera- tures are displayed in the result table on the screen. • With a spotmeter, the camera measures the temperature at the position of the spotmeter.
Measuring temperatures 8.4 Changing the measurement parameters For accurate temperature measurements, it is important to use appropriate measure- ment parameters: • Emissivity: The emissivity determines how much of the radiation originates from the object as opposed to being reflected by it. •...
To make reporting and post-processing more efficient, you can add notes with additional information, e.g., conditions and information about where an image is taken. The notes are added to the image file and can be viewed and edited in the camera or in a FLIR Thermography software.
Page 23
Saving and working with images 4. Manual adjustment mode is now active. For adjustment instructions, see section 7.2.3 Manually adjusting the temperature scale, page 12. 5. Tap the menu button • To change the image mode, tap Image mode • To add a measurement tool, tap Measurement •...
5. Use a computer or other device with internet access and follow the instructions on the camera screen. 10.3 Automatic upload You can set up the camera to automatically upload images to your FLIR Ignite account when the camera is connected to the internet. To enable automatic upload of images, do the following: 1.
FLIR Ignite and move the folders created in your camera into those. 10.5.3 Search You can search among all your files and images uploaded to FLIR Ignite. It is possible to search on file names, folder names, and any notes added to the images.
Working with the image gallery When you save an image, the camera stores the image file in the image gallery of the camera. You can open an image in the image gallery and, for example, change the color palette, apply another image mode, and add measurement tools. The image gallery can include one or several folders.
Working with the image gallery 11.4 Changing the active folder New images are saved to the active folder. To change the active folder, do the following: 1. Tap the Gallery button 2. Tap the folder that new images should be saved to. 3.
Page 28
Working with the image gallery To delete all images, do the following: 1. Tap the Settings button 2. Tap Save options & storage and then tap Delete all saved files..This displays a dia- log box. 3. To permanently delete all images, tap Delete. #T810539;...
Handling the camera 12.1 Charging the battery You can charge the battery by using a standard USB power adapter or by connecting the camera to a computer. It is good practice to disconnect the camera from power when the battery is fully charged. The battery status is displayed on the swipe-down menu, see section 6.3.4 Swipe-down menu, page 10.
Handling the camera 1. Tap the Settings button 2. Tap Connections > Bluetooth. 3. Make sure Bluetooth is enabled by toggling the Bluetooth switch. Note On the mobile phone, you must also make sure that Bluetooth is enabled, that the phone is in discovery mode, and that Bluetooth tethering is enabled. 4.
Page 31
Handling the camera 12.7.2.2 Equipment Cotton wool CAUTION If you use a lens cleaning cloth it must be dry. Do not use a lens cleaning cloth with the liquids that are given in section 12.7.2.1 above. These liquids can cause material on the lens cleaning cloth to become loose.
13.5 Accounts The Accounts dialog box is used to pair the camera with your FLIR Ignite account. For more information, see section 10 Uploading images, page 19. #T810539; r. AC/67331/67368; en-US...
Updating the camera, page 29. • Product improvement program: This setting is used to help FLIR improve your camera. The camera can send anonymous information to FLIR about how it is used and, when something does not work as intended, notify FLIR about it.
1. Make sure the camera battery is fully charged. 2. Download the FLIR update .zip file and save it in a suitable location on your computer. 3. Unzip the .zip file. You should find an update package file ending in .fuf or .run in the zip archive.
CE Declaration of conformity [See next page] #T810539; r. AC/67331/67368; en-US...
Page 38
This declaration of conformity is issued under the sole responsibility of the manufacturer. The object of the declaration: FLIR C5 -series (Product Model Name FLIR-C8940). The object of the declaration described above is in conformity with the relevant Union harmonisation...
• Extech Instruments (2007) Figure 17.1 Patent documents from the early 1960s FLIR Systems has three manufacturing plants in the United States (Portland, OR, Boston, MA, Santa Barbara, CA) and one in Sweden (Stockholm). Since 2007 there is also a manufacturing plant in Tallinn, Estonia.
17.1 More than just an infrared camera At FLIR Systems we recognize that our job is to go beyond just producing the best infra- red camera systems. We are committed to enabling all users of our infrared camera sys- tems to work more productively by providing them with the most powerful camera–...
Page 41
17.3 Supporting our customers FLIR Systems operates a worldwide service network to keep your camera running at all times. If you discover a problem with your camera, local service centers have all the equipment and expertise to solve it within the shortest possible time.
Page 42
Disclaimer Specifications subject to change without further notice. Models and accessories subject to regional market considerations. License procedures may apply. Products described herein may be subject to US Export Regulations. Please refer to exportquestions@flir.com with any questions. Publ. No.: T810539...
Need help?
Do you have a question about the C Series and is the answer not in the manual?
Questions and answers