Advertisement
Quick Links
Quick Start Guide
Getting started with Raven Scanner
Claim Your
FREE
Product - visit Raven.com/freeproduct
1
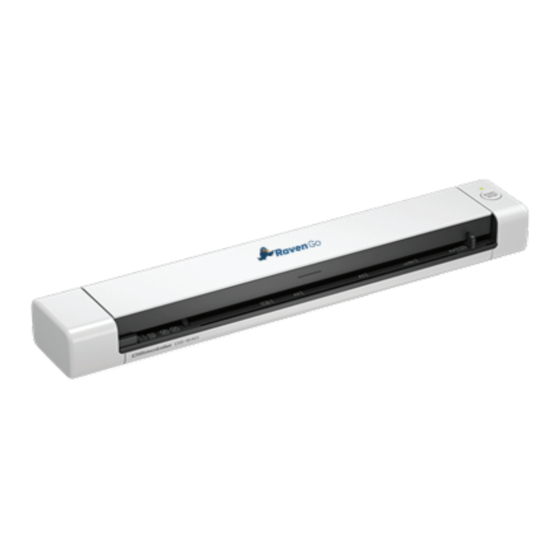
What's in the box:
Scanner
2
Install the scanner:
2.1
Remove the protective tapes from
the front and the back of the scanner.
3
Installing Raven Desktop and Scanner Drivers:
3.1 Visit
Raven.com/Desktop
download Raven Desktop and drivers to
your Mac or PC.
Download the user manual at
Our support team is available to answer any questions and take your feedback.
Call us at
1-800-713-9009
2.2 Connect the
cable to the USB port on the scanner.
Connect the
cable to the USB port on your computer
to
3.2 Choose the Go Scanner in the
installation wizard.
raven.com/user-manuals
or email
support@raven.com
USB Cable
square end
of the USB
rectangle end
of the USB
(USB)
Calibration Sheet
2.3
Press the Power button to power on
the scanner until the LED light remains
solid.
3.3 Choose the USB connection method to
your scanner, using the USB cable included
in the box.
Advertisement

Related Manuals for Raven Go


Summary of Contents for Raven Go
- Page 1 USB port on your computer Installing Raven Desktop and Scanner Drivers: 3.1 Visit Raven.com/Desktop 3.2 Choose the Go Scanner in the 3.3 Choose the USB connection method to download Raven Desktop and drivers to installation wizard. your scanner, using the USB cable included your Mac or PC.
- Page 2 6.1 Insert only one page at a time, and insert the next page only when the previous one is done. Otherwise, the scanner may malfunction. 6.2 Do not push or force your document into the feeding slot or the top of your image will be cut. Simply insert and let go of the document when it begins to feed into the slot.
Need help?
Do you have a question about the Go and is the answer not in the manual?
Questions and answers