Advertisement
Available languages
Available languages
Quick Links
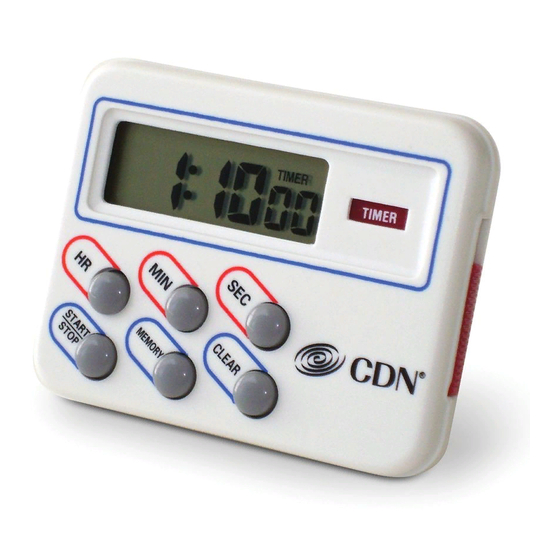
Model TM8
MULTI-TASK
Timer & CloCk
Counts 24 hours by minutes & seconds
Note: in the following instructions, names of the control
buttons are shown in CAPS. Function information that
appears on the display is shown in BOLD CAPS.
BATTERY INSTALLATION
replace battery when lCD becomes dim or alarm level
declines.
1. remove battery cover on the back by sliding it in the
direction of the arrow.
2. install one lr44 battery, positive (+) side up.
A brief alarm sounds.
3. replace the battery cover until it clicks shut.
OPERATING INSTRUCTIONS
A. Set Clock
1. Slide switch on the right side to CloCk to select
clock mode. AM or PM appears on the display in
12-hour time.
2. Press and hold the CleAr button for 2 seconds
to switch between 12-hour, Am/Pm time, and
24-hour, international time.
3. Press the Hr miN and/or SeC buttons to enter the
desired time. Press and hold for fast advance.
B. Count Down
1. Slide switch on the right side to Timer to select
the count down mode. TIMER appears on
the display.
2. Press the Hr miN and/or SeC buttons to enter
the desired time. Press and hold for fast advance.
Note: The timer retains any time showing on the display when the
sliding mode switch is moved to another position.
3. Press the memorY button to enter the set time
into memory. MEMORY appears on the display.
a. Press the memorY button to recall the set time.
b. Press the memorY button, then press the
CleAr button, to clear the set time from
memory.
4. Press the STArT/SToP button to start counting down.
Note: TIMER flashes on the display during count down when in
other modes.
5. Press the STArT/SToP button to interrupt
the count. Press STArT/SToP again to resume
the count.
6. The alarm sounds and TIME'S UP flashes on the
display when the count reaches 0:0000. The timer
counts up the overtime since reaching 0:0000.
The maximum overtime is 10 hours.
7. The alarm and flashing stop automatically after
60 seconds while the count up continues.
Press STArT/SToP to stop the alarm and the count
up, and reset to 0:0000.
8. Press CleAr when timer is stopped to reset
to 0:0000.
C. Count Up – Stopwatch
1. Slide switch on the right side to CoUNT UP to
select the count up mode. COUNT UP appears
on the display.
2. Press the STArT/SToP button to start counting up.
Note: COUNT UP flashes on the display during count up when in
other modes.
3. Press the STArT/SToP button to interrupt
the count. Press STArT/SToP again to resume
the count.
4. Press CleAr when timer is stopped to reset
to 0:00
.
00
Note: The timer retains any time showing on the display when the
sliding mode switch is moved to another position.
CARE OF YOUR PRODUCT
• Avoid exposing your timer to extreme temperatures,
water or severe shock.
• Avoid contact with any corrosive materials such as
perfume, alcohol or cleaning agents.
• Wipe clean with a damp cloth.
Note: remove sticker from display before use.
The information in this document has been reviewed and is believed
to be accurate. However, neither the manufacturer nor its affiliates
assume any responsibility for inaccuracies, errors or omissions that may
be contained herein. In no event will the manufacturer or its affiliates be
liable for direct, indirect, special, incidental or consequential damages
arisen by using this product or resulting from any defect/omission in
this document, even if advised of the possibility of such damages.
The manufacturer and its affiliates reserve the right to make
improvements or changes to this document and the products and
services described at any time, without notice or obligation.
5-Year Limited Warranty:
Any instrument that proves to be defective in material or
workmanship within five years of original purchase will be
repaired or replaced without charge upon receipt of the unit
prepaid at: CDN, Po Box 10947, Portland, or 97296-0947.
This warranty does not cover damage in shipment or failure
caused by tampering, obvious carelessness or abuse.
For more detailed
information on our
products, please visit
cdn-timeandtemp.com.
© 12-2013 Component Design Northwest, inc.
CD9999106en
Advertisement

Related Manuals for CDN TM8


Summary of Contents for CDN TM8
- Page 1 A brief alarm sounds. prepaid at: CDN, Po Box 10947, Portland, or 97296-0947. This warranty does not cover damage in shipment or failure 3. replace the battery cover until it clicks shut.
- Page 2 2. installer une pile de lr44 en plaçant le côté positif de l’unité payée d’avance à: CDN, Po Box 10947, Portland, le compte progressif. (+) du côté haut. Une alarme brève se déclenche.
Need help?
Do you have a question about the TM8 and is the answer not in the manual?
Questions and answers