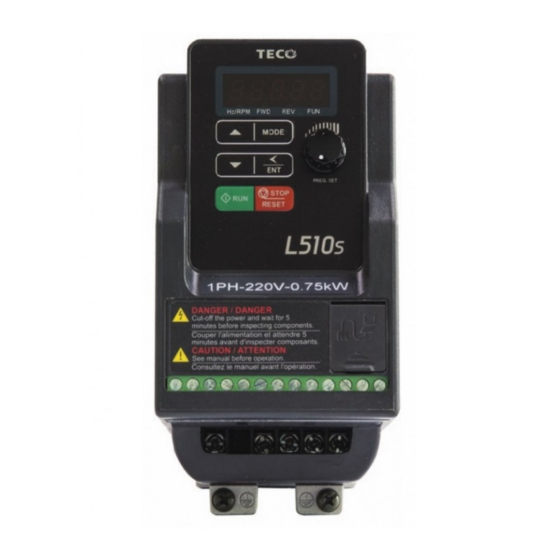
TECO L510s Series Manual
Hide thumbs
Also See for L510s Series:
- Instruction manual (199 pages) ,
- Quick manual (60 pages) ,
- Quick start manual (10 pages)

Related Manuals for TECO L510s Series


Summary of Contents for TECO L510s Series
- Page 2 Chapter 1 Safety Precautions 1.1 Before Power Up Danger Make sure the main circuit connections are correct. Single phase L1(L),L3(N), and Three phase L1(L),L2,L3(N); 400V : L1,L2,L3 are power-input terminals and must not be mistaken for T1,T2 and T3. Otherwise, inverter damage can result. Caution ...
- Page 3 1.3Before Operation Caution Make sure the model and inverter capacity are the same as that set in parameter 13-00. Note : On power up the supply voltage set in parameter 01-01 will flash on display for 2 seconds. 1.4 During Operation Danger ...
- Page 4 Chapter 2 Environment & Installation 2.1 System Diagram ~ ~ ~ Power supply: Power Supply Make sure the correct voltage is applied to avoid damaging the inverter. Molded-case circuit breaker (MCCB) or fused disconnect: Molded A molded-case circuit breaker or fused disconnect must be installed Circuit between the AC source and the inverter that conforms to the rated Breaker...
- Page 5 2.2 Standard wiring 2.2.1 Single phase (NPN) input 1:Data+ 2:Data- 3:Data+ 4:Reserved 5:Reserved 6:Data- 7:5V 8:GND Model: 100V : L510-1P2-SH1-N, L510-1P5-SH1-N, L510-101-SH1-N 200V : L510-2P2-SH1(F)-N, L510-2P5-SH1(F)-N, L510-201-SH1(F)-N, L510-202-SH1(F)-N, L510-203-SH1(F)-N...
- Page 6 2.2.2 Single phase (PNP) input 1:Data+ 2:Data- 3:Data+ 4:Reserved 5:Reserved 6:Data- 7:5V 8:GND Model: 200V : L510-2P2-SH1(F)-P, L510-2P5-SH1(F)-P, L510-201-SH1(F)-P, L510-202-SH1(F)-P, L510-203-SH1(F)-P...
- Page 7 2.2.3 Three phase (NPN) input 1:Data+ 2:Data- 3:Data+ 4:Reserved 5:Reserved 6:Data- 7:5V 8:GND Model: 200V : L510-2P2-SH3-N, L510-2P5-SH3-N, L510-201-SH3-N L510-202-SH3-N, L510-203-SH3-N 400V : L510-401-SH3-N, L510-402-SH3-N, L510-403-SH3-N...
- Page 8 2.2.4 Three phase (PNP) input 1:Data+ 2:Data- 3:Data+ 4:Reserved 5:Reserved 6:Data- 7:5V 8:GND Model: 400V : L510-401-SH3(F)-P, L510-402-SH3(F)-P, L510-403-SH3(F)-P...
- Page 9 2.2.5 NPN/PNP selectable models 1:Data+ 2:Data- 3:Data+ 4:Reserved 5:Reserved 6:Data- 7:5V 8:GND Model: 200V : L510-205-SH3, L510-208-SH3, L510-210-SH3 400V : L510-405-SH3(F), L510-408-SH3(F), L510-410-SH3(F), L510-415-SH3(F) NPN/PNP input is selected by “SC” terminal. If you need to use NPN input, please you shorted +24V and SC terminal. If you need to use PNP input, please you shorted COM and SC terminal.
- Page 10 2.3 Terminal Description 2.3.1 Description of main circuit terminals Terminal symbols TM1 Function Description L1(L) single phase: L1(L) / L3(N) Main power input, three phase(200V): L1(L) / L2 / L3(N) three phase(400V): L1 / L2 / L3 L3(N) externally connected braking resistor Inverter output, connect to U, V, W terminals of motor Ground terminal *P,BR for 205/208/210/401/402/403/405/408/410/415 series...
- Page 11 2.3.2 Description of control circuit terminals Frame1&Frame2 Terminal Signal Level TM2 Function Description symbols Relay output terminal, Specification: 250VAC/1A(30VDC/1A) 250VAC/1A(30VDC/1A) S1~S5 (COMMON) 【NPN】 ±15%,Max output current 30mA S1~S5 (COMMON) 【PNP】 24 VDC, 4.5 mA, Optical coupling isolation Multi-function input terminals(refer to group3) (Max,voltage30 Vdc, Input impedance 6kΩ) Built in Power for an external speed...
- Page 12 Frame3&Frame4 Terminal symbols TM1 Function Description 250VAC/5A(30VDC/5A) Relay output terminal, Specification: RA: Normally open RB: Normally close RC: common point Terminal TM2 Function Description Signal Level symbols +24V Common point of PNP input NPN/PNP selectable terminal. NPN input: +24V&SC need to be shorted. ±15%,Max output current 30mA PNP input: COM&SC need to be shorted.
- Page 13 Chapter 3 Software Index 3.1 Programmable Parameter Groups Parameter Group No. Description Group 00 Basic parameters Group 01 V/F Pattern selections & setup Group 02 Motor parameters Group 03 Multi-function digital Inputs/Outputs Group 04 Analog signal inputs/ Analog output Group 05 Preset Frequency Selections.
- Page 14 Group 00- The basic parameters group Group 00- The basic parameters group Factory Factory No. Description Range Note No. Description Range Note Setting Setting Communicat 0: V/F mode control 00-00 mode 1: SLV mode 00-08 0.00~599.00 Frequency Motor 0: Forward 00-01 Command rotation...
- Page 15 Group 01- V/F Pattern selection & Group 02- Motor parameters Setup Factory No. Description Range Note Setting Factory No. Description Range Note Motor No by motor Setting 02-00 Load ---- nameplate Current Frequency Motor Rated 01-03 0.0 ~ 100.0 100.0 by motor Voltage 02-01...
- Page 16 Group 03- Multi function Digital Group 03- Multi function Digital Inputs/Outputs Inputs/Outputs Factory Factory No. Description Range Note No. Description Range Note Setting Setting 0: Forward/Stop 2: Preset Command or Run frequency is held /Stop as the inverter Multifunction 1: Reverse/Stop stops, and the 03-00 Input Term.
- Page 17 Group 03- Multi function Digital Group 04- Analog signal inputs/ Inputs/Outputs Analogue output functions Factory Factory No. Description Range Note No. Description Range Note Setting Setting level (Hz) 04-08ACIBias 0 ~ 100 Frequency ACI Bias 0: Positive 04-09 03-14 Detection 0.00~30.00 2.00 Selection...
- Page 18 Group 05- Preset Frequency Selections. Group 05- Preset Frequency Selections. Factory Factory No. Description Range Note No. Description Range Note Setting Setting Preset Preset 05-03 Speed2 10.00 05-30 Speed6-Dec 10.0 (Hz) time Preset Preset 05-04 Speed3 20.00 05-31 Speed7-Acc 10.0 (Hz) time Preset...
- Page 19 Group 06- Auto Run(Auto Sequencer) Group 06- Auto Run(Auto Sequencer) function function Factory Factory No. Description Range Note No. Description Range Note Setting Setting Auto _ Run Auto_ Run Mode Mode 06-04 0.00 06-33 frequency running command 4 direction 1 Auto _ Run Auto_ Run Mode...
- Page 20 Group 07- Start/Stop command setup Group 08- Drive & Motor Protection functions Factory No. Description Range Note Setting Factory No. Description Range Note Brake Start Setting Frequency Prevention in Run (Hz) In Stop Mode mode x0xxx: Enable over 0 ~ 20 (Frame1/2). voltage Prevention Based on the 20% in Run Mode...
- Page 21 Group 08- Drive & Motor Protection Group 08- Drive & Motor Protection functions functions Factory Factory No. Description Range Note No. Description Range Note Setting Setting 0: Auto (Depends Over current Over heat on temp.) 08-18 protection 0.0 ~ 1500.0 Protection 1: Operate while in time...
- Page 22 Group10- PID function Setup Group10- PID function Setup Factory No. Description Range Note Setting Factory No. Description Range Note Proportional Setting 10-05 0.0 ~ 10.0 Gain 0: Potentiometer Integral on Keypad 10-06 0.0 ~ 100.0 Time 1: Analog Signal PID target Derivative Input.
- Page 23 Group10- PID function Setup Group11- Performance Control functions Factory No. Description Range Note Setting Factory No. Description Range Note Setting Feedback Setting Regeneration Prevention 0.00~15.00 11-15 3.00 Frequency Limit Regeneration 11-16 Prevention 0~200 Group11- Performance Control Voltage Gain Regeneration functions Prevention Factory 0~200...
- Page 24 Group12 Digital Display & Monitor Group 13 Inspection & Maintenance functions functions Factory Factory No. Description Range Note No. Description Range Note Setting Setting Display Unit 0: Enable all 2: xxxfl (flow) Setting Functions 1: Preset speeds Custom 05-01~05-08 Units (Line 1500/180 12-03 0~65535...
- Page 25 Group 14 PUMP Application Function Group 14 PUMP Application Function Factory Factory No. Description Range Note No. Description Range Note Setting Setting Setting of of Loss Pressure Pressure Transmitter Detection Pump Switching of 0:Set by 14-02 Pressure Pressure 0: Pressure 14-04 14-20 Command...
- Page 26 Chapter 4 Group 14 PUMP Application Function Factory Troubleshooting and No. Description Range Note Setting 2: Sleep Stop maintenance Alternately 4.1 Error display and corrective Selection 3: Timer and Sleep action Stop Alternately 4.1.1 Manual Reset and Auto-Reset Selection 4: Multiple Pumps Test Mode Faults which cannot be recovered Leakage...
- Page 27 Faults which can be recovered manually and automatically Faults which can be recovered Display Corrective action 1.Set a longer acceleration manually but not automatically OC-A time Display Corrective action 2.Replace inverter with one that has the same Consult with the supplier rating as that of the motor 3.Check the motor 4.Check the wiring...
- Page 28 Display Description Display Corrective action StP2 1. If the Stop key is 1.modify11-08~11-10 Err2 pressed while the inverter or 11-11 is set to external control 2.00- 12>00-13 mode (00-02/00-03=1) 3.set 00-05 and 00-06 to then‘STP2’flashes after be different stop. 4.set 03-21 <03-20 2.
- Page 29 第 1 章 安全注意事項 1.1 送電前 危險 主回路端子必須正確配線,單相 L1(L)、L3(N) /三相 L1(L)、L2、L3(N); 400V : L1、L2、L3 為電源輸入端子,絕對不可以與 T1、T2、T3 混用;混用時,送電將造成變頻器的損壞。 注意 所選用之電源電壓必須與變頻器之輸入電壓規格相同。 搬運變頻器時,請勿直接提取前蓋,應由變頻器本體搬運,以防止前蓋脫落,避免變 頻器掉落造成人員受傷或變頻器損壞。 請將變頻器安裝於金屬類等不燃物材料之上,請勿安裝於易燃性材料上或附近,以防 止發生火災。 若多台變頻器同放在一個控制盤內,請外加散熱風扇,使盤內溫度低於 50℃ 以下, 以防過熱或火災等發生。 請於關閉電源後,再拆卸或裝入操作器,並請按圖操作固定操作器,以免接觸不良造 成操作器故障或不顯示。 注意:安裝環境限制,內含風扇機種為‐10~50℃,不含風扇機種為‐10~40 ℃ 警告 本產品系通過 IEC EN61800-3、EN61800-5-1 限制區域使用等級。在某些環境下使用本產 品時,可能造成電磁干擾,故在使用前請先進行適當的測試,同時請務必做好接地工程。...
- Page 30 1.4 運轉中 危險 運轉中不可將馬達機組投入或切離,否則會造成變頻器過電流跳脫,嚴重時會造成變 頻器主回路損壞。 危險 變頻器送電中請勿取下前蓋,以防人員感電受傷。 如設定自動再啟動功能時,馬達於運轉停止後會自動再啟動,請勿靠近機器以免危 險。 停止開關的功能須設定才有效,與緊急停止開關的用法不同,請注意使用。 注意 散熱座、煞車電阻等發熱元件請勿觸摸。 變頻器可以很容易使馬達低速到高速運轉,請確認馬達與機械的容許範圍。 使用煞車模組等搭配產品時,請注意其使用之相關設定。 變頻器運轉時,請勿檢查電路板上的信號。 危險 避免感電!變頻器內部的直流電容器在電源移除後 5 分鐘才能放電完畢,請在電源移 除後 5 分鐘,再進行拆裝或實施檢查。 1.5 檢查保養時 注意 變頻器周圍溫度應在 -10℃~+50℃(注意 1) 95%RH 不結露環境中使用,但需確保周 圍環境無滴水及金屬粉塵。...
- Page 31 第 2 章 周圍環境及安裝 2.1 系統圖: ■ 電源 電源 ‧ 請確認電壓等級是否正確,以免變頻器損壞。 ■ 無熔絲開關 (NFB) 及漏電斷路器 無熔絲開關 NFB ‧ 請參考使用說明書,選用適當額定電流之 NFB。 (及漏電斷路器) ‧ 請勿使用 NFB 作為變頻器之運轉/停止控制。 ‧ 若加裝漏電斷路器以作漏電故障保護時,請選用 感度電流 200mA 以上,動作時間 0.1 秒以上(V- 電磁接觸器 TYPE),以防止高頻誤動作。 ■ 電磁接觸器 ‧ 一般使用時,可以不加電磁接觸器,但要作外部 AC 電抗器 順序控制或停電後自動再起動等功能時,需加裝...
- Page 32 2.2 標準配線 2.2.1 單相(NPN)輸入 對應型號: 100V : L510-1P2-SH1-N, L510-1P5-SH1-N, L510-101-SH1-N 200V : L510-2P2-SH1(F)-N, L510-2P5-SH1(F)-N, L510-201-SH1(F)-N, L510-202-SH1(F)-N, L510-203-SH1(F)-N...
- Page 33 2.2.2 單相(PNP)輸入 對應型號: 200V : L510-2P2-SH1(F)-P, L510-2P5-SH1(F)-P, L510-201-SH1(F)-P, L510-202-SH1(F)-P, L510-203-SH1(F)-P...
- Page 34 2.2.3 三相(NPN)輸入 對應型號 : 200V : L510-2P2-SH3-N, L510-2P5-SH3-N, L510-201-SH3-N L510-202-SH3-N, L510-203-SH3-N 400V : L510-401-SH3-N, L510-402-SH3-N, L510-403-SH3-N...
- Page 35 2.2.4 三相(PNP)輸入 對應型號 : 400V : L510-401-SH3(F)-P, L510-402-SH3(F)-P, L510-403-SH3(F)-P...
- Page 36 2.2.5 NPN/PNP 可切換機種 對應型號 : 200V : L510-205-SH3, L510-208-SH3, L510-210-SH3 400V : L510-405-SH3(F), L510-408-SH3(F), L510-410-SH3(F), L510-415-SH3(F) NPN/PNP輸入選擇 PNP: 1.連接SC與COM端子 2.+24v端子為S1~S5輸入端子之共點 NPN: 1.連接SC與+24V端子 2.使用COM端子為S1~S5輸入端子之共點 註:如未正確連接SC端子,變頻器之03參數群組(多功能端子)之功能將無法使用...
- Page 37 2.3 端子說明 2.3.1 主回路端子說明 TM1 端子功能說明 端子符號 L1(L) 交流電源輸入端,單相輸入機種:L1(L) / L3(N) 三相輸入機種(200V):L1(L) / L2 / L3(N) L3(N) 三相輸入機種(400V):L1 / L2 / L3 制動電阻連接端子,當負載慣量大或減速時間短,而使變頻器容易過電壓跳 脫時使用 變頻器的輸出端,連接馬達 U、V、W 端 接地端子 P,BR 為 205/208/210/401/402/403/405/408/410/415 機種端子 單相: L1(L) L3(N) 註:在 200V 單相機種,其對應端子以移除螺絲,避免誤接。 三相 (200V 機種): L1(L) L2 L3(N) 三相...
- Page 38 2.3.2 控制回路端子說明 框號 1 & 框號 2 端子符號 TM2 端子功能說明 信號準位 250VAC/1A(30VDC/1A) 繼電器輸出端子,規格:250VAC/1A(30VDC/1A) S1~S5 的公共點【NPN 模式】 ±15%, 最大輸出電流 30mA S1~S5 的公共點【PNP 模式】 +24V 24 VDC, 4.5 mA光耦合隔離(最大 多功能輸入端子(具體功能參見群組 3) S1~S5 電壓30 Vdc, 輸入阻抗6kΩ) 10V(最大電流:20mA) 頻率設定電位器(VR)電源端子 類比電壓輸入,規格:0/2~10VDC(由 04-00 選擇) 0 到 10V(輸入阻抗:200KΩ) 類比電流輸入,規格:0/4~20mA(由...
- Page 39 第 3 章 軟體索引 3.1 參數一覽表 參數群組 名 稱 群組 00 基本功能群組 群組 01 V/F 控制功能群組 群組 02 馬達參數群組 群組 03 外部端子數位輸入輸出功能群組 群組 04 外部端子類比輸入輸出功能群組 群組 05 多段速功能群組 群組 06 自動程式運轉功能群組 群組 07 啟動停止控制功能群組 群組 08 保護功能群組 群組 09 通訊功能群組 群組...
- Page 40 群組 00 基本功能群組 群組 00 基本功能群組 出廠 出廠 代碼 參數名稱 範圍 屬性 代碼 參數名稱 範圍 屬性 設定 設定 0:V/F 模式 1:頻率命令歸零 頻率命令模 00-00 控制模式 1:SLV 模式 式 2:依參數 00-11 設 0:正轉 定值 00-01 馬達轉向 1:反轉 停機時初始 50.00/ 00-11 0.00~599.00 頻率命令設 0:按鍵面板控制...
- Page 41 群組 01 V/F 控制功能群組 群組 02 馬達參數群組 出廠 出廠 代碼 參數名稱 範圍 屬性 代碼 參數名稱 範圍 屬性 設定 設定 SLV 有載滑 空載振盪抑 01-12 0.0~200.0 02-17 0~200 制增益 差補償增益 Dehunt 濾波 SLV 有載轉 01-13 1~8192 02-18 0~200 係數 矩補償增益 Dehunt 增益 SLV 滑差補...
- Page 42 群組 03-外部端子數位輸入輸出功能群組 群組 03-外部端子數位輸入輸出功能群組 出廠 出廠 代碼 參數名稱 範圍 屬性 代碼 參數名稱 範圍 屬性 設定 設定 S1~S5 信號 放準位設定 03-08 確認掃描時 1~200 機械煞車動 03-18 0.00~20.00 0.00 間 作準位設定 xxxx0:S1 常開接點 0:A 接點(常開) 繼電器輸出 03-19 xxxx1:S1 常閉接點 1:B 接點(常閉) 接點模式 xxx0x:S2 常開接點 100/220/230 100/200V: xxx1x:S2 常閉接點...
- Page 43 群組 04 外部端子模擬量輸入輸出功能群 群組 05 多段速功能群組 組 出廠 代碼 參數名稱 範圍 屬性 設定 出廠 代碼 參數名稱 範圍 屬性 多段速 3 加 設定 05-23 0.1 ~ 3600.0 10.0 速時間設定 AO 信號方 0: 正向 04-15 多段速 3 減 1: 負向 向控制選擇 05-24 0.1 ~ 3600.0 10.0 速時間設定...
- Page 44 群組 06-自動程式運轉功能群組 群組 06-自動程式運轉功能群組 出廠 出廠 代碼 參數名稱 範圍 屬性 代碼 參數名稱 範圍 屬性 設定 設定 6:單一週期結束 第 6 段運行 0:停止 1:正轉 06-38 2:反轉 後,以最後一段段 轉向選擇 運轉速度繼續運 第 7 段運行 0:停止 1:正轉 06-39 2:反轉 轉;停止後會從第 轉向選擇 一段速起,開始運 轉 第 0 段速的頻率通過參數 05-01 來設定 群組...
- Page 45 *修改 14-00=0,07-12 自動變為 1,修改 14- 群組 08 保護功能群組 00=1,07-12 自動變為 0 出廠 代碼 參數名稱 範圍 屬性 設定 群組 08 保護功能群組 機時無效 3:AVR 在減速時 出廠 代碼 參數名稱 範圍 屬性 無效(高頻->低頻) 設定 4:AVR 在減速和 xxxx0:加速時失 “stop”停機時無效 速防止有效 5:AVR 在減速和 xxxx1:加速時失 “stop”停機時無效 速防止無效 (當...
- Page 46 群組 09 通訊功能群組 群組 10 PID 功能群組 出廠 出廠 代碼 參數名稱 範圍 屬性 代碼 參數名稱 範圍 屬性 設定 設定 2:BACnet(內含 3:通訊設定 PUMP 並聯機種無 PID 鍵盤設 10-02 0.0~100.0 50.0 此功能) 定 0:4800 0:PID 運轉功能無 1:9600 效 *2*3 串列傳輸速 2:19200 09-02 1:PID 控制,偏差 ◇...
- Page 47 群組 10 PID 功能群組 群組 11 輔助功能群組 出廠 出廠 代碼 參數名稱 範圍 屬性 代碼 參數名稱 範圍 屬性 設定 設定 1:再生回避功能 允許誤差範 圍(單位值) 始終有效 10-16 0 ~ 100 (1 單元 2:僅在恆速運行 =1/8192) 時,再生回避功能 PID 休眠起 有效 10-17 0.00 ~ 599.00 0.00 始頻率...
- Page 48 群組 12 監視功能群組 群組 13 維護功能群組 出廠 出廠 代碼 參數名稱 範圍 屬性 代碼 參數名稱 範圍 屬性 設定 設定 0:xxx__(無單位) 可修改,不可恢復 PID 回饋顯 1:xxxpb(壓力) 出廠設定,其他參 12-02 示單位設定 2:xxxfl(流量) 數均可更改 1500/ 參數密碼功 12-03 線速度顯示 0~65535 13-07 00000~65535 1800 能 0:顯示變頻器輸 1150:將參數復歸 出頻率 為出廠值...
- Page 49 群組 14 PUMP 參數群組 群組 14 PUMP 參數群組 出廠 出廠 代碼 參數名稱 範圍 屬性 代碼 參數名稱 範圍 屬性 設定 設定 0:同時顯示目標 用水檢測減 14-27 0.1~3600.0 35.0 壓力與回授壓力 速時間 (14-03 設定值須小 0.00~(頻率上限值 強制運轉頻 14-28 0.00 於 99) 壓力顯示方 00-12) 率 14-05 1:僅顯示目標壓 式選擇...
- Page 50 群組 14 PUMP 參數群組 可手動復歸及自動復歸的故障 出廠 顯 示 對 策 代碼 參數名稱 範圍 屬性 設定 1.設定較長的加速時間 OC-A 計時間 2.更換容量相當的變頻器 **(參數群組 14 僅在 14-00=1 時方可被設定與使用) 3.檢修馬達 4.檢查配線 註:當 14-00 設定為 1 時,07-12 將同時修改為 0 5.更換 IGBT 模組 (V1.13 版後適用) OC-C 1.加大變頻器容量 2.電源輸入側加裝電抗器...
- Page 51 可手動復歸及自動復歸的故障 顯 示 說 明 1.5Hz(60Hz 系統),變頻器 顯 示 對 策 會出現 STP0 LV-C 在 SLV 模式,當輸出頻率 1.改善電源品質 小於 1Hz,變頻器會出現 2.電源輸入側加裝電抗器 STP0 變頻器設定外部運轉(00- StP1 OVSP 02/00- 03=1),且直接啟動 1.負載是否過重。 功能無效(07- 04=1)時,若 2.頻率設定信號是否正確。 電源投入時,運轉開關放在 導通的位置,則變頻器無法 1.改善通風條件 啟動,此時閃爍 STP1(請參 2.調整 08-15 參數 考 07- 04 說明)。 1.
- Page 52 Appendix-A Instructions for UL Appendix-A Instructions for UL ◆ Safety Precautions DANGER Electrical Shock Hazard Do not connect or disconnect wiring while the power is on. Failure to comply will result in death or serious injury. WARNING Electrical Shock Hazard Do not operate equipment with covers removed.
- Page 53 Failure to comply could result in damage to the drive and will void warranty. Teco is not responsible for any modification of the product made by the user. This product must not be modified. Check all the wiring to ensure that all connections are correct after installing the drive and connecting any other devices.
- Page 54 Appendix-A Instructions for Recommended Input Fuse Selection Fuse Type Drive Model L510s Manufacturer: Bussmann Fuse Ampere Rating (A) Model 100 V Class Single-Phase Drives Bussmann 16CT 690V 16A Bussmann 20CT 690V 20A Bussmann 25ET 690V 25A Fuse Type Manufacturer: Bussmann Drive Model L510s Fuse Ampere Rating (A)
- Page 55 Appendix-A Instructions for UL ◆ Drive Motor Overload Protection Set parameter 02-01 (motor rated current) to the appropriate value to enable motor overload protection. The internal motor overload protection is UL listed and in accordance with the NEC and CEC. 02-01 Motor Rated Current ■...
- Page 56 Préface Le produit est un lecteur conçu pour commander un moteur à induction triphasé. lire attentivement ce manuel pour garantir le bon fonctionnement, la sécurité et pour se familiariser avec les fonctions d'entraînement. Le lecteur est un appareil électrique / électronique et doit être installé et géré par un personnel qualifié...
- Page 57 1.2 Câblage Avertissement Coupez toujours l'alimentation électrique avant de procéder à l'installation d'entraînement et le câblage des terminaux utilisateurs. Le câblage doit être effectué par un personnel qualifié / électricien certifié. Assurez-vous que le lecteur est correctement mis à la terre. (220V Classe: impédance ...
- Page 58 pendant que l'alimentation du lecteur est allumé, un choc électrique peut se produire autrement. Ne pas brancher ou débrancher le moteur pendant le fonctionnement. Le variateur pourrai se déclencher et ainsi endommager le lecteur. Les opérations peuvent commencer soudainement si une alarme ou un défaut est réarmé...
- Page 59 產品說明書附件 產品中的有害物質的名稱及含量 有毒有害物質或元素 鉛及其化 汞及其化 鎘及其化 六價鉻化合 部件名稱 多溴聯苯 多溴二苯醚 合物 合物 合物 物 (PBB) (PBDE) (Pb) (Hg) (Cd) (Cr(VI)) 電子元器件 電子部件 電磁接觸器 顯示器 接線端子 電線和電纜 導線 絕緣部件 導電銅柱、風扇、 溫控開關 機械部件 其他 本表格依據 SJ/T 11364 的規定編制。 O: 表示該有毒有害物質在該部件所有均質材料中的含量均在 GB/T 26572 規定的限量要求以下。 X: 表示該有毒有害物質至少在該部件的某一均質材料中的含量超出...
- Page 62 L510s EMC Ferrite Core Installation In order to comply with EMC requirements, install the supplied ferrite cores as shown below : Suitable for 2P2/2P5/201 (frame 1 models) Single phase , 220V input Connect to L1(L)&L3(N) Power cable should be wound three times through the ferrite cores ...
- Page 63 L510s EMC 磁環安裝說明 為了符合 EMC 要求,請依照下列說明之安裝方式進行 EMC 磁環的安裝 適用機種:2P2/2P5/201 (框號一機種) 適用機種:202/203 (框號二機種) ...
Need help?
Do you have a question about the L510s Series and is the answer not in the manual?
Questions and answers