Table of Contents
Advertisement
Available languages
Available languages
Quick Links
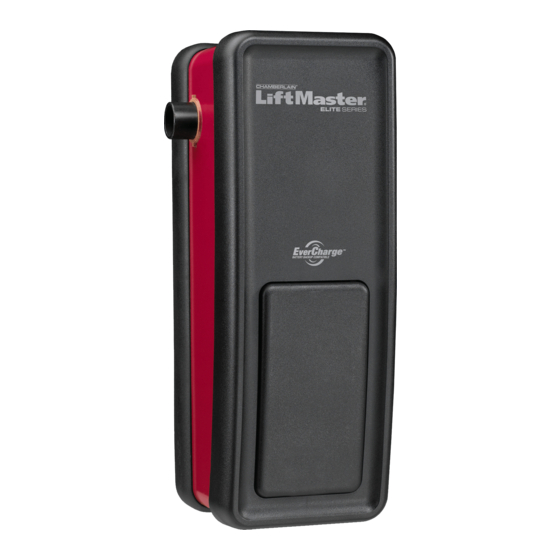
Wall Mount Garage Door Opener
Install on Sectional Doors with Torsion Assemblies Only
This product is intended for installation only by trained garage door technicians. This
product may require adjustments to door springs and or track configurations. This
product is not intended for use on low headroom tracks or garage doors utilizing
extension springs.
• Please read this manual and the enclosed safety materials carefully!
• Fasten the manual near the garage door after installation.
• The door WILL NOT CLOSE unless the Protector System
are connected and properly aligned.
• Periodic checks of the garage door opener are required to ensure safe operation.
• The model number label is located behind the hinged door of your opener.
• DO NOT exceed 10 complete cycles of door operation per hour.
• This garage door opener is ONLY compatible with myQ
accessories.
LiftMaster
300 Windsor Drive
Oak Brook, IL 60523
Model 8500
For Residential and Light Duty Commercial Use
and cable tension monitor
®
and Security+ 2.0
®
®
Advertisement
Chapters
Table of Contents
Troubleshooting

Related Manuals for Chamberlain 8500


Summary of Contents for Chamberlain 8500
- Page 1 Wall Mount Garage Door Opener Model 8500 For Residential and Light Duty Commercial Use Install on Sectional Doors with Torsion Assemblies Only This product is intended for installation only by trained garage door technicians. This product may require adjustments to door springs and or track configurations. This product is not intended for use on low headroom tracks or garage doors utilizing extension springs.
-
Page 2: Table Of Contents
Table of Contents ADJUSTMENT MAINTENANCE ......29 INTRODUCTION Program the Travel Limits .......19 Care of Your Garage Door Opener ...29 Safety Symbol and Signal Word Review ...2 Set the Force ...........20 Planning ............3 TROUBLESHOOTING Test the Safety Reversal System .....21 Preparing Your Garage Door .....4 Diagnostic Chart ........30 Test the Protector System... -
Page 3: Planning
Introduction Planning Survey your garage area to see if any of the conditions below apply to your installation. NOTE: Inspect the torsion bar while the Depending on your requirements, additional materials may be required. door is raised and lowered. It is important that there is no noticeable movement up THIS GARAGE DOOR OPENER IS COMPATIBLE WITH: and down or left and right. -
Page 4: Preparing Your Garage Door
Introduction Preparing Your Garage Door BEFORE YOU BEGIN: To prevent possible SERIOUS INJURY or DEATH: • ALWAYS call a trained door systems technician if garage door binds, sticks, or is • Disable locks. out of balance. An unbalanced garage door may NOT reverse when required. •... -
Page 5: Carton Inventory
Introduction Carton Inventory Accessories included with the garage door opener will vary depending on the model purchased. If anything is missing, carefully check the packing material. 2 Conductor Bell Wire White & Remote Light White/Red (Garage Door Opener Light) with Hardware Bag Collar with Set Screws The Protector System... -
Page 6: Assembly
Assembly Attach the Collar to the Garage Door Opener To avoid installation difficulties, do not run the garage door garage door opener until instructed to do so. To prevent possible SERIOUS INJURY The garage door opener can be installed on either side of the door (see Planning section or DEATH, the collar MUST be properly page 3). -
Page 7: Attach Mounting Bracket To Garage Door Opener
Assembly Attach Mounting Bracket to Garage Door Opener HARDWARE Loosely attach slotted side of mounting bracket to the same side of the garage door Screw opener as the collar, using screws provided. #10-32 (2) NOTE: Do not tighten screws until instructed. Socket Wrench Installation IMPORTANT INSTALLATION INSTRUCTIONS... -
Page 8: Position And Mount The Garage Door Opener
Installation Position and Mount the Garage Door Opener NOTE: For additional mounting options refer to the accessories page. To prevent possible SERIOUS INJURY Close the garage door completely. or DEATH: Slide the garage door opener onto the end of the torsion bar. If the torsion bar is too •... -
Page 9: Attach The Emergency Release Rope And Handle
Installation Attach the Emergency Release Rope and Handle Thread one end of the rope through the hole in the top of the red handle so To prevent possible SERIOUS INJURY “NOTICE” reads right side up. Secure with an overhand knot at least 1 inch (2.5 cm) or DEATH from a falling garage door: from the end of the rope to prevent slipping. -
Page 10: Attach The Cable Tension Monitor (Required)
Installation Attach the Cable Tension Monitor (Required) The cable tension monitor MUST be NOTE: The cable tension monitor is shipped for left side installation. It is recommended that the cable tension monitor be installed on the same side of the door as the garage connected and properly installed before door opener. -
Page 11: Install The Door Control (Myq Control Panel)
Installation Install the Door Control (myQ Control Panel) Install door control within sight of garage door, out of reach of small children at a minimum height of 5 feet (1.5 m) above floors, landings, steps or any other adjacent To prevent possible SERIOUS INJURY or walking surface, and away from ALL moving parts of door. -
Page 12: Install Remote Light
Installation IMPORTANT INSTALLATION INSTRUCTIONS To reduce the risk of SEVERE INJURY or DEATH: 1. This portable luminaire has a polarized plug (one blade 4. If it still does not fit, contact a qualified electrician. is wider than the other) as a feature to reduce the risk of 5. -
Page 13: Install The Protector System
Installation Install the Protector System ® The safety reversing sensor must be connected and aligned correctly before the garage door will move in the down direction. This is a required safety device and cannot be disabled. Be sure power is NOT connected to the garage door opener BEFORE installing IMPORTANT INFORMATION ABOUT THE SAFETY REVERSING SENSOR the safety reversing sensor. - Page 14 Installation INSTALLING THE BRACKETS Be sure power to the opener is disconnected. Install and align the brackets so the safety reversing sensors will face each other across the garage door, with the beam no higher than 6" (15 cm) above the floor. Choose one of the following installations. OPTION A: Track Installation Slip the curved arms over the Door Track...
- Page 15 Installation MOUNTING THE SAFETY REVERSING SENSORS HARDWARE 1. Slide a hex screw into the slot on each sensor. Hex Screw 10-24 (2) 2. Use wing nuts to fasten safety reversing sensors to brackets, with lenses pointing toward each other across the door. Be sure the lens is not obstructed by a bracket extension.
-
Page 16: Connect Power
RIGHT WRONG RIGHT WRONG Installation PERMANENT WIRING PERMANENT WIRING CONNECTION CONNECTION Connect Power Ground Tab Ground Tab To avoid installation difficulties, do not Green Green Ground Screw run the garage door opener at this time. Ground Screw To prevent possible SERIOUS INJURY or DEATH from electrocution or fire: To reduce the risk of electric shock, your Black Black... - Page 17 Installation ENSURE THE SAFETY REVERSING SENSORS ARE ALIGNED The door will not close if the sensors have not been installed and aligned correctly. When the light beam is obstructed or misaligned while the door is closing, the door will reverse. If the door is already open, it will not close. The sensors can be aligned by loosening the wing nuts, aligning the sensors, and tightening the wing nuts.
-
Page 18: Install The Battery Backup (Optional)
Installation Install the Battery Backup (optional) When in Battery Backup mode, wireless myQ devices and Timer-To-Close will be disabled. If the optional Battery Backup is part of this installation, it should be installed at this time. The Battery Backup can be mounted to either the ceiling or a wall within 3 feet (.9 m) of the garage door opener. -
Page 19: Adjustment
Adjustment Program the Travel Limits Travel limits regulate the points at which the door will stop when moving up or down. Without a properly installed safety Adjust the position of the door by using the black and yellow buttons. Black moves the reversal system, persons (particularly door UP (open) and yellow moves the door DOWN (close). -
Page 20: Set The Force
Adjustment Set the Force The force setting measures the amount of force required to open and close the door. Push the yellow button twice to enter into the Force Adjustment Mode. The LED will Without a properly installed safety flash quickly. reversal system, persons (particularly small children) could be SERIOUSLY Push the door control or programmed remote control. -
Page 21: Test The Safety Reversal System
Adjustment Test the Safety Reversal System TEST Without a properly installed safety With the door fully open, place a 1-1/2 inch (3.8 cm) board (or a 2x4 laid flat) on the reversal system, persons (particularly floor, centered under the garage door. small children) could be SERIOUSLY Operate the door in the down direction. -
Page 22: Test Cable Tension Monitor
Adjustment Test Cable Tension Monitor With the door fully closed, push on To prevent possible SERIOUS INJURY the front of the cable tension monitor. or DEATH from a falling garage door: A click should be heard. If there is • If possible, use emergency release no click, the roller may be hitting the Roller handle to disengage door ONLY when... -
Page 23: Operation
Operation IMPORTANT SAFETY INSTRUCTIONS To reduce the risk of SEVERE INJURY or DEATH: 1. Read and follow ALL warnings and instructions. 9. Safety reversal system MUST be tested every month. Door MUST reverse on contact with 1-1/2" (3.8 cm) high object 2. -
Page 24: Using The Door Control (Myq Control Panel)
Operation Using the Door Control (myQ Control Panel) NOTE: Due to power consumption this door control (Model 889LM) cannot be used in conjunction with another wired door control connected to your garage door opener. If an additional door control is needed, the wireless door control model 885LM can be programmed to the door control (Model 889LM). -
Page 25: Using The Remote Control
Operation Using the Remote Control Press and hold the button down until the door or gate starts to move. The remote control will operate from up to 3 car lengths away on typical installations. Installations and conditions vary, contact an installing dealer for more information. -
Page 26: Programming
Programming Your hand-held remote control (model 893MAX) has already programmed to the door control (myQ Control Panel) at the factory. Below are instructions for programming additional remote controls and keyless entries to the door control. NOTE: Use the learn button on the door control to program all accessories. The yellow learn button on the garage door opener will NOT program accessories. -
Page 27: Liftmaster ® Internet Gateway (Not Provided)
Programming LiftMaster Internet Gateway (Not Provided) ® The LiftMaster Internet Gateway gives you control of your garage door from your internet ® Model 828LM connected computer or mobile device. LiftMaster Internet ® Gateway To program your myQ Control Panel to the LiftMaster Internet Gateway: ®... -
Page 28: Additional Programming For The Keyless Entry (Not Provided)
Programming Additional Programming for the Keyless Entry (Not Provided) TO CHANGE AN EXISTING, KNOWN PIN If the existing PIN is known, it may be changed by one person without using a ladder. Press the four buttons for the present PIN, then press and hold the # button. Release the # button. Press the new 4-digit PIN you have chosen, then press Enter. -
Page 29: Maintenance
Maintenance Care of Your Garage Door Opener MAINTENANCE SCHEDULE Once a Month • Manually operate door. If it is unbalanced or binding, call a trained door systems technician. • Check to be sure door opens and closes fully. Adjust limits and/or force if necessary (see Adjustment Steps 1 and 2). -
Page 30: Troubleshooting Diagnostic Chart
Troubleshooting Garage Door Opener Diagnostic Chart Your garage door opener is programmed with self-diagnostic capabilities. The diagnostic LED will flash a number of times, then pause, signifying it has found a potential issue. Consult Diagnostic Chart below. Diagnostic Installed Installed Safety Reversing Safety Reversing Sensor... -
Page 31: Troubleshooting (Continued)
Troubleshooting Troubleshooting The garage door doesn't operate from the myQ Home Control App. • When using Model 580LM Alternate Power Supply or when in Battery Backup mode, the LiftMaster Internet Gateway will not ® activate the garage door through the myQ Home Control App. If you wish to use the LiftMaster Internet Gateway with your garage ®... - Page 32 Troubleshooting Troubleshooting (Continued) My door will not close: The safety reversing sensor must be connected and aligned correctly before the garage door opener will move in the down direction. • Verify the safety sensors are properly installed, aligned and free of any obstructions. The garage door opener strains to operate door: •...
-
Page 33: Repair Parts Installation Parts
Repair Parts Installation Parts PART PART DESCRIPTION DESCRIPTION 29B137 Remote control visor clip 41D96-1 Light lens for light 10A20 3V CR2032 Lithium battery 041-0136 Safety sensor kit: receiving and sending sensors with 2-conductor wire 041A4582 Emergency release rope & handle assembly 380LM Remote Light (garage door opener... -
Page 34: Garage Door Opener Assembly Parts
Repair Parts Garage Door Opener Assembly Parts PART PART DESCRIPTION DESCRIPTION 041DJ002 Logic board complete with plate 41A6095 Motor with bracket 41A6408 Travel Module 41B122 Power cord 41C168 Transformer 041A6348-1 Cover Contact Information Address repair parts order to: For installation and service LiftMaster information visit us online at: 6050 S. -
Page 35: Accessories
Includes visor clip. Mini 3-Button MAX Remote Control 480LM Alternate Mounting Kit: 893LM This kit allows model 8500 MYQ ACCESSORIES to be mounted below the 3-Button Remote Control: torsion bar in the case where 828LM Includes visor clip. -
Page 36: Warranty
Warranty LIFTMASTER LIMITED WARRANTY ® LiftMaster (“Seller”) warrants to the first retail purchaser of this product, for the residence in which this product ® is originally installed, that it is free from defects in materials and/or workmanship for a specific period of time as defined below (the “Warranty Period”). -
Page 37: Automatic Garage Door Opener Safety & Maintenance Guide
Automatic Garage Door Opener Safety & Maintenance Guide Garage Door Opener Safety – An Automatic Decision A garage door is the largest moving object in the home. An improperly adjusted garage door and opener can exert deadly force when the door closes – which could lead to entrapment of children or adults and subsequent injury or death. - Page 38 Routine Maintenance Can Prevent Tragedies Make monthly inspection and testing of your garage door and opener system a part of your regular routine. Review your owner’s manual for both the door and door opener. If you don’t have the owner’s manuals, contact the manufacturer(s) and request a copy for your specific model(s).
- Page 39 Abre-puertas de garaje de montaje en la pared Modelo 8500 Exclusivamente para uso residencial o uso comercial de servicio liviano Sólo instalizar en puertas seccionales con resorte de tension Este producto es para la instalación solamente por los técnicos especializados en sistemas de puertas del garaje.
- Page 40 Contenido INTRODUCCIÓN AJUSTES MANTENIMIENTO Revisión de los símbolos y palabras de Programación de los límites Mantenimiento del abre-puertas seguridad ..........2 del recorrido ........... 19 de garaje ..........29 Planificación ..........3 Ajuste la fuerza ........20 RESOLUCIÓN DE PROBLEMAS Preparación de la puerta del garaje ...
-
Page 41: Introducción
Introducción Planificación Revise el área de su garaje para ver si alguna de las siguientes condiciones se aplica a NOTA: Inspeccione la barra de torsión su instalación. Otros materiales podrían ser necesarios según las características de su mientras la puerta suba y baje. Es instalación particular. -
Page 42: Preparación De La Puerta Del Garaje
Introducción Preparación de la puerta del garaje ANTES DE COMENZAR: Para evitar la posibilidad de LESIONES GRAVES o incluso LA MUERTE: • Si la puerta se atora, se atasca o está desbalanceada, SIEMPRE llame a un técnico • Desarme los seguros. profesional para que la repare. -
Page 43: Inventario Del Empaque
Introducción Inventario del empaque Los accesorios suministrados con el abre-puertas de garaje dependerá del modelo comprado. Si falta alguna pieza, revise con cuidado el material de empaque. Luz remota Cable del timbre de (Luz del abre-puertas 2 conductores, Blanco de garaje) con bolsa y Blanco/Rojo de piezas Collar con... -
Page 44: Ensamblado
Ensamblado Montar el aro en el abre-puertas de garaje Para evitar problemas con la instalación, no opere el abre-puertas de garaje hasta que llegue al paso de la instalación correspondiente. Para evitar la posibilidad de una LESIÓN El abre-puertas de garaje puede montarse a izquierda o a derecha de la puerta (véase la GRAVE o INCLUSO LA MUERTE, sección Planificación de la página 3). -
Page 45: Montar La Ménsula Al Abre-Puertas De Garaje
Ensamblado Montar la ménsula al abre-puertas de garaje HERRAJES Con los tornillos autorroscantes suministrados, colocar el lado de la ménsula con la Tornillo núm. muesca del mismo lado en que se montó el aro en el abre-puertas de garaje. 10-32 (2) NOTA: No ajustar los tornillos hasta que así... -
Page 46: Instalación Montar El Abre-Puertas De Garaje
Instalación Montar el abre-puertas de garaje NOTA: Para opciones de montaje adiciónales, vea la página de accesorios. Cierre completamente la puerta del garaje. Para evitar la posibilidad de una LESIÓN GRAVE Deslizar el abre-puertas de garaje hacia el extremo de la barra de torsión. o INCLUSO LA MUERTE: Si la barra fuera muy larga o estuviera dañada, podría ser necesario •... -
Page 47: Montaje De La Cuerda Y La Manija De Desenganche De Emergencia
Instalación Montaje de la cuerda y la manija de desenganche de emergencia Pase un extremo de la cuerda a través del agujero en la parte superior de la manija Para evitar la posibilidad de una roja de manera que "AVISO" lee al derecho. Asegúrela con un nudo sencillo a, por lo LESIÓN GRAVE o INCLUSO LA MUERTE si la puerta del garaje se cae: menos, 2.5 cm (1 pulg.) del extremo de la cuerda, para evitar que se suelte. -
Page 48: Colocación Del Monitor De Tensión
Instalación Colocación del monitor de tensión del cable (Requerido) NOTA: El monitor de tensión del cable se envía de fábrica para realizar la instalación del El monitor de tensión del cable DEBE estar conectado y correctamente lado izquierdo. Es recomendable que el monitor de tensión de cable se instale del mismo instalado antes de que el abre-puertas lado de la puerta que el abre-puertas de garaje. -
Page 49: Instalar El Control De Puerta (Panel De Control Myq)
Instalación Instalar el control de puerta (Panel de control myQ) Instale el control de la puerta de manera que quede a la vista desde la puerta, donde los niños pequeños no lo puedan alcanzar, a una altura mínima de 1.5 m Para evitar la posibilidad de una LESIÓN GRAVE o INCLUSO LA MUERTE por electrocución: (5 pies) por encima de pisos, descansos, peldaños o cualquier otra superficie de... -
Page 50: Instalación De La Luz Con Comando Remoto
Instalación INSTRUCCIONES DE SEGURIDAD IMPORTANTES Para reducir el riesgo de LESIONS GRAVES o DE MUERTE: 1. Esta luminaria portátil tiene un enchufe con clavijas de 4. Si aún así no entra, diríjase a un electricista profesional. polaridad diferenciada (una clavija es más ancha que la otra) 5. -
Page 51: Instalación Del Protector System
Instalación Instalación del Protector System ® El sensor de seguridad de reversa se debe conectar y alinear antes de que se haga la puerta por primera vez. Este es un sistema de seguridad requerido y no puede ser ANTES de instalar el sensor de reversa incapacitado. -
Page 52: Ménsulas Para Sensor De Seguridad
Instalación INSTALACIÓN DE LOS SOPORTES Asegúrese de que el abre-puertas no esté conectado a la energía eléctrica. Instale y alinee los soportes, de modo que los sensores de reversa de seguridad se enfrenten de un extremo al otro de la puerta. El rayo no debe encontrarse a una distancia superior a las 15 cm (6 pulg.) del suelo. - Page 53 Instalación HERRAJES MONTAJE Y CABLEADO DE LOS SENSORES DE SEGURIDAD DE REVERSA Deslice un perno de coche de 1/4 de pulg. de 20x1/2 de pulg. en la ranura Perno de coche de de cada sensor. 1/4 de pulg.-20x1/2 Utilice tuercas mariposa para sujetar los sensores de reversa de seguridad a los de pulg.
-
Page 54: Conectar La Alimentación
Instalación Conectar la alimentación Para evitar problemas con la instalación, no opere el abre-puertas de garaje ahora. Para evitar la posibilidad de una LESIÓN GRAVE o incluso LA MUERTE por electrocución o incendio: Para reducir el riesgo de choque eléctrico, su abre-puertas de garaje viene con un enchufe de conexión a tierra de tres clavijas. - Page 55 Instalación ALINEACIÓN DE LOS SENSORES DE SEGURIDAD La puerta no se cerrará si los sensores de inversión no están instalados y alineados. Si el haz de luz está desalineado o hay una obstrucción cuando la puerta se está cerrando, la misma invertirá su dirección y las luces se encenderán y apagarán diez veces. Si la puerta estuviera abierta, no se cerrará.
-
Page 56: Instalar La Batería De Reserva (Opcional)
Instalación Instalar la batería de reserva (opcional) En modo de reserva de batería, los dispositivos inalámbricos myQ y el temporizador de cierre quedarán desactivados. Si la reserva de batería (opcional) es parte del sistema, instalarla ahora. La reserva de batería puede montarse en el techo o en la pared a una distancia máxima de 0.9 m (3 pies) del abre-puertas de garaje. -
Page 57: Ajustes
Ajustes Programación de los límites del recorrido Los límites del recorrido regulan los puntos en los que la puerta se detendrá al abrirse y cerrarse. Si el sistema de reversa de seguridad Regule la posición de la puerta con los botones negro y amarillo. El negro mueve la puerta no se ha instalado debidamente, las hacia ARRIBA (apertura) y el amarillo la mueve hacia ABAJO (cierre). -
Page 58: Ajuste La Fuerza
Ajustes Ajustar la fuerza El ajuste de la fuerza mide la cantidad de fuerza necesaria para abrir y cerrar la Si el sistema de reversa de seguridad puerta. no se ha instalado debidamente, las Pulse dos veces el botón amarillo para pasar al modo de Regulación de fuerza. La personas (y los niños pequeños en DEL parpadeará... -
Page 59: Prueba Del Sistema De Seguridad De Reversa
Ajustes Prueba del sistema de seguridad de reversa PRUEBA Si el sistema de reversa de seguridad Con la puerta totalmente abierta, coloque un tablón de 3.8 cm (1-1/2 de pulg.) (o de no se ha instalado debidamente, las 2 x 4 acostado) en el suelo, centrado debajo de la puerta del garaje. personas (y los niños pequeños en Opere la puerta en la dirección hacia abajo. -
Page 60: Prueba Del Monitor De Tensión Del Cable
Ajustes Prueba del monitor de tensión del cable Con la puerta completamente cerrada, Para evitar la posibilidad de una empuje en la parte frontal del monitor LESIÓN GRAVE o incluso LA MUERTE de tensión del cable. Un clic debe ser si la puerta del garaje se cae: oído. -
Page 61: Operación
Operación INSTRUCCIONES DE SEGURIDAD IMPORTANTES Para reducir el riesgo de LESIONES GRAVES o de MUERTE: 1. Lea y respete TODAS las advertencias y las instrucciones. 9. El sistema de reversa de seguridad SE DEBE probar cada 2. SIEMPRE conserve los controles remotos lejos del alcance mes. -
Page 62: Uso Del Control De Puerta (Panel De Control Myq)
Operación Uso del control de puerta (Panel de control myQ) NOTA: Por el consumo de energía, este control de puerta (Modelo 889LM) no puede usarse con ningún otro control cableado conectado al abre-puertas de garaje. Si fuera necesario otro control de puerta, el modelo inalámbrico 885LM puede programarse con el control de puerta (Modelo 889LM). -
Page 63: Cómo Usar El Control Remoto
Operación Cómo usar el control remoto Mantenga oprimido el botón hasta que la puerta o barrera comience a moverse. En instalaciones típicas, el control remoto podrá comandar la unidad a una distancia de hasta tres veces la longitud del automóvil. Los tipos y las condiciones de instalación pueden variar. -
Page 64: Programación
Programación El control remoto modelo 893MAX está programado de fábrica con el control de puerta (Panel de control myQ). A continuación se indican las instrucciones para programar con el control de puerta otros controles remotos, entradas sin llave y accesorios myQ. NOTA: Para programar los accesorios usar el botón de aprendizaje del control de puerta. -
Page 65: Liftmaster ® Internet Gateway
Programación Internet Gateway LiftMaster (No incluido) ® Modelo 828LM El LiftMaster Internet Gateway le da control de su puerta del garaje desde su ® LiftMaster Internet ® computadora o dispositivo móvil conectado a Internet. Gateway Para programar el panel de control myQ al Internet Gateway LiftMaster ®... -
Page 66: Homelink
Programación Programación adicional para la llave digital (no suministrada) PARA CAMBIAR UNA CLAVE (PIN) EXISTENTE Y CONOCIDA Si la clave (PIN) existente ya es conocida, una persona la puede cambiar sin usar una escalera. Oprima los cuatro botones que correspondan a la clave (PIN) actual; luego, oprima y mantenga oprimido el botón #. Oprima la nueva clave (PIN) de cuatro dígitos que haya elegido y luego oprima Enter. -
Page 67: Mantenimiento
Mantenimiento Mantenimiento del abre-puertas de garaje CALENDARIO DE MANTENIMIENTO Una vez al mes • Opere la puerta manualmente. Si está desequilibrada o se atasca, llame a un técnico especializado en sistemas de puertas. • Verifique que la puerta se abra y se cierre completamente. Si es necesario, ajuste los límites y/o la fuerza (consulte los Pasos 1 y 2 de la sección de Ajustes). -
Page 68: Resolución De Problemas Tabla De Diagnóstico
Resolución de problemas Tabla de diagnóstico Abre-puertas de garaje Su abre-puertas de garaje viene programado con funciones de autodiagnóstico. El LED de diagnóstico parpadeará un número de veces, y luego una pausa, lo que significa que ha encontrado un problema potencial. Consulte el siguiente Cuadro de diagnóstico. DEL de diagnóstico Installed... -
Page 69: Resolución De Problemas (Continuación)
Resolución de problemas Resolución de problemas La puerta del garaje no funcionará desde la aplicación de control myQ ni desde el sitio de Internet. • Al usar la fuente de alimentación de alternativa Modelo 580LM o en modo de batería de reserva, el LiftMaster Internet Gateway ®... - Page 70 Resolución de problemas Resolución de problemas (Continuación) La puerta no cierra y las luces parpadean: El sensor de reversa de seguridad debe estar bien conectado y alineado antes de que el abre-puertas de garaje se mueva hacia abajo. • Verifique que los sensores de seguridad estén debidamente instalados, alineados y libres de obstrucciones. El abre-puertas de garaje mueve la puerta con dificultad: •...
-
Page 71: Piezas De Repuesto
Piezas de repuesto Piezas para la instalación NÚM. NÚM. NÚM. NÚM. DE CLAVE DE PIEZA DESCRIPCIÓN DE CLAVE DE PIEZA DESCRIPCIÓN 29B137 Broche de visera para control remoto 41A5034 Juego de sensores de reversa de seguridad (receptor y emisor) con 10A20 Batería de Litio de 3V CR2032 cable de 2 conductores... -
Page 72: Piezas Del Abre-Puertas De Garaje
Piezas de repuesto Piezas del abre-puertas de garaje NÚM. NÚM. NÚM. NÚM. DE CLAVE DE PIEZA DESCRIPCIÓN DE CLAVE DE PIEZA DESCRIPCIÓN 041DJ002 Tablero lógico completo con placa 41A6095 Motor con soporte 41A6408 Módulo de viaje 41B122 Cable de corriente 41C168 Transformador 041A6348-1 Cubierta... -
Page 73: Accesorios
893LM ACCESORIOS myQ Juego de montaje alternativo: Control remoto de 3 Este conjunto pemite que la 828LM botones: modelo 8500 sea montada Internet Gateway LiftMaster ® Incluye broche para ENROLL de bajo de la barra de torsión Accesorio para conexión visera de vehículo. -
Page 74: Garantía
Garantía GARANTÍA LIMITADA DE LIFTMASTER ® LiftMaster El (“Vendedor”) garantiza al primer comprador minorista de este producto, para la residencia en la que ® se instaló originalmente este producto, que está libre de defectos de materiales y mano de obra durante un período específico según se define abajo (el “Período de garantía”). -
Page 75: Guía De Seguridad Y Mantenimiento Del Abre-Puertas De Garaje Automático
Guía de seguridad y mantenimiento del abre-puertas de garaje automático Seguridad del abre-puertas de garaje – Una decisión automática Una puerta de garaje es el objeto móvil más grande de la casa. Una puerta y un abre-puertas de garaje mal ajustados pueden ejercer una fuerza mortal cuando la puerta se cierra, que puede ocasionar el atrapamiento de niños o adultos y la posterior lesión o muerte. - Page 76 El mantenimiento de rutina puede evitar tragedias La inspección y prueba mensual de su puerta de garaje y sistema de abre-puertas debe formar parte de su rutina regular. Consulte el manual del propietario tanto para la puerta como para el abre-puertas. Si no tiene los manuales del propietario, comuníquese con el fabricante y solicite una copia para su modelo específico.
Need help?
Do you have a question about the 8500 and is the answer not in the manual?
Questions and answers