Advertisement
Quick Links
FTGHG 641 D/HA(BK)RU
FTGHG 751 D/HA(BK) EE
English
Operating Instructions
HOB
Contents
Operating Instructions,1
Warnings,2
Assistance,4
Description of the appliance,5
Installation,7
Start-up and use,10
Precautions and tips,10
Maintenance and care,11
Troubleshooting,11
Advertisement

Subscribe to Our Youtube Channel
Related Manuals for Hotpoint Ariston FTGHG 641 D D/HABK


Summary of Contents for Hotpoint Ariston FTGHG 641 D D/HABK
- Page 1 FTGHG 641 D/HA(BK)RU FTGHG 751 D/HA(BK) EE English Operating Instructions Contents Operating Instructions,1 Warnings,2 Assistance,4 Description of the appliance,5 Installation,7 Start-up and use,10 Precautions and tips,10 Maintenance and care,11 Troubleshooting,11...
- Page 2 Warnings WARNING: The appliance and its accessible parts become hot during use. Care should be taken to years of age shall be kept away unless continuously supervised. This appliance can be used by children reduced physical, sensory or mental capabilities or lack of experience and knowledge if they have been given supervision or instruction concerning use of the appliance in a safe way and understand the hazards...
- Page 4 Assistance Communicating: • the type of problem encountered. • appliance model (Mod.) • serial number (S/N) This information is found on the data plate located on the appliance and/or on the packaging. •...
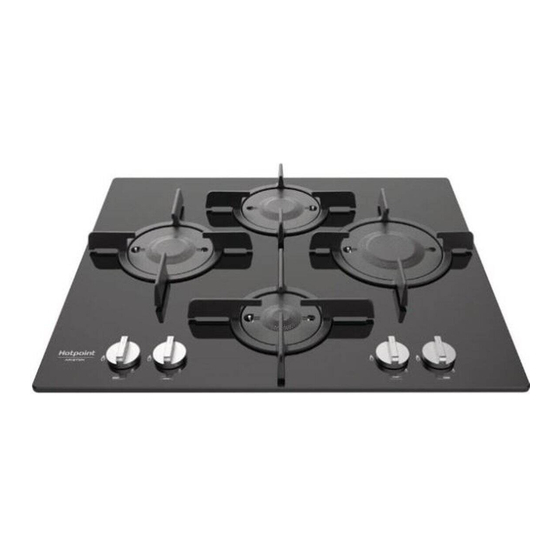
- Page 5 Description of the appliance Overall view 1. Support Grid for COOKWARE 2. GAS BURNERS Control Knobs for GAS BURNERS 4. Ignition for GAS BURNERS 5. SAFETY DEVICES ! The largest slot should be inserted into the ignition. • GAS BURNERS differ in size and power. Use the diameter of the cookware •...
- Page 6 • • • •...
- Page 7 Installation If the hob is installed beneath a wall cabinet, the latter must be situated at a minimum of 700 mm above the hob. ! Before operating your new appliance please read this instruction booklet 600mm min. carefully. It contains important information for safe use, installation and care of the appliance.
- Page 8 Gas connection The appliance should be connected to the main gas supply in compliance with current national regulations. Before carrying out the connection, make sure the cooker is compatible with the gas supply you wish to use. ! Check that the pressure of the gas supply is consistent with the values energy consumption.
- Page 9 Burner and nozzle specifications Table 1 Natural Gas Adjusting the burner’s (G20 / 20 mbar) primary air Burner Diameter Thermal Power Nozzle Flow* By-pass (mm) kW (p.c.s.*) 1/100 1/100 Nomin. Reduc. (mm) (G20) (mm) (mm) Rapid (R) 3.00 1.00 10.6 Semi Rapid (S) 1.90 0.80...
- Page 10 Start-up and use • For maximum stability, always make sure that the pan supports are • Pan handles should be positioned in line with one of the support bars on ! The position of the corresponding gas burner is shown on every knob. the pan support grid.
- Page 11 • The appliance is not intended to be operated by means of an external • When replacing the grids, make sure that the panstand area is aligned timer or separate remote-control system. with the burner. • Models equipped with electrical ignition plugs and safety device require Disposal thorough cleaning of the plug end in order to ensure correct operation.
- Page 12 • To clean the FTGH burner: cream soap BRUSH SCRUB Strofinare Spazzolare Frotter Brosser Avoid soaking NO ammollo Ne pas laisser tremper Asciugare Sécher 40°C RINSE Risciacquare Rincer Secar Cepillar Enjuagar No remojar Fregar Secar Escovar Enxaguar Sem amolecimento Esfregar Drogen Spoelen Niet weken...
- Page 13 600mm min. 555 mm B а Нe Пp o y a H=20mm H=30mm В У а а H=40mm...
- Page 15 Ха а П а Р а а 1 (Г13/13 а ) а а Д а Т а Ба а Ф а Ра 1/100 1/100 / а В (p.c.s.*) (Г13) Н С а . Б а 3.00 1.00 10.6 1.90 0.80 С...
- Page 16 К а Ø Д а а Б а (Б а )(R) 24 - 26 16 - 20 С 10 - 14 Ма а (A)
- Page 17 ”...
- Page 19 cream soap BRUSH SCRUB Strofinare Spazzolare Frotter Brosser Avoid soaking NO ammollo Ne pas laisser tremper Asciugare Sécher 40°C RINSE Risciacquare Rincer Secar Enjuagar No remojar Cepillar Fregar Secar Escovar Enxaguar Sem amolecimento Esfregar Drogen Spoelen Niet weken Borstelen Poetsen Kurulayın Fırçalayın Durulayın...
- Page 20 • • 555 mm • М а а а Т а а а а а а а а • Жа а а а а а а а а Жа а а Ж Т а а а а а •...
- Page 22 К а а а а а а Та а А а а а а (Г20/20 а ) Д а а Ж а Ба а Ф а Ш а В 1/100 1/100 а (p.c.s.*) Н а- а- (Г20) а Ж а 3.00 1.00 10.6...
- Page 23 • • • • О Ø а а а Ж а (R) 24 - 26 • Жа а а (S) 16 - 20 а (A) 10 - 14 ” / "...
- Page 24 • • • • • • • • • • • • • • • • • •...
- Page 25 cream soap BRUSH SCRUB Strofinare Spazzolare Frotter Brosser Avoid soaking NO ammollo Ne pas laisser tremper Asciugare Sécher 40°C RINSE Risciacquare Rincer Secar Enjuagar No remojar Cepillar Fregar Secar Escovar Enxaguar Sem amolecimento Esfregar Drogen Spoelen Niet weken Borstelen Poetsen Kurulayın Fırçalayın Durulayın...
- Page 28 195140606.01 02/2016 - XEROX FABRIANO Indesit Company S.p.A. Viale Aristide Merloni,47 60044 Fabriano (AN) www.hotpoint.eu...
Need help?
Do you have a question about the FTGHG 641 D D/HABK and is the answer not in the manual?
Questions and answers