Advertisement
Quick Links
TEC1000
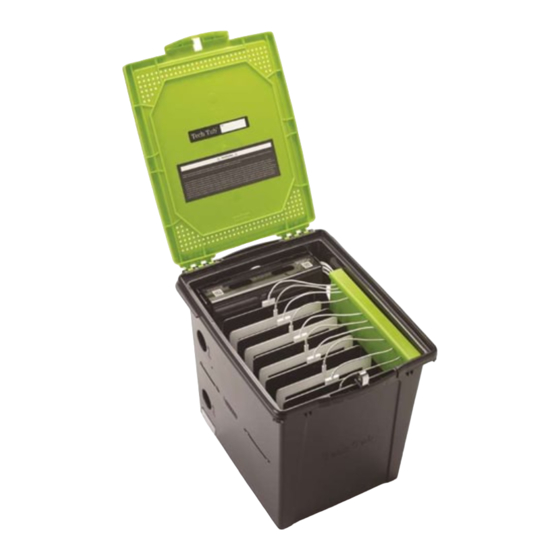
Tech Tub Premium: Holds Up to 10 Tablets
Assembly Guide
TEC1000_2017_A
Check out our other products online at
www.copernicused.com
WARNING
Padlock (2)
USB Hub
Enclosure (1)
Divider (9)
23229
Please Recycle
®
This product is meant to be assembled by an adult.
In its unassembled state, small parts present a hazard.
To be used under direct supervision of an adult.
Cable Management Pocket (1)
23228
TEC1000 - Version A - Released January 6, 2017 - Copernicus Educational Products Inc.
For assistance, please contact us:
1-800-267-8494
Email info@copernicused.com
Have your packing slip ready for reference
Lid (1)
23226
Tub (1)
23227
Cable Hook (2)
Locking Pin (1)
31079
Locking Block (1)
31078
Spacer (2)
232292
Rail (2)
232291L/R
USB "B" Cable (1)
Items not shown:
Bottom Foam Pad (1)
Padlock Keys (6)
10 Port USB Hub (1)
255144
Power Adapter (1)
255145
Advertisement

Related Manuals for Copernicus Tech Tub Premium


Summary of Contents for Copernicus Tech Tub Premium
- Page 1 Enclosure (1) Spacer (2) 232292 Rail (2) 232291L/R 10 Port USB Hub (1) 255144 Power Adapter (1) USB “B” Cable (1) 255145 Divider (9) 23229 Please Recycle TEC1000 - Version A - Released January 6, 2017 - Copernicus Educational Products Inc.
- Page 2 Life Time Year To validate your warranty, submit the ON-LINE form at www.copernicused.com. Tech Tub™ Enter a drawing to win a Copernicus Product for your classroom at the same time! Power Supply & Lid Warranty Warranty Frame TEC1000 - Version A - Released January 6, 2017 - Copernicus Educational Products Inc.
- Page 3 72 consecutive hours. Turn off power strip before unplugging. Specifications Read the electrical specifications of any electronic equipment you are using with your Copernicus products. Failure to read these specifications and follow their instructions could result in damage to your equipment or personal injury.
- Page 4 Tech Tub Locking Pin (31079) Padlock Hardware Actual Size M6 x 70mm M6 Washer M6 Lock Nut Hook and Loop Square with Adhesive Allen Key 4mm TEC1000 - Version A - Released January 6, 2017 - Copernicus Educational Products Inc.
- Page 5 Email our Tech Support Service at info@copernicused.com Watch this video on how to Need Tech Support? set up and manage your cables Have a Question? www.copernicused.com/help/default.aspx Email our Tech Support Service TEC1000 - Version A - Released January 6, 2017 - Copernicus Educational Products Inc.
- Page 6 Do not throw the Hub cover away. Unwrap USB Syncing Cable and Power Adapter Cable Unwrap USB Cable Repeat for Power Adapter Cable. Leave USB Cable loose TEC1000 - Version A - Released January 6, 2017 - Copernicus Educational Products Inc.
- Page 7 Unfasten and Remove USB Hub Enclosure Move the power adapter around to access this hardware. Do not throw this hardware away. Keep it for Step 9. TEC1000 - Version A - Released January 6, 2017 - Copernicus Educational Products Inc.
- Page 8 (Not to Scale) Unplug Power Adapter and USB Cables, Remove USB Hub, Remove Power Adapter Do not throw this hardware away. Keep it for Step 8. TEC1000 - Version A - Released January 6, 2017 - Copernicus Educational Products Inc.
- Page 9 Use the hardware from Step 4 You will need: (Not to Scale) Adjustable wrench Screwdriver Pliers Add Power Adapter and Cables into Enclosure Pull out cables through hole TEC1000 - Version A - Released January 6, 2017 - Copernicus Educational Products Inc.
- Page 10 Assemble USB Hub Enclosure to Tech Tub M3 Flat Washer Use the hardware from Step 3 M3 x 12 Screw with Washer M3 Lock Washer M3 Lock Nut TEC1000 - Version A - Released January 6, 2017 - Copernicus Educational Products Inc.
- Page 11 Hook and Loop Square with Adhesive Apply Hook and Loop Squares Plug Power Adapter and Wrap Cable Around Cable Hooks Insert USB Cable into USB Hub and Wrap Around Cable Hooks TEC1000 - Version A - Released January 6, 2017 - Copernicus Educational Products Inc.
- Page 12 Step 1 to move your USB Hub Enclosure to the ® outside of your Tech Tub if you want to fit 10 devices. Make sure divider tabs are pushed down fully. TEC1000 - Version A - Released January 6, 2017 - Copernicus Educational Products Inc.
- Page 13 Make sure it snaps into place. Start with the device at the back. Rear-mounted USB Enclosure: Use this USB port for setting up the cable of your first device. TEC1000 - Version A - Released January 6, 2017 - Copernicus Educational Products Inc.
- Page 14 Store Excess Cable in Cable Management Pocket Setup Cable for Second Device Rear-mounted USB Enclosure: Use this USB port for setting up the cable of your second device. TEC1000 - Version A - Released January 6, 2017 - Copernicus Educational Products Inc.
- Page 15 Repeat Steps 12 and 13 to Setup Remaining Devices Turn on USB Hub and Replace Cover TEC1000 - Version A - Released January 6, 2017 - Copernicus Educational Products Inc.
- Page 16 Allen Key 4mm Mount Locking Block Label facing Washer goes upwards INSIDE tube Washer goes UNDER tube Table Countertop Underside Drilled holes from Step 6 Section View TEC1000 - Version A - Released January 6, 2017 - Copernicus Educational Products Inc.
- Page 17 Push Tech Tub until Locking Block is completely in channel. Slide Locking Pin through hole on Secure Locking Pin with Padlock ® Tech Tub on other side. TEC1000 - Version A - Released January 6, 2017 - Copernicus Educational Products Inc.
- Page 18 Apple Configurator works with Macbooks running OS X 10.10 or later and Apple Configurator 2 works with ® Macbooks running OS X 10.11 or later. ® Scan this QR Code for resources on how to setup your devices with Apple Configurator. https://itunes.apple.com/us/itunes-u/ipad-management-using-apple/id567514148?mt=10 TEC1000 - Version A - Released January 6, 2017 - Copernicus Educational Products Inc.
-
Page 19: Tips For Use
You could use this system to also keep track of your devices! ® Carrying your Tech Tub ® Use the Handles along the sides of the Tech Tub for easy lifting and carrying. Handle Handle Handle Handle TEC1000 - Version A - Released January 6, 2017 - Copernicus Educational Products Inc. -
Page 20: Mounting Template
Leave a minimum of 15-1/2” (395mm) Leave a minimum of 15-1/2” (395mm) of space from Locking Block of space from Locking Block Drill here Snap Side Snap Side of Tech Tub TEC1000 - Version A - Released January 6, 2017 - Copernicus Educational Products Inc.
Need help?
Do you have a question about the Tech Tub Premium and is the answer not in the manual?
Questions and answers