Advertisement
Quick Links
IS2
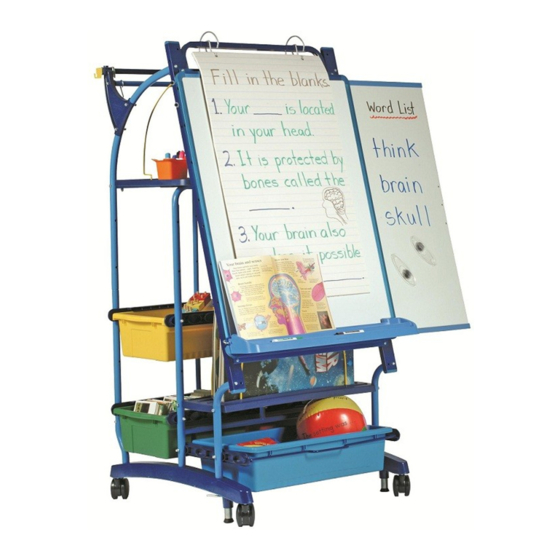
Standard Royal Inspiration Station
WARNING
Check out some of our
other great products!
www.copernicused.com
Whiteboard Support (2)
Whiteboard (1)
Page Paw (2)
Ultra Safe Premium
Bookledge (1)
Big Book Rack (4)
Front Frame (2)
Tub Rack (1)
Really Big Tub (1)
Please Recycle
Assembly Guide
IS2 _2016_C
Check out our other products online at
www.copernicused.com
This product is meant to be assembled by an adult.
In its unassembled state, small parts present a hazard.
To be used under direct supervision of an adult.
Don't forget to check out our tips for your whiteboard at:
www.copernicused.com
IS2 - Version C - Released July 20, 2016 - Copernicus Educational Products Inc.
®
For assistance, please contact us:
1-800-267-8494
Email info@copernicused.com
Have your packing slip ready for reference
Front Channel (2)
Accessory Rods (2)
Telescopic Extension (2)
Accessory Rod
Brackets (2)
Chart Paper Guides (3)
Tiny Tub (2)
Rear Frame Upper (2)
Frame Upright (1)
Rear Frame Lower (2)
Middle Frame (1)
Tub Channel (4)
Open Tub (4)
Big Book Rack (1)
Advertisement

Related Manuals for Copernicus Royal Inspiration Station


Summary of Contents for Copernicus Royal Inspiration Station
- Page 1 Big Book Rack (4) Tub Channel (4) Front Frame (2) Open Tub (4) Tub Rack (1) Really Big Tub (1) Big Book Rack (1) Front Channel (2) Please Recycle IS2 - Version C - Released July 20, 2016 - Copernicus Educational Products Inc.
-
Page 2: Assembly Guide
Life Time Time To validate your warranty, submit the ON-LINE form at www.copernicused.com Enter a draw to win a Copernicus Product for your classroom at the same time! Frame Warranty Warranty IS2 - Version C - Released July 20, 2016 - Copernicus Educational Products Inc. - Page 3 Tub Channel (31058) (23208) Middle Frame (33032) Rear Hanging Front Channel Hook 1 Left, 1 Right Chart Paper (31061) Support (23209 - Set) (23209R) (33034) (23209L) IS2 - Version C - Released July 20, 2016 - Copernicus Educational Products Inc.
- Page 4 M8 Lock Washer M6 Acorn Nut (43274) (43271) Driver for Cordless Drill Caster (Not to Scale) (41003C) (43280) Individual Optional use for faster assembly Allen Key (43281) IS2 - Version C - Released July 20, 2016 - Copernicus Educational Products Inc.
- Page 5 Have a Question? 1-800-267-8494. Monday - Friday 8:30am - 4:30 pm EST. Email our Tech Support Service at info@copernicused.com Email our Tech Support Service IS2 - Version C - Released July 20, 2016 - Copernicus Educational Products Inc.
- Page 6 Allen Key x 1 2 Person Task Middle Frame x 1 Install Middle Frame Stand unit right side up DO NOT tighten the bolts DO NOT tighten the bolts IS2 - Version C - Released July 20, 2016 - Copernicus Educational Products Inc.
- Page 7 (Not to Scale) Whiteboard Support 2 Person Task Install Whiteboard Supports Right Side Left Side Right Side Left Side Fasten bottom bolts first DO NOT tighten the bolts IS2 - Version C - Released July 20, 2016 - Copernicus Educational Products Inc.
- Page 8 Select Your Whiteboard Height Middle position & Orientation Low position Top Mounting holes Right DO NOT tighten the bolts Fasten bottom bolts first Mounts at outer hole on bottom IS2 - Version C - Released July 20, 2016 - Copernicus Educational Products Inc.
- Page 9 Bottom two holes for Lowest Board Height Middle two holes for Middle Board Height Top two holes for Highest Board Height IS2 - Version C - Released July 20, 2016 - Copernicus Educational Products Inc.
- Page 10 Whiteboard Frame. Pull out the opposite hook & snap into corresponding hole. Note: The spring tension is designed to discourage children from unhooking the Book Ledge. IS2 - Version C - Released July 20, 2016 - Copernicus Educational Products Inc.
- Page 11 Install Chart Paper Guides Install the Chart Paper Guides into the holes in the Top Shelf Press Chart Paper Guides firmly into place Ensure guides are secure IS2 - Version C - Released July 20, 2016 - Copernicus Educational Products Inc.
- Page 12 4. Fasten the ends of the Round Accessory Rod to the Accessory Brackets Fasten. Detail ‘A’ Ensure hole is turned upwards Note hook orientation Repeat on other side. IS2 - Version C - Released July 20, 2016 - Copernicus Educational Products Inc.
- Page 13 Align the Front Channels with the bottom holes on the Middle and Front Frame It may help to loosely install first, and tighten once both bolts are through the part. IS2 - Version C - Released July 20, 2016 - Copernicus Educational Products Inc.
- Page 14 Premium model if you need more tubs. See our website for more information. Before installing tubs, tighten all fasteners firmly IS2 - Version C - Released July 20, 2016 - Copernicus Educational Products Inc.
- Page 15 15 lbs Weight Limit Open Tub x 4 Tiny Tub x 2 Really Big Tub x 1 10 lbs Weight Limit Insert Tubs Angle tub into the channel Slide IS2 - Version C - Released July 20, 2016 - Copernicus Educational Products Inc.
Need help?
Do you have a question about the Royal Inspiration Station and is the answer not in the manual?
Questions and answers