Advertisement
Quick Links
RC 005
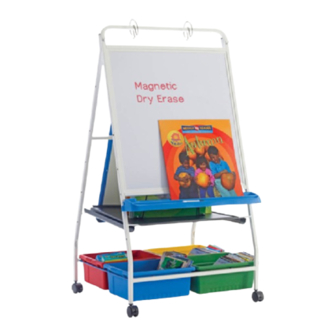
Royal Reading / Writing Center
If parts are missing or you require assistance,
please call:
1-800-267-8494
Have your packing slip ready for reference
RC005-2008-E
This Asembly Guide provides instructions to build the Royal Reading / Writing Center.
For a full color photographic guide go to: www.copernicused.com/assemblyinstructions.aspx
This product is meant to be assembled by an adult
WARNING
In its unassembled state, small parts present a hazard
Not intended for use by children
Front Frame (1)
Page Paw (2)
Ultra Safe
Book Ledge (1)
Caster (4)
Please Recycle
R
or
email info@copernicused.com
Rc005 Assembly Instructions - Version E - Released 9 January 2008 - Copernicus Educational Products Inc.
-
Assembly Guide
Chart Loop Hook (2)
'S' Chart Hook (2)
Rear Whiteboard (1)
Rear Frame (1)
Big Book Divider (4)
Metal Shelf (1)
Tub (4)
Bottom Rack (2)
Life
Time
Tub
Warranty
Not Shown
Life
Time
Easel
Warranty
Advertisement

Related Manuals for Copernicus Royal Reading Writing Center


Summary of Contents for Copernicus Royal Reading Writing Center
- Page 1 Metal Shelf (1) Ultra Safe Book Ledge (1) Tub (4) Caster (4) Bottom Rack (2) Life Life Time Time Easel Please Recycle Warranty Warranty Rc005 Assembly Instructions - Version E - Released 9 January 2008 - Copernicus Educational Products Inc.
- Page 2 Open Tub Small Tub Locking Caster PTP2 ‘S’ Chart Hook Chart Loop Hooks Open Tub Small Tub Divided Tub Additional tools required: Adjustable wrench RC005 Assembly Instructions - Version E - Released 9 January 2008 - Copernicus Educational Products Inc.
- Page 3 - Fasten with two M6 x 40mm Bolts & Lock Washers Remove packaging & Slide into top of frame Rotate into position RC005 Assembly Instructions - Version E - Released 9 January 2008 - Copernicus Educational Products Inc.
- Page 4 Align the holes at the top of the Frames - Fasten together using 50mm Thumbscrews, Lock Washers & Wing Nuts - Hand tighten fasteners Bottom Channels should face each other RC005 Assembly Instructions - Version E - Released 9 January 2008 - Copernicus Educational Products Inc.
- Page 5 Note: If you cannot push the casters in by hand, try placing an adjustable wrench between caster wheels and then tapping with a rubber mallet RC005 Assembly Instructions - Version E - Released 9 January 2008 - Copernicus Educational Products Inc.
- Page 6 - Be careful to not over tighten the fasteners, otherwise Racks will not slide Repeat for other side Do not over tighten or Rack will not slide RC005 Assembly Instructions - Version E - Released 9 January 2008 - Copernicus Educational Products Inc.
- Page 7 Align the loops on the Big Book Dividers with the raised holes in the Metal Shelf as shown - Fasten with eight M6 x 20mm Bolts , Lock Washers & Nuts - Tighten fasteners RC005 Assembly Instructions - Version E - Released 9 January 2008 - Copernicus Educational Products Inc.
- Page 8 Once the Shelf is in place, tighten the Thumbscrews at the top of the Frame - 2 in total Tighten Thumbscrews (2) at top of unit Note: Place bottom Shelf on Unit through back of Frame RC005 Assembly Instructions - Version E - Released 9 January 2008 - Copernicus Educational Products Inc.
- Page 9 Book Ledge Insert one hook in the appropriate hole in one side of the Frame -Pull out the opposite hook and snap into place RC005 Assembly Instructions - Version E - Released 9 January 2008 - Copernicus Educational Products Inc.
- Page 10 - Place an empty hardware bag over the frame to prevent the Unit from being scratched Pull bag free once the hooks have been snapped over the Frame Snap Snap RC005 Assembly Instructions - Version E - Released 9 January 2008 - Copernicus Educational Products Inc.
- Page 11 Use the sliding hooks on the Lined Magnetic Dry Erase Board and the ‘S’ Hooks to hang the board on the back of the center RC005 Assembly Instructions - Version E - Released 9 January 2008 - Copernicus Educational Products Inc.
- Page 12 Copernicus Product #AC 405 Quality schools are the result of quality teachers going above and beyond the call of duty.” - Vicki Caruana “ RC005 Assembly Instructions - Version E - Released 9 January 2008 - Copernicus Educational Products Inc.
- Page 13 Rinse with water. Dry with soft cloth. Repeat a few times. 4. SoySafe white board cleaner and restorer is also perfect for removing permanent marker stains. (Copernicus Product # AC405) RC005 Assembly Instructions - Version E - Released 9 January 2008 - Copernicus Educational Products Inc.
Need help?
Do you have a question about the Royal Reading Writing Center and is the answer not in the manual?
Questions and answers