Table of Contents
Advertisement
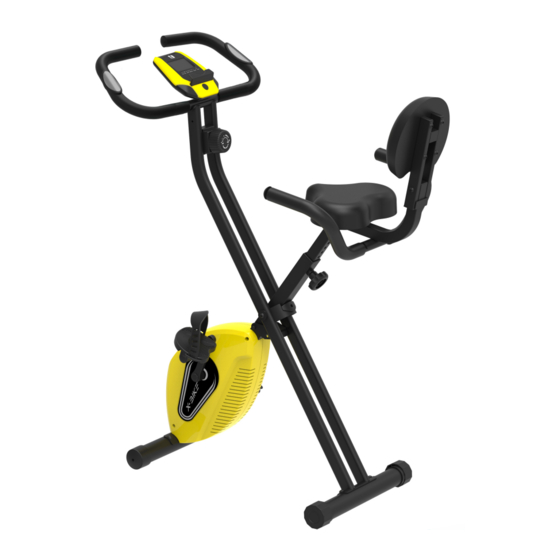
USER MANUAL
ES893 EXERCISE BIKE
Please Keep For Future Reference
95-0PKN-71B7
IMPORTANT - Please Read Instructions Fully Before Assembly Or Use
These instructions contain important information which will help you get the best
from your equipment and ensure safe and correct assembly, use and maintenance.
If you need help or have damaged or missing parts,
call the Customer Helpline: 0330 124 0718 (Opening hours: Mon-Fri 9:00am-6:00pm)
or Email: customerservices@fit4home.co.uk
1
Advertisement
Table of Contents

Subscribe to Our Youtube Channel
Related Manuals for Fit4Home ES893


Summary of Contents for Fit4Home ES893
- Page 1 USER MANUAL ES893 EXERCISE BIKE Please Keep For Future Reference 95-0PKN-71B7 IMPORTANT - Please Read Instructions Fully Before Assembly Or Use These instructions contain important information which will help you get the best from your equipment and ensure safe and correct assembly, use and maintenance.
-
Page 2: Table Of Contents
CONTENTS Safety Information Hardware List Exploded Diagram Assembly Instructions Step 1 Step 2 Step 3 Step 4 Step 5 Step 6 Operating Instructions Folding Instructions Operarting the Monitor Bluetooth Instructions Maintenance Warm Up & Cool Down 14,15 Fit4Home... -
Page 3: Safety Information
IMPORTANT SAFETY INFORMATION IMPORTANT SAFETY INFORMATION BE SURE TO READ THE ENTIRE MANUAL BEFORE YOU ASSEMBLE OR OPERATE YOUR MACHINE. IN PARTICULAR, NOTE THE FOLLOWING SAFETY PRECAUTIONS: 1. Read all instructions and follow it carefully before using this equipment. Make sure the equipment is properly assembled and tightened before use. -
Page 4: Hardware List
HARDWARE LIST... -
Page 5: Exploded Diagram
EXPLODED DIAGRAM... -
Page 6: Assembly Instructions
ASSEMBLY INSTRUCTIONS STEP 1 : Install the Ball Pin 1. Pull the ball pin out to expand the main frame, and then insert the ball pin back. STEP 2 : Install the Front and Rear Stabilizers. 1. Loose the screws in the stabilizer, and insert them into the corresponding grooves and tighten in each stabilizer. - Page 7 ASSEMBLY INSTRUCTIONS STEP 3 : Install the Handlebar and Control Panel 1. Place the handlebar onto the corresponding grooves in the main frame, tighten it with bolts and gaskets. Connect the cords with the corresponding slots, and then place the control panel onto the main frame and tighten.
- Page 8 ASSEMBLY INSTRUCTIONS STEP 5 : Install the Back Handlebar and Seat Cushion 1. Loose the nylon nut and washer, place the back handlebar onto the triangle plate and tighten. Place the seat cushion onto the plate and tighten. STEP 6 : Install the Seat Post 1.
-
Page 9: Operating Instructions
OPERATING INSTRUCTIONS OPERATING INSTRUCTIONS... -
Page 10: Folding Instructions
FOLDING BIKE INSTRUCTIONS HOW TO FOLD THE X BIKE Pull out the ball pin, and insert it back after folded. -
Page 11: Operarting The Monitor
OPERATING THE MONITOR HOW TO OPERATE THE MONITOR Press the Mode Button to switch between modes. Press and hold the Mode Button for 3 seconds to reset all data back to zero. SCAN – Cycles through each mode and displays the value for a few seconds. TIME –... -
Page 12: Bluetooth Instructions
BLUETOOTH SET UP HOW TO SET UP BLUETOOTH CONNECTION STEP 1 STEP 2 Download the free FitShow App on Open the app and turn on the Bluetooth Google Play or App Store in your device settings STEP 3 STEP 4 Open the application on your device and Once the device is paired you can choose the device section to pair it with... -
Page 13: Maintenance
MAINTENANCE CLEANING The bench can be cleaned with a soft clean damp cloth.Do not use abrasives or solvents on plastic parts. Please wipe your perspiration off the bench after each use.Be careful not get excessive moisture on the computer display panel as this might cause an electrical hazard or electronics to fail. Please keep the bench, especially the computer console out of direct sunlight to prevent screen damage. -
Page 14: Warm Up & Cool Down
WARM UP AND COOL DOWN ROUTINE The WARM-UP is an important part of any workout. The purpose of warming up is to prepare your body for exercise and to minimize injuries. Warm up for two to five minutes before aerobic exercising.It should begin every session to prepare your body for more strenuous exercise by heating up and stretching your muscles, increasing your circulation and pulse rate, and delivering more oxygen to your muscles. - Page 15 WARM UP AND COOL DOWN ROUTINE QUADRICEP STRETCH With one hand against a wall for balance, reach behind you and pull your right foot up.Bring your heel as close to your buttocks as possible. Hold for 15 counts and repeat with left foot. INNER THIGH STRETCH Sit with the soles of your feet together and your knees pointing outward.
-
Page 16: Fit4Home
FIT4HOME LTD Fit4Home is essentially an online business which aims to provide high quality Exercise and Fitness products to ensure all customers maintain a healthy lifestyle. At Fit4Home we stock various different types of fitness and exercise equipment such as Treadmills, Cross Trainers, Weights, Exercise Bikes etc and aim to provide an excellent service to each and every one of our valued customers.
Need help?
Do you have a question about the ES893 and is the answer not in the manual?
Questions and answers