Table of Contents
Advertisement
Quick Links
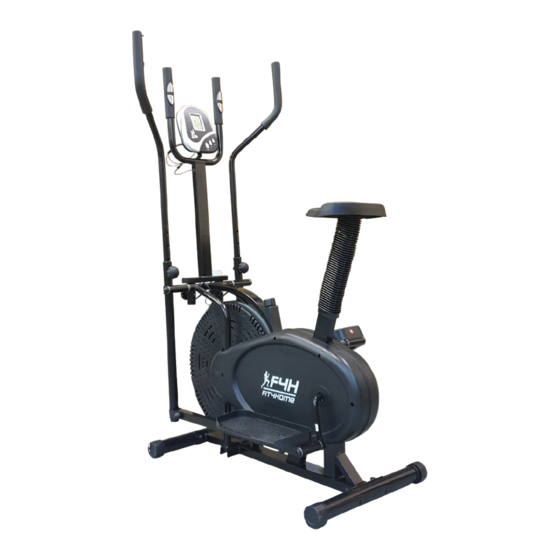
USER MANUAL
ORBITRAC EXERCISE BIKE
Please Keep For Future Reference
F4H-EB-ORB2600S
IMPORTANT - Please Read Instructions Fully Before Assembly Or Use
These instructions contain important information which will help you get the best
from your equipment and ensure safe and correct assembly, use and maintenance.
If you need help or have damaged or missing parts,
call the Customer Helpline: 0330 124 0718 (Opening hours: Mon-Fri 9:00am-6:00pm)
or Email: customerservices@fit4home.co.uk
1
Advertisement
Table of Contents

Related Manuals for Fit4Home F4H-EB-ORB2600S


Summary of Contents for Fit4Home F4H-EB-ORB2600S
- Page 1 These instructions contain important information which will help you get the best from your equipment and ensure safe and correct assembly, use and maintenance. If you need help or have damaged or missing parts, call the Customer Helpline: 0330 124 0718 (Opening hours: Mon-Fri 9:00am-6:00pm) or Email: customerservices@fit4home.co.uk...
-
Page 2: Table Of Contents
CONTENTS Safety Information Parts List Exploded Diagram Preparation Step 1 & 2 Step 3 & 4 Step 5 & 6 Step 7 Reversible Movement Operating the Computer Precautions Warm Up and Cool Down 14,15 Fit4Home Ltd Declaration... -
Page 3: Safety Information
IMPORTANT SAFETY INFORMATION IMPORTANT SAFETY INFORMATION BE SURE TO READ THE ENTIRE MANUAL BEFORE YOU ASSEMBLE OR OPERATE YOUR MACHINE. IN PARTICULAR, NOTE THE FOLLOWING SAFETY PRECAUTIONS: 1. Read all instructions and follow it carefully before using this equipment. Make sure the equipment is properly assembled and tightened before use. -
Page 4: Parts List
PARTS LIST Description Description Main Frame Locking Knob Rear Stabilizer Foam Grip End Cap Handlebar End Grip Key Head Bolt (M10*60) Computer Wire Domed Nut (M10 Computer holder Arc Washer Tension Control Front Stabilizer Chain Cover Adjustable Cap Washer Lower Handle Bar (Left) Washer Lower Handle Bar (Right) Nut M8... -
Page 5: Exploded Diagram
EXPLODED DIAGRAM... -
Page 6: Preparation
ASSEMBLY INSTRUCTIONS PREPARATION 1. Before assembling make sure that you have enough space around the item. 2. Use the present tool for assembling. 3. Before assembling please check whether all needed parts are available (in the above instruction sheet you will find an explosion drawing with all single parts (marked with numbers) which this item consists of. -
Page 7: Step 1
ASSEMBLY INSTRUCTIONS STEP 1 Attach the Front Stabilizer (NO.7) and the Rear Stabilizer(N0.2) with four sets of Carriage Bolts(NO.4), Washers(NO.6) and Domed Nuts(NO.5). N.B. The Front Stabilizer has the integral transport wheels STEP 2 Then insert a Pedal Hinge Bolt (NO.15) and put the arc washer (NO.36) through the Pedal Post (NO.11 for the right side, NO.12 for the left). - Page 8 ASSEMBLY INSTRUCTIONS STEP 3 FIG.1: Attach the Pedals (NO.23) to the Pedal Posts ( NO .11 NO.12),using two M10*45 Bolts ( NO .24) and two M10 Nuts (NO.13) for eachside. STEP 4 FIG.2: When fixing your Handlebars (NO .26 NO .27), you can either select either the dual action mode or the fixed mode.
- Page 9 ASSEMBLY INSTRUCTIONS STEP 5 Remove the washer (NO.37) nut (NO.38) from the saddle (NO.40), attach the saddle and saddle post (NO.41) as shown in FIG.6, re-insert and tighten the bolts. Insert the saddle post into the main frame as shown in FIG.6, insert and tighten the knob (NO.42).
- Page 10 ASSEMBLY INSTRUCTIONS STEP 7 Connect the sensor wires(NO.55) two ends and the computer wires(NO.31) two ends. Put the computer(NO.14) on the computer holder(NO.33) ,tight with 4 cross screws M4X12(NO.56). The assembly of your strider is now complete. When you try it for the first time, you should adjust the tension to the correct level before you begin a full workout.
-
Page 11: Reversible Movement
REVERSIBLE MOVEMENT REVERSIBLE MOVEMENT Remember, your strider has REVERSIBLE movement! Forward pedaling exercises your quadriceps (front thigh muscles), while backward pedaling targets your hamstrings (back thigh muscles). Take advantage of these facts to make your workout less fatiguing and more fun. CAUTION: MAKE SURE YOU HAVE TIGHTENED ALL THE BOLTS AND NUTS WELL BEFORE BEGINNING YOUR WORKOUT. -
Page 12: Operating The Computer
OPERATING THE COMPUTER SPECIFICATIONS TIME……………………………………………………………………00:00-99:59 SPEED(SPD)..……………………………………………0.0-99.9KM/H (ML/H) DISTANCE…………………………………………………..0.00-9999KM (ML) CALORIES……………………………………………………..0.0-9999KCAL ODOMETER(ODO)…………………………..…………..…0.0-9999KM (ML) PULSE (PUL) ……..............0 40~240BPM KEY FUNCTIONS: MODE: This key lets you to select and lock on to a particular function you want.The monitor will be reset by changing battery. -
Page 13: Precautions
PRECAUTIONS PRECAUTIONS Do not use exercise machinery without the consent of your doctor. There is no supervision do not allow children to use this product Keep your fingers, body parts, children and pets away from moving parts Warm up before each workoutand cool down after each workout Insure that all nuts, bolts, and screws are completely tightened before using this product. -
Page 14: Warm Up And Cool Down
WARM UP AND COOL DOWN ROUTINE The WARM-UP is an important part of any workout. The purpose of warming up is to prepare your body for exercise and to minimize injuries. Warm up for two to five minutes before aerobic exercising. It should begin every session to prepare your body for more strenuous exercise by heating up and stretching your muscles, increasing your circulation and pulse rate, and delivering more oxygen to your muscles. - Page 15 WARM UP AND COOL DOWN ROUTINE QUADRICEP STRETCH With one hand against a wall for balance, reach behind you and pull your right foot up.Bring your heel as close to your buttocks as possible. Hold for 15 counts and repeat with left foot. INNER THIGH STRETCH Sit with the soles of your feet together and your knees pointing outward.
-
Page 16: Fit4Home Ltd
FIT4HOME LTD Fit4Home is essentially an online business which aims to provide high quality Exercise and Fitness products to ensure all customers maintain a healthy lifestyle. At Fit4Home we stock various different types of fitness and exercise equipment such as Treadmills, Cross Trainers, Weights, Exercise Bikes etc and aim to provide an excellent service to each and every one of our valued customers. -
Page 17: Declaration
Declaration of Conformity We, Importer Fit4home Ltd Unit A, Perseverance Mills, Olive Lane, Darwen BB3 3DQ United Kingdom Declare that the product ORBITRAC EXERCISE BIKE Complies with the following European Directives: Electronic Console EN 61000-6-3: 2007 + A1: 2011 EN 61000-6-1: 2007...
Need help?
Do you have a question about the F4H-EB-ORB2600S and is the answer not in the manual?
Questions and answers