Advertisement
Quick Links
Items you will need:
640XL
1 Replacement Overlay and backer assembly
1 Medium Cross-Tip (Phillips) Screwdriver
1 Small Cross-Tip (Phillips) Screwdriver
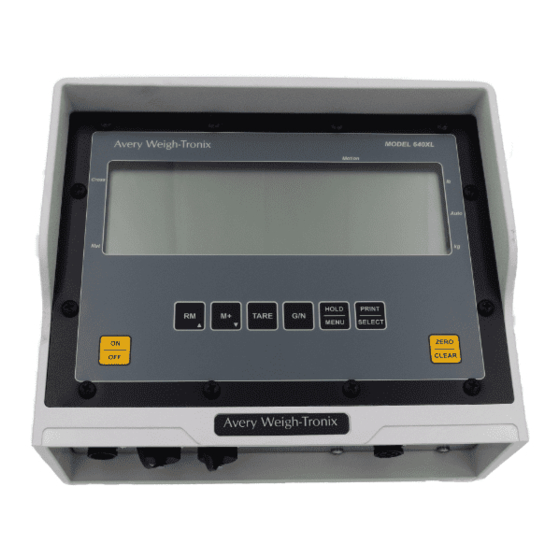
Begin by removing all 12 screws around the front face of the indicator as shown below:
How to replace the
overlay and backer
assembly on a 640XL
Advertisement

Subscribe to Our Youtube Channel
Related Manuals for Avery Weigh-Tronix 640XL


Summary of Contents for Avery Weigh-Tronix 640XL
- Page 1 How to replace the overlay and backer assembly on a 640XL Items you will need: 640XL 1 Replacement Overlay and backer assembly 1 Medium Cross-Tip (Phillips) Screwdriver 1 Small Cross-Tip (Phillips) Screwdriver Begin by removing all 12 screws around the front face of the indicator as shown below:...
- Page 2 Take the front face out of the enclosure:...
- Page 3 Remove the screws that hold the main board to the display board (4) and remove the main board from the display board. After the screws are removed there is a multi-pin connector that will still be connecting the main board to the display board. Wiggle this connection gently while pulling up, and this connector will become unseated:...
- Page 4 Remove the ribbon cable from the display board. Lift up the latch that adds tension to the pins then gently wiggle the connector free of the pins:...
- Page 5 Finally remove the screws and standoffs from the display board, and remove the display board from the overlay and backer assembly:...
- Page 6 Now your Overlay and backer assembly should be bare and removable from your system. Remove it, and replace it with the new, provided assembly. Mount the display board to the overlay and backer assembly with the screws and standoffs circled below:...
- Page 7 Connect the ribbon cable from the overlay and backer assembly to the display board and close the latch:...
- Page 8 Connect the main board to the display board by pressing the multi-pin connector firmly into place, then fasten with the four (4) screws circled below:...
- Page 9 12 screws removed earlier. No recalibration should be necessary. Simply install the indicator where it will be in use, and resume using your scale. Congratulations on your successful completion of replacing the overlay and backer assembly. Thank You for Choosing Avery Weigh-Tronix.
Need help?
Do you have a question about the 640XL and is the answer not in the manual?
Questions and answers