2N Access Unit Configuration Manual
Hide thumbs
Also See for Access Unit:
- Installation manual (119 pages) ,
- Configuration manual (111 pages) ,
- Installation manual (116 pages)
Table of Contents
Advertisement
Quick Links
Advertisement
Table of Contents

Related Manuals for 2N Access Unit


Summary of Contents for 2N Access Unit
- Page 1 2N Access Unit Configuration Manual v.2.34 www.2n.com...
-
Page 2: Table Of Contents
2N Access Unit Configuration Manual Content: • 1. Product Overview • 2. Express Wizard for Basic Settings • 3. Function Licensing • 4. Signalling of Operational Statuses • 5. Web Interface Configuration • 5.1 Status • 5.2 Directory • 5.2.1 Users •... -
Page 3: Product Overview
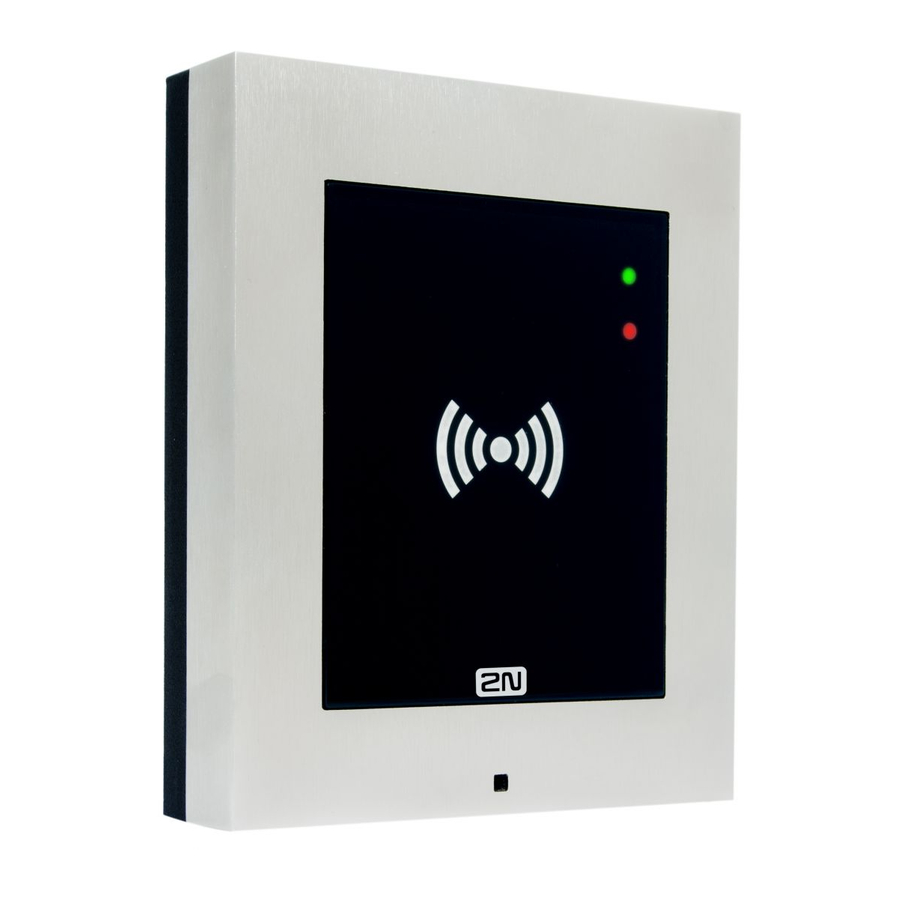
Your 2N Access Unit can be equipped with a numeric keypad, so you can use it as code lock. Your 2N Access Unit can also be equipped with another RFID card reader, so it can be used as a part of your security system or attendance system in your company. -
Page 4: Express Wizard For Basic Settings
MAC address given on the production plate), or will be communicated to you by the 2N Access Unit voice function; refer to the Installation Manual. If there is no DHCP server in your LAN, use the 2N Access Unit RESET button to set the static IP address mode; refer to the respective Installation Manual. Your unit address will then be 192.168.1.100. - Page 5 2N Access Unit Configuration Manual Enable the switch in the Switch Enabled parameter on the Hardware / Switches / Switch 1 tab, set the Controlled Output to the intercom output to which the electric door lock is connected. Now set one or more activation codes for the electric door lock switching.
-
Page 6: Function Licensing
3. Function Licensing 2N Access Unit only supports two licensed functions: 2N Access Unit Lift module license and 2N Access Unit – NFC license. The NFC license can only be used for the 2N Access Unit version that is equipped with a 13MHz card reader. Part No. - Page 7 2N Access Unit Configuration Manual *) The service availability depends on the mobile provider's network configuration. **) The scrambled keypad function is only available for 2N Access Unit 2.0. 7 / 134...
-
Page 8: Signalling Of Operational Statuses
This tone signals profile deactivation. Refer to the Profile subsection for the deactivation code settings. Internal application launched The internal application of the 2N Access Unit is launched upon the 2N Access Unit power up or restart. A successful launch is signaled by this tone combination. - Page 9 Access Unit. Default reset of network parameters Upon power up, a 30 s timeout is set for the default reset code entering. Refer to the Device Configuration subsection in the 2N Access Unit Installation Manual for details. 9 / 134...
-
Page 10: Web Interface Configuration
button in the left-hand upper corner of the following web interface pages to return to this screen anytime. The screen header includes the 2N Access Unit name (refer to the Display Name parameter in the Services / Web Server/ Basic Settings). Select the web interface language with the CZ, EN, DE, FR, IT, ES and RU buttons. -
Page 11: Status
Status • Device – essentials on the 2N Access Unit • Services – information on active services and their states • Licence – current states of licences and available 2N Access Unit functions • Access Log – list of last ten access cards • Events – list of events Directory •... - Page 12 2N Access Unit Configuration Manual Services • E-mail – sending e-mails when e.g. denied events • Mobile Key – Bluetooth settings and management of paired devices • Automation – flexible intercom settings according to user requirements • HTTP API – application programming interface for controlling selected functions of intercom •...
- Page 13 / device in contradiction to the manufacturer’s instructions, guidelines or recommendations or in conjunction with unsuitable products / devices of other suppliers, the customer agrees that the 2N TELEKOMUNIKACE a.s. company shall not be held liable for any functionality limitation of such a product or any damage, loss or injury related to this potential functionality limitation.
- Page 14 2N Access Unit Configuration Manual 5.1 Status The Status menu provides clear status and other essential information on the 2N Access Unit. The menu is divided into the following tabs: Device This tab displays basic information on the device model, its features, firmware and bootloader versions and so on.
- Page 15 2N Access Unit Configuration Manual Services This tab displays the statuses of the network interface and selected services. 15 / 134...
- Page 16 2N Access Unit Configuration Manual Licence This tab displays the list of licensed functions of the 2N Access Unit including their current availability (on the basis of a valid licence key entered in the System / Licences menu). Access Log The Access Log tab displays the last 10 records on the cards applied. Each record includes the card tapping time, card ID and type and description details (validity, card owner, etc.).
- Page 17 2N Access Unit Configuration Manual 17 / 134...
-
Page 18: Users
2N Access Unit Configuration Manual Events This tab displays activity of the device (switches, signalling leds, pressed keys on keypad etc.). It also allows filtering between events through the 13 optional parameters. • – press the button to export all recorded events to a CSV file. - Page 19 2N Access Unit Configuration Manual 5.2.1 Users The Users list is one of the crucial parts of the intercom configuration. It contains user information relevant for such intercom functions as quick dialling, RFID card/code door unlocking, missed call e-mails and so on. ...
- Page 20 2N Access Unit Configuration Manual The Search in directory function works as a fulltext search in user names, phone numbers and e- mail addresses. It searches for all matches in the list. Click to create a new user and to show the user details. Click ...
- Page 21 2N Access Unit Configuration Manual • Entry Rules • Access Enabled – enable authentication via this access point. • Access Profiles – select one of the profiles pre-defined in Directory / Time profiles or set the time profile for this element manually. • Exit Rules ...
- Page 22 Virtual card ID – set the user virtual card ID for user identification in the devices that are integrated with the 2N IP intercoms via a Wiegand interface. Each user can be assigned just one virtual card. The virtual card ID is a sequence of 6–32 characters: 0–9, A–F. After the user is validated via the Bluetooth/biometric reader, the identifier is sent to the device integrated with the 2N IP intercom via Wiegand.
- Page 23 Subs. 5.2.1.1 User Fingerprint Setting Instructions for user fingerprint loading details. 2N Access Unit helps you use the recognized license plates sent in the HTTP request by the AXIS cameras equipped with additional VaxALPR to api/lpr/licenseplate (refer to the HTTP API manual for IP intercoms).
- Page 24 The last five photos are stored in the device memory and can be ® retrieved via an HTTP request sent to api/lpr/image available in 2N Access Commander. The door is unlocked if the entry in the directory with the recognized license plate has currently the entry/exit right.
- Page 25 USB fingerprint scanner (Part No. 9137423E) as follows: ® 1a) To load fingerprints via the 2N Access Unit Fingerprint reader, use the web interface at the selected user and click Load via fingerprint reader module in Directory / Users/ User fingerprints.
- Page 26 2N Access Unit Configuration Manual 2) Click to select a finger for fingerprint loading. Up to two fingerprints may be saved for each user. 3) Click SCAN FINGER to load a fingerprint. 26 / 134...
- Page 27 2N Access Unit Configuration Manual 4) Place the selected finger on an external USB reader. This process is repeated three times for greater precision. Repeat the process if any inconsistency occurs during fingerprint reading. 27 / 134...
- Page 28 2N Access Unit Configuration Manual 5) If fingerprint scanning is successful, click DONE to confirm the settings. To set the finger function, click the icon to display the list of available functions: • Door opening • Silent alarm; configurable only if Door opening is active •...
- Page 29 2N Access Unit Configuration Manual Click SAVE AND QUIT to confirm the fingerprint enrolment and selected functions. 6) You can check the current settings in the User tab. 29 / 134...
- Page 30 It is possible to read the card ID via an RFID card reader. Proceed as follows: ® • Go to the 2N USB Driver settings. • Set up the COM port for the connected reader. • Press the Read button via the 2N Access Unit web interface. 30 / 134...
- Page 31 Do not forget to save the configuration. . 5.2.2 Time Profiles Such 2N Access Unit functions as RFID card/numeric code access, for example, can be time- limited by being assigned a time profile. By assigning a time profile you can: • block all calls to a selected user beyond the set time interval •...
- Page 32 Assign a time profile according to a week time sheet to define availability of the selected function. Just set from-to and/or days in the week on which the function shall be available. 2N Access Unit helps you create up to 20 time profiles that can be assigned to the function; refer to the Users, Access Cards and Switches settings.
- Page 33 2N Access Unit Configuration Manual This parameter helps you set time profiles within a week period. A profile is active when it matches the set intervals. If a day is marked as holiday (refer to Directory → Holidays), the last table row (Holiday) is applied regardless of the day in a week.
- Page 34 2N Access Unit Configuration Manual Note • You can set any number of intervals within a day: 8:00–12:00, 13:00–17:00, 18:00– 20:00, e.g. • To make a profile active for the whole day, enter one day-covering interval: 00:00– 24:00. 34 / 134...
-
Page 35: Hardware
2N Access Unit Configuration Manual 5.2.3 Holidays Here select the bank holidays (including Sundays). You can assign them different time intervals than to working days in their time profiles. You can set holidays for the coming 10 years (click the year number at the top of the screen to select a year). - Page 36 5.3.1 Switches Switches provide a very flexible and efficient control of such peripherals connected to the Access Unit as electric door locks, lighting, additional ringing signalling, and so on. 2N Access Unit allows you to configure to 2 independent all-purpose switches. A switch can be activated by: •...
- Page 37 (the switch is not held). If a switch is active, you can: • activate any logical output of the 2N Access Unit (relay, power output). ® • activate the output to which the 2N IP Security Relay module is connected.
- Page 38 2N Access Unit Configuration Manual • Switch Enabled – enable/disable the switch globally. When disabled, the switch cannot be activated by any of the available codes (including user switch codes), by quick dial button. • Switch mode – set the monostable/bistable mode for the switch. The switch is switched off after a timeout in the monostable mode and switched on with the first activation and off with the next activation in the bistable mode.
- Page 39 2N Access Unit Configuration Manual Security • The 12V output is used for lock connection. If, however, the unit (2N IP Intercom, 2N Access Unit) is installed where unauthorized tampering may happen, we ® strongly recommend that the 2N Security Relay (Part No.
- Page 40 The table above includes a list of universal codes that help you activate switches from 2N Access Unit keypad. Up to 10 universal codes can be defined for each switch (depending on the particular intercom model).
- Page 41 2N Access Unit Configuration Manual • Synchronise with – set switch synchronisation to enable automatic switch activation after another switch activation with a predefined delay. Define the delay in the Synchronisation Ddelay parameter. • Synchronisation Delay – set the time interval between synchronised activations of two switches.
- Page 42 2N Access Unit Configuration Manual In case of use external relay part no.: 9137410E are used next HTTP commands: To turn on the switch – http://ip_address/state.xml?relayState=1 (e.g.: http:// 192.168.1.10/state.xml?relayState=1) To turn on for pre-defined time (default value is 1.5 s) – http://ip_address/state.xml? relayState=2 (e.g.: http://192.168.1.10/state.xml?relayState=2) To turn off – http://ip_address/state.xml?relayState=0 (e.g.: http://192.168.1.10/...
- Page 43 2N Access Unit Configuration Manual 5.3.2 Door Door • Assigned switch – select a switch for the electromagnetic door lock control. The switch state controls the door unlocking signalling (green door symbol, green LED). • Assigned input – define one (or none) of the logical inputs for open door detection.
- Page 44 2N Access Unit Configuration Manual • Assigned input – select one (or none) of the logic inputs for the departure button function. The departure button input activation activates the selected switch. The activation time and mode are set by the selected switch parameters.
- Page 45 2N Access Unit Configuration Manual Entry Rules • Access enabled – enable access in a direction (entry, exit). If access is disabled, the door cannot be opened from the selected side. • Time profile – choose one or more time profiles to be applied. Set the time profiles in Directory / Time profiles •...
- Page 46 2N Access Unit Configuration Manual • Zonal code – enable the zonal code for the time profile and authentication combination in this row. You can use the zonal code instead of the user PIN. Caution • If the time profile is unset, the authentication mode is ignored on the given row.
- Page 47 2N Access Unit Configuration Manual card, etc.), the access module will be blocked for 30 seconds even if authentication is valid. • License Plate Recognition – choose the scenario after the license plate is recognized. Refer to the manual for function details. Refer to...
- Page 48 2N Access Unit Configuration Manual Exit Rules • Access enabled – enable access in a direction (entry, exit). If access is disabled, the door cannot be opened from the selected side. • Time profile – choose one or more time profiles to be applied. Set the time profiles in Directory / Time profiles.
- Page 49 2N Access Unit Configuration Manual • Zonal code – enter the switch numeric zonal code consisting of two characters at least. However, four characters at least are recommended. • Authentication signalling – choose the way of signalling a used card or another identifier.
- Page 50 2N Access Unit Configuration Manual Service cards are two common cards that are dedicated to this particular purpose by you. Be sure to complete their IDs in the Plus card ID and Minus card ID items in this section. The count of access card ID characters is given by the card type and is variable.
- Page 51 2N Access Unit Configuration Manual 5.3.3 Audio • Key beep volume – set the key beep volume. The volume values are relative against the set master volume. • Warning tone volume – set the volume of warning and signalling tones described in the Signalling of Operational Statuses section.
- Page 52 2N Access Unit Configuration Manual 5.3.4 Backlight Use this tab to set the module backlight and signalling LED brightness levels separately. • Backlight – set the backlight brightness value for the day mode. Set the value as a percentage of the maximum possible LED brightness.
- Page 53 2N Access Unit Configuration Manual Note • The brightness parameters affect the function, power consumption and general appearance of your device. A high nametag and button backlight value may, if the ambient light level is low, dazzle the persons standing in front of the intercom and, in general, increase the power consumption of the device.
- Page 54 2N Access Unit Configuration Manual 5.3.5 Display 2N Access Unit version 2.0 can be extended to include a display module. A color LCD display provides a touch keypad function and indicates the device state (door opening, access denial etc.) and/or can work in the Showcase mode at the same time, showing sets of loaded images after a defined idle timeout.
- Page 55 2N Access Unit Configuration Manual • Prefer Icons to Text – the icons on the dosplay will be preferred to the text. • Power Saving Mode – activate the power saving mode in which the display brightness is reduced. If no event occurs during two Slideshow screen activation timeouts, the power saving mode activation has been successful.
- Page 56 2N Access Unit Configuration Manual Make sure that the image resolution is 214 x 214 pixels. Other sizes will be adjusted to the display resolution automatically. Click the magnifier icon to view the loaded image, press to delete an image and click ...
- Page 57 2N Access Unit Configuration Manual 5.3.6 Card Reader Card Reader helps you control access to your building effectively using contactless RFID cards. The supported card types depend on the card reader model used. List of Parameters • Door – set the reader direction (Arrival, Departure) for the Attendance system purposes.
- Page 58 2N Access Unit Configuration Manual Caution • Unlike earlier Access Unit versions, where card readers were displayed separately, ® the 2N Access Unit 2.0 card readers are set in the Hardware / Extending modules section. 58 / 134...
- Page 59 List of Parameters • Assigned input – define one (or none) of the logical inputs for secured state detection. The secured state is then signalled by a red LED on the 2N Access Unit. • Input mode – set the active level of the input (polarity).
- Page 60 2N Access Unit Configuration Manual If the function is enabled, all the switches get blocked for 30 minutes whenever the tamper is activated. Blocking is active even after the device restart. Each port can be controlled via Automation. Press the UNBLOCK button, disable the function or reset the configuration factory values to unblock the switches.
- Page 61 2N Access Unit Configuration Manual 5.3.8 Extenders You can enhance the 2N Access Unit with extending modules connected to the basic unit. The following modules are available: • Five-button module • Keypad module • Infopanel module • Card reader module • Bluetooth module •...
- Page 62 2N Access Unit Configuration Manual Caution • Be sure to configure the replaced modules. The configuration is tied with the module serial number. Note • The modules can also be configured via the text row with a list of parameters (parameter_name=parameter_value) separated with semicolons.
- Page 63 2N Access Unit Configuration Manual Button Module Configuration • Button Functions – press the buttons to dial selected Automation functions. Keypad Module Configuration • Module Name – set the module name for logging events from the keypad. • Door – set the reader direction (Door Entry, Door Exit) for the Attendance system purposes.
- Page 64 2N Access Unit Configuration Manual • Forward to Wiegand Output – set a group of Wiegand outputs to which all pressed keys are to be forwarded. • Transmitted Code Format – select a 4bit or 8bit (higher security) format for the codes to be transmitted.
- Page 65 2N Access Unit Configuration Manual Infopanel Module Configuration • No parameters are available to the public at present. 125 kHz Card Reader Module Configuration • Module Name – set the module name for card reader logging purposes. • Door – set the reader direction (Not specified, Arrival, Departure) for the Attendance system purposes.
- Page 66 2N Access Unit Configuration Manual • Associated Switch – set the switch to be activated after user authentication via this module. If you set Door Lock Switch, the authentication rules specified in Hardware / Door will be used. • Allowed Card Types – set the type of a card to be accepted by the card reader. The card reader supports just one card type at an instant. ...
- Page 67 2N Access Unit Configuration Manual • Allowed Card Types – set the type of a card to be accepted by the card reader. The card reader supports just one card type at an instant. • Samsung NFC Compatibility – enable NFC compatibility with the Samsung phones.
- Page 68 2N Access Unit Configuration Manual • To accelerate card reading, you are recommended to select the card types used by the user in the module settings. Bluetooth Module • Module Name – set the module name for logging events from the Bluetooth module.
- Page 69 Tap in app – authentication has to be confirmed by tapping on an icon in the application running in a mobile phone. ® • Touch mode – touch the card reader having a phone with paired 2N Mobile Key to confirm authentication. Warning •...
- Page 70 Change Facility Code – set the first code part via Wiegand. This applies to Wiegand OUT for 26-bit code format. Contact your security system supplier to know if the Facility Code is requested. • Facility Code – define the 2N IP device location in the security system. Enter a decimal value for the location (0–255). 70 / 134...
- Page 71 2N Access Unit Configuration Manual OSDP Module Configuration • Module Name – set the module name. The module name is used for input / output specification in Automation. • Credentials Forward Group – assign the OSDP output to the group to which codes from the connected card readers or OSDP inputs can be resent.
- Page 72 2N Access Unit Configuration Manual Induction Loop Module Configuration • Maximum Power – set the maximum transmission power for the induction loop antenna. A higher transmission power means a wider range, but less power for other intercom functions. The convenient default value is 0.25 W under normal circumstances. ...
- Page 73 2N Access Unit Configuration Manual • The display is not supported on Access Unit 1.0 from FW version 2.27. Fingerprint Reader Module Configuration • Module Name – set the module name for logging events from the Fingerprint reader. • Door – set the reader direction (Arrival, Departure) for the Attendance system purposes.
- Page 74 2N Access Unit Configuration Manual Touch Keypad • Module Name – set the module name for logging events from the keypad. • Door – set the reader direction (Door Entry, Door Exit) for the Attendance system purposes. • Blink at Keystroke – set keystroke light signalling for noisy environments where acoustic signals are difficult to hear.
- Page 75 2N Access Unit Configuration Manual Touch Keypad & RFID Reader 125 kHz, 13.56 MHz 13.56 MHz (125 kHz) Card Reader (serial number) 75 / 134...
- Page 76 2N Access Unit Configuration Manual • Module Name – set the module name for card reader logging purposes. • Door – set the reader direction (Not specified, Arrival, Departure) for the Attendance system purposes. • Associated Switch – set the switch to be activated after user authentication via this module.
- Page 77 2N Access Unit Configuration Manual Bluetooth & RFID Reader 125 kHz, 13.56 MHz 13.56 MHz (125 kHz) Card Reader (serial number) 77 / 134...
- Page 78 Tap in app – authentication has to be confirmed by tapping on an icon in the application running in a mobile phone. ® • Touch mode – touch the card reader having a phone with paired 2N Mobile Key to confirm authentication. 78 / 134...
- Page 79 To control the floor lift access, connect the AXIS A9188 relay module to the 2N Access Unit. Up to 5 relay modules can be connected to one 2N Access Unit, each of which can control up to 8 floors, which makes a total of 64. Make sure that the 2N Access Unit Lift module license is active (Part No.
- Page 80 2N Access Unit Configuration Manual Relay Modules • Switch-On Duration – set the relay module activation time (range of 1 – 600 s). • Enabled – activate/deactivate the AXIS A9188 module used for lift control for up to 8 floors. • IP address – AXIS A9188 IP address.
- Page 81 2N Access Unit Configuration Manual • Password – external device (WEB relay, etc.) authentication password. The parameter is only mandatory if the external device requests authentication. 81 / 134...
- Page 82 2N Access Unit Configuration Manual Caution • You just need one authentication username and password for all the modules. Floors • Floor name – set the floor name. • Public access – activate permanent floor access without any authentication. • Profile – select one or more time profiles to be applied. Set the time profiles in the Directory / Time Profiles section.
-
Page 83: E-Mail
Go to System Options / Security / HTTPS. Select the certificate in a pop-up menu and press Save to save it. Move to the 2N Access Unit web interface, Hardware / Lift Control. Enter the login data and the relay module IP address. - Page 84 To inform the intercom users on all missed and/or successfully completed calls, configure 2N IP intercom to send an e-mail after every call to the called user. You can compile the e-mail subject and message text of your own. If your intercom is equipped with a camera, you can automatically attach one or more snapshots taken during the call or ringing.
- Page 85 2N Access Unit Configuration Manual • Server address – set the SMTP server address to which e-mails shall be sent. • Server port – specify the SMTP server port. Modify the value only if the SMTP server setting is substandard. The typical SMTP port value is 25.
- Page 86 2N Access Unit Configuration Manual Click Apply & Test to send a testing e-mail to the defined address with the aim to test the functionality of the current e-mail sending setting. Enter the destination e-mail address into the Test e-mail address field and press the button. The current e-mail sending state is continuously displayed in the window for you to detect an e-mail setting problem if any on the intercom or another network element.
- Page 87 2N Access Unit Configuration Manual • Subject – set the e-mail subject to be sent. • E-Mail Body – edit the text to be sent. Use the HTML formatting marks in the text. You can insert special symbols substituting the username, date and time, intercom/card identification, Bluetooth/fingerprint identifier and identifier validity for information.
- Page 88 2N Access Unit Configuration Manual Send to E-Mail Address – set e-mail sending. The following options are available: • Device Rebooted • Tamper Switch Activation Device Restart Message – set the message to be sent to the specified e-mail address whenever the device is restarted.
- Page 89 2N Access Unit Configuration Manual Tamper Activated Message – set the message to be sent to the specified e-mail address whenever the tamper switch is activated. • Subject – set the e-mail subject to be sent. • E-Mail Body – edit the text to be sent. Use the HTML formatting marks in the text. You can...
- Page 90 Auth ID uniquely identifies just one mobile device or its user. You can set and edit the Auth ID value for each user in the Mobile Key section of the 2N Access Unit phone book. You can move Auth ID to another user or copy it to another intercom. By deleting the Auth ID value you can block the user's access.
- Page 91 (i.e. the mobile device is used as a key for more locations at the same time). To pair a user with a mobile device, use the user's page in the 2N Access Unit phone book. Physically, you can pair a user locally using the USB Bluetooth module connected to your PC or remotely using an integrated Bluetooth module.
- Page 92 Mobile Key users that still use this key will not be able to authenticate themselves unless they have updated the encryption keys in their mobile devices ® before deletion. The mobile device keys are updated at every use of the 2N Mobile Key application.
- Page 93 2N Access Unit Configuration Manual devices before deletion. The mobile device keys are updated at every use of ® the 2N Mobile Key application. • Delete primary key – delete the primary key to prevent the users that still use this key from authentication.
- Page 94 2N Access Unit Configuration Manual • In the case of loss of a mobile phone with access data proceed as follows: Delete the Mobile Key Auth ID value for the user to block the lost phone and avoid misuse.
- Page 95 2N Access Unit Configuration Manual 5.4.3 Automation The 2N Access Unit provides highly flexible setting options to satisfy variable user needs. There are situations in which the standard configuration settings (switch or call modes, e.g.) are insufficient and so 2N Access Unit offers a special programmable interface, 2N Automation.
- Page 96 HTTP API is an application interface designed for control of selected 2N IP intercom functions via the HTTP. It enables 2N IP intercoms to be integrated easily with third party products, such as home automation, security and monitoring systems, etc. 2N HTTP API provides the following services: •...
- Page 97 2N Access Unit Configuration Manual 97 / 134...
- Page 98 2N Access Unit Configuration Manual 5.4.5 User Sounds User Sounds helps you set or mute the acoustic signalling of the activated 2N Access Unit switch. For acoustic signalling for authentication refer to 5.3.1 Door. • Switch 1 Activation Signaling – set the sound to be generated when a switch 1 is activated.
- Page 99 2N Access Unit Configuration Manual and 2N Access Unit. Having accessed the intercom, enter the login name and password. The default login name and password are admin a 2n respectively. We recommend you to change the default password as soon as possible. The Web Server function is used by the following 2N Access Unit functions too: HTTP commands for switch control, refer to the Switches subsection.
- Page 100 2N Access Unit Configuration Manual of user certificates and private keys (refer to the Certificates subsection) or keep the SelfSigned setting, in which the certificate automatically generated upon the first intercom power up is used. • Remote access enabled – enable remote access to the intercom web server from off-LAN IP addresses.
- Page 101 2N Access Unit Configuration Manual <?xml version="1.0" encoding="UTF-8"?> <strings language="English" languageshort="EN"> <!-- Global enums--> <s id="enum/error/1">Invalid value!</s> <s id="enum/bool_yesno/0">NO</s> <s id="enum/bool_yesno/1">YES</s> <s id="enum/bool_user_state/0">ACTIVE</s> <s id="enum/bool_user_state/1">INACTIVE</s> <s id="enum/bool_profile_state/0">ACTIVE</s> <s id="enum/bool_profile_state/1">INACTIVE</s> </strings> While translating, modify the value of <s> elements only. Do not modify the id values. The language name specified by the language attribute of the <strings> element will be available in...
- Page 102 2N Access Unit Configuration Manual 5.4.7 SNMP The 2N Access Unit access systems integrate a remote intercom supervision functionality via the SNMP. The 2N Access Unit systems support the SNMP version 2c. List of Parameters • SNMP Enabled – enable the SNMP function. •...
-
Page 103: System
2N Access Unit Configuration Manual • Location – enter the device location (1st floor, e.g.). • IP Address – enter up to 4 valid IP addresses for SNMP agent access to block access from other addresses. If the field is empty, the device may be accessed from any IP address. - Page 104 2N Access Unit Configuration Manual 5.5.1 Network As the 2N Access Unit is connected to the LAN, make sure that its IP address has been set correctly or obtained from the LAN DHCP server. Configure the IP address and DHCP in the Network subsection.
- Page 105 If the DHCP server is unavailable or inaccessible in your LAN, use the manual network settings. • Static IP Address – display the static IP address of the 2N Access Unit, which is used together with the below mentioned parameters if the Use DHCP Server parameter is disabled.
- Page 106 Repress Ping to send another query to the same address. 802.1x The tab is not displayed for 2N Access Unit 2.0, which does not support the 802.1x protocol. • Device Identity – set the user name (identity) for authentication via EAP-MD5 and EAP- TLS.
- Page 107 • User Certificate – specify the user certificate and private key for verification of the 2N Access Unit authorisation to communicate via the 802.1x-secured network element port in the LAN. Choose one of three sets of user certificates and private keys; refer to the Certificates subsection.
- Page 108 2N Access Unit Configuration Manual • Default Interface – if enabled, it directs all outgoing network traffic to the VPN interface outside the LAN mask. • Server Address – OpenVPN Server Address • Server Port – OpenVPN Server Port. • Trusted Certificate – specify a set of certificates issued by certification authorities to verify the OpenVPN server public certificate validity.
- Page 109 2N Access Unit Configuration Manual Trace In the Trace tab, you can launch capturing of incoming and outgoing packets on the intercom network interface. The captured packets can be stored locally in the IP intercom 4 MB buffer or remotely in the user PC. When the local capture buffer is full, the oldest packets are rewritten automatically. We recommend that you lower the video stream transmission rate below 512 kbps while capturing packets locally. Press ...
- Page 110 If you control validity of lock activation codes and similar by time profiles, make sure that the 2N Access Unit internal date and time are set correctly. 2N Access Unit is equipped with a back-up real-time clock to withstand up to several days’ long power outages. You can synchronise the 2N Access Unit time with your PC anytime by pressing the Synchronise button.
- Page 111 2N Access Unit Configuration Manual List of Parameters • Synchronise – push the button to synchronise the 2N Access Unit time value with your PC time value. • Automatic Detection – define whether the time zone shall be detected automatically from My2N. In case automatic detection is disabled, the Manual selection parameter is Used (manually selected time zone or Own rule).
- Page 112 2N Access Unit Configuration Manual 5.5.3 Licence Some 2N Access Unit functions are available with a valid licence key only. Refer to the Function Licensing subsection for the list of 2N Access Unit licensing options. List of Parameters • Serial Number – display the serial number of the device for which the licence is valid.
- Page 113 • Lift Control Support – check whether the functions activated by the Lift Module license are available. • Automatic update – enable automatic license key update from the 2N License server. • Manual update – manual license availability check request. • Manual update state – running, updated, unspecified, failed: license is not available.
- Page 114 2N Access Unit Configuration Manual 5.5.4 Certificates Some 2N Access Unit network services use the Transaction Layer Security (TLS) protocol for communication with other LAN devices to prevent third parties from monitoring and/or modifying the communication contents. Unilateral or bilateral authentication based on certificates and private keys is needed for establishing connections via TLS.
- Page 115 If you use the Self Signed certificate for encryption of the intercom web server – browser communication, the communication is secure, but the browser will warn you that it is unable to verify the 2N Access Unit certificate validity. The current overview of CA and User certificate uploads is shown in the following two folders: Press ...
- Page 116 2N Access Unit Configuration Manual Caution • For certificates based on elliptic curves use the secp256r1 (aka prime256v1 aka NIST P-256) and secp384r1 (aka NIST P-384) curves only. 116 / 134...
- Page 117 The 2N Access Unit allows you to update firmware and configuration manually or automatically from a storage on a TFTP/HTTP server selected by you according to predefined rules. You can configure the TFTP and HTTP server address manually. The 2N Access Unit supports automatic address identification via the local DHCP server (Option 66).
- Page 118 The 2N Access Unit compares the server file with its current firmware file periodically and, if the server file is more recent, automatically updates firmware and gets restarted (approx. 30 s). Hence, we recommend you to update when the 2N Access Unit traffic is very low (at night, e.g.). The 2N Access Unit expects the following files: MODEL-firmware.bin – 2N Access Unit firmware...
- Page 119 – 2N Access Unit 2.0 MACADDR is the MAC address of the 2N Access Unit in the 00-00-00-00-00-00 format. Find the MAC address on the 2N Access Unit production plate or on the Status tab in the web interface. Example: 2N Access Unit with MAC address 00-87-12-AA-00-11 downloads the following files from the TFTP server: •...
- Page 120 ACS. • At Boot Time – enable check and/or execution of update upon every 2N Access Unit start. • Update Period – set the update period. Set an automatic update to take place hourly/ daily/weekly/monthly, or set the period manually.
- Page 121 Configuration Use the Configuration tab to set automatic configuration download from the server defined by you. The 2N Access Unit periodically downloads a file from the server and gets reconfigured without getting restarted. • Firmware update enabled – enable automatic firmware/configuration updating from the TFTP/HTTP server.
- Page 122 2N Access Unit Configuration Manual • Address Retrieval Mode – select whether the TFTP/HTTP server address shall be entered manually or a value retrieved automatically from the DHCP server using Option 66 shall be used. • Server Address – enter the TFTP (tftp://ip_address), HTTP (http://ip_address) or HTTPS (https://ip_address) server address manually.
- Page 123 2N Access Unit Configuration Manual • At Boot Time – enable check and, if possible, update execution upon every intercom start. • Update Period – set the update period. Set an automatic update to take place hourly/ daily/weekly/monthly, or set the period manually.
- Page 124 2N Access Unit Configuration Manual My2N / TR069 Use this tab to enable and configure remote intercom management via the TR-069 protocol. TR-069 helps you reliably configure intercom parameters, update and back up configuration and/or upgrade device firmware. The TR-069 protocol is utilised by the My2N cloud service. Make sure that TR-069 is enabled and Active profile set to My2N to make your intercom log in to My2N periodically for configuration.
- Page 125 2N Access Unit Configuration Manual • ACS Address – set the ACS address in the following format: ipaddress[: port], 192.168.1.1:7547, for example. • Username – set the user name for intercom authentication while connecting to the ACS server. • Password – set the user password for intercom authentication while connecting to the ACS server.
- Page 126 2N Access Unit Configuration Manual 5.5.6 Syslog The 2N Access Unit allow you to send system messages to the Syslog server including relevant information on the device states and processes for recording, analysis and audit. It is unnecessary to configure this service for common 2N Access Unit operation.
- Page 127 2N Access Unit Configuration Manual General overview of local syslog messages. 127 / 134...
- Page 128 • Restore Configuration – reset configuration from the preceding backup. Press the button to display a dialogue window for you to select and upload the configuration file to the 2N Access Unit. You can also choose before uploading whether the directory, network parameters or SIP exchange connection settings from the configuration file shall be applied.
- Page 129 The 2N Access Unit will automatically get restarted and new FW will then be available. The whole upgrading process takes less than one minute. Refer to www.2n.cz. for the latest FW version for your intercom.
- Page 130 Caution • The 2N Access Unit configuration change writing takes 3–15 s depending on the 2N Access Unit configuration size. Do not restart the intercom during this process. • License – click Display to display a dialogue window including a list of used licenses and third party software as well as a EULA link.
-
Page 131: Supplementary Information
6.3 General Instructions and Cautions 6.1 Troubleshooting For the most frequently asked questions refer to faq.2n.cz. 6.2 Directives, Laws and Regulations 2N Access Unit conforms to the following directives and regulations: • 2014/53/EU for radio equipment • 2011/65/EU on the restriction of the use of certain hazardous substances in electrical and electronic equipment •... -
Page 132: General Instructions And Cautions
2N Access Unit Configuration Manual Changes or modifications to this unit not expressly approved by the party responsible for compliance could void the user's authority to operate this equipment. 6.3 General Instructions and Cautions Please read this User Manual carefully before using the product. Follow all instructions and recommendations included herein. - Page 133 2N Access Unit Configuration Manual The consumer shall, without delay, change the access password for the product after installation. The manufacturer shall not be held liable or responsible for any damage incurred by the consumer in connection with the use of the original password.
- Page 134 Konfigurační manuál 2N Access Unit 134 / 134...
Need help?
Do you have a question about the Access Unit and is the answer not in the manual?
Questions and answers