
Subscribe to Our Youtube Channel
Related Manuals for Childcare BabyDen


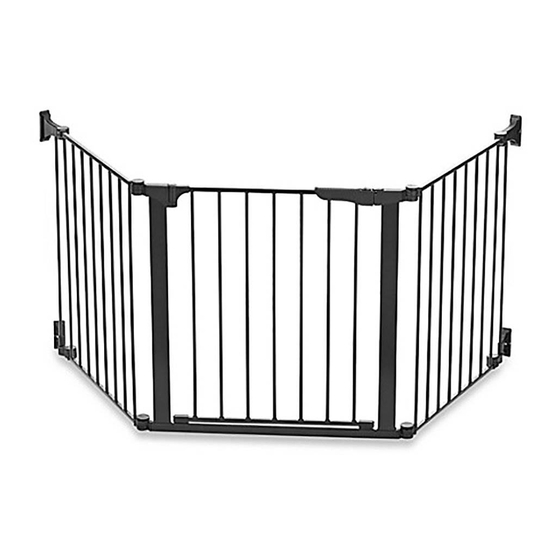
Summary of Contents for Childcare BabyDen
- Page 1 CNP BRANDS 20 Calarco Drive Derrimut, Victoria. 3030, Australia Tel: 1300 667 137 email: info@cnpbrands.com.au www.cnpbrands.com.au...
- Page 2 The BabyDen The ConfigureGate The HearthGate...
- Page 4 Index • Warnings • Care of your product • Parts check list • Overview of basic gates • Unfolding and setting up the BabyDen • Accessories (available separately) • Fitting the base • Opening and closing the walk through door section • Measuring the area around the fireplace/hearth • Unfolding and setting up the HearthGate • Fitting the wallfitting 13-15 • Opening and closing the walk through door section • Measuring the area to protect or isolate • Unfolding and setting up the ConfigureGate • Fitting the wall fittings 13-15 • Opening and closing the walk through door section • Adding optional sections • Removing sections • Fitting hinge caps/cones/covers...
-
Page 5: Important Notes
• W hen used as a safety gate (HearthGate • W hen used as a fire surround, this product /ConfigureGate), never use without wall is not a fire guard. It is intended to keep fittings. children away from the area surrounding the fireplace. • W hen used as a HearthGate, always place the gate mimimum 75 cm (29.5”) away • D o not leave anything in the BabyDen from the source of heat/fire and minimum which could provide a foothold or create a 90 cm (35.4”) from open fire. danger of suffocation or strangulation. • S ince every fireplace/wood burning stove • W hen used as a BabyDen be aware of the reaches different temperatures, the above risk of open fire and other sources of strong placing is only intended as a guide line. heat, such as electric bar fires, gas fires, etc. -
Page 6: Parts Checklist
ConfigureGate Baby Den incl. wall incl. wall Qty. Description fittings fittings 60 cm (24”) Extension Available separately 1 ConfigureGate consisting of 3 sections 1 HearthGate consisting of 5 sections 1 BabyDen consisting of 6 sections 2 Upper Bar Brackets (A) 2 Lower Bar Brackets (B) ( ) Lower Bar Slides (C) ( ) 4 Wall Plates (D) ( ) 2 Lower Bar Brackets screws (E) ( ) 2 Upper Bar Brackets nuts (F) ( ) 2 Hinge caps with groove (G) - Page 7 Unfolding and Setting up the BabyDen Unpack your folded BabyDen on a stable surface making sure the handle is on the top side. Separate the BabyDen into two parts by lifting up on the centre removable, vertical bar (see ill. 1) while sliding it sideways out of the lower hinge (1a). Central vertical bar Unfold the sections: Lift up (1) on the section with top hinges while pressing down (2) on the connected section (2). It is easiest to lift up and turn the sections if Press down you lift and press as close to the hinges as Top hinge possible (see ill. 2). Turn around the section (3). Lift up Cone hinge The top hinges have markings intended for setting up as a BabyDen. In order to set up the BabyDen in a square or a hexagon, turn around the sections, and release when the arrow on the hinge is in line with the marking on the top hinge. Fold out both parts so that the sections form a hexagon - follow the markings:...
- Page 8 Unfolding and Setting up the BabyDen The removable, vertical bar has been fitted Top hinge in the end section by the manufacturer (see ”overview of basic gates” page 18). Lift up the vertical bar and remove it. Align the ends of the two parts and make sure that the hinges drop together both on Bottom hinge top and bottom (see the extracts pictures of ill. 5). Connect the two parts by pushing the verti- cal bars (1) up into the top hinge and let Re-fit the vertical them slide into the groove of the lower hinge (2). Wall mounting equipment is not included with the BabyDen. Should you wish to use the BabyDen as a safety gate, follow the instructions of the ConfigureGate and HearthGate (see index page 3). Note: Should you want to attach all 6 sections of the BabyDen to the wall, you will have to use the enclosed loose vertical bar (J).
- Page 9 Fitting the Base (Base only included in CC7050C) Place the textile base in the BabyDen with the printed side facing up. Start by fitting the base to the three corners with hinges as shown in ill. 9. Pass the elastic of the base underneath the BabyDen. Slide the removable, vertical bar out of the hinge. Hold the elastic as shown (see ill. 10), while sliding the bar back in place. Hereafter fit the last three corners of the base by pulling the elastic underneath the BabyDen and up around the hinge (see ill. 11). Tie the ribbons around the horizontal, square tubes of the metal sections - not around the bars.
- Page 10 Opening and Closing the Walk Through Door Section Opening of walk through door section Squeeze the handle as far as possible (1). The door may easily be opened in either direc- tion (2). Closing the walk through door section Squeeze the handle as far as possible (1) and align the bottom of door with gate frame. Release handle, and door should lock. Pos. A The walk through door section will be pro- perly locked when the handle hook falls down into the hole of the opposite hinge (see pos. A), and the locking bar and the hole of the bottom frame have engaged (see pos. B of ill. 15). Test to ensure both locks are engaged. Pos. B...
- Page 11 Measuring the Area Around the Fireplace/Hearth Measuring around fireplace/hearth. The distance from the gate sections to the fireplace/hearth must be minimum 75 cm (29.5”). Min. 75 cm Min. 75 cm (29.5”) (29.5”) • The gate must never be set up in a straight line. Should it not be possible to keep the recom- mended distances, separate sections are available at your supplier. The distance from the gate sections to open fire must be minimum 90 cm (35.4”).
- Page 12 Measuring the Area to Protect/Isolate Setting up on top of stairs If the ConfigureGate is placed on top of stairs, please note the following: • The gate must be set up in a curve away from the stairs (see ill. 18). • The gate must never be set up in a straight line. • There must be a minimum distance of 40 cm (15.7”) from gate to stairs. Should it not be possible to keep the recom- mended distances, separate sections are available at your supplier. Setting up on bottom of stairs If the ConfigureGate is placed on bottom of stairs, please note the following: • The gate must be set up in a bow away from the stairs (see ill. 19). • The gate must be placed as far away from the stairs that the child will not be able to reach the bottom stair and crawl over the...
- Page 13 Setting up the HearthGate and ConfigureGate Place the folded gate on a stable surface with the handle facing up. Separate the HearthGate in two parts by pul- ling up in the centre removable, vertical bar (see ill. 21) and let it slide out of the groove of the bottom hinge (ill. 21a). Centre vertical Unfold the sections: At the corner, lift up slightly on the section with hinge teeth facing down (1) while gently pressing down on the connected section (2). Rotate the section (3). Press down Top hinge Lift up Cone hinge Unfold the gate to the desired shape. Top hinge Unfold both parts and align the end section with cone hinge underneath the end section with top hinge (ill. 23) - be sure that the hinges engage both on top and on bottom (see circle drawings of ill 23). Bottom hinge Connect the two parts by pushing the remo- vable, vertical bar up into the upper hinge (1) and let it slide into the groove (2). • If adding sections - go to page 16. • If gate is too long - go to page 17. • If making no changes - continue with fitting the wall fittings on next page.
- Page 14 Fitting the Wall Fittings Assemble lower bar brackets (b) and slides (c) with screws and nuts as shown. Tighten screws just enough to allow parts to slide easily. Slide wall plates (d) onto back of upper and lower bar brackets (a and b) until click is heard and locked in place. 25a. Place upper bracket around top cone hinge. Slide lower bracket assembly onto removable bar and push bar up into upper bracket. Repeat for opposite side of gate. Move ConfigureGate to desired location. Rotate upper and lower brackets until flush against mounting surface. With a pencil, out- line brackets on mounting surface. NOTE: Lower bracket is adjustable. It can be moved up (maximum 15 cm (6”)) to accom- modate various heights of floor molding; and by loosening screw, can adjust widths to accommodate uneven wall construction. max 15 cm (6”)
- Page 15 Fitting the Wall Fittings Remove wall plates from brackets by pres- 16a. sing locking tabs (29 and 30) and lifting off. Press Press WARNING If placed around a fireplace/hearth, a distan- ce of minimum 75 cm (29.5”) from source of heat/fire is recommended. Min. 75 cm (29.5”) If placed around open fire, minimum distance must be 90 cm (35.4”). See also ”Measuring the area around the fire- place/hearth” on page 10. Hold one wall plate (d) inside wall outline and screw in two wood screws. Repeat for other wall plate. NOTE: Screws provided are for mounting directly into wood. If mounting into brick, drywall or other surfaces, use appropriate hardware. Screw holes...
- Page 16 Fitting the Wall Fittings Reattach brackets to wall plates. Gate should now be properly installed. The other end of the gate is fitted in the same way. Opening and closing the Walk Through Door Section: See page 9...
- Page 17 Adding Optional Sections An extension has a top hinge in one end and Top hinge a cone hinge in the other. This makes it pos- Cone Hinge sible to fit the extension to all kinds of sections. The removable, vertical bar has already been fitted by the manufacturer. Remove this bar by lifting it up (1) and sliding it out of the lower hinge (2). To avoid rearranging the caps/covers/cones, add extensions according to the next illustra- tions. ConfigureGate Top hinge Separate the gate between door and section (see ill. 35) by removing the removable, verti- cal bar. Fit the extension by placing the top hinge on the door section over the cone hinge of the extension (see ill. 35a). The hinges must be aligned both on top and bottom. Let the hinges drop together and insert the removable, vertical bar. Fit the last section in the same way. HearthGate Top hinge Separate the gate between two sections (see ill. 36) by removing the removable, vertical bar. Fit the extension by placing the top hinge of the extension over the cone hinge of the sec- tion (see ill. 36a). The hinges must be aligned both on top and bottom. Let the hinges drop together and insert the removable vertical bar.
-
Page 18: Removing Sections
Removing Sections If you want to remove a section from the gate you have bought, always remove the end section(s). Remove the removable, vertical bar by lifting it up (1) and let the bar slide out of the groove towards the hinge (2). Lift off the section(s). Remove the loose caps from the end section (the illustration shows the end section of the HearthGate - end section of ConfigureGate see ill. 40). Loose cap Loose cap Fitting of hinge caps /cones /covers Depending on the number of sections remo- ved or added, you will end up with one of the illustrated end sections (ill. 39 and 40). Fit the loose caps/covers (remaining caps /covers are enclosed in a plastic bag) on what is now the end sections according to ill. 39 and 40. The caps/covers are enclosed in a plastic bag. Fit these according to ill. 39 and 40. - Page 19 Overview of Basic Gates ConfigureGate Walk through door HearthGate BabyDen Assembling the BabyDen Section with walk through door Loose cap, plain Handle Loose cap with groove Locking bar Loose cap, cone Section with cone hinges Removable, vertical bar (these are set off in grey) Section with top hinges...
Need help?
Do you have a question about the BabyDen and is the answer not in the manual?
Questions and answers