Vent-Axia Sentinel Kinetic 200Z User Instructions
Hide thumbs
Also See for Sentinel Kinetic 200Z:
- Installation & commissioning (40 pages) ,
- Installation & commissioning (36 pages)
Table of Contents
Advertisement
Quick Links
V:\Technical\ARTWORK\Fitting & Wiring\Word Files HOLDING\449355 D.doc
Sentinel
Kinetic 200Z & 200ZH
300ZH
User Instructions
PLEASE RETAIN THESE INSTRUCTIONS WITH THE PRODUCT.
449355 D.docCopyright © 2009 Vent-Axia Limited. All rights reserved.
Model
Stock Ref. N°
200Z
448733A
200ZH
449540A
300ZH
449536A
Advertisement
Table of Contents

Related Manuals for Vent-Axia Sentinel Kinetic 200Z


Summary of Contents for Vent-Axia Sentinel Kinetic 200Z
- Page 1 V:\Technical\ARTWORK\Fitting & Wiring\Word Files HOLDING\449355 D.doc Sentinel Kinetic 200Z & 200ZH 300ZH User Instructions Model Stock Ref. N° 200Z 448733A 200ZH 449540A 300ZH 449536A PLEASE RETAIN THESE INSTRUCTIONS WITH THE PRODUCT. 449355 D.docCopyright © 2009 Vent-Axia Limited. All rights reserved.
-
Page 2: Table Of Contents
About this Document Contents IMPORTANT SAFETY INFORMATION Product Description Sentinel Kinetic 200Z, 200ZH & 300ZH ........3 Remote Wired Control Display ............4 PLEASE READ THESE PLEASE READ THESE Technical Specification INSTRUCTIONS CAREFULLY INSTRUCTIONS CAREFULLY Technical Specification ..............5 BEFORE USING THE UNIT. -
Page 3: Product Description
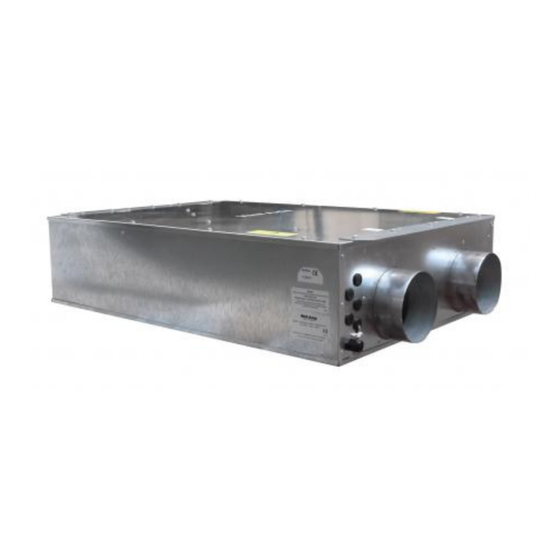
Product Description Sentinel Kinetic 200Z, 200ZH, 300ZH The Vent-Axia Sentinel Kinetic 200Z, 200ZH, 300ZH Mechanical Ventilation / Heat Recovery (MVHR) is a heat recovery unit designed for the energy efficient ventilation of houses and similar dwellings, conforming to the latest requirements of the Building Regulations document F 2010. -
Page 4: Remote Wired Control Display
Product Description Wired remote Control Display The Wired remote Control provides the user interface for commissioning and monitoring purposes. Display The main display is an LCD Normal Airflow (see Overview on page 7). Buttons Four buttons on the Control Unit provide the controls for configuring and monitoring the unit. Table 1: Control Unit Buttons Button Function... -
Page 5: Technical Specification
Condensate pipe 22 mm diameter Environmental IP Rating IP22 Operating Temperature -10°C to +45°C Operating Humidity 0% to 95% RH For all other technical details, please see the Product Catalogue or our website at www.vent-axia.com. Sentinel Kinetic MVHR Operation & Monitoring... -
Page 6: Getting Started
Starting Up Powering Up the Unit Switching On (The unit is designed to run continuously) To switch the unit on: Switch on the power at the mains supply isolator feeding the unit. Following switch-on, the fan motors will start and the Control Unit will display a series of startup screens, described below. -
Page 7: Operation And Monitoring
Operation and Monitoring Operation and Monitoring Overview When the Sentinel Kinetic unit has been installed and commissioned it should require no further intervention in order to operate, unless external switches are used to control on/off/boost, etc, or BMS control requires user action. -
Page 8: User Menu Screens
Operation and Monitoring User Menu Screens From the Normal Airflow screen, press the button to access the rest of the User Menu screens. Changing the value of a setting (if adjustable) is typically a 3-step procedure: Press to select the setting (the setting will flash). Use the buttons to adjust the value. -
Page 9: Summer Mode Screens
Operation and Monitoring Set Clock Screen From the Normal Airflow screen, simply press the Set Clock button once to access the Set Clock screen. Mon 12:30 The Set Clock Control screen enables you to change the clock settings. The clock retains its settings for approximately two weeks without mains power, after which it will need resetting when power is reconnected Values are DDD HH:MM. -
Page 10: Boost & Purge Screens
Operation and Monitoring Boost & Purge Screens Boost Screen Pressing the button activates boost airflow mode Boost Airflow when extra ventilation is required. 50 % No. of presses Boost action Boosts for 30 minutes Boosts for 60 minutes Boosts continuously Back to Normal flow rate If the installation has switch sensors, is wired to the lighting, has Vent-Wise sensors or if the internal time... -
Page 11: Status Message Screens
Operation and Monitoring Low Airflow Screen Low Airflow mode is activated when the Normal Airflow Low Airflow is set to Off. 20 % The Normal Airflow mode can be set to run during the daytime i.e. from 6am to 11pm, the Low Airflow mode will then run during the night from 11pm to 6pm. - Page 12 Operation and Monitoring Heating Failure Screen The Room Too Cold screen displays the status of the Room Too Cold fan. If the heating system in the building fails or is Fan Off switched off and the internal temperature drops below 5°C, the unit will stop running so as to not bring cold air into an already cold house.
-
Page 13: Maintenance
Maintenance Maintenance Caring for the Unit Heat recovery units, by their very nature, require regular maintenance. The Sentinel Kinetic unit has been designed to facilitate access to enable maintenance to be carried out easily. Filter Maintenance Item Action Fan Filters When the unit displays “Check filters”. - Page 14 Maintenance Cover Filter access Panels Stage 1: Isolate the mains power supply and remove the Filter access Panels and Filters. Undo the securing screws and remove the Cover . Jubilee Clip Condensate Pipe Condensate Tray Stage 2: Loosen the Condensate Pipe Jubilee Clip and remove Pipe from Condensate Tray. Sentinel Kinetic MVHR Operation &...
- Page 15 Maintenance Security Strap Stage 3: Remove the Condensate Tray. Note: Remove the additional Security Strap on the 300ZH before removing the Condensate Tray Caution: Keep the Tray as horizontal as possible as this may contain condensate. Brackets Stage 5: Remove the two Heat Exchanger fixing Brackets and Heat Recovery Cell. Note : Take care when removing the Heat Recovery Cell.
- Page 16 For re assembly, please reverse this process ensuring the Heat Exchanger Cell is re positioned with the “TOP” label visible and that the same level of care and attention is retained in re-applying all fixings to their previous locations. Spares The following spares may be ordered from Vent-Axia Description Part No 200Z & 200ZH...
-
Page 17: Troubleshooting
Troubleshooting Maintenance Troubleshooting Diagnosing a Problem In the event of a problem, always troubleshoot the unit according to: Fault code displayed on the Remote Wired Control. Fault LED if connected. If no indications are displayed, then troubleshoot problem according to the fault symptom as described in the following table. - Page 18 PRODUCT FICHE For Residential Ventilation Units (Complying Commission Delegated Regulation (EU) No 1254/2014) Name: Vent-Axia Vent-Axia Vent-Axia Kinetic 200 Z - Kinetic 200 ZH - Kinetic 300 ZH - Model ID (Stock Ref.) : 448733 449540 449536 SEC Class SEC Value ('Average') -39.08...
- Page 20 IF CLAIMING UNDER TERMS OF GUARANTEE Please return the complete product, carriage paid to your original supplier or nearest Vent-Axia Centre, by post or personal visit. Please ensure that it is adequately packed and accompanied by a letter clearly marked “Guarantee Claim” stating the nature of the fault and providing evidence of date and source of purchase.
Need help?
Do you have a question about the Sentinel Kinetic 200Z and is the answer not in the manual?
Questions and answers