
Related Manuals for Holman 40101


Summary of Contents for Holman 40101
- Page 1 Instruction Guide 40101 Holman Rancho Cordova, CA 95742 800-343-7486 InstallationSupport@Holman.com 20220301R1 DATE: ________________...
- Page 2 Step 6 – Install Tank Rack ....................... 6 Before You Begin Read all instructions prior to assembling or installing any Holman product. Always locate your installation locations prior to performing any work. ENSURE SAFETY WHILE INSTALLING OR DRILLING INTO VEHICLE.
- Page 3 Instructions – 40101 Parts For Technical Support Call: 800-343-7486 Monday-Friday 7AM - 4 PM (PST) Page 2...
- Page 4 Instructions – 40101 Hardware For Technical Support Call: 800-343-7486 Monday-Friday 7AM - 4 PM (PST) Page 3...
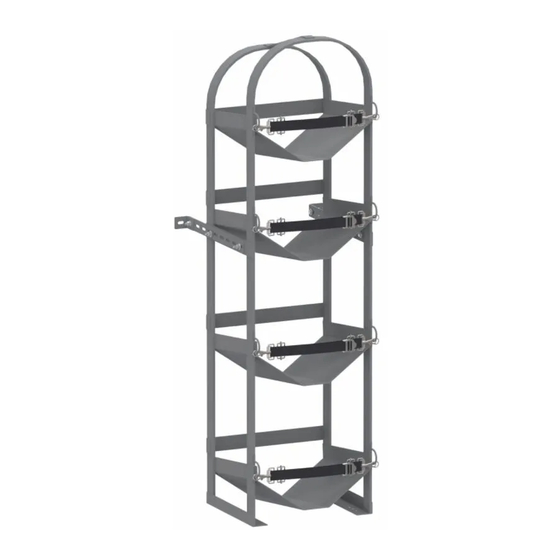
- Page 5 Instructions – 40101 ALWAYS ENSURE TANKS ARE SECURE PRIOR TO TRANSPORTATION. Step 1 – Find Mount Location Determine location of where the 4-tier tank rack will be placed. Tank rack may be installed stand-alone to the vehicle wall and floor, or installed to a shelf side in addition to vehicle wall and floor.
- Page 6 Instructions – 40101 Step 3 – Attach Strap Bracket In some circumstances, the mounting strap will only attach to the tank rack in one location. Using a 1/4” x 1” hex head bolt, two 1/4” flat washers, and a 1/4” lock nut, bolt the mounting strap to the side of the rack.
- Page 7 Instructions – 40101 Step 5 – Install Plus Nuts Plus nuts are installed into wall and floor only. Plus nuts are not to be used for mounting to shelf side. Drill hole using 25/64” drill bit and appropriate size drill stop. If 25/64” drill bit is not available, a 3/8”...
- Page 8 Instructions – 40101 If a gap exists between the bottom of tank rack and the floor, insert a nylon spacer between rack and floor, centered on installed plus nut. Using 1/4" x 1-1/4” hex head bolts, 1/4” lock washers, and 1/4” flat Use 1/4”...
Need help?
Do you have a question about the 40101 and is the answer not in the manual?
Questions and answers