
Related Manuals for Holman MK21010


Summary of Contents for Holman MK21010
- Page 1 Charcoal Colour Misting Kit 10 Metres PRODUCT CODE MK21010 User Guide www.holmanindustries.com.au...
-
Page 2: Table Of Contents
Please read these instructions in full before proceeding with setup. The Bluetooth® word mark and logos are registered trademarks owned by Bluetooth SIG, Inc. and any use of such marks by Holman Industries is under license. Other trademarks and trade names are those of their respective owners. -
Page 3: Overview
Overview Features L Misting kits can reduce your L Easy to assemble–fittings outdoor area temperature simply push over hose tubing by up to 10 degrees with no clamps required L Perfect to cool down patios, L 3°C minimum working recreation and pet areas temperature L Keeps areas and plants cool L 275 kPa minimum... -
Page 4: Components
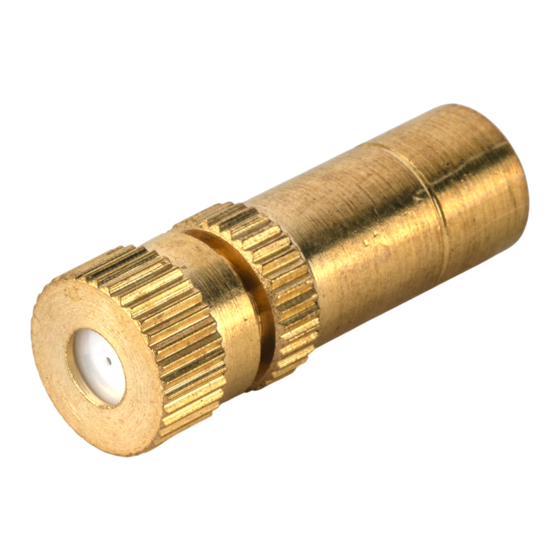
Overview (continued) Components 1. 5× 7mm Barbed/4mm BSP Threaded Tee 2. 1× 7mm Barbed Tee Connector 3. 1× 7mm Barbed/4mm BSP Threaded End Connector 4. 1× 7mm Barbed Elbow Connector 5. 1× 7mm Barbed Joiner 6. 16× Hose Clamps 7. 5× 4mm BSP Brass Jets 8. -
Page 5: Plan Your Misting Installation
Overview (continued) Plan your Misting Installation ® Plan where to position ® Plan where to attach the MISTING JETS pipework and a route to (page 7), where your water easily attach it together source will come from ® Position MISTING JETS (page 6) and where the supply pipeline will run... -
Page 6: Installation
Installation Understand your Water Supply Á Only fresh tap water quicker and more effectively is recommended as they evaporate and cool the bore or dam water may area. A normal household contain sediment that water supply is usually at will block MISTING JETS an adequate pressure ®... -
Page 7: How To Position Misting Jets
Installation (continued) How to Position Misting Jets Á Position MISTING JETS away from where people sit as the jets may drip water Á Too much water can be a problem. The air can become saturated and even wet the people and objects in the space ®... -
Page 8: Benefits Of A Misting Timer
Installation (continued) Benefits of a Misting Timer L To achieve the best misting results install a MISTING TIMER L Regulate the amount of water entering a space by adjusting the “ON” times and “OFF” times of the timer L MISTING TIMERS allow you to make these settings in seconds, where other timers may not have this feature L We have several Tap Timers with misting settings Also available:... -
Page 9: Installing Misting Timer To Misting System
Installation (continued) Installing Misting Timer to Misting System 1. Install MISTING TIMER directly to tap ® Use UNIVERSAL Use Universal Tap TAP ADAPTOR Adaptor for 25mm taps to connect 20 to 25mm fittings if needed 2. Connect MISTING TIMER to MISTING FILTER ®... -
Page 10: How To Join Misting Tube To Compression Fittings
Installation (continued) How to Join Misting Tube to Compression Fittings Á Once tubing is installed ® This system features to ELBOW, TEE or “compression fittings”: JOINER CONNECTORS • These fittings grip it cannot be removed the MISTING TUBE 1. Measure and cut and prevent it MISTING TUBE to desired loosening or leaking... - Page 11 Installation (continued) How to Join Misting Tube to Compression Fittings (continued) 2. Once MISTING TUBE 5. The MISTING TUBE [e] is cut, the compression should enter the fitting [f] fitting can be installed at least 10mm 3. Bring the two parts Á...
-
Page 12: Installing Your Misting System
Installation (continued) Installing your Misting System 1. Start at the garden tap or water source point. If using a GARDEN HOSE [g], it is recommended you install a 12mm SPRINKLER ADAPTOR [h] (sold separately) into MISTING FILTER [i] as shown Á If your GARDEN HOSE is running in the sun, ensure it is a good quality hose that can withstand the pressure when the water and hose may get heated Á... - Page 13 Installation (continued) Installing your Misting System (continued) 2. Run MISTING TUBE [i] 3. Use ELBOW CONNECTOR to a low position to install [m] to go around corners AUTO DRAIN VALVE [k] using THREADED TEE CONNECTOR [j] ® Valve automatically releases pressure and “dumps” water in MISTING TUBE “above”...
- Page 14 Installation (continued) Installing your Misting System (continued) Á Avoid installing 5. Finish the line with the THREADED END MISTING TUBE in direct CONNECTOR [p] sunlight as this may cause the tube to go brittle over time ® HOSE CLAMPS use a strong masonry nail that should not bend when you hammer it into timber or masonry...
-
Page 15: Flushing The System
Installation (continued) Flushing the System 1. Perhaps the most important part of the installation process is to properly flush the system 2. Remove ALL MISTING JETS and connect the water and run for 4 or 5 minutes ® This will ensure all dirt and pipe swarf is flushed from the system. If this is not done, MISTING JETS will clog and not work 3. -
Page 16: Maintenance
Maintenance Drain Water from your System ® When your system is not in use, drain all water from system. If using an AUTOMATIC DRAINING VALVE, this will happen automatically ® If this is not shutting off while in use, unscrew the valve inside a container and check the internal spring and ball bearing–if these are not moving freely, the valve may need cleaning or replacing Á... -
Page 17: Clean Filter
® This cleans solid particles away and dissolves calcium and iron deposits that build up as water evaporates in MISTING FILTER and MISTING JETS The Holman website has a host of additional information on features. Head to support.holmanindustries.com.au for more tips, tricks and support content. -
Page 18: Troubleshooting
Troubleshooting Question Answer Why is my auto drain valve leaking? The line not reaching pressure, ensure there is sufficient supply pressure to run the system efficiently I cannot remove the MISTING TUBE We recommend cutting the hose from the barbed fittings. Can free of the fitting. - Page 19 Holman Industries Australian Family Owned 11 Walters Dr, Osborne Park WA 6017 support@holmanindustries.com.au www.holmanindustries.com.au...
- Page 20 We recommend registering your new product on our website. This will ensure we have a copy of your purchase and activate an extended warranty. Keep up to date to with relevant product information and special offers available through our newsletter. www.holmanindustries.com.au/product-registration/ Copyright © 2022 Holman Industries...
Need help?
Do you have a question about the MK21010 and is the answer not in the manual?
Questions and answers