Table of Contents
Advertisement
Available languages
Available languages
Quick Links
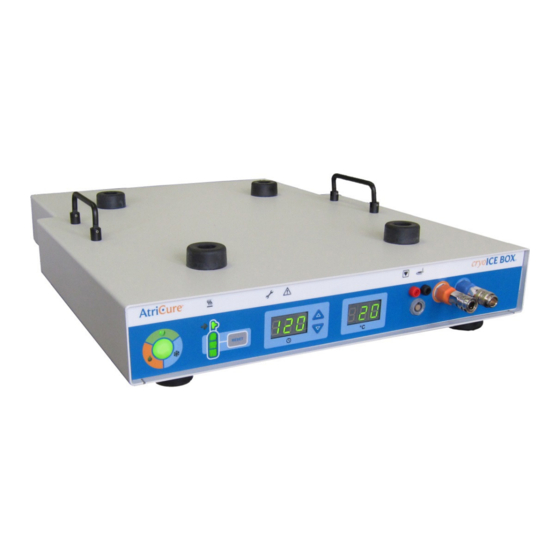
AtriCure cryoICE BOX, model ACM1 – 115 (100-120)VAC, 4A, 50/60 Hz
BR REP
Technical Name: Cryogenic Surgical Unit
Commercial Name: AtriCure Cryosurgical System
ANVISA n°: 80117580971
Importer: Emergo Brazil Import Importação e Distribu-
ição de Produtos Médicos Hospitalares Ltda. Avenida
Francisco Matarazzo, 1.752, Salas 502/503, Agua Branca,
São Paulo-SP, CEP – 05001-200 CNPJ: 04.967.408/0001-
98
Email: brazilvigilance@ul.com
Technical Manager: Luiz Levy Cruz Martins, CRF-SP:
42415
cryoICE BOX
Version 6
USER'S MANUAL
Manufacturer:
AtriCure, Inc.
7555 Innovation Way,
Mason, Ohio 45040 USA
+1 866 349 2342 (toll free)
+1 513 755 4100 (phone)
2022/04 | IFU-0229.A
EN
Advertisement
Chapters
Table of Contents

Subscribe to Our Youtube Channel
Related Manuals for AtriCure cryoICE BOX ACM1


Summary of Contents for AtriCure cryoICE BOX ACM1
- Page 1 BOX Version 6 USER’S MANUAL AtriCure cryoICE BOX, model ACM1 – 115 (100-120)VAC, 4A, 50/60 Hz BR REP Technical Name: Cryogenic Surgical Unit Manufacturer: Commercial Name: AtriCure Cryosurgical System AtriCure, Inc. ANVISA n°: 80117580971 7555 Innovation Way, Importer: Emergo Brazil Import Importação e Distribu- Mason, Ohio 45040 USA ição de Produtos Médicos Hospitalares Ltda.
-
Page 2: Table Of Contents
Meanings of Symbols on AtriCure cryoICE BOX ........ - Page 3 AtriCure Address / Toll Free Telephone Number ........
-
Page 4: Foreword
(WAGD) system. It is intended only to be used together with the AtriCure cryoICE BOX to enable meeting its intended purpose. The ACM footswitch is used to activate the AtriCure cryoICE BOX as an alternative to using the Activation But- ton on the front panel of the generator. -
Page 5: Warnings
• no thermocouple wires are exposed from the cable, connector, or the cryoICE probe. Use of accessories, transducers and cables other than those specified or provided by AtriCure could re- • sult in increased electromagnetic emissions or decreased electromagnetic immunity of the cryoICE BOX and result in improper operation •... -
Page 6: Meanings Of Symbols On Atricure Cryoice Box
Meanings of Symbols on AtriCure cryoICE BOX Power Off Cylinder Valve On/Off Caution O Gas Gauge Reset Alternating Current Gas Exhaust Equipotential Terminal Maintenance Needed Type CF Applied Part Cylinder Heater Band (cryoICE Probe) READY Footswitch FREEZE Maximum Pressure DEFROST... -
Page 7: Classification In Accordance With Iec, En, Ansi/Aami, Csa 60601-1
IN ACCORDANCE WITH ANSI/AAMI ES60601-1 (2005) + AMD 1 (2012) CAN/CSA C22.2 No. 60601-1 (2014) E509985 Cryogenic Ablation Device, Model AtriCure Cryo Module, ACM1, cord connected/ appliance coupler / transportable, rated: 115VAC, 4A, 50/60 Hz 1. Type of protection against electric shock: Class I 2. -
Page 8: System Overview
• The cryoICE BOX is designed to operate only with AtriCure cryoICE probes. Refer to the cryoICE probe Instruction for Use for complete description and indications for use of these devices. -
Page 9: Operating Modes
Operating Modes cryoICE BOX operates in one of three modes: READY, FREEZE, and DEFROST. These modes are identified by the system status indicator LEDs and the ablation status indicator LEDs located on the front of the cryoICE BOX unit. READY Mode This mode is entered automatically upon successful execution of Power-on-self -test when the unit is first turned on or following DEFROST Mode upon the cryoICE probe reaching approximately 10°C (50°F) and automatically venting. -
Page 10: Electrical Specifications
G: AtriCure cryoICE BOX Footswitch (Optional – not shown) - Accessory H: AtriCure cryoICE BOX Power Cord (not shown) - Component I: AtriCure cryoICE probe with integral tube set (not shown) - Type CF Applied Part J: AtriCure cryoICE BOX Heater Band Extension Spring (not shown) – Component... -
Page 11: O Gas Coupling Installation
O gas coupling to the Tank Hose Assembly angled connector. • Secure this connection as tight as possible only AtriCure cryoICE BOX Set-Up and Preparation This section will outline the preliminary set-up for the cryoICE BOX, including cylinder installation, heater band installation, turning on the cryoICE BOX, and resetting the cylinder gauge on the cryoICE BOX user interface. -
Page 12: Exhaust Tubing
Figure 5: Attach country specific coupler to Figure 6: Turn Valve Counter-Clockwise to Open Threaded Connection • Listen for leaks. If a leak is detected, tighten the black knob with a wrench if needed. If the Low-Pressure indicator, as seen in Figure 7, illuminate’s amber this indicates that the cryoICE BOX •... -
Page 13: Turning On The Atricure Cryoice Box
After powering up, the Activation Button on the front of the cryoICE BOX interface will be illuminated. If • no light is observed, check for proper power cord connection and switch position Figure 10: Turn-On AtriCure cryoICE BOX with Switch Resetting the N O Gas Gauge •... -
Page 14: System Check
1-Segment Flashing = Approximately 5 minutes or less remaining – CHANGE TANK System Check • Verify neither the Maintenance Needed or System Fault icons are illuminated. DEVICE Install AtriCure cryoICE Probe Ensure cryoICE BOX is properly connected to a N O gas cylinder. - Page 15 Figure 13: Color Coded Pneumatic Connectors Ensure each pneumatic connection is fully seated by listening for an audible “click” as each connector engages its receptacle. Gently tug on each tube to ensure proper engagement with connector. Insert the corresponding red and black colored connections into the thermocouple connectors, see Figure 15. Figure 14 Figure 15 The cryoICE probe icon, seen above in Figure 14, will extinguish if the cryoICE probe is functioning prop-...
-
Page 16: Set Ablation Time
Set Ablation Time The time of ablation is displayed in the middle of the interface of the cryoICE BOX and is indicated by a clock underneath the display. The display shows the time of ablation in seconds, see Figure 17. Figure 17: Ablation Time Display To change the duration of the ablation, press either of the up or down arrows to the right of the time display. -
Page 17: Operate Without Temperature Reading
FREEZE mode and the counter will start the countdown immediately. This should only be done at the discretion of a physician as there will not be temperature feedback. 6 . SYSTEM DISASSEMBLY AFTER USE Check to see that the service icon is not illuminated. If so, notify AtriCure service to correct the problem. Disconnecting the AtriCure cryoICE Probe The cryoICE probe can only be removed in the READY mode. -
Page 18: Preventive Maintenance
The cryoICE BOX unit has been pre-set at the factory to a nominal voltage of 115V (ACM1). The Rating Label below the Power Entry Module on the back panel of the cryoICE BOX indicates the selected Input Voltage for this unit. This setting should only be adjusted by the manufacturer or by an authorized AtriCure technical service representative. Note: cryoICE BOX unit should be powered off and unplugged before continuing with the fuse replacement procedure. -
Page 19: Tank Hose Assembly Without Canisters - Standard
5. Return the fuse box to the power entry module and push in firmly. 6. Confirm operational status by plugging in the cryoICE BOX and turning power on. Ensure that the self- test is completed without errors. New AtriCure cryoICE BOX Installation A001054-4 Packaged, ACM Components - Brazil Tank Hose Assembly without canisters –... -
Page 20: Tank Hose Assembly With Canisters - Alternate (Replacement Of Desiccant Filter)
Figure 20: AtriCure cryoICE BOX Tank Hose Assembly without canisters Tank Hose Assembly with canisters – Alternate (Replacement of Desiccant Filter) This section only applies to cryoICE Box Systems equipped with the Tank Hose Assembly which contains the canister set. - Page 21 Replace the filter housing by screwing on clockwise using hand force only. Component and Accessorry Device Tables See Table 3 Figure 24: Exhaust Hose Connector Assembly – A001150 Table 3: AtriCure Accessory Devices AtriCure Accessory Part Accessory Description Number A001150-15 Medical Vacuum Connector Chemetron by 1/4"...
-
Page 22: Disposal
Table 4: AtriCure Component Devices AtriCure Component A001054-4 (Kit Component Description Part Number Quantities) A000836-4 (Qty. 6) Extension Spring S000543-4 (A001399 Tank Hose Assembly without Cannisters individually packaged) A000838-4 Tank Hose Assembly with Cannisters S000648 N2O Exhaust Hose A000728-4 Cylinder Heater Band (CMH15) -
Page 23: Troubleshooting
• Check AC plug in wall socket. • Ensure power is available at wall socket. • cryoICE BOX electrical failure. • Call AtriCure Service. Cylinder Heater • Heater not plugged in. • Check connection on back of unit. Band Icon Illumi- •... - Page 24 O cylinder. • Exhaust filter is clogged. • Exhaust connector (orange) is frosting/ freezing ice (liquid condensate is not uncommon) call AtriCure Service. Temperature • cryoICE probe plugged in incorrectly. • Ensure cryoICE probe black and red plugs are in correct receptacles.
-
Page 25: Atricure Cryoice Box Error Codes
If an error condition should occur, the Maintenance Needed Indicator or the System Fault Indicator will illu- minate. The probe Temperature display on the front panel will temporarily display one of the following error codes during the power-up sequence. Contact AtriCure Service if one of these conditions occurs. Error... -
Page 26: Electromagnetic Compatability Tables
Guidance and manufacturer’s declaration – Electromagnetic Emissions The AtriCure cryoICE BOX is intended for use in the electromagnetic environment specified below. The customer or the user of the AtriCure cryoICE BOX unit should assure that it is used in such an environment. Phenomenon... -
Page 27: Electromagnetic Immunity - Input A.c. Power Port
Guidance and manufacturer’s declaration – Input A.C Power Port Immunity The AtriCure cryoICE BOX is intended for use in the electromagnetic environment specified below. The customer or the user of the AtriCure cryoICE BOX unit should assure that it is used in such an environment. - Page 28 The test may be performed at any one power input voltage within the AtriCure cryoICE BOX’s RATED voltage range. If the AtriCure cryoICE BOX is tested at one power input voltage, It Is not necessary to re-test al additional voltages. b) All AtriCure cryoICE BOX cables are attached during the test.
-
Page 29: Electromagnetic Immunity - Input D.c. Power Port - Not Applicable
Guidance and manufacturer’s declaration – Patient Coupling Port Immunity The AtriCure cryoICE BOX is intended for use in the electromagnetic environment specified below. The customer or the user of the AtriCure cryoICE BOX unit should assure that it is used in such an environment. -
Page 30: Warranties
AtriCure’s obligation under this warranty is limited to the repair or replace- ment, at its option, of any product, or part thereof, which has been returned to AtriCure, Inc. or its Distributor within the applicable time period shown below and which examination disclosed, to AtriCure’s satisfaction, to be defective. - Page 31 BZ-PT cryoICE BOX Versão 6 MANUAL DO USUÁRIO AtriCure cryoICE BOX, modelo ACM1 — 115 (100–120) VCA, 4 A, 50/60 Hz BR REP Nome técnico: Unidade cirúrgica criogênica Fabricante: Nome Comercial: AtriCure Cryosurgical System AtriCure, Inc. Nº Registro ANVISA: 80117580971 7555 Innovation Way, Importador: Emergo Brazil Import Importação e Distribuição...
- Page 32 O .........34 Configuração e preparação do AtriCure cryoICE BOX ....... .34 Instalação do cilindro de N...
- Page 33 Tabela 3: Dispositivos acessórios da AtriCure ........46 Tabela 4: Dispositivos dos componentes da AtriCure ....... .46 Descarte .
-
Page 34: Prefácio
(waste anesthesia gas disposal, WAGD). É destinado para ser usado apenas em conjunto com o AtriCure cryoICE BOX para cumprir sua finalidade pretendida. O pedal do ACM é usado para ativar o AtriCure cryoICE BOX como uma alternativa ao uso do botão de ativação no painel frontal do gerador. -
Page 35: Avisos
BOX e que nenhum fio do termopar do cabo, conector ou sonda cryoICE esteja exposto. • O uso de acessórios, transdutores e cabos diferentes dos especificados ou fornecidos pela AtriCure pode resultar em aumento das emissões eletromagnéticas ou diminuição da imunidade eletromagnética do cryoICE BOX e resultar em operação inadequada... -
Page 36: Significados Dos Símbolos No Atricure
Significados dos símbolos no AtriCure cryoICE BOX Energia desligada Válvula do cilindro ligada/desligada Reinicialização do medidor de gás Cuidado de N Corrente alternada Exaustão de gás Terminal de equipotencial Manutenção necessária Peça aplicada tipo CF Banda de aquecimento do cilindro... -
Page 37: Classificação De Acordo Com Iec, En, Ansi/Aami, Csa 60601-1
DE ACORDO COM ANSI/AAMI ES60601-1 (2005) + AMD 1 (2012) CAN/CSA C22.2 N.º 60601-1 (2014) E509985 Dispositivo de ablação criogênica, módulo do Módulo AtriCure Cryo, ACM1, cabo conectado/acoplador de aparelhos/ transportável, classificado: 115 VCA, 4 A, 50/60 Hz 1. Tipo de proteção contra choque elétrico: Classe I 2. -
Page 38: Visão Geral Do Sistema
• O cryoICE BOX foi projetado para operar somente com sondas cryoICE da AtriCure. Consulte as instruções de uso da sonda cryoICE para obter uma descrição completa e indicações para o uso desses dispositivos. -
Page 39: Modos De Operação
Figura 2: Painel traseiro do AtriCure cryoICE BOX 17. Porta de exaustão de N 23. Tomada do plugue de alimentação 18. Botão de exaustão manual de N 24. Interruptor de alimentação 19. Porta de entrada de N 25. Localização do fusível da rede elétrica 20. -
Page 40: Especificações Técnicas
H: Cabo de alimentação do AtriCure cryoICE BOX (não mostrado) — Componente I: Sonda cryoICE da AtriCure com conjunto de tubo integral (não mostrado) — Peça aplicada tipo CF J: Mola de extensão da banda de aquecimento do AtriCure cryoICE BOX (não mostrada) — Componente... -
Page 41: Instalação Do Acoplamento De Gás De N O
Figura 3: Componentes e acessórios do AtriCure cryoICE BOX Instalação do acoplamento de gás de N • Use fita Teflon (não fornecida) para envolver o conector NPT de ¼”-18 do acoplamento de gás de N • Conecte o acoplamento de gás N O ao conector angulado do conjunto de mangueiras do botijão. - Page 42 4: Conexão de entrada de N Figura • Em seguida, conecte a extremidade oposta do botão preto do tubo de gás de N O com a porta de conexão rosqueada de um novo cilindro de gás de N • Aparafuse o tubo de gás do cryoICE BOX no lugar apertando manualmente o acoplador específico do país, conforme mostrado na Figure 5.
-
Page 43: Tubulação De Exaustão
Figura 7: Indicador de pressão baixa Tubulação de exaustão Observação: Assegure-se de que a tubulação de exaustão (mangueira) esteja firmemente conectada à porta de exaustão de N O do cryoICE BOX, consulte a Figura 2 item 17. Antes do uso, direcione a tubulação de ventilação de N O para uma área segura. -
Page 44: Ligação Do Atricure Cryoice Box
• observada nenhuma luz, verifique a conexão correta do cabo de alimentação e a posição do interruptor. Figura 10: Ligar o AtriCure cryoICE BOX com o interruptor Reinicialização do medidor de gás de N Reinicie o medidor somente quando um novo cilindro cheio for instalado. -
Page 45: Verificação Do Sistema
• 4 . USO DO DISPOSITIVO Instale a sonda do AtriCure cryoICE Assegure-se de que o cryoICE BOX esteja conectado corretamente a um cilindro de gás de N A sonda cryoICE pode ser conectada antes que o cryoICE BOX seja ligado, enquanto o cryoICE BOX está... -
Page 46: Definição Do Tempo De Ablação
Insira as conexões de cor vermelha e preta correspondentes nos conectores do termopar. Consulte a Figura 15. Figura 14 Figura 15 O ícone da sonda cryoICE, visto acima na Figura 14, se apagará se a sonda cryoICE estiver funcionando corretamente e a temperatura ambiente aproximada será exibida no visor de temperatura (normalmente 10 a 25°C [50°F a 77°F]). -
Page 47: Iniciar Ablação
Para alterar a duração da ablação, pressione as setas para cima ou para baixo à direita do visor de tempo. O visor mudará em incrementos de dez segundos. O temporizador será redefinido para a configuração padrão após a execução de um único ciclo. Iniciar ablação Assegure-se de que o cryoICE BOX esteja ligado e que a sonda cryoICE e o N O estejam conectados... -
Page 48: Desmontagem Do Sistema Após O Uso
6 . DESMONTAGEM DO SISTEMA APÓS O USO Verifique se o ícone de serviço não está aceso. Em caso afirmativo, notifique o serviço técnico da AtriCure para corrigir o problema. Desconexão da sonda do AtriCure cryoICE A sonda cryoICE só pode ser removida no modo PRONTO. -
Page 49: Endereço/Número De Telefone Gratuito Da Atricure Nos Eua
O cryoICE BOX não possui peças que possam ser reparadas pelo cliente além dos fusíveis e do filtro dessecante do tubo de gás para unidades do cryoICE BOX equipadas com eles. Para solucionar problemas de manutenção, entre em contato com a AtriCure, Inc. em: Endereço/Número de telefone gratuito da AtriCure nos EUA AtriCure, Inc. 7555 Innovation Way, Mason, Ohio 45040 USA 1.866.349.2342... -
Page 50: Procedimento Para Substituir Os Fusíveis Da Rede Elétrica De Ca
5. Recoloque a caixa de fusíveis no módulo de entrada de energia e empurre com firmeza. 6. Confirme o status operacional conectando o cryoICE BOX e ligando a energia. Assegure-se de que o autoteste seja concluído sem erros. Instalação do novo AtriCure cryoICE BOX A001054-4 Componentes embalados do ACM — Brasil Conjunto de mangueiras do botijão sem recipientes —... -
Page 51: Conjunto De Mangueiras Do Botijão Com Recipientes
Figura 20: Conjunto de mangueiras do botijão do AtriCure cryoICE BOX sem recipientes Conjunto de mangueiras do botijão com recipientes — Alternativo (substituição do filtro dessecante) Esta seção é aplicável apenas aos sistemas do cryoICE Box equipados com o conjunto de mangueiras do botijão que contém o conjunto de recipientes. - Page 52 Procedimento Antes de trocar o cartucho do filtro dessecante, certifique-se de que a sonda cryoICE esteja desconectada do paciente e que o cryoICE Box esteja desligado. Desaparafuse a carcaça do cartucho do filtro girando-a no sentido anti-horário. Consulte a Figura 22 abaixo Figura 22: Remoção da carcaça do filtro Remova o cartucho do filtro dessecante girando-o no sentido anti-horário usando apenas a força da mão.
-
Page 53: Tabela 3: Dispositivos Acessórios Da Atricure
Conector de vácuo médico Chemetron por 1/4" MNPT — Brasil A001150-16 Conector Chemetron WAGD por 1/4" MNPT — Brasil A001400 Pedal da ACM Tabela 4: Dispositivos dos componentes da AtriCure Número da peça A001054-4 do componente da Descrição do componente... -
Page 54: Resolução De Problemas
• Assegure-se de que a energia esteja disponível na tomada da parede. • cryoICE BOX. • Ligue para o Serviço técnico da AtriCure. Falha elétrica do Ícone de banda de • Aquecimento não conectado. • Verifique a conexão na parte traseira da unidade. - Page 55 • Substitua a sonda cryoICE. • Interferência eletromagnética • Reposicione ou reoriente o cryoICE BOX • cryoICE BOX com mau funcionamento. • Ligue para o Serviço técnico da AtriCure. Segmento inferior • Cilindro de N O vazio. • Substitua por cilindro cheio.
- Page 56 Se ocorrer uma condição de erro, o indicador de manutenção necessária ou o indicador de falha do sistema acenderá. O visor de temperatura da sonda no painel frontal exibirá temporariamente um dos seguintes códigos de erro durante a sequência de ativação. Entre em contato com o Serviço técnico da AtriCure se ocorrer uma dessas condições.
-
Page 57: Tabelas De Compatibilidade Eletromagnética
Ambiente profissional de instalações de saúde. b) Este teste não é aplicável neste ambiente, a menos que o AtriCure cryoICE BOX usado esteja conectado à REDE PÚBLICA DE ENERGIA e a entrada de energia esteja dentro do escopo do padrão básico de EMC. -
Page 58: Imunidade Eletromagnética - Entrada De Ca Porta De Energia
Orientação e declaração do fabricante — Imunidade da porta de energia da entrada de CA O AtriCure cryoICE BOX deve ser utilizado no ambiente eletromagnético especificado abaixo. O cliente ou o usuário da unidade do AtriCure cryoICE BOX deve garantir que ele seja usado em tal ambiente. - Page 59 O teste pode ser realizado em qualquer tensão de entrada de energia dentro da faixa de tensão NOMINAL DO AtriCure cryoICE BOX. Se o AtriCure cryoICE BOX for testado em uma tensão de entrada de energia, não é necessário testar novamente todas as tensões adicionais. b) Todos os cabos do AtriCure cryoICE BOX são conectados durante o teste.
-
Page 60: Imunidade Eletromagnética - Porta De Energia De Entrada De Cc - Não Aplicável
Orientação e declaração do fabricante — Imunidade da porta de acoplamento do paciente O AtriCure cryoICE BOX deve ser utilizado no ambiente eletromagnético especificado abaixo. O cliente ou o usuário da unidade do AtriCure cryoICE BOX deve garantir que ele seja usado em tal ambiente. -
Page 61: Garantias
A obrigação da AtriCure durante o período de garantia está limitada ao reparo ou substituição, a seu critério, de qualquer produto ou peça que tenha sido devolvido(a) à AtriCure, Inc. ou sua distribuidora dentro do período apropriado exibido abaixo e que tenha sido considerado(a) defeituoso(a) pela verificação da AtriCure. - Page 62 (This page is intentionally left blank)
Need help?
Do you have a question about the cryoICE BOX ACM1 and is the answer not in the manual?
Questions and answers