Table of Contents
Advertisement
Advertisement
Table of Contents

Related Manuals for Kyocera FS FS-3900DN


Summary of Contents for Kyocera FS FS-3900DN
- Page 1 FS-2000D FS-3900DN FS-4000DN Operation Guide...
-
Page 3: Table Of Contents
Components at the Front of the Printer..........1-2 Components at the Left of the Printer and Internal Components ......1-2 Components at the Rear of the Printer . - Page 4 Contents OPERATION GUIDE...
-
Page 5: Legal And Safety Information
(contents of its read-only memory). This guide, any copyrightable subject matter sold or provided with or in connection with the sale of the page printer, are protected by copyright. All rights are reserved. Copying or other reproduction of all or part of this guide, any copyrightable subject matter without the prior written consent of Kyocera Mita Corporation is prohibited. - Page 6 This product uses PeerlessPrintXL to provide the HP LaserJet compatible PCL 6 language emulation. PeerlessPrintXL is a trademark of Peerless Systems Corporation, 2381 Rosecrans Ave. El Segundo, CA 90245, U.S.A. This product was developed using the Tornado™ Real Time Operating System and Tools from Wind River Systems.
- Page 7 License Agreements IBM Program License Agreement OPERATION GUIDE THE DEVICE YOU HAVE PURCHASED CONTAINS ONE OR MORE SOFTWARE PROGRAMS (“PROGRAMS”) WHICH BELONG TO INTERNATIONAL BUSINESS MACHINES CORPORATION (“IBM”). THIS DOCUMENT DEFINES THE TERMS AND CONDITIONS UNDER WHICH THE SOFTWARE IS BEING LICENSED TO YOU BY IBM. IF YOU DO NOT AGREE WITH THE TERMS AND CONDITIONS OF THIS LICENSE, THEN WITHIN 14 DAYS AFTER YOUR ACQUISITION OF THE DEVICE YOU MAY RETURN THE DEVICE FOR A FULL REFUND.
- Page 8 Some jurisdictions do not allow the exclusion of implied warranties, so the above exclusion may not apply to you. 3. Limitation of Remedies IBM's entire liability under this license is the following; For any claim (including fundamental breach), in any form, related in any way to this license, IBM's liability will be for actual damages only and will be limited to the greater of: the equivalent of U.S.
- Page 9 Typeface Trademark Acknowledgement Monotype Imaging License Agreement OPERATION GUIDE All resident fonts in this printer are licensed from Monotype Imaging Inc. Helvetica, Palatino and Times are registered trademarks of Linotype-Hell AG. ITC Avant Garde Gothic, ITC Bookman, ITC ZapfChancery and ITC Zapf Dingbats are registered trademarks of International Typeface Corporation.
- Page 10 Compliance and Conformity FCC Statement (for users in the United States) viii THE PARTIES AGREE THAT ALL OTHER WARRANTIES, EXPRESSED OR IMPLIED, INCLUDING WARRANTIES OF FITNESS FOR A PARTICULAR PURPOSE AND MERCHANTABILITY, ARE EXCLUDED. Your exclusive remedy and the sole liability of Monotype Imaging in connection with the Software and Typefaces is repair or replacement of defective parts, upon their return to Monotype Imaging.
-
Page 11: Precautions For Use
Precautions for Use OPERATION GUIDE guarantee that interference will not occur in a particular installation. If this equipment does cause harmful interference to radio or television reception, which can be determined by turning the equipment off and on, the user is encouraged to try to correct the interference by one or more of the following measures: •... -
Page 12: Safety Information
This printer is certified in the U.S. to conform to the requirements of DHHS 21 CFR Subchapter for Class I (1) laser products, and elsewhere is certified as a Class I laser product conforming to the requirements of IEC 825. - Page 13 To minimize the concentration of ozone gas to less than 0.1ppm, we recommend you not to install the printer in a confined area where ventilation is blocked. ) which may concentrate in the place...
- Page 14 Declaration of Conformity for U.S.A. CE Marking Directive Model name: Page Printer FS-2000D/FS-3900DN/FS-4000DN Trade name: Kyocera Mita Responsible party: Kyocera Mita America, Inc. Address: 225 Sand Road PO Box 40008 Fairfield, New Jersey 07004- 0008, U.S.A. Telephone: (973) 808-8444 Fax: (973) 882-6000 Manufacturer: Kyocera Mita Corporation Tamaki Plant Manufacturer’s address: 704-19, Nojino, Tamaki-cho, Watarai-gun, Mie-...
- Page 15 Description of devices: This Page Printer Model FS-4000DN is the 45ppm (FS-2000D is the 30ppm, FS-3900DN is the 35ppm); A4 size and utilized plain paper; dry toner; etc. The printer can be equipped with several enhancement optional units as a paper feeder as PF-310.
-
Page 16: Energy Star Program
The basic objective of the E pollution by encouraging the manufacture and sale of equipment that uses energy more efficiently. This printer is equipped with a sleep timer function that conforms with the standards of the E NERGY reduce the amount of electrical power consumed by the printer. For maximum power savings, turn off the printer’s power supply when not... - Page 17 Group for Energy Efficient Appliances (GEEA) Initial Auto Sleep 15 minutes (60 minutes) Setting Power Consumption - Power off 0W (1W) - Auto Sleep 4.4W (15W) Please read this Operation Guide before using the machine. Keep it close to the machine for easy reference. OPERATION GUIDE The goal of GEEA is efficient use of energy.
- Page 18 Symbols The following symbols indicate that the related section includes safety warnings. Specific points of attention are indicated inside the symbol. [General warning] [Warning of danger of electrical shock] [Warning of high temperature] The following symbols indicate that the related section includes information on prohibited actions.
-
Page 19: Installation Precautions
Installation Precautions Environment CAUTION: Avoid placing the machine on or in locations which are unstable or not level. Such locations may cause the machine to fall down or fall over. This type of situation presents a danger of personal injury or damage to the machine. Avoid locations with humidity or dust and dirt. -
Page 20: Other Precautions
During printing, some ozone is released, but the amount does not cause any ill effect to one's health. If, however, the printer is used over a long period of time in a poorly ventilated room or when printing an extremely large number of copies, the smell may become unpleasant. - Page 21 Precautions for Use Cautions when Using the Machine WARNING: Do not place metallic objects or containers with water (flower vases, flower pots, cups, etc.) on or near the machine. This situation presents a danger of fire or electrical shock should they fall inside.
- Page 22 CAUTION Do not pull the power cord when removing it from the outlet. If the power cord is pulled, the wires may become broken and there is a danger of fire or electrical shock. (Always grasp the power plug when removing the power cord from the outlet.) Always remove the power plug from the outlet when moving the machine.
- Page 23 Cautions when Handling Consumables Other Precautions OPERATION GUIDE CAUTION Use of controls or adjustments or performance of procedures other than those specified herein may result in hazardous radiation exposure. CAUTION Do not attempt to incinerate the Toner Container. Dangerous sparks may cause burns. Keep the Toner Container out of the reach of children.
- Page 24 This chapter explains how to replace the toner container and how to care for your printer. Chapter 4 - Troubleshooting This chapter explains how to handle printer problems that may occur, such as paper jams. Chapter 5 - Specifications This chapter lists the printer’s specifications.
- Page 25 Conventions Convention Italic Typeface Courier Typeface Bold Typeface Notes Important Caution Warning OPERATION GUIDE This manual uses the following conventions Description Used to emphasize a key word, phrase or references to additional information. Used to denote messages or names displayed on the operation panel.
- Page 26 xxiv OPERATION GUIDE...
-
Page 27: Machine Parts
This chapter contains explanations on the following topics: • Components at the Front of the Printer ... 1-2 • Components at the Left of the Printer and Internal Components ... 1-2 •... -
Page 28: Components At The Front Of The Printer
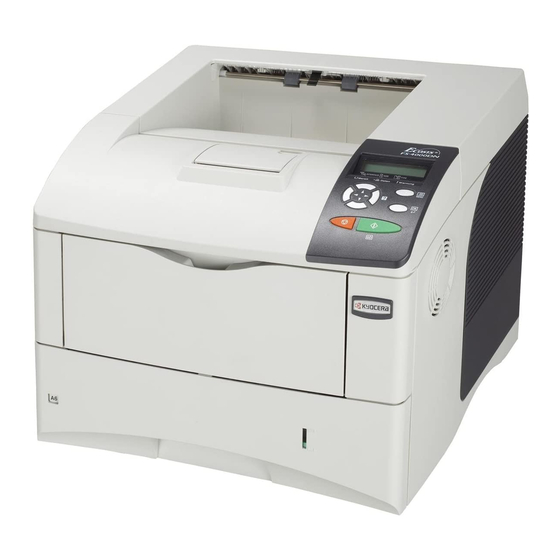
Components at the Front of the Printer Components at the Left of the Printer and Internal Components FS-2000D Top Cover Paper Stopper Top Tray Right Cover Operation Panel Paper Cassette MP (Multi-Purpose) Tray Left Cover Toner Container Power Switch Waste Toner Box... -
Page 29: Components At The Rear Of The Printer
Components at the Rear of the Printer OPERATION GUIDE USB Memory Slot USB Interface Connector Network indicators (FS-3900DN/FS-4000DN only) Network Interface Connector (FS-3900DN/FS-4000DN only) Parallel Interface Connector Power Cord Connector Rear Unit Option Interface Slot (Network/Serial/CF card/Microdrive) - Page 30 Machine Parts OPERATION GUIDE...
-
Page 31: Printing Operation
OPERATION GUIDE 2 Printing Operation This chapter contains explanations on the following topics: • Loading Printer Driver ... 2-2 • Printing from Application Software ... 2-3... -
Page 32: Loading Printer Driver
NOTE: If the Welcome to the Found New Hardware Wizard dialog box displays, select Cancel. Insert the CD-ROM supplied with the printer into the optical drive of the PC. The installation program launches. NOTE: If the installation program fails to launch, use Windows Explorer to access the CD-ROM and select Setup.exe. -
Page 33: Printing From Application Software
Load the paper required into the paper cassette. From the application File menu, select Print. The Print dialog box displays. Click the drop down list of printer names. All the printers installed in Windows are listed. Click the name of the machine. - Page 34 Printing Operation OPERATION GUIDE...
-
Page 35: Maintenance
OPERATION GUIDE 3 Maintenance This chapter contains explanations on the following topics: • General Information... 3-2 • Toner Container Replacement... 3-3 • Cleaning the Printer... 3-8... -
Page 36: General Information
General Information This chapter describes basic maintenance tasks you can perform on the printer. You can replace the following component according to the printer’s display: • Toner Kits • Waste Toner Box Also, the internal parts need periodic cleaning. OPERATION GUIDE... -
Page 37: Toner Container Replacement
The toner container packed with the new printer is a starter toner container. The starter toner container lasts an average of 10,000 pages (FS- 4000DN);... -
Page 38: Replacing The Toner Container
This section explains how to replace the toner container. When replacing the toner container, always replace the waste toner box at the same time. If this box is full, the printer may be damaged or contaminated by the waste toner that may spill over the box. - Page 39 OPERATION GUIDE Push lock lever to the right and pull out the toner container. Put the old toner container in the plastic bag (contained in the toner kit) and discard it later according to the local code or regulations for waste disposal. Take the new toner container out of the toner kit.
-
Page 40: Replacing The Waste Toner Box
Replacing the Waste Toner Box Set the new toner container in the printer and push down on the top of the toner container to install it firmly in place as shown in the figure below. Close the top cover. Proceed to the next section. - Page 41 OPERATION GUIDE Close the cap to the old waste toner box after removing the box from the printer. To prevent toner from spilling, put the old waste toner box in the plastic bag (contained in the toner kit) and discard it later according to the local code or regulations for waste disposal.
-
Page 42: Cleaning The Printer
After replacing the toner containers and the waste toner box, clean the internal parts. For instructions, refer to Cleaning the Printer on page 3-8. To avoid print quality problems, the interior of the printer must be cleaned. Open the top cover and MP tray. - Page 43 OPERATION GUIDE Lift the developer unit together with the toner container out of the printer. Use a lint free cloth to clean dust and dirt away from the registration roller (metal)
- Page 44 3-10 Insert the developer unit together with the toner container, back into the machine. Close the top cover and MP tray. OPERATION GUIDE...
-
Page 45: Troubleshooting
OPERATION GUIDE 4 Troubleshooting This chapter contains explanations on the following topics: • General Guidelines... 4-2 • Print Quality Problems... 4-3 • Error Messages ... 4-5 • Clearing Paper Jams...4-11 If a problem cannot be corrected, contact your service technician. -
Page 46: General Guidelines
• Turn the printer power off and wait for several seconds. Then, turn on the printer. • Reboot the computer which sends the print jobs to the printer. -
Page 47: Print Quality Problems
The tables and diagrams in the following sections define print quality problems and the corrective action you can conduct to solve the problems. Some solutions may require cleaning or replacing parts of the printer. If the suggested corrective action will not solve the problem, call for service. - Page 48 Printed Results Grey background Dirt on the top edge or back of the paper Printing incomplete or out of position Corrective Action Check the operation panel. If the Toner low message is displayed and the Attention indicator is flashing, install a new toner kit. Refer to Toner Container Replacement on page 3-3.
-
Page 49: Error Messages
This message is displayed alternately with messages indicating the printer status, such as, Ready, Please wait, Processing, Waiting, and FormFeed Time Out. F### represents a controller error (#=0, 1, 2, ...). Call for service. The printer does Call service not operate when this message is displayed. - Page 50 Storage Error Codes on page 4-9. To ignore the Microdrive error, press Press GO [GO]. This message is displayed when you attempt to use the printer’s operation panel to I/F occupied change the environmental settings on the interface from which data are presently being received.
- Page 51 T O T I f y o u w a n t t o p r i n t f r o m a d i f f e r e n t p a p e r s o u r c e , p r e s s "...
- Page 52 The top tray has become full. You must remove all printed pages from the top tray. Top tray When the printer detects that the top tray is empty again, the printer will continues paper full printing into the top tray.
-
Page 53: Storage Error Codes
An unreadable page was found in a job (The job is damaged.). A print job for the specified ID does not exist in the Microdrive. The printer does not support the CompactFlash card inserted. The CompactFlash card is not installed. - Page 54 RAM disk mode is Off. Turn RAM disk mode On from the operation panel. No disk space. Purge unnecessary files. Specified file is not on disk. Insufficient printer memory to support the RAM disk system. Expand printer memory. Meaning OPERATION GUIDE...
-
Page 55: Clearing Paper Jams
Remove jammed paper. After removing jammed paper, the printer will re-start printing. The figure below explains the printer’s paper paths including the options. The locations where paper jams might occur are also shown here, with each location explained in the table below. Paper jams can occur in more than one component on the paper paths. - Page 56 If paper jams occur frequently, try using a different type of paper, replace the paper with paper from another ream, flip the paper stack over, or rotate the paper stack 180 degrees. The printer may have problems if paper jams recur after the paper was replaced.
-
Page 57: Paper Cassette
Open and close the top cover to clear the error. Pull out the paper cassette. Remove any partially fed paper. Check to see if paper is loaded correctly. If not, reload the paper. Push the paper cassette back in firmly. The printer warms up and resumes printing. 4-13... - Page 58 Pull the paper cassette all the way out of the printer. Open the duplexer’s cover and remove any jammed paper. Insert the paper cassette into the slot in the printer. The printer warms up and resumes printing. OPERATION GUIDE...
- Page 59 If you cannot find a paper jam, try checking inside the rear of the printer. Refer to Rear Unit on page 4-16. Insert the developer unit together with the toner container, back into the machine. Close the top cover and MP tray. The printer warms up and resumes printing. 4-15...
- Page 60 CAUTION: The fuser unit inside the printer is hot. Do not touch it with your hands as it may result in burn injury. Close the rear unit. The printer warms up and resumes printing.out.
-
Page 61: Specifications
Item Printing Method Semiconductor laser and electrophotography Printing Speeds - Simplex A5: 19ppm A4: 30ppm Letter: 31ppm Legal: 26ppm - Duplex A4: 15.5ppm Letter: 15.5ppm Paper Sizes - Cassette A4, A5, B5, Letter, Legal, Folio, Oficio2, Custom (148 x 210 to 216 x 356 mm [5 x 14"]) - MP Tray... - Page 62 Item Warm-up Time (23°C, 50%RH) - Power on 13 seconds or less - Sleep 10 seconds or less First Print Out (A4, 23°C, 60%RH) 19 seconds or less Resolution Fine1200, Fast1200, 600dpi, 300dpi Monthly Duty - Average 4,000 pages - Maximum 150,000 pages Operating Systems Microsoft Windows 95/98/Me/2000/XP...
- Page 63 Item Operating noise (in During printing: LpA = accordance with ISO7779 50dB (A) [Bystander Position, sound pressure level at During standby: LpA = the front]) 40dB (A) During sleep mode: immeasurably low OPERATION GUIDE Description FS-2000D FS-3900DN During printing: LpA = 52dB (A) During standby: LpA = 40dB (A)
- Page 64 Specifications OPERATION GUIDE...
- Page 68 Rev. 1.1 2006.3 Printed in China 302F956021...
Need help?
Do you have a question about the FS FS-3900DN and is the answer not in the manual?
Questions and answers