Advertisement
Quick Links
WARNING!!
Children have died from furniture tipover.
Tip restraints have been included with this product;
you must install the tip restraints according to these instructions in order to
minimize the risk of furniture tipping.
If you have any questions about this product or the tip restraint, please send us an
email at tip_restraint_help@Noblehousefurniture.com
NEVER allow children to climb or hang on furniture,
including drawers or cabinet doors.
In addition to installing the restrains,to help prevent tip-over
1. NEVER put a TV or other heavy objects on top of
this product.
2. Do not stand on the product
Page 1 OF 26
Noble house Home Furnishings LLC
Advertisement

Related Manuals for Noble House Home Furnishings 4 DRAWER CHEST


Summary of Contents for Noble House Home Furnishings 4 DRAWER CHEST
- Page 1 In addition to installing the restrains,to help prevent tip-over 1. NEVER put a TV or other heavy objects on top of this product. 2. Do not stand on the product Page 1 OF 26 Noble house Home Furnishings LLC...
-
Page 2: Part List
Assembly Instructions Caution : You must read this before you proceed 4 DRAWER CHEST Part List Label Picture Description Left Front Leg Right Front Leg Right Rear Leg Left Rear Leg Page 2 OF 26 Noble house Home Furnishings LLC... - Page 3 Left Side Panel Right Side Panel Horizontal Panel Bottom Front Panel Bottom Rear Panel Top Panel Back Panel Drawer Front Page 3 OF 26 Noble house Home Furnishings LLC...
- Page 4 Drawer Front Left Drawer Side Panel Right Drawer Side Panel Drawer Back Panel Drawer Panel Left Drawer Side Panel Right Drawer Side Panel Page 4 OF 26 Noble house Home Furnishings LLC...
- Page 5 Drawer Back Panel Drawer Support Panel Back Support Drawer Divider Page 5 OF 26 Noble house Home Furnishings LLC...
- Page 6 Cam Lock (15/9.5mm) Screw M4.5 x 38mm Screw M4 x 25mm Screw M4 x 12mm Slide Carcass Slide Drawer Slide Screw M4 x 14mm L-Bracket Truss Head Screw M4 x 12mm Handle Page 6 OF 26 Noble house Home Furnishings LLC...
- Page 7 Corner Block Screw M3 x 20mm Screwdriver (not provided) Hammer (not provided) Power Drill (not provided) Restraint Device Hardware Screw M3.5 x 12mm Screw M3.5 x 38mm Wall Plug Metal Bracket Page 7 OF 26 Noble house Home Furnishings LLC...
-
Page 8: Assembly Preparation
⑦ ㉑ ⑲ ⑳ ② ⑤ ⑰ ⑧ ⑨ ⑱ ⑬ ① ⑦ X 17 X 29 X 33 X 13 X 49 X 29 X 19 X 21 X 25 Page 8 OF 26 Noble house Home Furnishings LLC... -
Page 9: Assembly Steps
This 4 Drawer Chest has multiple parts and may require up to 60 minutes to assemble. To give you an overview of the 4 Drawer Chest parts, the above picture is to help you put the various parts into perspective. - Page 10 Left Drawer Side Panel ⑱, Right Drawer Side Panel ⑲, Drawer Support Panel ㉑, and Drawer Divider ㉓ using the hammer (R). Note: There are pre-existing mounting positions on the Panels to insert the Wood Dowels (A). Page 10 OF 26 Noble house Home Furnishings LLC...
- Page 11 Right Side Panel ⑥, Top Panel ⑩, Drawer Front ⑫, and Drawer Front ⑬ using screwdriver (Q). Note: There are pre-existing mounting positions on the Panels to insert the Cam Bolts (C). Page 11 OF 26 Noble house Home Furnishings LLC...
- Page 12 Right Drawer Side Panel ⑲, and Drawer Support Panel ㉑. CAUTION: Insert Cam Locks (E) per the correct orientation as indicated in the above picture. Note: There are pre-existing mounting positions on the Panels to insert the Cam Locks (E). Page 12 OF 26 Noble house Home Furnishings LLC...
- Page 13 Left Drawer Side Panel ⑱ and Right Drawer Side Panel ⑲. Tips: To ensure the Drawer Panels ⑰ are in the correct position: Insert the panels with the warning label facing down. Page 13 OF 26 Noble house Home Furnishings LLC...
- Page 14 9.2) Attach Handles (M) to Drawer Front ⑬ using Truss Head Screw M4 x 12mm (L) and Screwdriver (Q). Tighten the Screws fully in a sequential manner. Note: There are pre-existing mounting positions on the Panels to attach the Handles (M). Page 14 OF 26 Noble house Home Furnishings LLC...
- Page 15 Repeat the same steps to attach Slides onto Left Drawer Side Panel ⑱ and Right Drawer Side Panel ⑲. Note: There are pre-existing mounting positions on the Panels to attach the Slide (I). Page 15 OF 26 Noble house Home Furnishings LLC...
- Page 16 11.2) Apply Glue (N) into the dowel mounting positions on Left Front Leg ①. Attach Left Front Leg ① to Left Side Panel ⑤. Turn the Cam Locks (D) clockwise with screwdriver (Q) until they all lock into place. Page 16 OF 26 Noble house Home Furnishings LLC...
- Page 17 (Q). Repeat the same steps to Assemble Horizontal Panel ⑦ to Right Side Panel ⑥. Note: There are pre-existing mounting positions on the Panels for the screws M4 x 25mm (G). Page 17 OF 26 Noble house Home Furnishings LLC...
- Page 18 Attach Bottom Front Panel ⑧ and Bottom Rear Panel ⑨ to Right Side Panel ⑥. 15.2) Turn the Cam Locks (D) clockwise with screwdriver (Q) until they all lock into place. Page 18 OF 26 Noble house Home Furnishings LLC...
- Page 19 Screwdriver (Q).Then, assemble Back Support ㉒ to Left Side Panel ⑤ and Right Side Panel ⑥ using screws M4 x 14mm (J) with Screwdriver (Q). Note: There are pre-existing mounting positions on the Panels to attach the L-Brackets (K). Page 19 OF 26 Noble house Home Furnishings LLC...
- Page 20 Right Rear Leg ③, Left Rear Leg ④, Left Side Panel ⑤ and Right Side Panel ⑥. Turn the Cam Locks (D) clockwise with screwdriver (Q) until they all lock into place. Page 20 OF 26 Noble house Home Furnishings LLC...
- Page 21 Step 20 ⑪ ⑪ Assemble the Corner Block (O) to Back Panel ⑪ using Screws M3 x 20mm (P) and Screwdriver (Q). Page 21 OF 26 Noble house Home Furnishings LLC...
- Page 22 See product instructions for more ways to help prevent furniture tip-over. Usage For Restraint Device: To secure 4 Drawer Chest against wall, attach two Metal Brackets from the Hardware Pack (T) onto the wall and the product, using screws. Instructions: Step 21 ⑩...
- Page 23 Note: The Metal Brackets need to be secured to a solid, load bearing surface. Please use a Stud Finder(not supplied) if needed to locate the Wall Frame. 22.2) Insert Wall Plugs (T) into the drilled holes on the wall with Hammer (R). Page 23 OF 26 Noble house Home Furnishings LLC...
- Page 24 Step 23 Move the 4 Drawer Chest to the wall, and secure the 4 Drawer Dresser using Screws M4.5 x 38mm (T) and screwdriver (Q). Page 24 OF 26 Noble house Home Furnishings LLC...
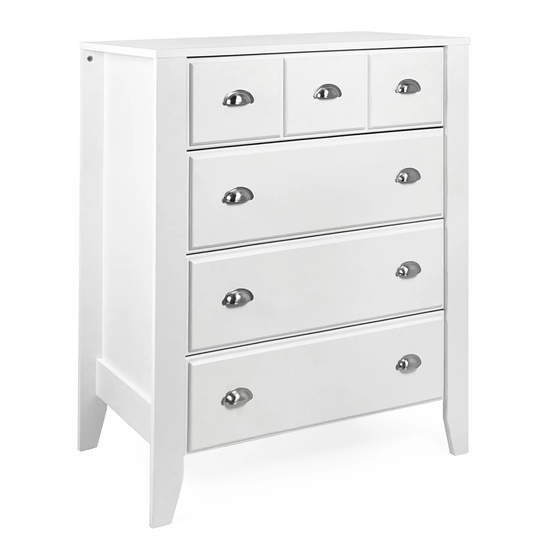
- Page 25 ⑬ ⑬ ⑬ Insert the Drawer Front ⑫ and Drawer Fronts ⑬ into the 4 Drawer Chest. Step 25 Your 4 Drawer Chest is ready to be used. This 4 Drawer Chest can only be used on a flat level surface.
- Page 26 Page 26 OF 26 Noble house Home Furnishings LLC...
Need help?
Do you have a question about the 4 DRAWER CHEST and is the answer not in the manual?
Questions and answers