Table of Contents
Advertisement
Quick Links
WARNING!!
Furniture Tipping Risk.
Serious risk of severe or fatal crush injuries can occur from
furniture tipping over if not secured.
Children like to climb on furniture and Unsecured furniture can
pose a serious danger.
Please follow all instructions and install the tip-over restraints
provided.
Assembly Instructions
Caution : You must read this before you proceed. This Headboard must
be used in conjunction with a Mattress Support Frame (not included and
not supplied with this headboard).
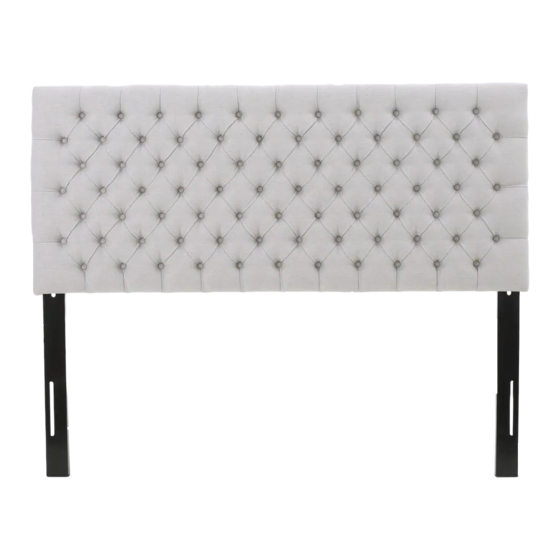
Headboard
Page 1 OF 9
Noble House Home Furnishings LLC
Advertisement
Table of Contents

Related Manuals for Noble House Home Furnishings Headboard


Summary of Contents for Noble House Home Furnishings Headboard
- Page 1 Please follow all instructions and install the tip-over restraints provided. Assembly Instructions Caution : You must read this before you proceed. This Headboard must be used in conjunction with a Mattress Support Frame (not included and not supplied with this headboard).
- Page 2 (Labelled "Left" on the bottom) Right Support Leg with 3 Mounting Brackets (Labelled "Right" on the bottom) Hardware Label Picture Description Bolt (M8x25mm) Spring Washer Washer Allen Key Wrench Screw (2cm self-tapping) Page 2 OF 9 Noble House Home Furnishings LLC...
- Page 3 Screw (5cm self-tapping) Restraint Strap Metal Bracket Screwdriver (not provided) Assembly Preparation Before Beginning Assembly: Unpack and place all parts for clear visibility. Assembly Steps Page 3 OF 9 Noble House Home Furnishings LLC...
- Page 4 Left Support Leg (B) Right Support Leg (C) This Headboard has multiple parts and may require up to 30 minutes to assemble. To give you an overview of the Headboard parts, the above picture is to help you put the various parts into perspective. Please read through the instructions below to familiarise yourself with the parts and steps before assembly.
- Page 5 King size assembly - picture(1); Cal King size - picture(2) At this point of assembly, DO NOT fully tighten the Bolts. The final height of the Headboard may be adjusted to your own need. Step 3 Page 5 OF 9...
- Page 6 Attach Headboard to the Mattress Support Frame using Bolts(a), Washers(c), Spring Washers(b) and Nuts(d) with Wrench(f). Please install the Bolts from the FRONT TO BACK of the Headboard. Step 4 Make sure all parts are connected and securely locked into position.
- Page 7 Screwdriver(k) as shown above. Put the Headboard against the wall where desired and mark the location for the Metal Brackets(j) to be the same height as the top of the Headboard. Attach Metal Bracket(j) to the wall where you marked using Screws(h) with Screwdriver(k).
- Page 8 Pull the Restraint Straps(i) through the Metal Brackets(j) on the wall and Headboard(A) one by one, and pull the Restraint Straps(i) tight. Headbord Restraint Device is installed and Headbord is ready for use. The strap between headboard(A) and Metal Brackets(j) on wall should be within 3.5''. Page 8 OF 9...
- Page 9 Page 9 OF 9 Noble House Home Furnishings LLC...
Need help?
Do you have a question about the Headboard and is the answer not in the manual?
Questions and answers