MIR 100 Quick Start Manual
Hide thumbs
Also See for 100:
- User manual (57 pages) ,
- Quick start manual (24 pages) ,
- Quick start manual (42 pages)
Table of Contents
Advertisement
Quick Links
Advertisement
Table of Contents

Related Manuals for MIR 100


Summary of Contents for MIR 100
- Page 1 Quick Start (en) Date: 08/2021 Revision: v.2.2...
-
Page 2: Table Of Contents
Table of contents 1. Version history 2. Safety 2.1 Safety message types 2.2 General safety precautions 2.3 Intended use 2.4 Users 2.5 Foreseeable misuse 2.6 Residual risks 2.7 Warning label 3. Light indicators and speakers 3.1 Status lights 3.2 Speakers 4. - Page 3 5.8 Checking the hardware status 5.9 Mounting the nameplate 5.10 Shutting down the robot MiR100 Quick Start (en) 08/2021 - v.2.2 ©Copyright 2016-2021: Mobile Industrial Robots A/S.
-
Page 4: Version History
1. Version history 1. Version history This table shows current and previous versions of this document. MiR100 Revision Release date Description 2021-08-27 Updated for HW version 6.0 with new battery. 2020-10-30 General improvements throughout the document. 2020-10-01 Major update and new structure with new chapters: Warning label, IT security, Mounting the nameplate. -
Page 5: Safety
2. Safety 2. Safety Read the information in this section before powering up and operating MiR100. Pay particular attention to the safety instructions and warnings. NOTICE Mobile Industrial Robots disclaims any and all liability if MiR100 or its accessories are damaged, changed, or modified in any way. Mobile Industrial Robots cannot be held responsible for any damages caused to MiR100, accessories, or any other equipment due to programming errors or malfunctioning of MiR100. -
Page 6: General Safety Precautions
2. Safety 2.2 General safety precautions This section contains general safety precautions. WARNING If the robot is not running the correct software and is therefore not functioning properly, the robot may collide with personnel or equipment causing injury or damage. •... - Page 7 Using a charging device different from the one supplied by the manufacturer can cause a fire and thereby burn injuries to nearby personnel and damage to the robot and equipment. • Only use an original MiR charger. MiR100 Quick Start (en) 08/2021 - v.2.2 ©Copyright 2016-2021: Mobile Industrial Robots A/S.
- Page 8 2. Safety WARNING Lithium battery packs may get hot, explode, or ignite and cause serious injury if they are misused electrically or mechanically. Observe the following precautions when handling and using lithium-ion batteries: • Do not short-circuit, recharge, or connect with false polarity. •...
- Page 9 2. Safety WARNING Load falling or robot overturning if the load on the robot is not positioned or fastened correctly can cause fall injuries to nearby personnel or damage to equipment. • Ensure that the load is positioned according to the specifications and is fastened correctly—see the user guide of your robot for safe payload distribution.
-
Page 10: Intended Use
MiR100 is intended to be commissioned and used in indoor industrial environments where access for the public is restricted. For details about the environmental conditions in which MiR100 should operate, see specifications for MiR100 on the MiR website. MiR100 is intended to be commissioned according to the guidelines in your robot's user guide. -
Page 11: Users
2. Safety or commission a system that does not meet the limitations of use of MiR100 carry the obligations of a manufacturer and shall ensure a safe design according to EN ISO 12100. Guidelines outlined in this manual are not sufficient. The following list gives examples of custom modules that are foreseeable misuse of MiR100: •... -
Page 12: Foreseeable Misuse
2. Safety • Ensuring the safety of nearby personnel when the robot is accelerating, braking, and maneuvering. • Marking operating hazard zones. Operators Operators have thorough knowledge of MiR100 and of the safety precautions presented in this user guide. Operators have the following main tasks: •... -
Page 13: Residual Risks
2. Safety • Using the robot in medical and life critical applications • Operating the robot outside the permissible operating parameters and environmental specifications • Using the robot in potentially explosive environments • Using the robot outdoors • Using the robot in hygiene zones 2.6 Residual risks Mobile Industrial Robots has identified the following potential hazards that commissioners must inform personnel about and take all precautions to avoid when working with MiR100:... - Page 14 2. Safety Figure 2.1. The warning label must be placed on the robot or top module. MiR100 Quick Start (en) 08/2021 - v.2.2 ©Copyright 2016-2021: Mobile Industrial Robots A/S.
-
Page 15: Light Indicators And Speakers
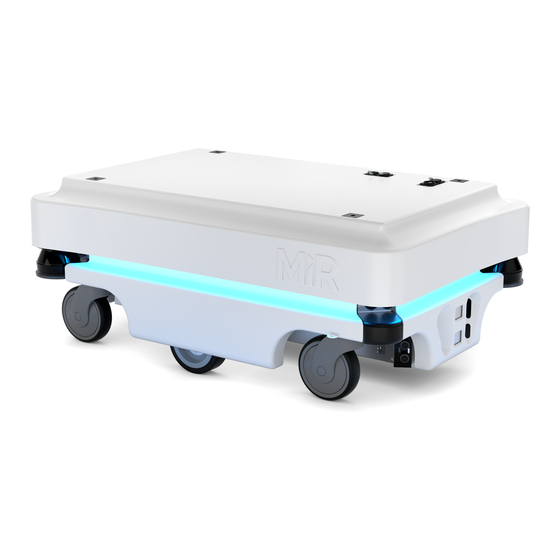
3. Light indicators and speakers 3. Light indicators and speakers The robot uses its status lights and speaker to let people in the environment know what the robot is currently doing or planning to do. 3.1 Status lights The LED light bands running all the way around the robot indicate the robot’s current operational state. -
Page 16: Speakers
3. Light indicators and speakers Cyan wavering (robots Waiting for MiR Fleet resource or for another MiR robot to connected to MiR Fleet move only) When the robot's battery reaches a critically low level of power (0-1%), the ends of the status lights flash red. -
Page 17: Security
MiR100 communicates all data over the network that it is connected to. It is the responsibility of the commissioner to ensure that it is connected to a secure network. MiR recommends conducting an IT-security risk assessment before commissioning the robot. - Page 18 Security patches are included from software version 2.8.3 and higher. Understanding MiR software versions MiR uses the Major.Minor.Patch.Hot fix format to version software. For example, 2.8.1.1 means that the software is based on the second major release, the eighth minor release of the major version, the first patch release of the minor version, and, in this example, a single hot fix is included too.
-
Page 19: Getting Started
5. Getting started 5. Getting started This section describes how to get started with MiR100. NOTICE Read Safety on page 5 before powering up MiR100. 5.1 In the box This section describes the contents of the MiR100 box. Figure 5.1. The robot and accessories. MiR100 Quick Start (en) 08/2021 - v.2.2 ©Copyright 2016-2021: Mobile Industrial Robots A/S. -
Page 20: Unpacking Mir100
The USB flash drive in the document folder has the following content: • MiR100 User Guide • MiR100 Quick Start • MiR Network and WiFi Guide • MiR Robot Reference Guide • MiR Robot REST API Reference • Getting the robot online •... - Page 21 5. Getting started Place the box with the robot so that there is three meters of free space at the front or the back of the box. This is necessary as the robot drives out of the box on a ramp. Cut the protective straps surrounding the box.
-
Page 22: Connecting The Battery
5. Getting started Place the lid of the box so that you can use it as a ramp at the robot's front or rear end. Align the lid so that it is flush with the base of the box. 5.3 Connecting the battery To connect the battery to the robot, follow these steps: Grab the two rounded corners and carefully lift off the cover. - Page 23 5. Getting started Switch on the three relays placed in the corner by the front laser scanner. Ensure that the Battery disconnect switch, placed in the rear right corner, is on (the two yellow indicators pointing to On). MiR100 Quick Start (en) 08/2021 - v.2.2 ©Copyright 2016-2021: Mobile Industrial Robots A/S.
- Page 24 5. Getting started Put the cover back on and make sure to fit it correctly over the connector openings. Mount and connect the Emergency stop box on top of the robot cover. MiR100 Quick Start (en) 08/2021 - v.2.2 ©Copyright 2016-2021: Mobile Industrial Robots A/S.
- Page 25 5. Getting started If a top module is going to be mounted on top of the robot, the Emergency stop must be placed in a position where it is easy to reach—see the mounting instructions for your top module. Connect the antenna to the connector on top of the robot cover. Remove the plastic cap from the connector before fixing the antenna.
-
Page 26: Powering Up The Robot
5. Getting started 5.4 Powering up the robot To power up the robot, follow these steps: Press the Power button in the corner to turn on the robot. The status lights waver yellow, and the robot starts the software initialization process. When the initialization process ends, the robot goes into Protective stop. -
Page 27: Connecting To The Robot Interface
5. Getting started operate. 5.5 Connecting to the robot interface When the robot is turned on, it enables the connection to its WiFi access point. The name of the access point appears in the list of available connections on your PC, tablet, or phone. NOTICE The original username and password for the robot’s web interface are in the document Getting the robot online. - Page 28 WiFi access point. The access point name has the following format: MiR_20XXXXXXX. The access point name is derived from the robot application's model serial number. In a browser, go to the address mir.com and sign in. MiR100 Quick Start (en) 08/2021 - v.2.2 ©Copyright 2016-2021: Mobile Industrial Robots A/S.
- Page 29 5. Getting started Switch to Manual mode, and drive the robot down the ramp—see Driving the robot in Manual mode on page 33. Always make sure your robot is running the latest recommended software. This also applies to newly supplied robots, as there may have been important software updates during the storage time and shipment of the robot.
-
Page 30: Connecting The Robot To A Wifi Network
5. Getting started Figure 5.2. You can see the software version your robot is running in the bottom left corner of the robot interface. 5.6 Connecting the robot to a WiFi network To communicate with the robot wirelessly without connecting an access point, you can connect the robot to your local WiFi network. - Page 31 5. Getting started To connect the robot to a WiFi network, follow these steps: Connect to your robot as described in Connecting to the robot interface on page 27. Go to System > Settings > WiFi, and select + Add connection. MiR100 Quick Start (en) 08/2021 - v.2.2 ©Copyright 2016-2021: Mobile Industrial Robots A/S.
- Page 32 5. Getting started Select the network you want the robot to be connected to, and fill out the displayed fields. MiR100 Quick Start (en) 08/2021 - v.2.2 ©Copyright 2016-2021: Mobile Industrial Robots A/S.
-
Page 33: Driving The Robot In Manual Mode
5. Getting started Select + Add connection when you have finished. The robot is now connected to the network. When you are connected to the same network, you can access the robot's interface by entering the IP address displayed under the connection description into your internet browser. - Page 34 5. Getting started To drive the robot in Manual mode, follow these steps: In the robot interface, select the joystick icon. The joystick control appears. Place your foot in front of the ramp while the robot drives on it to keep the ramp from slipping.
- Page 35 Check that all elements on the page have the status and that they have green dots on the left. For more information, see Hardware health in MiR Robot Reference Guide on the MiR website. 5.9 Mounting the nameplate Before using MiR100, you must mount its unique nameplate to it. The nameplate contains information specific to your MiR application.
- Page 36 5. Getting started To mount the nameplate correctly, follow these steps: Locate the area below the side cover near the swivel wheel at the rear end of the robot. Clean the area marked in the image below with a degreasing agent. If you cannot access the area, either lift the robot to an appropriate height or remove the top cover to gain access.
- Page 37 5. Getting started 5.10 Shutting down the robot To shut down MiR100, follow these steps: Ensure that the robot is not moving or executing an action. Press the Power button for three seconds. The robot starts the shutdown process. The status lights waver yellow. When the robot finishes the shutdown process, the status lights are off.
- Page 38 All rights reserved. No parts of this document may be reproduced in any form without the express written permission of Mobile Industrial Robots A/S (MiR). MiR makes no warranties, expressed or implied, in respect of this document or its contents. In addition, the contents of the document are subject to change without prior notice.
Need help?
Do you have a question about the 100 and is the answer not in the manual?
Questions and answers