
Subscribe to Our Youtube Channel
Related Manuals for Gaggenau BS 470612


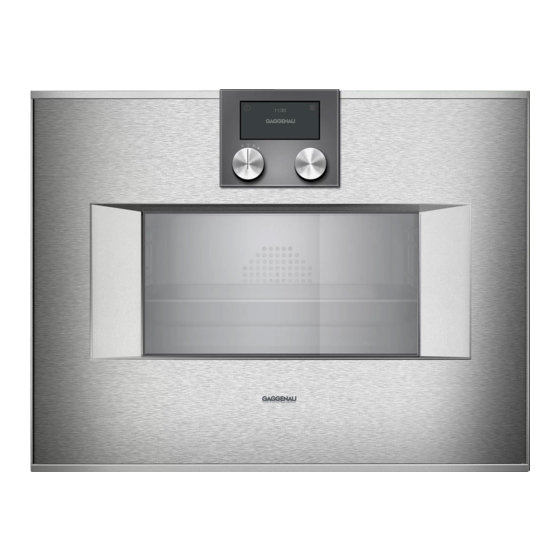
Summary of Contents for Gaggenau BS 470612
- Page 1 Gaggenau en-us Use and Care Manual BS 470/471 612, BS 474/475 612, BS 484/485 612 Combination steam oven...
-
Page 2: Table Of Contents
en-us Table of contents 1 IMPORTANT SAFETY INSTRUCTIONS..... 4 11 Automatic programs.......... 19 1.1 Safety definitions............ 4 11.1 Information about the settings for the automatic programs .............. 19 1.2 General information............ 4 11.2 Setting the food............ 19 1.3 Safe use.............. 4 11.3 Calling up the last automatic programs used .. - Page 3 en-us 18.18 Juicing – berries........... 56 18.19 Preparing yogurt .......... 56 18.20 Preparing bulky food .......... 56 18.21 Tips for keeping acrylamide levels to a mini- mum when cooking .......... 57 19 Disposal.............. 57 19.1 Disposal of your old appliance ....... 57 20 Customer Service .......... 57 20.1 Model number (E-Nr.) and production number (FD) ............... 57 20.2 Rating plate location.......... 57...
-
Page 4: Important Safety Instructions
en-us IMPORTANT SAFETY INSTRUCTIONS READ AND SAVE THESE INSTRUCTIONS Read all instructions carefully before use. These precau- WARNING tions will reduce the risk of electrical shock, fire and injury If materials inside an oven or warming drawer should ig- to persons. When using kitchen appliances, basic safety nite, keep door closed. - Page 5 en-us IMPORTANT SAFETY INSTRUCTIONS READ AND SAVE THESE INSTRUCTIONS DO NOT TOUCH HEATING ELEMENTS OR INTERIOR This appliance is intended for normal family household SURFACES OF OVEN - Heating elements may be hot use only. even though they are dark in color. Interior surfaces of an ▶...
-
Page 6: Child Safety
en-us IMPORTANT SAFETY INSTRUCTIONS READ AND SAVE THESE INSTRUCTIONS Do not place anything on the oven cavity bottom. Do not Do not allow anyone to climb, stand, lean, sit, or hang on cover it with aluminum foil. A build-up of heat could dam- any part of an appliance, especially a door, warming age the appliance or cause injury. -
Page 7: Cleaning Function
en-us IMPORTANT SAFETY INSTRUCTIONS READ AND SAVE THESE INSTRUCTIONS User Servicing - Do not repair or replace any part of the ▶ Keep children away. appliance unless specifically recommended in this man- Hot liquid may spill over the sides of cooking accessories ual. -
Page 8: Preventing Material Damage
en-us Preventing material damage 2.2 Steam 2 Preventing material damage Preventing material damage NOTICE: Preventing material damage Dripping liquids may damage the oven cavity. 2.1 General information To catch any dripping liquids, when steaming using a ▶ perforated cooking container, always insert the unperfo- NOTICE: rated cooking container underneath. -
Page 9: Familiarizing Yourself With Your Appliance
Familiarizing yourself with your appliance en-us Always place cookware in the perforated cooking con- Remove any accessories that are not being used from the ▶ tainer or on the wire rack. oven cavity. The accessories may tip. a Accessories that are not being used do not need to be Do not push the accessories between the shelf posi- ▶... - Page 10 en-us Familiarizing yourself with your appliance Display The display shows current settings and selection options, for example. Rotary selector Use the rotary selector to select the temperature and change additional set- tings. Function selector Use the function selector to select the type of heating, cleaning or the basic settings.
- Page 11 Familiarizing yourself with your appliance en-us Position Function/type of heating Temperature Application Zero setting Light Switch on the interior lighting Access to other functions, e.g. au- tomatic programs, individual recipes, remote start via Home Connect™ 85-445 °F (30-230 °C) Steaming at 160-210 °F Default temperature 210 °F (70-100 °C): For vegetables, fish Hot air + 100% humidity (100 °C)
-
Page 12: Automatic Door Opening
en-us Familiarizing yourself with your appliance Position Function/type of heating Temperature Application 120-200 °F (50-95 °C) Cooking food in a vacuum at low Default temperature 140 °F temperatures between 120-200 °F Sous-vide cooking (60 °C) (50-95 °C) and with 100% steam: Suitable for meat, fish, vegetables and desserts A vacuum-sealing machine uses heat to hermetically seal the food in a special heat-resistant cooking... -
Page 13: Standby
Different things can be displayed in standby mode. The cally. GAGGENAU logo and the time are preset. The process of drying the oven cavity may take up to In standby mode, the brightness of the control panel is re- 95 minutes. -
Page 14: Accessories
You will find a comprehensive range of products for your (5 l) appliance in our brochures and online: Wire rack, with feet BA030300 www.gaggenau.com Set with 4 cleaning car- CLS10040 Accessories are appliance-specific. When purchasing, al- tridges ways check for compatibility with your appliance model number (E-Nr). -
Page 15: Locking Function
After connecting the appliance to the power supply, the work correctly, always insert the wire rack and the perfo- GAGGENAU logo appears for approximately 30 seconds rated cooking container into the oven cavity the right way and then the appliance displays the "Initial settings" menu. -
Page 16: Basic Operation
en-us Basic Operation Setting the temperature unit 7.3 Switching on the appliance Requirement: The display shows the possible units °C Use the function selector to set the required type of and °F. The unit °C is preset. heating. Turn the rotary selector to set the required unit. The display shows the selected type of heating and the Press to confirm. -
Page 17: After Each Use
Timer functions en-us Full surface grill setting 1 + humidity ¡ 8 Timer functions Timer functions Full surface grill setting 2 + humidity ¡ Sous-vide cooking ¡ Your appliance has different timer functions, with which Timer functions The steam removal function is also available for a short you can control its operation. -
Page 18: Stopwatch
en-us Timer functions Press , open the appliance door or set the function 8.5 Stopwatch selector to . The stopwatch runs independently of the other appliance The signal tone stops. settings. The stopwatch counts from 0 seconds up to 90 minutes. Changing the cooking time The stopwatch has a pause function. -
Page 19: Long-Term Timer
Long-term timer en-us Canceling the entire procedure 10.2 Deactivating the childproof lock Turn the function selector to . ▶ Requirement: The function selector is set to . Press and hold for approximately 6 seconds. This deactivates the childproof lock. Long-term timer 9 Long-term timer Set the appliance as normal. -
Page 20: Calling Up The Last Automatic Programs Used
en-us Individual recipes For some dishes, you must set the weight. 12 Individual recipes Individual recipes The display shows the possible settings. Press . You have the option to save up to 50 individual recipes Individual recipes The display shows information about the accessories with a name so that, if required, you can access the recipe and preparation. -
Page 21: Entering A Name
Core temperature probe en-us Entering the core temperature for a phase 12.6 Deleting a recipe Note: You cannot enter the cooking time for phases with a Turn the function selector to . programmed core temperature. Press . Press to select the next phase. Use the rotary selector to select "Individual recipes"... -
Page 22: Core Temperature Guideline Values
en-us Core temperature probe Press to display the current core temperature. Food Core temperature To display the current core temperature instead of the esti- guideline value in mated cooking time, change the settings in the basic set- °F (°C) tings → Page 26 . Poultry The display shows "<60°F (<15°C)"... -
Page 23: Turning The Food
Core temperature probe en-us With poultry, ensure that the tip of the core temperature Inserting the core temperature probe into meat probe does not protrude into the cavity in the middle of Insert the core temperature probe at the thickest point the bird. -
Page 24: Home Connect
en-us Home Connect™ Ensure that the set core temperature is higher than If you want to operate the appliance via the Home Con- ¡ ‒ the current core temperature. nect™ app, you must activate the remote control func- You can change the set core temperature at any time. tion in the Home Connect™ settings first. -
Page 25: Data Protection
Home Connect™ en-us Symbol Basic setting Possible settings Explanation Connect to app Start the connection process between the app and the ap- pliance. Software update As soon as a new software version is available, a message appears on the display. In the Home Connect™ menu, you can install the new software using ... -
Page 26: Overview Of The Basic Settings
Clock + GAGGENAU this setting to reduce the ¡ logo standby energy consumption Date of your appliance. ¡ Date + GAGGENAU logo On: Multiple screens can be ¡ adjusted. Press to confirm Clock + date ¡ "On" and use the rotary se- Clock + date + GAGGE- ¡... - Page 27 Basic settings en-us Display Basic setting Selection Description Language German Set the language for the text French display [...] The system restarts when English you change the language. The restart takes a few sec- onds. After restarting, the appliance closes the basic settings menu.
-
Page 28: Changing The Basic Settings
en-us Cleaning and maintenance Display Basic setting Selection Description Home network Connection type Select settings for the con- Connection nection to the home network Connect to app and mobile devices Software update The display shows different Remote control setting options depending on Permanent remote start the connection status. -
Page 29: Microfiber Cloth
Cleaning and maintenance en-us Oven cavity Area Suitable cleaning agents Notes Oven cavity inner Hot soapy water Clean with a dishcloth and then dry with a soft cloth. ¡ walls Stainless steel cleaner that is suitable for the appliance can be obtained from customer service or online. -
Page 30: Cleaning Program
en-us Cleaning and maintenance Remove any food remnants from the drain filter. Depending on which version of the appliance you have, the complete cleaning program takes either 3 hours 20 minutes or 3 hours 45 minutes. With normal use, we recommend cleaning the appliance with the cleaning program four times a year. Depending on the use, more frequent cleaning can be necessary. - Page 31 Cleaning and maintenance en-us Ensure that the drain filter remains inserted in the oven Starting the cleaning program cavity floor while the cleaning program is in progress. Close the appliance door. Press to confirm. The display shows the cleaning time of 3:45. Press to start.
-
Page 32: Drying Program
en-us Cleaning and maintenance Dispose of the empty cleaning cartridge in accordance 16.6 Descaling program with regional regulations for household garbage. You can use the descaling program to descale and rinse Causes of an unsatisfactory cleaning result the appliance fully automatically using special descaling tablets. -
Page 33: Removing The Shelf Supports
Cleaning and maintenance en-us Remove all accessories from the oven cavity. The descaling solution must not come into contact with ▶ food. Remove the water tank from the appliance and take off Clean the water tank in the dishwasher or thoroughly by the lid. -
Page 34: Fitting The Shelf Supports
en-us Cleaning and maintenance 16.8 Fitting the shelf supports NOTICE: Incorrect spare parts may lead to corrosion in the oven cavity. Only use the original knurled nuts. ▶ Fit the shelf supports the right way round. Position the stop in the rear of the oven cavity. ‒... -
Page 35: Troubleshooting
Troubleshooting en-us 17 Troubleshooting Troubleshooting You can eliminate minor issues on your appliance your- If the power cord of this appliance becomes damaged, it Troubleshooting ▶ self. Please read the information on eliminating issues be- must be replaced by the manufacturer, the manufac- fore contacting Customer Service. - Page 36 en-us Troubleshooting Issue Cause and troubleshooting The core temperature probe is in- Moisture on the core temperature probe plug or on the socket in the oven cavity. serted; the display shows 210 °F Insert and remove the plug for the core temperature probe in the socket in the ▶...
-
Page 37: How It Works
How it works en-us 17.1 Power failure Your appliance can bridge a power failure of a few sec- onds. The operation continues. If the power failure lasts longer and the appliance was op- erating, the display shows a message. The operation is in- terrupted. -
Page 38: Vegetables
en-us How it works Use the cookware specified. If you use other cookware, When cooking very cold foods and when cooking at ¡ ¡ cooking times may be longer or shorter. high temperatures, the cooking container may deform. Always use plates, baking tins or ovenproof dishes with This deformation does not impair its performance. -
Page 39: Fish
How it works en-us Food Accessories/cook- Tempera- Type of Humidity Cooking Remarks ware ture in °F heating in % time in (°C) min. Kohlrabi, sliced Perforated steam con- 212 (100) 25-35 tainer Leeks, sliced Perforated steam con- 212 (100) 20-30 tainer Leeks, whole Perforated steam con- 212 (100) -
Page 40: Fish - Low-Temperature Steaming
en-us How it works Food Accessories/cook- Tempera- Type of Humidity Cooking Remarks ware ture in °F heating in % time in (°C) min. Fish dumplings, Unperforated steam 195-212 8-12 Line the cooking con- 0.7-1.4 oz (20-40 g) container (90-100) tainer with baking apiece parchment. Shrimp Unperforated steam 175 (80) -
Page 41: Meat - Cooking At Higher Temperatures
How it works en-us Food Accessories/cook- Tempera- Type of Humidity Cooking Remarks ware ture in °F heating in % time in (°C) min. Scallops, ½-1 oz Unperforated steam 175-195 9-13 The more the scallops (15-30 g) apiece container (80-90) weigh, the longer the chosen cooking time should be. -
Page 42: Fish And Poultry - Low-Temperature Cooking
en-us How it works Food Accessories/cook- Tempera- Type of Humidity Cooking Remarks ware ture in °F heating in % time in (°C) min. Saddle of veal, Unperforated steam 320-355 20-30 If you add liquid to the seared, medium rare, container (160-180) unperforated cooking 2.2 lb (1 kg) container, 30% humid-... -
Page 43: Poultry
How it works en-us For food hygiene reasons, sear the meat briefly on all Note that the core temperature of the food cannot be ¡ ¡ sides at a high temperature in the frying pan before higher than the temperature inside the oven cavity. As a cooking it. -
Page 44: Sous-Vide Cooking
en-us How it works Poultry Food Accessories/cook- Tempera- Type of Humidity Cooking Remarks ware ture in °F heating in % time in (°C) min. Duck, whole, 6.6 lb Unperforated steam 1. 300-320 1. 60 1. 80-90 Cook with the breast (3 kg) container (150-160) 2. - Page 45 How it works en-us You can cook on up to two levels. Slide the cooking ¡ Preparation containers in at levels 1 and 3 to achieve the best cook- Sous-vide cooking prevents flavors from escaping, intensi- ing results. If you are cooking on just one level, use fying the food's natural flavor.
- Page 46 en-us How it works Food Accessories/cook- Tempera- Type of Cooking Remarks ware ture in °F heating time in (°C) min. Entrecôte, medium Perforated steam con- 145 (63) Once the meat is cooked, flash fry rare, 6 oz (180 g) tainer it on a teppan yaki, or grill it at a apiece high temperature on both sides.
- Page 47 How it works en-us Sous-vide – fish/seafood Food Accessories/cook- Tempera- Type of Cooking Remarks ware ture in °F heating time in (°C) min. Shrimp, 4½ oz (125 g) Perforated steam con- 140 (60) Recipe tip: Vacuum-seal along apiece tainer with some olive oil, salt and garlic. Scallops, 1-2 oz Perforated steam con- 140 (60)
-
Page 48: Grilling
en-us How it works Sous-vide – dessert Food Accessories/cook- Tempera- Type of Cooking Remarks ware ture in °F heating time in (°C) min. Pineapple, in 1.5 cm, Perforated steam con- 185 (85) Recipe tip: Vacuum-seal along 14 oz (400 g) slices tainer with some butter, honey and vanilla Apples, peeled, in Perforated steam con-... -
Page 49: Side Dishes
How it works en-us Food Accessories/ Shelf posi- Tem- Type of Humidity Cooking Remarks cookware tion pera- heating in % time in ture in min. °F (°C) Grilled eggplant, Unperforated sliced steam container (200) Grilled vegetables, Unperforated 20-25 e.g. zucchini 1.5 lb (700 g) steam container (230) Vegetable bake... -
Page 50: Desserts
en-us How it works Food Accessories/cook- Tempera- Type of Humidity Cooking Remarks ware ture in °F heating in % time in (°C) min. Long-grain rice, 0.5 lb Unperforated steam 212 (100) 25-30 + 2 cups (250 g + container 500 ml) water Brown rice, 0.5 lb + Unperforated steam 212 (100) 30-35... -
Page 51: Miscellaneous
How it works en-us Food Accessories/cook- Tempera- Type of Humidity Cooking Remarks ware ture in °F heating in % time in (°C) min. Rice pudding, 7 oz Unperforated steam 212 (100) 55-60 Allow to cool down for (200 g) rice + 3.3 cups container 10 minutes and stir. -
Page 52: Baked Goods
en-us How it works – - | Hot air + 60 - 100% humidity: Puff pastry and 18.13 Baked goods yeast-risen pastry are fluffy inside and crispy outside, with a gloss. Note the recommended settings for baked goods. If you only bake on one level, use level 2. If you bake on ¡... -
Page 53: Dough Proving - Leaving To Rise
How it works en-us Food Accessories/ Shelf po- Tempera- Type of Humidity Cooking Remarks cookware sition ture in °F heating in % time in (°C) min. Yeast tray bakes Unperforated 320-340 0, 30 or 60 30-45 For yeast tray steam container (160-170) ... -
Page 54: Reheating - Warming
en-us How it works Dough proving Food Accessories/cook- Tempera- Type of Humidity Cooking Remarks ware ture in °F heating in % time in (°C) min. Dough mixture, pizza Bowl 100 (38) e.g. yeast dough, nat- ural fermentation starter, sourdough Dough mixture, bread Bowl 115 (45) e.g. -
Page 55: Defrosting
How it works en-us After defrosting, operate the combi-steam oven for ▶ 18.16 Defrosting 15 minutes using hot air at 180 °C. In your appliance, you can defrost frozen food gently and To do this, use the "Defrost" operating mode. ¡ faster than in the refrigerator and more evenly than in the With this operating mode, no preheating is necessary. -
Page 56: Juicing - Berries
en-us How it works Food Accessories/cook- Tempera- Type of Humidity Cooking Remarks ware ture in °F heating in % time in (°C) min. Beans, peas, in sealed Perforated steam con- 212 (100) ½ pint preserving jars tainer (0.75 l) Leave the berries in the appliance until all of the juice ¡... -
Page 57: Tips For Keeping Acrylamide Levels To A Minimum When Cooking
(“Gaggenau“) in this Statement of Limited Product War- If you contact the Customer Service, you will need the ranty applies only to the Gaggenau appliance sold to you model number (E-Nr.) and the production number (FD) of (“Product“), provided that the Product was purchased: your appliance. -
Page 58: How Long The Warranty Lasts
Please make sure to return your registration card; while to make the service call. not necessary to effectuate warranty coverage, it is the best way for Gaggenau to notify you in the unlikely event 21.4 Out of warranty product of a safety notice or product recall. -
Page 59: Obtaining Warranty Service
TELS AND/OR RESTAURANT MEALS, REMODELLING EXPENSES IN EXCESS OF DIRECT DAMAGES WHICH ARE DEFINITIVELY CAUSED EXCLUSIVELY BY GAGGENAU, OR OTHERWISE. SOME STATES DO NOT ALLOW THE EXCLUSION OR LIMITATION OF INCIDEN- TAL OR CONSEQUENTIAL DAMAGES, AND SOME STATES DO NOT ALLOW LIMITATIONS ON HOW LONG... - Page 60 Wi-Fi® Module FCC/IC Statements Model: COM2 FCC ID: 2AHES-COM2 IC: 21152-COM2 The Home Connect module is a communication device designed to provide communication between appliances and smart devices. This module is integrated at the factory, under direct control of B/S/H Home Appliances Corporation, and is not user serviceable or upgradable.
- Page 64 BSH Home Appliances Corporation 1901 Main Street, Suite 600 Irvine, CA 92614 www.gaggenau.com 1-877-442-4436 © 2022 BSH Home Appliances Corporation...
Need help?
Do you have a question about the BS 470612 and is the answer not in the manual?
Questions and answers