Emerson Liebert 610 Series Manual
Hide thumbs
Also See for Liebert 610 Series:
- Installation manual (112 pages) ,
- Operation & maintenance manual (120 pages)

Related Manuals for Emerson Liebert 610 Series


Summary of Contents for Emerson Liebert 610 Series
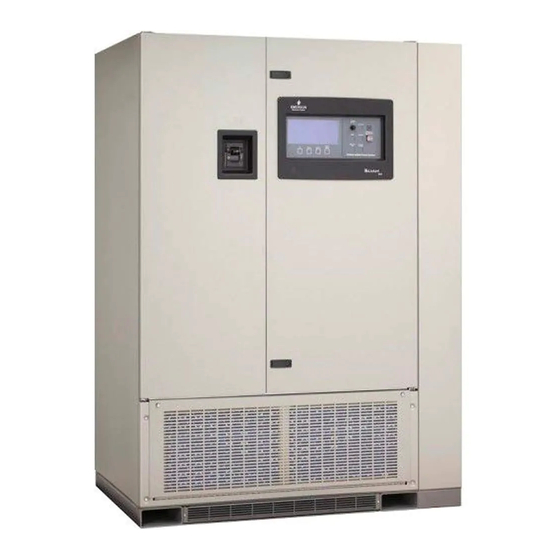
- Page 1 DISCONTINUED AC Power PRODUCT For Business-Critical Continuity™ Liebert Series 610 ™ Installation Manual - 100-225kVA, 60Hz, Three Phase Single-Module...
-
Page 2: Contacting Liebert For Support
ATTERY ABINET RECAUTIONS The following warning applies to all battery cabinets supplied with UPS systems. Additional warnings and cautions applicable to battery cabinets may be found in: • Important Safety Instructions—page 1 • Section 2.0 - Unloading and Handling • Section 5.0 - Battery Installation WARNING Internal battery strapping must be verified by manufacturer prior to moving a battery cabinet (after initial installation). -
Page 3: Table Of Contents
TABLE OF CONTENTS ....... . . I ATTERY ABINET RECAUTIONS NSIDE RONT OVER... - Page 4 FIGURES Figure 1 Preferred grounding configuration, wye-connected service ......13 Figure 2 Alternate grounding configuration, wye-connected service .
- Page 5 TABLES Table 1 Abbreviations for circuit breakers ..........23 Table 2 Power wiring terminals, factory supplied .
- Page 6 DISCONTINUED PRODUCT...
-
Page 7: Important Safety Instructions
MPORTANT AFETY NSTRUCTIONS SAVE THESE INSTRUCTIONS This manual contains important instructions that should be followed during installation of your Series 610 UPS and batteries. WARNING Exercise extreme care when handling UPS cabinets to avoid equipment damage or injury to personnel. The UPS module weight ranges from 1500 to 4805 lbs. (680 to 2180kg), including input transformer. - Page 8 CAUTION This unit complies with the limits for a Class A digital device, pursuant to Part 15 Subpart J of the FCC rules and EN550022. These limits provide reasonable protection against harmful interference in a commercial environment. This unit generates, uses and radiates radio frequency energy and, if not installed and used in accordance with this instruction manual, may cause harmful interference to radio communications.
-
Page 9: Installation Considerations
Installation Considerations NSTALLATION ONSIDERATIONS Install your Series 610 UPS in accordance with the submittal drawing package and the following pro- cedures. A Liebert authorized representative must perform the initial system check-out and start-up to ensure proper system operation. Equipment warranties will be voided unless system start-up is performed by a Liebert authorized representative. - Page 10 Installation Considerations 10. A breaker coordination study should be performed to ensure proper handling of fault currents. NOTE The instantaneous trip setting of the breaker feeding the UPS bypass input should be high enough to accommodate short-duration overloads. The bypass static switch inside the UPS can draw up to 10 times the system’s rated current for up to three cycles.
-
Page 11: Unloading And Handling
Unloading and Handling NLOADING AND ANDLING The UPS module is shipped in one cabinet to allow ease of handling at the site. Because the weight distribution in the cabinet is uneven, use extreme care during handling and transport. Your installa- tion may also include battery cabinets and a Maintenance Bypass Cabinet. -
Page 12: Inspections
Inspections NSPECTIONS External Inspections 1. While the UPS system is still on the truck, inspect the equipment and shipping container(s) for any signs of damage or mishandling. Do not attempt to install the system if damage is apparent. If any damage is noted, file a damage claim with the shipping agency within 24 hours and contact Liebert Global Services at 1-800-LIEBERT to inform them of the damage claim and the condition of the equipment. -
Page 13: Equipment Location
Equipment Location QUIPMENT OCATION 1. Handle cabinet(s) in accordance with the safety precautions in this manual, especially in these sections: • Battery Cabinet Precautions—inside front cover • Important Safety Instructions—page 1 • 2.0 - Unloading and Handling—page 5 • 5.0 - Battery Installation—page 8 Use a suitable material handling device to move cabinet to its final location. -
Page 14: Battery Installation
Battery Installation ATTERY NSTALLATION Battery Safety Precautions Servicing of batteries should be performed or supervised by personnel knowledgeable of batteries and the required precautions. Keep unauthorized personnel away from batteries. Be sure to observe the grounding recommendations in 6.0 - Configuring Your Neutral and Ground Connections when installing batteries. -
Page 15: Battery Safety Precautions In French Per Csa Requirements
Battery Installation Battery Safety Precautions in French Per CSA Requirements Instructions Importantes Concernant La Sécurité Conserver Ces Instructions AVERTISSEMENT Respecter toutes les consignes de sécurité applicables à l'installation, le chargement ou l'entretien des batteries. En plus du danger de chocs électriques, le gaz produit par les batteries peut exploser dégageant de l'acide sulfurique qui peut entraîner de très graves brûlures. -
Page 16: Battery Cabinets
Battery Installation Battery Cabinets Optional battery cabinets are available from Liebert and other qualified vendors. Consult your sub- mittal package for details. Several models of optional battery cabinets with varying run times are available. Each model is 78" (1981mm) high and has forklift slots. Refer to Figures 17 through 20. The battery cabinet cells range from 90 to 150 ampere-hours. -
Page 17: Open-Rack Batteries
Battery Installation Open-Rack Batteries When batteries other than Liebert battery cabinets are used, a remote battery disconnect switch with overcurrent protection is required per the National Electrical Code. Refer to Required Battery Discon- nect Rating in the site planning data tables in Appendix A for recommended overcurrent protection ratings. -
Page 18: Configuring Your Neutral And Ground Connections
Configuring Your Neutral and Ground Connections ONFIGURING EUTRAL AND ROUND ONNECTIONS Improper grounding is the largest single cause of UPS installation and start-up problems. This is not an easy subject, since grounding techniques vary significantly from site to site, depending on several factors. -
Page 19: Preferred Grounding Configuration, Wye-Connected Service
Configuring Your Neutral and Ground Connections Preferred Grounding Configuration, Wye-Connected Service One of the most common configurations of Series 610 UPS Single-Module Systems is with 480 VAC input, 480 VAC output and a connected load consisting of multiple Power Distribution Units (PDUs) with isolation transformers in the PDUs to produce 208 VAC. -
Page 20: Alternate Grounding Configuration, Wye-Connected Service
Configuring Your Neutral and Ground Connections Alternate Grounding Configuration, Wye-Connected Service This configuration must NOT be used when single-phase loads are directly connected to the UPS. The alternate configuration is similar to that shown in 6.1 - Preferred Grounding Configuration, Wye-Connected Service, except that the service entrance neutral is not brought into the UPS mod- ule. -
Page 21: Preferred Grounding Configuration With Isolated Bypass
Configuring Your Neutral and Ground Connections Preferred Grounding Configuration With Isolated Bypass Another configuration in this power range is the Single-Module System with 480 or 600 VAC input, 208 VAC output, a Bypass Isolation Transformer and a connected load consisting of multiple distribu- tion panelboards or switchboards. -
Page 22: Alternate Grounding Configuration, Non-Isolated
Configuring Your Neutral and Ground Connections Alternate Grounding Configuration, Non-Isolated A few applications in this power range have 208 VAC input and output, and a connected load consist- ing of multiple Power Distribution Units (PDUs), panelboards, switchboards or other items of load equipment which do not have isolation transformers. -
Page 23: Grounding Configuration, Corner-Grounded Delta Or Impedance-Grounded Wye
Configuring Your Neutral and Ground Connections Grounding Configuration, Corner-Grounded Delta or Impedance-Grounded Wye As previously mentioned, Series 610 UPS modules require a bypass input neutral for sensing and monitoring. With a wye-connected input source, the installer should always connect the building ser- vice neutral to the module output neutral to achieve this. -
Page 24: Preferred Grounding Configuration, Battery Systems
Configuring Your Neutral and Ground Connections Preferred Grounding Configuration, Battery Systems Open-rack battery systems, depending on local code requirements and customer preference, are normally: 1. Floating (ungrounded), 2. Center-tapped and floating or 3. Center tapped and grounded. Battery cabinet systems must be connected as floating (ungrounded) systems—Option 1 above. Center-tapped or grounded battery systems are not possible with battery cabinet systems. -
Page 25: Wiring Considerations
Wiring Considerations IRING ONSIDERATIONS WARNING All power connections must be completed by a licensed electrician experienced in wiring this type of equipment. Wiring must be installed in accordance with all applicable national and local electrical codes. Improper wiring may cause damage to the equipment or injury to personnel. -
Page 26: Power Wiring
Wiring Considerations Power Wiring 1. Power wiring—rectifier input, bypass input, UPS output and battery cables—must be run in individual, separate conduits or cable trays. Refer to the Outline and Terminal Details drawings (Figures 11 through 16, 21, 24, 25, and 40 through 44) for locations of the various power connections within the UPS and ancillary equipment. -
Page 27: Figure 8 Power Single-Line Diagrams, Standard Sms
Wiring Considerations Figure 8 Power single-line diagrams, standard SMS* * These configurations are for illustrative purposes only. They represent only a sample of the possible configurations. Refer to the submittals supplied with your order for more information or for order-specific details. Input Iso Transformer Standard SMS, with 208/208, 480/480 or 600/600 VAC... -
Page 28: Figure 9 Power Single-Line Diagrams, Optional Input Transformer
Wiring Considerations Figure 9 Power single-line diagrams, optional input transformer* * These configurations are for illustrative purposes only. They represent only a sample of the possible configurations. Refer to the submittals supplied with your order for more information or for order-specific details. Input Isolation Transformer Standard single-input SMS with 208/208, 480/480 or... -
Page 29: Figure 10 Power Single-Line Diagrams, Optional Maintenance Bypass Cabinets
Wiring Considerations Figure 10 Power single-line diagrams, optional Maintenance Bypass Cabinets* * These configurations are for illustrative purposes only. They represent only a sample of the possible configurations. Refer to the submittals supplied with your order for more information or for order-specific details. 2-breaker Maintenance Bypass Cabinets for standard (left) and single-input (right) modules 3-breaker Maintenance Bypass Cabinets for standard (left) and single-input (right) modules BYPASS... -
Page 30: Control Wiring
Wiring Considerations Control Wiring Control wiring must be flexible stranded, tinned copper and run in individual separate steel conduits. Control wiring must be separated from power wiring. In addition, each control wiring cable group should be run in a separate conduit to minimize control signal interference. If your system has any installed options, special wire lists will be included in your Submittal Drawing Package. -
Page 31: Wiring Connections
Wiring Connections IRING ONNECTIONS WARNING Verify that all incoming high and low voltage power circuits are de-energized and locked out before installing cables or making electrical connections. All power connections must be completed by a licensed electrician experienced in wiring UPS equipment and in accordance with all applicable national and local electrical codes. -
Page 32: Specific Connections
Wiring Connections Specific Connections Refer to the drawings in this manual and any other drawings provided by Liebert for this installation. NOTE If your installation includes a Maintenance Bypass Panelboard or a Transformer Cabinet, some or all power cables will be terminated in these cabinets. Make sure all required wiring between the UPS module and the optional cabinets is completed per the submittal drawings. -
Page 33: Wiring Inspection
Wiring Inspection IRING NSPECTION 1. Verify all power connections are tightened per the torque specifications in Table 3. 2. Verify all control wire terminations are tight. 3. Verify all power wires and connections have proper spacing between exposed surfaces, phase-to- phase and phase-to-ground. -
Page 34: Table 4 Field-Supplied Lugs
Wiring Inspection Table 4 Field-supplied lugs One-Hole Lugs T & B Lug Style Wire Size Bolt Size (in.) Tongue Width (in.) T & B Liebert P/N #1 AWG 0.76 H973 12-714255-46 1/0 AWG 0.88 J973 12-714255-56 Stak-On 2/0 AWG 1.00 K973 12-714255-66 3/0 AWG... -
Page 35: Table 5 Table 310-16, National Electrical Code (Reprint)
Wiring Inspection Table 5 Table 310-16, National Electrical Code (Reprint) Allowable Ampacities of Insulated Conductors Rated 0-2000 Volts, 60° to 90°C (140° to 194°F) Not More Than Three Conductors in Raceway or Cable or Earth (Directly Buried), Based on Ambient Temperature of 30°C (86°F) SIZE TEMPERATURE RATING OF CONDUCTOR. -
Page 36: Installation Drawings
Installation Drawings 10.0 I NSTALLATION RAWINGS Figure 11 Outline drawing, Single-Module System, SpaceSaver DISCONTINUED PRODUCT... -
Page 37: Figure 12 Terminal Details, Single-Module System, 100 & 125Kva, Spacesaver
Installation Drawings Figure 12 Terminal details, Single-Module System, 100 & 125kVA, SpaceSaver DISCONTINUED PRODUCT... -
Page 38: Figure 13 Terminal Details, Single-Module System, 150 & 225Kva - 480V, 600V Spacesaver
Installation Drawings Figure 13 Terminal details, Single-Module System, 150 & 225kVA - 480V, 600V SpaceSaver DISCONTINUED PRODUCT... -
Page 39: Figure 14 Outline Drawing, Single-Module System, Standard
Installation Drawings Figure 14 Outline drawing, Single-Module System, Standard DISCONTINUED PRODUCT... -
Page 40: Figure 15 Terminal Details, Single-Module System, 100 & 125Kva
Installation Drawings Figure 15 Terminal details, Single-Module System, 100 & 125kVA DISCONTINUED PRODUCT... -
Page 41: Figure 16 Terminal Details, Single-Module System, 150 & 225Kva
Installation Drawings Figure 16 Terminal details, Single-Module System, 150 & 225kVA DISCONTINUED PRODUCT... -
Page 42: Figure 17 Battery Power Pack System
Installation Drawings Figure 17 Battery power pack system DISCONTINUED PRODUCT... -
Page 43: Figure 18 Battery Power Pack, Size A
Installation Drawings Figure 18 Battery power pack, Size A DISCONTINUED PRODUCT... -
Page 44: Figure 19 Line-Up Detail, Single- Or Multi-Module System, Spacesaver With Battery Cabinets
Installation Drawings Figure 19 Line-up detail, Single- or Multi-Module System, SpaceSaver with battery cabinets DISCONTINUED PRODUCT... -
Page 45: Figure 20 Line-Up Detail, Single- Or Multi-Module System, With Battery Cabinets
Installation Drawings Figure 20 Line-up detail, Single- or Multi-Module System, with battery cabinets DISCONTINUED PRODUCT... -
Page 46: Figure 21 Outline Drawing, Bypass Transformer Cabinet, 208V, 480V, 600V
Installation Drawings Figure 21 Outline drawing, Bypass Transformer Cabinet, 208V, 480V, 600V DISCONTINUED PRODUCT... -
Page 47: Figure 22 Line-Up Detail, Single-Module System, Spacesaver With Bypass Transformer Cabinet
Installation Drawings Figure 22 Line-up detail, Single-Module System, SpaceSaver with Bypass Transformer Cabinet DISCONTINUED PRODUCT... -
Page 48: Figure 23 Line-Up Detail, Single-Module System, With Bypass Transformer Cabinet
Installation Drawings Figure 23 Line-up detail, Single-Module System, with Bypass Transformer Cabinet DISCONTINUED PRODUCT... -
Page 49: Figure 24 Outline Drawing, 3-Breaker Maintenance Bypass Cabinet, 125-400A
Installation Drawings Figure 24 Outline drawing, 3-breaker Maintenance Bypass Cabinet, 125-400A DISCONTINUED PRODUCT... -
Page 50: Figure 25 Outline Drawing, 3-Breaker Maintenance Bypass Cabinet, 450-800A
Installation Drawings Figure 25 Outline drawing, 3-breaker Maintenance Bypass Cabinet, 450-800A DISCONTINUED PRODUCT... -
Page 51: Figure 26 Line-Up Detail, Single-Module System, Spacesaver With 3-Breaker Maintenance
Installation Drawings Figure 26 Line-up detail, Single-Module System, SpaceSaver with 3-breaker Maintenance Bypass Cabinet DISCONTINUED PRODUCT... -
Page 52: Figure 27 Line-Up Detail, Single-Module System, With 3-Breaker Maintenance Bypass Cabinet
Installation Drawings Figure 27 Line-up detail, Single-Module System, with 3-breaker Maintenance Bypass Cabinet DISCONTINUED PRODUCT... -
Page 53: Figure 28 Line-Up Detail, Single-Module System, With Bypass Transformer Cabinet And 3-Breaker Maintenance Bypass Cabinet
Installation Drawings Figure 28 Line-up detail, Single-Module System, with Bypass Transformer Cabinet and 3-breaker Maintenance Bypass Cabinet DISCONTINUED PRODUCT... -
Page 54: Figure 29 Line-Up Detail, Single-Module System, Spacesaver With Bypass Transformer Cabinet
Installation Drawings Figure 29 Line-up detail, Single-Module System, SpaceSaver with Bypass Transformer Cabinet and 3-breaker Maintenance Bypass Cabinet DISCONTINUED PRODUCT... -
Page 55: Figure 30 Control Connection Location Diagram, Single-Module System
Installation Drawings Figure 30 Control connection location diagram, Single-Module System DISCONTINUED PRODUCT... -
Page 56: Figure 31 Control Wiring, Single-Module System, Standard Wiring
Installation Drawings Figure 31 Control wiring, Single-Module System, standard wiring DISCONTINUED PRODUCT... -
Page 57: Figure 32 Module Control Wiring, Alarm Status Contacts Option
Installation Drawings Figure 32 Module control wiring, alarm status contacts option DISCONTINUED PRODUCT... -
Page 58: Figure 33 Com Pwa, Remote Terminal (Rs232) Option, Sitescan Option, Internal Modem Option
Installation Drawings Figure 33 COM PWA, remote terminal (RS232) option, SiteScan option, internal modem option DISCONTINUED PRODUCT... -
Page 59: Figure 34 Control Wiring, Customer Alarm Interface Option
Installation Drawings Figure 34 Control wiring, customer alarm interface option DISCONTINUED PRODUCT... -
Page 60: Figure 35 Control Wiring, Snmp Interface Option
Installation Drawings Figure 35 Control wiring, SNMP interface option DISCONTINUED PRODUCT... -
Page 61: Figure 36 Control Wiring, Remote Status Panel Interface Option
Installation Drawings Figure 36 Control wiring, remote status panel interface option DISCONTINUED PRODUCT... -
Page 62: Figure 37 Control Wiring, Battery Temperature Sensor Interface
Installation Drawings Figure 37 Control wiring, battery temperature sensor interface DISCONTINUED PRODUCT... -
Page 63: Figure 38 Control Wiring, Maintenance Bypass Interlock Option
Installation Drawings Figure 38 Control wiring, maintenance bypass interlock option DISCONTINUED PRODUCT... -
Page 64: Figure 39 Control Wiring, Maintenance Bypass Cabinet Option
Installation Drawings Figure 39 Control wiring, Maintenance Bypass Cabinet option DISCONTINUED PRODUCT... -
Page 65: Figure 40 Outline Drawing, Single-Breaker Module Battery Disconnect, 175-250A
Installation Drawings Figure 40 Outline drawing, single-breaker module battery disconnect, 175-250A, 600VDC circuit breaker DISCONTINUED PRODUCT... -
Page 66: Figure 41 Outline Drawing, Dual-Breaker Module Battery Disconnect, 175-250A
Installation Drawings Figure 41 Outline drawing, dual-breaker module battery disconnect, 175-250A, 600VDC circuit breaker DISCONTINUED PRODUCT... -
Page 67: Figure 42 Outline Drawing, Single-Breaker Module Battery Disconnect
Installation Drawings Figure 42 Outline drawing, single-breaker module battery disconnect, 300, 450, 600, 800, 1000, 1200A DISCONTINUED PRODUCT... -
Page 68: Figure 43 Outline Drawing, Dual-Breaker Module Battery Disconnect, 300 & 450A
Installation Drawings Figure 43 Outline drawing, dual-breaker module battery disconnect, 300 & 450A DISCONTINUED PRODUCT... -
Page 69: Figure 44 Outline Drawing, Remote Status Panel, Surface Mount
Installation Drawings Figure 44 Outline drawing, remote status panel, surface mount DISCONTINUED PRODUCT... - Page 70 Installation Drawings DISCONTINUED PRODUCT...
-
Page 71: Appendixa - Site Planning Data , Series 610, 100-225 Kva, Single -Module Systems
Site Planning Data, Series 610, 100-225kVA, Single-Module Systems DISCONTINUED PRODUCT... -
Page 72: Table 6 Site Planning Data-600V Input
Site Planning Data, Series 610, 100-225kVA, Single-Module Systems DISCONTINUED PRODUCT... -
Page 73: Table 7 Site Planning Data-480V Input
Site Planning Data, Series 610, 100-225kVA, Single-Module Systems DISCONTINUED PRODUCT... -
Page 74: Table 8 Site Planning Data-208V Input
Site Planning Data, Series 610, 100-225kVA, Single-Module Systems DISCONTINUED PRODUCT... - Page 75 DISCONTINUED PRODUCT...
- Page 76 Racks & Integrated Cabinets Connectivity Embedded Power Power Switching & Controls Services DC Power Monitoring Precision Cooling Surge Protection Business-Critical Continuity, Emerson Network Power and the Emerson Network Power logo are trademarks and service marks of Emerson Electric Co. ©2007 Emerson Electric Co.
Need help?
Do you have a question about the Liebert 610 Series and is the answer not in the manual?
Questions and answers