Table of Contents
Advertisement
Quick Links
Advertisement
Table of Contents

Related Manuals for ADJ WIFLY PAR QA5


Summary of Contents for ADJ WIFLY PAR QA5
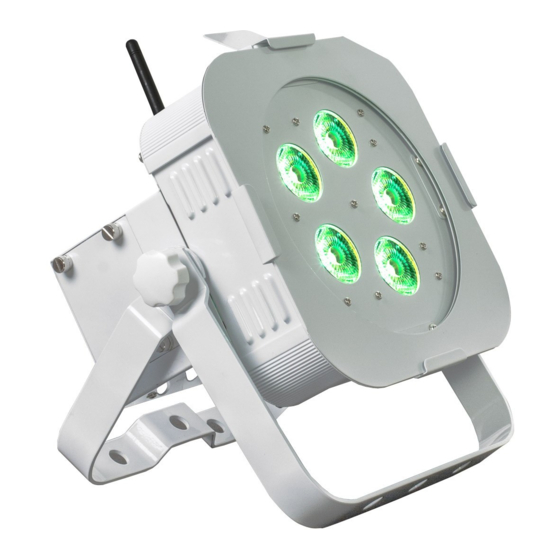
- Page 1 WIFLY PAR QA5 User Manual...
- Page 2 Products, LLC brands and product names are trademarks or registered trademarks of their respective companies. ADJ Products, LLC and all affiliated companies hereby disclaim any and all liabilities for property, equipment, building, and electrical damages, injuries to any persons, and direct or indirect economic...
-
Page 3: Table Of Contents
Safety Precautions Battery Precautions DMX Setup Operating Instructions Primary-Secondary Configuration | Power Cord Daisy Chain Wifly Setup ADJ RFC Operation DMX Traits Battery Information Battery Replacement Re-Initialization Photometric Chart | Dimmer Curve Chart Fuse Replacement | Trouble Shooting | Cleaning... -
Page 4: Introduction
INTRODUCTION Unpacking: Thank you for purchasing the WiFly Par QA5 by ADJ Products, LLC. Every WiFly Par QA5 has been thoroughly tested and has been shipped in perfect operating condition. Carefully check the shipping carton for damage that may have occurred during shipping. If the carton appears to have been damaged, carefully inspect your fixture for any damage and be sure all accessories necessary to operate the unit have arrived intact. -
Page 5: General Instructions | Warranty Registration | Installation
• WARRANTY REGISTRATION The WiFly Par QA5 carries a 2 year limited warranty. Please fill out the enclosed warranty card to validate your purchase. All returned service items, whether under warranty or not, must be freight pre-paid and accompanied by a return authorization (R.A.) number. The R.A. number must be clearly written on the outside of the return package. -
Page 6: Safety Precautions
SAFETY PRECAUTIONS • To reduce the risk of electrical shock or fire, do not expose this unit to rain or moisture. • Do not spill water or other liquids into or on to your unit. • Do not attempt to operate this unit if the power cord is frayed or broken. •... -
Page 7: Battery Precautions
2.5 Do Not Expose the Battery to water or liquids Never soak/drop the batteries in liquids such as water, seawater, or beverages such as soft drinks, juices, or coffee. 2.6 Battery Replacement For battery replacement please contact ADJ customer support (800) 322-6337. - Page 8 BATTERY PRECAUTIONS 2.7 Do Not use a damaged Battery There is the possibility that the battery could be damaged during shipping. Should the battery be found damaged, including damage to the plastic casing of the battery, deformation of the battery package, emission of electrolyte odors, leakage of the electrolyte gel, or other concerns, DO NOT use the battery.
-
Page 9: Dmx Setup
Data Cable (DMX Cable) Requirements (For DMX Operation): The WiFly Par QA5 can be con- trolled via DMX-512 protocol. The WiFly Par QA5 has 8 DMX channel modes, and detailed infor- mation on these channels modes can be found in the DMX Traits section of this manual. The DMX address is set on the back panel of the device. - Page 10 XLR connector of the last unit in your daisy chain to terminate the line. Using a cable terminator (ADJ part number Z-DMX/T) will reduce the risk of erratic behavior. 5-pin XLR Connectors. Some manufacturers use 5-pin XLR connectors for DATA transmission in place of 3-pin.
-
Page 11: Operating Instructions
“rev” inverts the display 180°. Operating Modes: The WiFly Par QA5 has five operating modes: • Static Color Mode - There are 15 colors to choose from. • RGBA Mode - Choose one of the four colors to remain static, or adjust the intensity of each color to create a custom color. - Page 12 Auto Run Mode: In this mode, the WiFly Par QA5 will run an auto program. There are 3 types of Auto Run Modes to choose from: Color Fade, Color Change, and both modes running together. The running speed is adjustable in all 3 modes.
- Page 13 This function also allows you to use your fixtures as spot lights. The WiFLY Par QA5 has 8 DMX modes: 1 Channel mode, 2 Channel mode, 3 Channel mode, 4 Channel mode, 5 Channel mode, 6 Channel mode, 7 Channel mode, and a 8 Channel mode. See the DMX Traits section of this manual for detailed information.
- Page 14 OPERATING INSTRUCTIONS DMX State: This setting defines how the fixture will behave in the event that the DMX signal is lost or interrupted, as well as the operating mode the fixture will default to when it is first powered up. 1.
-
Page 15: Primary-Secondary Configuration | Power Cord Daisy Chain
PRIMARY-SECONDARY CONFIGURATION This function will allows you to link units together to run in a Primary-Secondary setup, with one unit acting as the controlling unit and the other units reacting to the controlling unit’s built-in programs. Any unit can act as a Primary or as a Secondary, but only one unit can be programmed to act as the “Primary.”... -
Page 16: Wifly Setup
This feature will let you link units to run in a primary-secondary mode without the use of XLR cables. NOTE: The ADJ RFC control must be set to OFF on all the units to use this function. See the Operating Instructions section of this manual for instructions on how to turn OFF ADJ RFC. -
Page 17: Adj Rfc Operation
The ADJ RFC remote (sold seperately) has many different functions and allows you to control your WiFly Par QA5 from a distance. The maximum range is 150 ft. To use the RFC, you must first acti- vate the fixtures receiver, as instructed in the Operation Instructions section of this manual. -
Page 18: Dmx Traits
DMX TRAITS CHANNEL FUNCTION VALUES 1CH 2CH 3CH 4CH 5CH 6CH 7CH 8CH 000 - 255 Red, 0% to 100% 000 - 255 Green, 0% to 100% 000 - 255 Blue, 0% to 100% 000 - 255 Amber, 0% to 100% 000 - 255 Master Dimmer, 0% to 100% Strobing 000 - 015 Off... - Page 19 DMX TRAITS CHANNEL FUNCTION VALUES 1CH 2CH 3CH 4CH 5CH 6CH 7CH 8CH Color Macros (continued) 144 - 159 Green & Amber 160 - 175 Blue & Amber 176 - 191 Red, Green, & Blue 192 - 207 Red, Green, & Amber 208 - 223 Red, Blue, &...
- Page 20 DMX TRAITS CHANNEL FUNCTION VALUES 1CH 2CH 3CH 4CH 5CH 6CH 7CH 8CH Color Change Mode (continued) 096 - 111 Color Change 7 112 - 127 Color Change 8 128 - 143 Color Change 9 144 - 159 Color Change 10 160 - 175 Color Change 11 176 - 191 Color Change 12 192 - 207 Color Change 13...
- Page 21 DMX TRAITS CHANNEL FUNCTION VALUES 1CH 2CH 3CH 4CH 5CH 6CH 7CH 8CH Sound Active Mode (continued) 048 - 063 Sound Active Mode 4 064 - 079 Sound Active Mode 5 080 - 095 Sound Active Mode 6 096 - 111 Sound Active Mode 7 112 - 127 Sound Active Mode 8 128 - 143 Sound Active Mode 9 144 - 159 Sound Active Mode 10...
-
Page 22: Battery Information
BATTERY INFORMATION BATTERY STATUS: This function is used to check the life status of the battery. Plug the fixture in and press the MODE button until “bXXX” is displayed. “XXX” represents an number between “000” and “100”. The num- ber that is displayed is the remaining battery life. If “b---” is displayed, it means the battery is de- pleted, or that the fixture is running the unit on AC power. -
Page 23: Battery Replacement
BATTERY REPLACEMENT 1. Unplug the unit from power and turn both switches to the off position. Unscrew the four thumb- screws that hold the battery door in place, then remove the battery door. 2. Carefully remove the battery from its compartment. 3. -
Page 24: Re-Initialization
RE-INITIALIZATION After replacing either the PCB or the battery, the unit must be re-initialized by following the steps below. The unit must be re-initialized in order for the battery life readout to be accurate. 1. Make sure the unit is unplugged from any power source. Switch OFF the BATTERY switch and switch ON the LOAD switch. -
Page 25: Photometric Chart | Dimmer Curve Chart
PHOTOMETRIC CHART DISTANCE 1.0 m 2.0 m 3.0m 4.0 m 5.0 m 2520 2220 1980 2200 RGBA 8620 2400 1068 DIMMER CURVE CHART... -
Page 26: Fuse Replacement | Trouble Shooting | Cleaning
FUSE REPLACEMENT Disconnect the unit from its power source, and remove the power cord from the unit. Locate the fuse holder inside the power socket. Insert a flat-head screw driver into the power socket and gently pry out the fuse holder. Remove the bad fuse and replace with a new one. Please note that the fuse holder also has an extra slot for holding a spare fuse. -
Page 27: Warranty
WARRANTY A. ADJ Products, LLC hereby warrants, to the original purchaser, ADJ Products, LLC products to be free of manufacturing defects in material and workmanship for a prescribed period from the date of purchase (see specific warranty period on reverse). This warranty shall be valid only if the product is purchased within the United States of America, including possessions and territories. -
Page 28: Specifications
ADJ Products, LLC 6122 S. Eastern Ave. Los Angeles, CA 90040 USA Tel: 323-582-2650 / Fax: 323-725-6100 Web: www.adj.com / E-mail: info@adj.com A.D.J. Supply Europe B.V. Junostraat 2 6468 EW Kerkrade The Netherlands service@adjgroup.eu / www.adj.eu...
Need help?
Do you have a question about the WIFLY PAR QA5 and is the answer not in the manual?
Questions and answers