Table of Contents

Related Manuals for HOOKE ROAD QP.BXG-054


Summary of Contents for HOOKE ROAD QP.BXG-054
- Page 1 Hard Top Carrier QP.BXG-054 (1)Contents: (2)Tools required: A.Box Cutter or Knife for Packaging; B.Crescent Wrench; (3)Installation time: About 1 hour,Only 1 person needed. Installation time is different according to individual person ( )...
- Page 2 (4)Installation instruction: Step 1: Using a box cutter, carefully open the cardboard box along the corners. Step 2: Once the box is open (Figure A), make sure all pieces and hardware are present. You should have three separate pieces and a box that contains four casters and the adjoining four lock washers and four acorn nuts.
- Page 3 Step 3: Remove the packaging carefully with the box cutter, being certain not to cut into the finish on the pieces (Figure B). Figure B Step 4: Once removed, align your pieces in the appropriate order (Figure C). Figure C...
- Page 4 Step 5: When aligning the pieces, ensure that the bracket pieces are facing upward to choose which side affixes to the left and right (Figure D). Figure D Step 6: Line up holes shown in Figure E according to your vehicle year (align outside holes for Wranglers 67-06;...
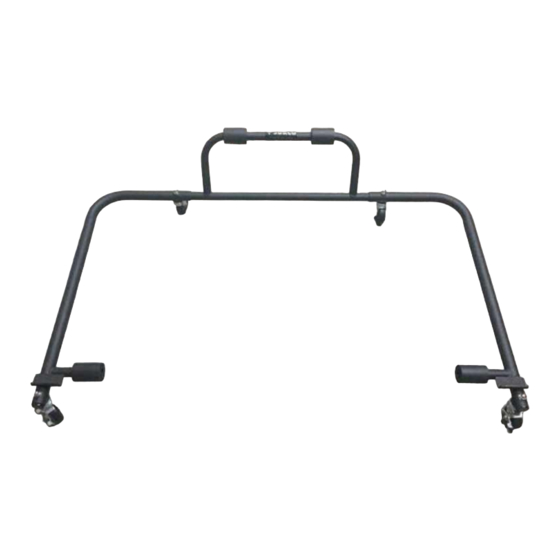
- Page 5 Step 7: Align and insert all four casters (Figure F). Figure F Step 8: Attach the lock washer and acorn nut on each caster (Figure G). Figure G...
- Page 6 Step 9: The locking casters affix to the front end (Figure H); non-locking casters to the back end. Figure H Step 10: Tighten each lock washer and acorn nut with a crescent wrench (Figure I). Figure I...
- Page 7 Step 11: Once you have everything in place you are finished with installation, congratulations on your new product. Completed installation. As shown below. Attention: 1.The product parts in this instruction may differ slightly from the actual product contents but generally does not affect the installation of the product. 2.Please feel free to contact us if you have any kind of question about your purchase.
Need help?
Do you have a question about the QP.BXG-054 and is the answer not in the manual?
Questions and answers