Table of Contents
Advertisement
Quick Links
Advertisement
Table of Contents

Subscribe to Our Youtube Channel
Related Manuals for ICT Protege PRT-RDI2-PCB


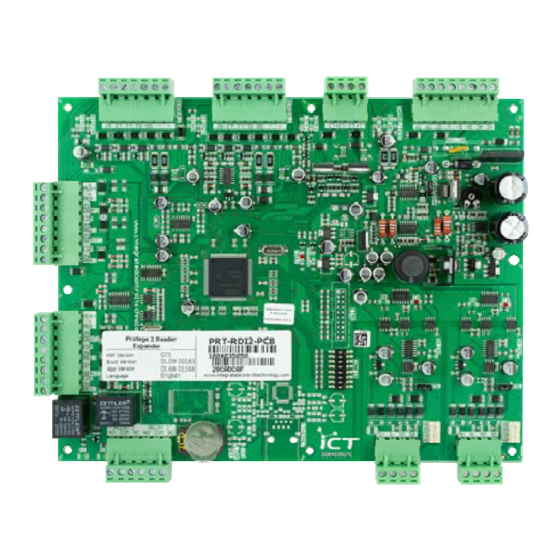
Summary of Contents for ICT Protege PRT-RDI2-PCB
- Page 1 Protege Intelligent 2 Reader Expander Installation Manual...
- Page 2 The specifications and descriptions of products and services contained in this document were correct at the time of printing. Integrated Control Technology Limited reserves the right to change specifications or withdraw products without notice. No part of this document may be reproduced, photocopied, or transmitted in any form or by any means (electronic or mechanical), for any purpose, without the express written permission of Integrated Control Technology Limited.
-
Page 3: Table Of Contents
Contents Introduction _______________________________________________________________ 5 1.1 Document Conventions ....................6 Installation Requirements ___________________________________________________ 7 Installation ________________________________________________________________ 8 3.1 Location and Mounting ....................8 3.2 UL/ULC Installation Cabinet Options ................8 3.3 Wiring Diagram ......................9 3.4 ... - Page 4 Status Indication _________________________________________________________ 30 8.1 Status Indicator ......................30 8.2 Fault Indicator ......................30 8.3 Charge/Test Indicator ....................30 8.4 Auxiliary OK Indicator ....................30 8.5 AC OK Indicator ......................30 8.6 5V Isolated Power Indicator ..................31 8.7 ...
-
Page 5: Introduction
2 X 1N4007 Lock Reverse EMF Protection Diodes Red/Black Backup Battery Wires For more information on the PRT-RDI2-PCB Protege Intelligent Reader Expander and other Integrated Control Technology products please visit the ICT website (http://www.ict.co). PRT-RDI2-PCB Protege Intelligent 2 Reader Expander... -
Page 6: Document Conventions
1.1 Document Conventions This document uses the following conventions: Important warnings or cautionary messages to prevent equipment damage, data loss, or other similar conditions Notes with additional information such as an explanation, a comment, or a clarification about the subject Tips containing practical information that may help you solve a problem or describing actions that may save you time Information relating to UL and ULC compliance... -
Page 7: Installation Requirements
Installation Requirements This equipment is to be installed in accordance with: The Product installation instructions UL 681 - Installation and Classification of Burglar and Holdup Systems UL 827 - Central-Station Alarm Services CAN/ULC-S301, Central and Monitoring Station Burglar Alarm Systems ... -
Page 8: Installation
Installation 3.1 Location and Mounting The Reader Expander is available as a PCB Only (Printed Circuit Board) or complete unit supplied with a metal cabinet. We recommend that the cabinet is used wherever possible as this provides the best mounting and installation solution as well as the required cable entry and termination space. -
Page 9: Wiring Diagram
3.3 Wiring Diagram Protege ® SE Integrated System Gel Cell Tamper Cold water The Protege ® Intelligent Reader Controller or module supplying Backup Switch earth pipe CAUTION: INCORRECT Expander shall be supplied by a +AUX- Z13 COM Z14 Z15 power to networked devices Battery Transformer: dedicated electrical power source rated... -
Page 10: Cabinet Tamper Switch
3.5 Cabinet Tamper Switch The enclosure tamper input signals to the monitoring station or remote computer that the Reader Expander enclosure has been opened. The tamper input switch shall be mounted into the steel bracket provided and connected to the tamper connection terminals as shown in the diagram below. The tamper input opens and closes trouble zone RDxxx:01 on the Reader Expander. -
Page 11: Ac Power
3.7 AC Power The Protege Controller shall be supplied by a dedicated electrical power source rated for a minimum 10Amp load and have a dedicated circuit breaker. Do not use a switch controlled breaker or a switched electrical point to supply electrical power. Connect the primary (120VAC) of a 16 to 16.5 VAC, 60Hz, 40VA or 100VA transformer (refer to the table below) to the electrical circuit and run the secondary (16 to 16.5VAC) to the AC Input on the Controller terminals. -
Page 12: Battery Backup
3.8 Battery Backup It is recommended that a minimum of a 7Ah battery is used as the main battery backup. From the accessory bag provided, connect the battery housing connector to the battery connector on the Controller. Connect the spade terminals to the battery as shown in the diagram below. Connection of the battery in reverse will not damage the Controller but will cause the electronic battery fuse (5A fast blow) to open. -
Page 13: Battery Charge Current Setting
3.9 Battery Charge Current Setting To configure the Reader Expander manually for the charge current, select the appropriate battery current limit setting using the jumpers as shown below. 350mA 700mA Battery Charge Jumper Jumper Location 3.10 Status Indicator The status output will activate according to the status indicator on the Protege Reader Expander and can be used to provide signalling or indication of the Reader Expander status outside the enclosure. -
Page 14: Encrypted Module Network
3.11 Encrypted Module Network The Protege Reader Expander incorporates technically advanced encrypted RS-485 communications technology. The isolated communications interface offers full galvanic isolation to prevent ground loop noise and cross phase ground differential. The communication offers superior interference immunity. Connection of the communications shall be performed according to the following diagram. - Page 15 High Rise Elevator Control is not evaluated for UL/ULC installations Slave Device Network is not to be connected for UL/ULC installations Warning: The 12V N+ and N- communication input must be supplied from only one point. Connections from more than one 12V supply may cause failure or damage to the units supplying power.
-
Page 16: Slave Device Network
3.12 Slave Device Network The Protege Reader Expander incorporates a secondary encrypted RS-485 communication interface that can be used to expand the functionality of the Reader Expander for the purpose of High Rise Elevator Control. A floor control module PRT-PX16 Protege 16 PGM Expander, set as a floor control device, is attached to the slave communication interface. - Page 17 The above diagram shows a power connection taken from the auxiliary power outputs on the Reader Expander's zone terminals. This connection is suitable for smaller systems provided that the: Maximum total output current, AUX DC output current, B1/B2 DC output current, and ...
-
Page 18: Rs-485 Biasing Settings
The EOL (End Of Line) jumper setting MUST be set in the ON position for the LAST slave module on the RS485 network. EOL is ON when the jumper is closest to the EOL text. EOL OFF EOL ON EOL Jumper ... -
Page 19: Door Access Control
Door Access Control The Reader Expander allows the control of two separate access controlled doors used for entry or exit only, and a single access controlled door using entry/exit. 4.1 Reader Connection The Protege Reader Expander allows the connection of 2 reading devices or 4 Wiegand reading devices and the ability to control 2 doors (Entry or Exit Only) or 1 door (Entry and Exit). -
Page 20: Multiple Wiegand Reader Connection
4.2 Multiple Wiegand Reader Connection When operating the reader expander in multiple reader mode the Protege Reader Expander allows the connection of 4 wiegand reading devices controlling two doors each with Entry/Exit readers. When connecting Wiegand readers in multiple reader mode the secondary reader that is connected will have all connections wired to the same port as the primary card reader with the DATA 1 connection wired to the opposite reader connection DATA 1 input. -
Page 21: Door Contact Connection
4.4 Door Contact Connection The Reader Expander allows the connection of up to 4 contacts for monitoring and controlling access control doors. Each zone on the Reader Expander can be used for the door function that is automatically assigned and as a normal zone input on the system. - Page 22 1N4007 Diode 12VDC Electric Locking Device Contact Rating 7A, 30VDC or 30VAC Power Supply for Locking Devices Max 30VDC Door Lock Relay Outputs When using a door with an entry and exit reader, the LOCK output shall be connected to LOCK 1, and enable the swap lock option for the second reader input to allow the reader LED's to display the correct status.
-
Page 23: Zone Inputs
Zone Inputs The Protege Reader Expander has 8 Zone Inputs. The reader expander also monitors 16 trouble zones used to report trouble conditions. A trouble zone is in most cases not physically connected with a device, rather it is related within the system. For example, a module communication fault causes a trouble zone to open as a result of the communication failure. -
Page 24: Resistor Value Options
Each zone input can use a different input configuration. To program a large number of zones, with a single configuration type, use the Multiple Selection feature in the Protege System Management Suite application. When using the No Resistor configuration, the Controller only monitors the opened and closed state of the connected input device generating the (OPEN) Alarm and (CLOSED) Sealed conditions. -
Page 25: Trouble Zone Inputs
5.3 Trouble Zone Inputs Each reader expander can monitor up to 16 trouble zones. Trouble zones are used to monitor the status of the reader expander and in most cases are not physically connected to an external zone. For example, trouble zone RD001:06 is used to monitor door 1 for a forced open condition and will generate an alarm state if the door is forced. -
Page 26: Programmable Outputs
Programmable Outputs The Protege Reader Expander has 4 Programmable Outputs (PGMs). The PGMs are used to activate the Electric Door Locks, Sirens, Lighting Control and Relay Accessory Products. 6.1 Lock PGM Outputs (1 and 2) The + and - terminals of Lock 1 (PGM1 RD001:01) and Lock 2 (PGM2 RD001:02) are used to power electric door strikes and other lock control devices that require a steady voltage output. -
Page 27: Standard Pgm Outputs (3 To 8)
6.2 Standard PGM Outputs (3 To 8) The PGM outputs 3, 4, 5, 6, 7 and 8 on the Protege Reader Expander are open collector outputs and switch to a ground connection. The PGMs have a default pre-programmed function as detailed in the following table and are used to control the indicator and audible outputs on the attached reading device. -
Page 28: Pgm Beeper Outputs Special Functions (5 And 8)
6.3 PGM Beeper Outputs Special Functions (5 and 8) The PGM beeper outputs 5 and 8 on the Reader Expander provide special diagnostic information when a card is presented. The following table shows the beeper modes of operation. Function Description 2 Beeps Access Granted. -
Page 29: Configuration Switch
Configuration Switch The addressing of the Reader Expander allows up to 128 devices to be connected to the system controller. The 'CONFIG' configuration DIP switch allows each Reader Expander to have a unique address. 7.1 Address Configuration The switch positions 1 to 7 select the device address from 1 to 128. When setting an address, the Reader Expander must be powered down (Battery and AC) and restarted for the new address to take effect. -
Page 30: Status Indication
Status Indication The Reader Expander includes comprehensive diagnostic indicators that can aid the installer in diagnosing faults and conditions. In some cases, an indicator may have multiple meanings depending on the status indicator display at the time. 8.1 Status Indicator The Status Indicator is located in the centre of the PCB and indicates the status of the Protege Reader Expander. -
Page 31: Isolated Power Indicator
8.6 5V Isolated Power Indicator The Reader Expander communicates using an isolated RS-485 interface for optimal performance and this requires an isolated supply on the N+ and N- terminals. When a valid power supply is available the '5V ISO' indicator will be ON for the interface. The '5V ISO' indication is located at the top of the network isolated interface. -
Page 32: Error Code Indication
Error Code Indication When the Reader Expander attempts to register or communicate with the system controller a registration error can be generated indicating that it was not successful. 9.1 Error Code Display The following table is only valid if the FAULT indicator is ON and the STATUS indicator is FLASHING GREEN. If the fault indicator is FLASHING the Reader Expander requires a firmware update or is currently in firmware update mode. -
Page 33: Technical Specifications
Integrated Control Technology continually strives to increase the performance of its products. As a result these specifications may change without notice. We recommend consulting the ICT website (http://www.ict.co) for the latest documentation and product information. -
Page 34: Current And Validation Example 1
Warning: The total combined current must not exceed a maximum of 1.7A if a 37/40VA transformer is used, or a maximum of 2.5A if a 60VA or greater transformer is used. The transformer can be damaged if the total combined current exceeds its capability. The total combined current is the sum of the operating current, charging current, and DC Outputs (AUX, L1 and L2, R1 and R2). -
Page 35: Current And Validation Example 2
10.2 Current and Validation Example 2 The example shown below refers to the specifications needed to help ensure the correct installation of the Protege Reader Expander. Specifications have to be validated to ensure that individual maximum currents and total combined current are not exceeded. Using a 80VA Transformer External Devices Connected to Panel 2 x PRX-NPROX Nano Prox Card Readers (120mA @ 13.8VDC) connected on Reader 1 and Reader 2 Outputs... -
Page 36: Maximum Total Output Current : Ul And Ulc Installations
10.3 Maximum Total Output Current : UL and ULC Installations The following table describes the maximum total output current available for standby operation using an external VRLA battery in order to comply with UL and ULC standby requirements. Maximum Total Output Charging Jumper Application Current Available... -
Page 37: Current And Validation (Ul Installation) Example 2
Validation In order to comply with UL294 4 hr standby requirements, is the Total Yes, it is 340mA Output Current less or equal to 1200mA (1.2A)? Is the DC Output (AUX) current less or equal to 700mA? Yes, it is 100mA ... - Page 38 Validation In order to comply with ULC-S319 30-min standby requirements, is the Total Yes, it is 1.38A (1380mA) Output Current less or equal to 2A? Is the DC Output current (AUX) less or equal to 700mA? Yes, it is 100mA ...
-
Page 39: New Zealand And Australia
11 New Zealand and Australia General Product Statement The RCM compliance label indicates that the supplier of the device asserts that it complies with all applicable standards. PRT-RDI2-PCB Protege Intelligent 2 Reader Expander Installation Manual | June 2017... -
Page 40: European Standards
Access class B EN 50133-1:1998 ICT enclosure all products, CAB-JMB-NOT, has been tested and certified to EN50131. By design, the ICT enclosure for all products, CAB-FBY-NOT, complies with the EN50131 standards. Tamper protection against removal of the cover as well as removal from mounting is provided by tamper switch. - Page 41 EN 50131 In order to comply with EN 50131-1 the following points should be noted: Ensure for Grade 3 compliant systems, the minimum PIN length is set for 6 digits. To comply with EN 50131-1 Engineer access must first be authorized by a user, therefore Installer codes will only be accepted when the system is unset.
-
Page 42: Ul And Ulc Installation Requirements
13 UL and ULC Installation Requirements Only UL / ULC listed compatible products are intended to be connected to a UL / ULC listed access control system. 13.1 CAN/ULC-S319-05 The Models PRT-CTRL-SE and PRT-RDI2-PCB are intended to be mounted within the Model CAB-LARGE-UL enclosure, installed inside the protected premise, and are CAN/ULC-S319 Listed for Class I applications only ... -
Page 43: Fcc Compliance Statements
14 FCC Compliance Statements FCC PART 15, WARNINGS: INFORMATION TO USER This equipment has been tested and found to comply with the limits for a Class B digital device, pursuant to Part 15 of the FCC Rules. These limits are designed to provide reasonable protection against harmful interference in a residential installation. -
Page 44: Industry Canada Statement
15 Industry Canada Statement This class B digital apparatus complies with Canadian ICES-003. Cet appareil numérique de la classe B est conforme à la norme NMB-003 du Canada. PRT-RDI2-PCB Protege Intelligent 2 Reader Expander Installation Manual | June 2017... -
Page 45: Ordering Information
Includes Accessory Bag To order the Protege Intelligent Reader Expander in a cabinet order the CAB-LRG large steel cabinet complete with transformer and tamper connections. Manuals and additional literature are available on the ICT Website (http://www.ict.co). PRT-RDI2-PCB Protege Intelligent 2 Reader Expander... -
Page 46: Warranty
ICT's obligation and liability under this warranty is expressly limited to repairing or replacing, at ICT's option, any product not meeting the specifications. In no event shall ICT be liable to the buyer or any other person for any loss or damages whether direct or indirect or consequential or... -
Page 47: Contact
18 Contact Integrated Control Technology welcomes all feedback. Please visit our website (http://www.ict.co) or use the contact information below. Integrated Control Technology P.O. Box 302-340 4 John Glenn Ave North Harbour Post Centre Rosedale Auckland North Shore City 0632 New Zealand... - Page 48 Integrated Control Technology Limited 4 John Glenn Avenue, Rosedale, Auckland 0632 PO Box 302-340, North Harbour, Auckland 0751, New Zealand Email: sales@ict.co Toll Free: (0800) 428 111 Phone: 64 (9) 476 7124 AMERICAS Integrated Control Technology (USA) LLC 5265 S Rio Grande Street, Suite 201, Littleton, CO 80120 Email: ussales@ict.co Toll Free: (855) 428 9111 Phone: 720 442 0767...
Need help?
Do you have a question about the Protege PRT-RDI2-PCB and is the answer not in the manual?
Questions and answers