
Subscribe to Our Youtube Channel
Related Manuals for Outsunny 842-186


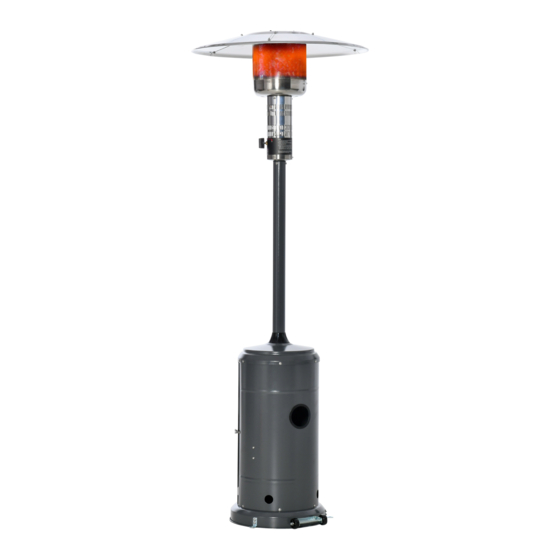
Summary of Contents for Outsunny 842-186
- Page 1 INbza015_UK 842-186 IMPORTANT, RETAIN FOR FUTURE REFERENCE: READ CAREFULLY ASSEMBLY & INSTRUCTION MANUAL...
-
Page 2: Table Of Contents
Patio Heater Safety Warnings -----------------------------------------------1-2 Part List ----------------------------------------------------------------------------3 Patio Heater Assembly -------------------------------------------------------4-6 Operating Instructions ----------------------------------------------------------7 Leak Testing ----------------------------------------------------------------------7 Gas Requirement ----------------------------------------------------------------8 Connecting To a Gas Cylinder -------------------------------------------------8 Important Safety Rules ---------------------------------------------------------9 Maintenance ----------------------------------------------------------------------9 Servicing --------------------------------------------------------------------------9 Storage ----------------------------------------------------------------------------9 Troubleshooting------------------------------------------------------------------9 Technical Data --------------------------------------------------------------10-11 PATIO HEATER SAFETY WARNINGS PLEASE READ THE INSTRUCTIONS CAREFULLY BEFORE INSTALLATION AND USE. - Page 3 Shut off the valve at the gas cylinder or the regulator before moving the appliance. Use only the type of gas specified by the manufacturer. Repairs should be done by a qualified person. In case of violent wind, particular attention must be taken against tilting of the appliance.
-
Page 4: Part List
Reflector Panel Reflector Plate Head Assembly Deck Ring Top of Housing (preassembled) Door (preassembled) Door Lock (preassembled) Rear of Housing (preassembled) Gas Pipe Hose & Regulator (not included) Post Base (preassembled) Wheel Kit M8*16 M6*16 Φ6 Φ5 M6*8 M5*10 M5*12... -
Page 5: Patio Heater Assembly
Instruction before assembly Required Tools: Philip Screwdriver / Adjustable Spanners / Wrenches Leak Detection Solution: one part detergent and three parts water Assemble all nuts and bolts loosely at first. Tighten all connections after completion of assembly. This eases your work and increases the stability of your appliance. - Page 6 3. Attach reflector panels (A) together using M6 x 8mm screws(FF), Φ6 washers (DD) and cap nuts (GG). Secure loosely with cap nuts (GG). Note: In order to achieve proper alignment of reflector sections,it may be necessary to loosen the preassembled bolts prior to assembly and retighten once complete.
- Page 7 6. Buy at least 1.3m gas hose and regulator from local market. Connect hose & regulator to gas pipe (I). Insert gas pipe with hose & regulator assembly (I/J) through top of housing (E) and Post (K), tighten gas pipe (I) to head assembly(C).
-
Page 8: Operating Instructions
OPERATING INSTRUCTIONS BEFORE FIRST USE AND AFTER EVERY GAS CYLINDER CHANGE, GAS DELIVERY SYSTEM MUST BE PURGED OF AIR BEFORE IGNITING! TO DO THIS, TURN THE CONTROL KNOB ANTI-CLOCKWISE TO THE PILOT SETTING. PRESS KNOB IN AND HOLD FOR 3 MINUTES BEFORE ATTEMPTING IGNITION. TO LIGHT THE PILOT Check all connections prior to each use. -
Page 9: Gas Requirement
GAS REQUIREMENTS The pressure regulator and hose assembly to be used must conform to local standard codes. Never use a gas cylinder with a damaged body, valve, collar, or foot ring. A dented or rusty gas tank may be hazardous and should be checked out by a gas supplier. -
Page 10: Maintenance
MAINTENANCE To enjoy years of outstanding performance from your heater, make sure you perform the following maintenance activities on a regular basis: Keep exterior surfaces clean. Use warm soapy water for cleaning. Never use flammable or corrosive cleaning agents. While washing your unit, be sure to keep the area around the burner and pilot assembly dry at all times. -
Page 11: Technical Data
If for some reasons your ignition fails to deliver a spark, the heater can be started by inserting a lit match using supplied match holder through the burner hole (see left photo) while pushing the control knob in the “PILOT” position, which shall be performed by a qualified person IN THE EVENT OF ANY PROBLEM, PLEASE ALWAYS CONSULT YOUR LOCAL DEALER. - Page 12 Warning: The appliance shall only be installed or operated with maximum height from the rim of reflector to the ground, so the adjustable device shall be fixed according to this requirement.’ Use only regulator and hose approved for LP Gas at the correct pressures and gas type.
Need help?
Do you have a question about the 842-186 and is the answer not in the manual?
Questions and answers