
Related Manuals for Daikin EKVDX-A


Summary of Contents for Daikin EKVDX-A
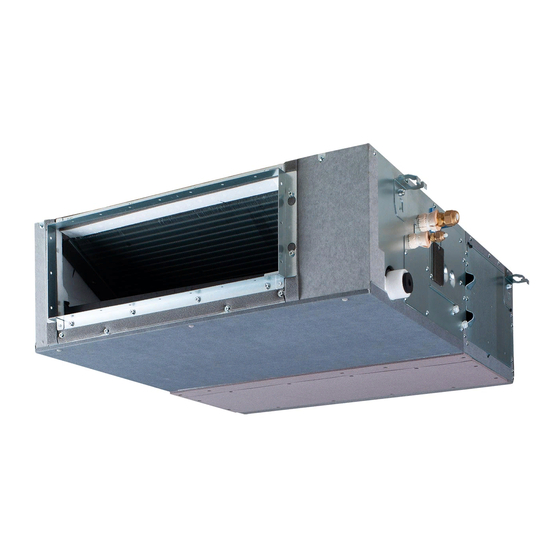
- Page 1 Installer and user reference guide VRV system air conditioner EKVDX32A2VEB EKVDX50A2VEB EKVDX80A2VEB EKVDX100A2VEB...
-
Page 2: Table Of Contents
Table of contents Table of contents 1 About the documentation About this document ..............................2 General safety precautions About the documentation .............................. 2.1.1 Meaning of warnings and symbols ........................ For the installer ................................2.2.1 General ................................2.2.2 Installation site ............................... 2.2.3 Refrigerant —... - Page 3 Table of contents 13 About the box 13.1 Overview: About the box ..............................49 13.2 Indoor unit ..................................49 13.2.1 To unpack and handle the unit ........................49 13.2.2 To remove the accessories from the indoor unit ..................50 13.2.3 To remove the duct flanges from the indoor unit..................
- Page 4 Table of contents 24 Disposal 25 Technical data 25.1 Wiring diagram................................90 26 Glossary Installer and user reference guide EKVDX32~100A2VEB VRV system air conditioner 4P664010-1 – 2021.08...
-
Page 5: About The Documentation
The original documentation is written in English. All other languages are translations. Technical engineering data ▪ A subset of the latest technical data is available on the regional Daikin website (publicly accessible). EKVDX32~100A2VEB Installer and user reference guide VRV system air conditioner... - Page 6 About the documentation ▪ The full set of latest technical data is available on the Daikin Business Portal (authentication required). EKVDX32~100A2VEB Installer and user reference guide VRV system air conditioner 4P664010-1 – 2021.08...
-
Page 7: General Safety Precautions
General safety precautions 2 General safety precautions In this chapter About the documentation..............................2.1.1 Meaning of warnings and symbols ........................For the installer..................................2.2.1 General ................................... 2.2.2 Installation site ............................... 2.2.3 Refrigerant — in case of R410A or R32 ......................... 2.2.4 Electrical ................................. -
Page 8: For The Installer
Improper installation or attachment of equipment or accessories could result in electrical shock, short-circuit, leaks, fire or other damage to the equipment. ONLY use accessories, optional equipment and spare parts made or approved by Daikin. WARNING Make sure installation, testing and applied materials comply with applicable legislation (on top of the instructions described in the Daikin documentation). -
Page 9: Installation Site
General safety precautions CAUTION Wear adequate personal protective equipment (protective gloves, safety glasses,…) when installing, maintaining or servicing the system. WARNING Tear apart and throw away plastic packaging bags so that nobody, especially children, can play with them. Possible risk: suffocation. WARNING Provide adequate measures to prevent that the unit can be used as a shelter by small animals. -
Page 10: Refrigerant - In Case Of R410A Or R32
General safety precautions 2.2.3 Refrigerant — in case of R410A or R32 If applicable. See the installation manual or installer reference guide of your application for more information. NOTICE Make sure refrigerant piping installation complies with applicable legislation. In Europe, EN378 is the applicable standard. NOTICE Make sure the field piping and connections are NOT subjected to stress. -
Page 11: Electrical
General safety precautions WARNING Make sure there is no oxygen in the system. Refrigerant may ONLY be charged after performing the leak test and the vacuum drying. Possible consequence: Self-combustion and explosion of the compressor because of oxygen going into the operating compressor. ▪... - Page 12 General safety precautions WARNING If NOT factory installed, a main switch or other means for disconnection, having a contact separation in all poles providing full disconnection under overvoltage category III condition, MUST be installed in the fixed wiring. WARNING ▪ ONLY use copper wires. ▪...
- Page 13 General safety precautions Install power cables at least 1 meter away from televisions or radios to prevent interference. Depending on the radio waves, a distance of 1 meter may NOT be sufficient. WARNING ▪ After finishing the electrical work, confirm that each electrical component and terminal inside the electrical components box is connected securely.
-
Page 14: Specific Installer Safety Instructions
WARNING Make sure installation, servicing, maintenance, repair and applied materials follow the instructions from Daikin and, in addition, comply with applicable legislation and are performed by qualified persons only. In Europe and areas where IEC standards apply, EN/IEC 60335-2-40 is the applicable standard. - Page 15 Specific installer safety instructions NOTICE ▪ Do NOT use mineral oil on flared part. ▪ Do NOT reuse piping from previous installations. ▪ NEVER install a drier to this unit to guarantee its lifetime. The drying material may dissolve and damage the system. NOTICE ▪...
-
Page 16: Instructions For Equipment Using R32 Refrigerant
Specific installer safety instructions WARNING ALWAYS use multicore cable for power supply cables. WARNING Use an all-pole disconnection type breaker with at least 3 mm between the contact point gaps that provide full disconnection under overvoltage category III. WARNING The VAM and the EKVDX indoor unit MUST share the same electrical safety devices and power supply. - Page 17 WARNING Make sure installation, servicing, maintenance and repair comply with instructions from Daikin and with applicable legislation and are executed ONLY by authorised persons. WARNING If one or more rooms are connected to the unit using a duct system, make sure: ▪...
-
Page 18: Installation Space Requirements
Specific installer safety instructions NOTICE ▪ Do NOT re-use joints and copper gaskets which have been used already. ▪ Joints made in installation between parts of refrigerant system shall be accessible for maintenance purposes. 3.1.1 Installation space requirements If the system uses R32 refrigerant, extra safety measures are required because R32 refrigerant is mildly flammable. -
Page 19: To Determine The Charge Limitations
Specific installer safety instructions 3.1.2 To determine the charge limitations Overview R32 charge limitations Case 1: VAM+EKVDX and indoor unit Case 2: VAM+EKVDX only Lowest underground floor + Lowest underground floor + Other floors only Other floors only other floors other floors For A1 and A2: see For A2: see... - Page 20 Specific installer safety instructions m (kg) m (kg) m (kg) / 1.9 13.8 / 6.9 24.3 / 12.1 / 2.0 14.1 / 7.0 24.6 / 12.3 / 2.1 14.5 / 7.2 24.9 / 12.4 / 2.2 14.8 / 7.4 25.3 / 12.6 / 2.3 15.1...
- Page 21 Specific installer safety instructions WARNING For VAM+EKVDX, only consider rooms that are continuously served. E.g. In case of zonal dampers in the duct between EKVDX and a room, this room cannot be considered as part of the total room area. Only exception are zonal dampers only used for fire safety.
-
Page 22: To Determine The Floor Area
Specific installer safety instructions m (kg) 14.4 3‒1 Example Case 2: VAM+ EKVDX only Step 1 – determine A : the total area of all the rooms which the EKVDX unit is discharging air into. See "3.1.3 To determine the floor area" [ 22]. Step 2 –... - Page 23 Specific installer safety instructions ▪ Do not consider spaces connected by only false ceilings, ductwork or similar connections as a single space. ▪ If the partition between 2 rooms on the same floor meets certain requirements, the rooms are considered as one room and the areas of the rooms may be added up.
-
Page 24: For The User
For the user EKVDX32~100A2VEB Installer and user reference guide VRV system air conditioner 4P664010-1 – 2021.08... -
Page 25: User Safety Instructions
User safety instructions 4 User safety instructions Always observe the following safety instructions and regulations. In this chapter General....................................Instructions for safe operation............................... 4.1 General WARNING If you are NOT sure how to operate the unit, contact your installer. WARNING This appliance can be used by children aged from 8 years and above and persons with reduced physical, sensory or mental capabilities or lack of experience and knowledge if... -
Page 26: Instructions For Safe Operation
User safety instructions ▪ Units are marked with the following symbol: This means that electrical and electronic products may NOT be mixed with unsorted household waste. Do NOT try to dismantle the system yourself: the dismantling of the system, treatment of the refrigerant, of oil and of other parts MUST be done by an authorised installer and MUST comply with applicable legislation. - Page 27 User safety instructions CAUTION This unit is equipped with electrically powered safety measures, such as a refrigerant leak detector. In order to be effective, the unit must be electrically powered at all times after installation, except for short service periods. CAUTION NEVER touch the internal parts of the controller.
- Page 28 User safety instructions WARNING Do NOT place a flammable spray bottle near the air conditioner and do NOT use sprays near the unit. Doing so may result in a fire. Maintenance and service (see "9 Maintenance and service" [ 39]) WARNING NEVER replace a fuse with a fuse of a wrong ampere ratings or other wires when a fuse blows out.
- Page 29 User safety instructions WARNING The appliance using R32 refrigerant shall be stored so as to prevent mechanical damage and in a well-ventilated room without continuously operating ignition sources (e.g. open flames, an operating gas appliance, or an operating electric heater). The room size shall be as specified in the General safety precaution.
- Page 30 User safety instructions "10 Troubleshooting" [ 42]) Troubleshooting (see WARNING Stop operation and shut OFF the power if anything unusual occurs (burning smells etc.). Leaving the unit running under such circumstances may cause breakage, electrical shock or fire. Contact your dealer. DANGER: RISK OF ELECTROCUTION To clean the air conditioner, be sure to stop operation and turn all power supplies OFF.
-
Page 31: About The System
About the system 5 About the system WARNING ▪ Do NOT modify, disassemble, remove, reinstall or repair the unit yourself as incorrect dismantling or installation may cause an electrical shock or fire. Contact your dealer. ▪ In case of accidental refrigerant leaks, make sure there are no naked flames. The refrigerant itself is entirely safe and non-toxic. - Page 32 About the system 5‒1 For VAM500~1000 and EKVDX32~80 5‒2 For VAM1500+2000 and EKVDX100 a Heat reclaim ventilation unit (VAM) b EKVDX indoor unit c Outdoor unit d User interface e Air inlet duct for EKVDX indoor unit f Discharge air g Duct flange(s) h Drain pipe i Refrigerant piping + transmission cable EKVDX32~100A2VEB...
-
Page 33: Compatibility With Vam Models
About the system 5.2 Compatibility with VAM models EKVDX32 EKVDX50 EKVDX80 EKVDX100 VAM500J8 ● — — — VAM650J8 — ● — — VAM800J8 — ● — — VAM1000J8 — — ● — VAM1500J8 — — — ● VAM2000J8 — — —... -
Page 34: User Interface
User interface 6 User interface Each EKVDX unit MUST be connected to a separate user interface. The user interface BRC1H* (or a compatible H-type user interface) MUST be used. NOTICE Do NOT wipe the controller operation panel with benzine, thinner, chemical dust cloth, etc. -
Page 35: Operation
Operation 7 Operation In this chapter Before operation ..................................Operation range..................................About operation modes ................................. 7.3.1 Basic operation modes............................7.3.2 Special heating operation modes .......................... To operate the system................................7.1 Before operation WARNING This unit contains electrical and hot parts. WARNING Before operating the unit, be sure the installation has been carried out correctly by an installer. -
Page 36: About Operation Modes
Operation ▪ The supply air coming from the heat reclaim ventilation unit should correspond to the following temperature and humidity ranges. Cooling Heating Air supply temperature 11~35°C DB Indoor humidity ≤80% Setting temperature range 13~30°C 24~45°C To avoid condensation and water dripping out of the unit. If the temperature or the humidity is beyond these conditions, safety devices may be put in action and the air conditioner may not operate. -
Page 37: Special Heating Operation Modes
Operation 7.3.2 Special heating operation modes Operation Description Defrost To prevent a loss of heating capacity due to frost accumulation in the outdoor unit, the system will automatically switch to defrost operation. The supply air fan will stop operation while the exhaust air fan will resume operation as before defrost operation started. -
Page 38: Energy Saving And Optimum Operation
Energy saving and optimum operation 8 Energy saving and optimum operation CAUTION NEVER expose little children, plants or animals directly to the airflow. NOTICE Do NOT place objects below the indoor and/or outdoor unit that may get wet. Otherwise condensation on the unit or refrigerant pipes, air filter dirt or drain blockage may cause dripping, and objects under the unit may get dirty or damaged. -
Page 39: Maintenance And Service
Maintenance and service 9 Maintenance and service In this chapter Cleaning the air outlet ................................9.1.1 To clean the air outlet ............................Maintenance before a long stop period ..........................Maintenance after a long stop period ........................... About the refrigerant ................................9.4.1 About R32 refrigerant leakage safety........................ -
Page 40: About R32 Refrigerant Leakage Safety
Maintenance and service This product contains fluorinated greenhouse gases. Do NOT vent gases into the atmosphere. The EKVDX contains either R32 or R410A refrigerant. The EKVDX has an automatic refrigerant detection function. You do not need to identify the refrigerant via a field setting. Refrigerant type R410A Global warming potential (GWP) - Page 41 Maintenance and service Airflow rate threshold levels Airflow rates too low imply a safety concern in case there is R32 leakage. Therefore, when the R32 safety settings are active, three airflow rate threshold levels are taken into account. Level Airflow rate System response Action required Lower than...
-
Page 42: Troubleshooting
Troubleshooting 10 Troubleshooting If one of the following malfunctions occur, take the measures shown below and contact your dealer. WARNING Stop operation and shut OFF the power if anything unusual occurs (burning smells etc.). Leaving the unit running under such circumstances may cause breakage, electrical shock or fire. -
Page 43: Symptoms That Are Not System Malfunctions
Troubleshooting Malfunction Measure The system operates but ▪ Check if air inlet or outlet of outdoor or indoor cooling or heating is unit is not blocked by obstacles. Remove any insufficient. obstacles and make sure the air can flow freely. ▪... -
Page 44: Symptom: White Mist Comes Out Of A Unit (Indoor Unit)
Troubleshooting ▪ The system does not start immediately after the power supply is turned on. Wait one minute until the micro computer is prepared for operation. 10.1.2 Symptom: White mist comes out of a unit (Indoor unit) ▪ When humidity is high during cooling operation (in oily and dusty places). If the interior of an indoor unit is extremely contaminated, the temperature distribution inside a room becomes uneven. -
Page 45: Symptom: The Units Can Give Off Odours
Troubleshooting 10.1.8 Symptom: The units can give off odours The unit can absorb the smell of rooms, furniture, cigarettes, etc., and then emit it again. EKVDX32~100A2VEB Installer and user reference guide VRV system air conditioner 4P664010-1 – 2021.08... -
Page 46: Relocation
Relocation 11 Relocation Contact your dealer for removing and reinstalling the total unit. Moving units requires technical expertise. EKVDX32~100A2VEB Installer and user reference guide VRV system air conditioner 4P664010-1 – 2021.08... -
Page 47: Disposal
Disposal 12 Disposal NOTICE Do NOT try to dismantle the system yourself: dismantling of the system, treatment of the refrigerant, oil and other parts MUST comply with applicable legislation. Units MUST be treated at a specialised treatment facility for reuse, recycling and recovery. EKVDX32~100A2VEB Installer and user reference guide VRV system air conditioner... - Page 48 For the installer EKVDX32~100A2VEB Installer and user reference guide VRV system air conditioner 4P664010-1 – 2021.08...
-
Page 49: About The Box
About the box 13 About the box In this chapter 13.1 Overview: About the box................................ 13.2 Indoor unit ....................................13.2.1 To unpack and handle the unit ..........................13.2.2 To remove the accessories from the indoor unit ....................13.2.3 To remove the duct flanges from the indoor unit....................13.1 Overview: About the box This chapter describes what you have to do after the box with the indoor unit is delivered on-site. -
Page 50: To Remove The Accessories From The Indoor Unit
About the box 13.2.2 To remove the accessories from the indoor unit 1× 1× 4× 52× 4× 1× 1× 1× 3× 8× 1× 4× 3× 1× 1× 1× 1× 1× 1× a Installation and operation manual b General safety precautions c Screws for duct flanges (EKVDX32A2) d Screws for duct flanges (EKVDX50~100A2) e Auxiliary pipe (gas) (Ø15.9 mm) -
Page 51: To Remove The Duct Flanges From The Indoor Unit
About the box 13.2.3 To remove the duct flanges from the indoor unit Duct flange for EKVDX32A2 4× Duct flange(s) for EKVDX50~100A2 The procedure below shows the EKVDX100A2 but is similar for the EKVDX50-80A2 that only have 1 duct flange (reducer). 12×... -
Page 52: About The Units And Options
About the units and options 14 About the units and options In this chapter 14.1 Identification................................... 14.1.1 Identification label: Indoor unit ..........................14.2 About the indoor unit................................14.3 System layout..................................14.4 Combining units and options..............................14.4.1 Possible options for the indoor unit ........................14.4.2 Compatibility with outdoor unit .......................... -
Page 53: System Layout
About the units and options INFORMATION The EKVDX is a pretreatment unit. Therefore, the temperature setpoints: ▪ are not displayed on the user interface. ▪ can only be modified with field settings (see "19.4 Field settings" [ 80] for the appropriate field settings). -
Page 54: Combining Units And Options
About the units and options 14‒2 For VAM1500+2000 and EKVDX100 a Heat reclaim ventilation unit (VAM) b EKVDX indoor unit c Outdoor unit d User interface e Air inlet duct for EKVDX indoor unit f Discharge air g Duct flange(s) h Drain pipe i Refrigerant piping + transmission cable 14.4 Combining units and options INFORMATION... -
Page 55: Possible Options For The Indoor Unit
About the units and options 14.4.1 Possible options for the indoor unit CAUTION ▪ Each VAM unit is connected to only ONE EKVDX unit (via duct and electrical connection). ▪ When connected to an EKVDX unit, there is NO connection of the VAM to any other indoor unit, linkage or multiple EKVDX units. -
Page 56: Unit Installation
Unit installation 15 Unit installation WARNING In case of R32 refrigerant, the installation MUST comply with the requirements that apply to this R32 equipment. For more information, see "3.1 Instructions for equipment using R32 refrigerant" [ 16]. In this chapter 15.1 Preparing the installation site .............................. - Page 57 Unit installation ▪ In places where a mineral oil mist, spray or vapour may be present in the atmosphere. Plastic parts may deteriorate and fall off or cause water leakage. It is NOT recommended to install the unit in the following places because it may shorten the life of the unit: ▪...
-
Page 58: Mounting The Indoor Unit
Unit installation c ≥600 (mm) A Side view: refrigerant piping, drain piping, control box B Side view: air outlet C Bottom view a Ceiling opening – width: 900 mm (EKVDX32) 950 mm (EKVDX50~100) b Ceiling opening – length: 550 mm (EKVDX32) 700 mm (EKVDX50) 1000 mm (EKVDX80) 1400 mm (EKVDX100) c Service space... -
Page 59: Guidelines When Installing The Ducting
Unit installation ▪ Suspension bolts. Use M10 suspension bolts for installation. Attach the hanger bracket to the suspension bolt. Fix it securely using a nut and washer from the upper and lower sides of the hanger bracket. 4× e=630 (mm) a Nut (field supply) b Washer (accessories) c Hanger bracket... -
Page 60: Guidelines When Installing The Drain Piping
Unit installation 1 Connect the canvas duct to the inside of the flange on the outlet side. For connecting the canvas duct, use accessory screws. 2 Connect the duct to the canvas duct. a Screws for duct flanges (accessory) b Duct flange, rectangular (installed on the unit) c Indoor unit d Insulation (field supply) e Canvas duct (field supply) -
Page 61: To Connect The Drain Piping To The Indoor Unit
Unit installation b Drain hose (accessory) c Rising drain piping (vinyl pipe nominal Ø20 mm and outer Ø26 mm) d Hanging bars (field supply) ▪ Combining drain pipes. You can combine drain pipes. Make sure to use drain pipes and T-joints with the correct gauge for the operating capacity of the units. (mm) a T-joint 15.2.4 To connect the drain piping to the indoor unit... - Page 62 Unit installation d Sealing pad (accessory) 6 Connect the drain piping to the drain hose. e Drain piping (field supply) NOTICE ▪ Do NOT remove the drain pipe plug. Water might leak out. ▪ Use the drain outlet only to discharge the water before maintenance. ▪...
-
Page 63: Piping Installation
Piping installation 16 Piping installation In this chapter 16.1 Preparing refrigerant piping ..............................16.1.1 Refrigerant piping requirements ........................... 16.1.2 Refrigerant piping insulation..........................16.2 Connecting the refrigerant piping............................16.2.1 About connecting the refrigerant piping....................... 16.2.2 Precautions when connecting the refrigerant piping.................... 16.2.3 Guidelines when connecting the refrigerant piping.................... -
Page 64: Refrigerant Piping Insulation
Piping installation ▪ Piping temper grade and thickness: Outer diameter (Ø) Temper grade Thickness (t) Ø 6.4 mm (1/4") Annealed (O) ≥0.8 mm 9.5 mm (3/8") 12.7 mm (1/2") 15.9 mm (5/8") Depending on the applicable legislation and the maximum working pressure of the unit (see "PS High"... -
Page 65: Precautions When Connecting The Refrigerant Piping
Piping installation ▪ Keeping in mind the guidelines for: Pipe bending Flaring pipe ends Using the stop valves 16.2.2 Precautions when connecting the refrigerant piping INFORMATION Also read the precautions and requirements in the following chapters: ▪ General safety precautions ▪... -
Page 66: Guidelines When Connecting The Refrigerant Piping
Piping installation INFORMATION Do NOT open the refrigerant stop valve before checking the refrigerant piping. When you need to charge additional refrigerant it is recommended to open the refrigerant stop valve after charging. 16.2.3 Guidelines when connecting the refrigerant piping Take the following guidelines into account when connecting pipes: ▪... -
Page 67: To Connect The Refrigerant Piping To The Indoor Unit
Piping installation a Cut exactly at right angles. b Remove burrs. 3 Remove the flare nut from the stop valve and put the flare nut on the pipe. 4 Flare the pipe. Set exactly at the position as shown in the following figure. Flare tool for R32 Conventional flare tool (clutch type) - Page 68 Piping installation f Unit g Sealing pads: gas pipe, liquid pipe (accessories) 1 Turn up the seams of the insulation pieces. 2 Attach to the base of the unit. 3 Tighten the tie wrap on the insulation pieces. 4 Wrap the sealing pad from the base of the unit to the top of the flare nut. In case of R32 refrigerant, for some connections an auxiliary pipe (accessory) must be installed and insulated using the correct insulation tube (accessory): Model...
-
Page 69: Electrical Installation
Electrical installation 17 Electrical installation CAUTION "3 Specific installer safety instructions" [ 14] to make sure this installation complies with all safety regulations. In this chapter 17.1 About connecting the electrical wiring ..........................17.1.1 Precautions when connecting the electrical wiring ....................17.1.2 Guidelines when connecting the electrical wiring .................... -
Page 70: Guidelines When Connecting The Electrical Wiring
Electrical installation WARNING ▪ If the power supply has a missing or wrong N-phase, equipment might break down. ▪ Establish proper earthing. Do NOT earth the unit to a utility pipe, surge absorber, or telephone earth. Incomplete earthing may cause electrical shock. ▪... -
Page 71: Specifications Of Standard Wiring Components
Electrical installation Wire type Installation method Stranded conductor wire with round crimp-style terminal a Terminal b Screw c Flat washer Allowed NOT allowed Tightening torques Wiring Screw size Tightening torque (N•m) Power supply cable 1.2~1.4 Transmission cable M3.5 0.79~0.97 (indoor↔outdoor) User interface cable ▪... -
Page 72: To Connect The Electrical Wiring To The Indoor Unit
Electrical installation 17.2 To connect the electrical wiring to the indoor unit CAUTION "3 Specific installer safety instructions" [ 14] to make sure this installation complies with all safety regulations. NOTICE ▪ Follow the wiring diagram (delivered with the unit, located at the inside of the service cover). - Page 73 Electrical installation 3× P1P2 F1 F2 T1 T2 a Power supply and earth wiring b Service cover with wiring diagram c Transmission wiring 6 Fix the cables with tie wraps (see accessory bag) to the plastic clamps. Note: One of the remaining two tie wraps from the accessory bag is for the relay PCB wiring and one is a spare tie wrap.
-
Page 74: To Connect The External Outputs
Electrical installation e Normal VRV indoor unit 17.3 To connect the external outputs The applied current of the external device MUST be less or equal than 1 A. Install a fuse ≤1 A to protect the internal PCB contact. If the applied current of the external device is more than 1 A, the use of a field supplied external relay is mandatory to limit the current in the internal PCB contact. - Page 75 Electrical installation WARNING In case of R32 refrigerant, terminal connections T1/T2 are for fire alarm input ONLY. Fire alarm has a higher priority than R32 safety and shuts the entire system down. a Fire alarm input signal (potential free contact) NOTICE The user interface has to be in fully functional mode or in alarm only mode.
-
Page 76: System Configuration
System configuration 18 System configuration 18.1 Independent system EKVDX F1 F2 P1 P2 F1 F2 P1 P2 P1 P2 EKVDX F1 F2 F1 F2 P1 P2 F1 F2 P1 P2 P1 P2 P1 P2 a Outdoor unit b Controller VRV VRV indoor unit EKVDX EKVDX indoor unit VAM VAM heat reclaim ventilation unit NOTICE... -
Page 77: Central Control System
System configuration 18.2 Central control system EKVDX F1 F2 P1 P2 F1 F2 P1 P2 F1 F2 P1 P2 EKVDX F1 F2 F1 F2 P1 P2 F1 F2 P1 P2 P1 P2 P1 P2 a Outdoor unit b Controller c Central controller for all units VRV VRV indoor unit EKVDX EKVDX indoor unit VAM VAM heat reclaim ventilation unit... -
Page 78: Configuration
Configuration 19 Configuration INFORMATION Refer to the installer and user reference guide of the user interface for more information on how to change field settings. NOTICE In case an EKVDX indoor unit is installed, extreme setpoints can result in constant thermostat ON behaviour. -
Page 79: About External Input Switching (T1/T2)
Configuration 19.3 About external input switching (T1/T2) The following table shows the T1/T2 functionality. Mode Setting Description position 12(22) Forced Stop Closed T1/T2 Open External input (ON/OFF operation) Closed T1/T2 Open Protective device input Closed T1/T2 Open Forced Stop B Closed T1/T2 Open... -
Page 80: Field Settings
Configuration Installer and user reference guide EKVDX32~100A2VEB VRV system air conditioner 4P664010-1 – 2021.08... - Page 81 Configuration EKVDX32~100A2VEB Installer and user reference guide VRV system air conditioner 4P664010-1 – 2021.08...
-
Page 82: Commissioning
Commissioning 20 Commissioning In this chapter 20.1 Overview: Commissioning ..............................20.2 Precautions when commissioning............................20.3 Checklist before commissioning............................. 20.4 To perform a test run ................................20.1 Overview: Commissioning This chapter describes what you have to do and know to commission the system after it is installed. - Page 83 Commissioning General You read the complete installation and operation instructions, as described in the installer and user reference guide. The indoor unit is properly mounted. The outdoor unit is properly mounted. Make sure drain piping is properly installed, insulated and drainage flows smoothly. Check for water leaks.
-
Page 84: To Perform A Test Run
Commissioning 20.4 To perform a test run INFORMATION ▪ Perform the test run according to the instructions in the outdoor unit manual. ▪ The test run is only completed if there is no malfunction code displayed on the user interface or the outdoor unit 7‑segment display. ▪... -
Page 85: Hand-Over To The User
Hand-over to the user 21 Hand-over to the user Once the test run is finished and the unit operates properly, please make sure the following is clear for the user: ▪ Make sure that the user has the printed documentation and ask him/her to keep it for future reference. -
Page 86: Maintenance And Service
Maintenance and service 22 Maintenance and service NOTICE Maintenance MUST be done by an authorised installer or service agent. We recommend performing maintenance at least once a year. However, applicable legislation might require shorter maintenance intervals. NOTICE Applicable legislation on fluorinated greenhouse gases requires that the refrigerant charge of the unit is indicated both in weight and CO equivalent. -
Page 87: Troubleshooting
Troubleshooting 23 Troubleshooting In this chapter 23.1 Solving problems based on error codes..........................23.1.1 Error codes: Overview............................23.1 Solving problems based on error codes If the unit runs into a problem, the user interface displays an error code. It is important to understand the problem and to take measures before resetting an error code. - Page 88 Troubleshooting Code Description Room temperature thermistor in remote controller abnormality Non H-type remote control is connected An error has occurred on another indoor on the same F1 F2 line, but EKVDX /indoor can still operate An error has occurred on another indoor on the same F1 F2 line, EKVDX /indoor cannot operate anymore Capacity mismatch between VAM and EKVDX VAM abnormality.
- Page 89 Disposal 24 Disposal NOTICE Do NOT try to dismantle the system yourself: dismantling of the system, treatment of the refrigerant, oil and other parts MUST comply with applicable legislation. Units MUST be treated at a specialised treatment facility for reuse, recycling and recovery. EKVDX32~100A2VEB Installer and user reference guide VRV system air conditioner...
- Page 90 Technical data 25 Technical data ▪ A subset of the latest technical data is available on the regional Daikin website (publicly accessible). ▪ The full set of latest technical data is available on the Daikin Business Portal (authentication required). In this chapter 25.1...
- Page 91 Technical data Symbol Meaning Printed circuit board Pushbutton ON/OFF, operation switch BZ, H*O Buzzer Capacitor AC*, CN*, E*, HA*, HE*, HL*, HN*, Connection, connector HR*, MR*_A, MR*_B, S*, U, V, W, X*A, K*R_*, NE D*, V*D Diode Diode bridge DIP switch Heater FU*, F*U, (for characteristics, refer Fuse...
- Page 92 Technical data Symbol Meaning Circuit breaker Q*DI, KLM Earth leak circuit breaker Overload protector Thermo switch Residual current device Resistor Thermistor Receiver Limit switch Float switch S*NG Refrigerant leak detector S*NPH Pressure sensor (high) S*NPL Pressure sensor (low) S*PH, HPS* Pressure switch (high) S*PL Pressure switch (low)
- Page 93 Technical data English Translation X35A is connected when optional X35A is connected when optional accessories are being used, see wiring accessories are being used, see wiring diagram of this accessory diagram of this accessory An EKVDX unit and its corresponding An EKVDX unit and its corresponding VAM-J8 unit should be connected to a VAM-J8 unit should be connected to a...
- Page 94 Optional equipment Equipment made or approved by Daikin that can be combined with the product according to the instructions in the accompanying documentation. Field supply Equipment NOT made by Daikin that can be combined with the product according to the instructions in the accompanying documentation.
- Page 96 4P664010-1 2021.08 Verantwortung für Energie und Umwelt...
Need help?
Do you have a question about the EKVDX-A and is the answer not in the manual?
Questions and answers