
Related Manuals for Daikin EKHTS200AC


Summary of Contents for Daikin EKHTS200AC
- Page 1 INSTALLATION MANUAL Domestic hot water tank for air to water heat pump system EKHTS200AC EKHTS260AC EKHTSU200AC EKHTSU260AC EKUHWHTA...
- Page 2 EKHBRD* >250 EKHVMR/YD* >250 EKHVH/X* >300...
-
Page 3: Table Of Contents
Hot water Tank Stainless steel ELECTRIC SHOCK, SHORT-CIRCUIT, LEAKS, FIRE OR European Kit OTHER DAMAGE TO THE EQUIPMENT. BE SURE ONLY TO USE ACCESSORIES MADE BY DAIKIN WHICH ARE SPECIFICALLY DESIGNED FOR USE WITH THE CCESSORIES EQUIPMENT AND HAVE THEM INSTALLED BY A PROFESSIONAL. -
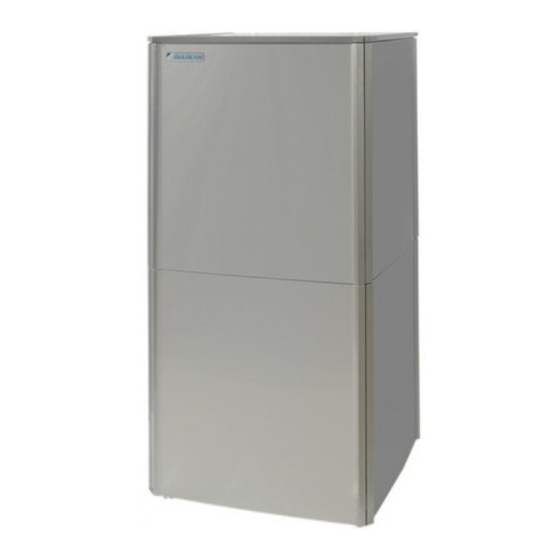
Page 4: Overview Of The Unit
Casing The total system (indoor unit and outdoor unit) is designed Knockout holes for water piping for combination with a Daikin domestic hot water tank. In case another tank is being used in combination with the Safety devices Daikin indoor unit, Daikin cannot guarantee neither good operation nor reliability of the system. -
Page 5: Installation Of The Ekhts Domestic Hot Water Tank
EKHTS Installation guidelines NSTALLATION OF THE DOMESTIC HOT WATER TANK Keep in mind the following guidelines when installing the domestic hot water tank: ■ The installation location is frost-free. ■ Installation shall be done by a licensed technician, the ■ Standard installation location of the domestic hot water tank is choice of materials and installation shall comply with on top of the indoor unit. - Page 6 Connect the 3-way valve 4 Put the sleeve on the valve and turn the valve so that the sleeve is positioned according to the figure below. Only EKHBRD EKHVMR/YD units. Remove both parts of the drain plate on top of the indoor unit before installing the 3-way valve.
- Page 7 ■ For EKHVMRD indoor units only. 5 Install the 3-way valve body in the piping. Avoid contact between hot piping and electrical wiring at all time. Refer to the figure below before making the connection. ■ For EKHBRD indoor units only. EKHTS200+260AC Installation manual Domestic hot water tank for air to water heat pump system...
- Page 8 ■ For EKHVMYD indoor units only. ■ For EKHVH/X indoor units only. Installation manual EKHTS200+260AC Domestic hot water tank for air to water heat pump system 4PW64052-1 – 08.2010...
- Page 9 6 Push the motor on the sleeve. Connect the flexible hoses as indicated in figure figure figure 6 figure Make sure not to rotate the sleeve during this action, so as to ■ The 2 flexible hoses with quick coupling connections on both maintain the valve position as set during step 4.
- Page 10 Connect the thermistor wire to the indoor unit switch box. Make Note: only relevant field wiring is shown. sure power supply is switched off. Refer to the wiring diagram ■ For EKHBRD indoor units only. delivered with the indoor unit. 3-way ■...
- Page 11 ■ For EKHVMR/YD indoor units only. 10 Only for EKHBRD and EKHVMR/YD units: reattach the drain plate on the indoor unit. 3-way valve 11 Commissioning >50 mm The domestic hot water tank coil must be filled with water at the indoor unit water inlet. This to avoid that X11A dirt enters the system.
-
Page 12: Maintenance
AINTENANCE ROUBLESHOOTING In order to ensure optimal availability of the unit, a number of checks This section provides useful information for diagnosing and and inspections on the unit and the field wiring have to be carried out correcting certain troubles which may occur in the unit. at regular intervals. -
Page 13: Disposal Requirements
ISPOSAL REQUIREMENTS OTES Dismantling of the unit and treatment of parts must be done in accordance with relevant local and national legislation. ECHNICAL SPECIFICATIONS Domestic hot water tank specifications EKHTS200AC EKHTS260AC Storage capacity Internal heat exchanger volume Material Stainless steel... - Page 14 EKHBRD* EKHVH/X*...
- Page 15 EKHVMRD* EKHVMYD*...
- Page 16 4PW64052-1 08.2010...
Need help?
Do you have a question about the EKHTS200AC and is the answer not in the manual?
Questions and answers
Error code list please